Little Chico Creek and Get Me to Diamond Match on Time
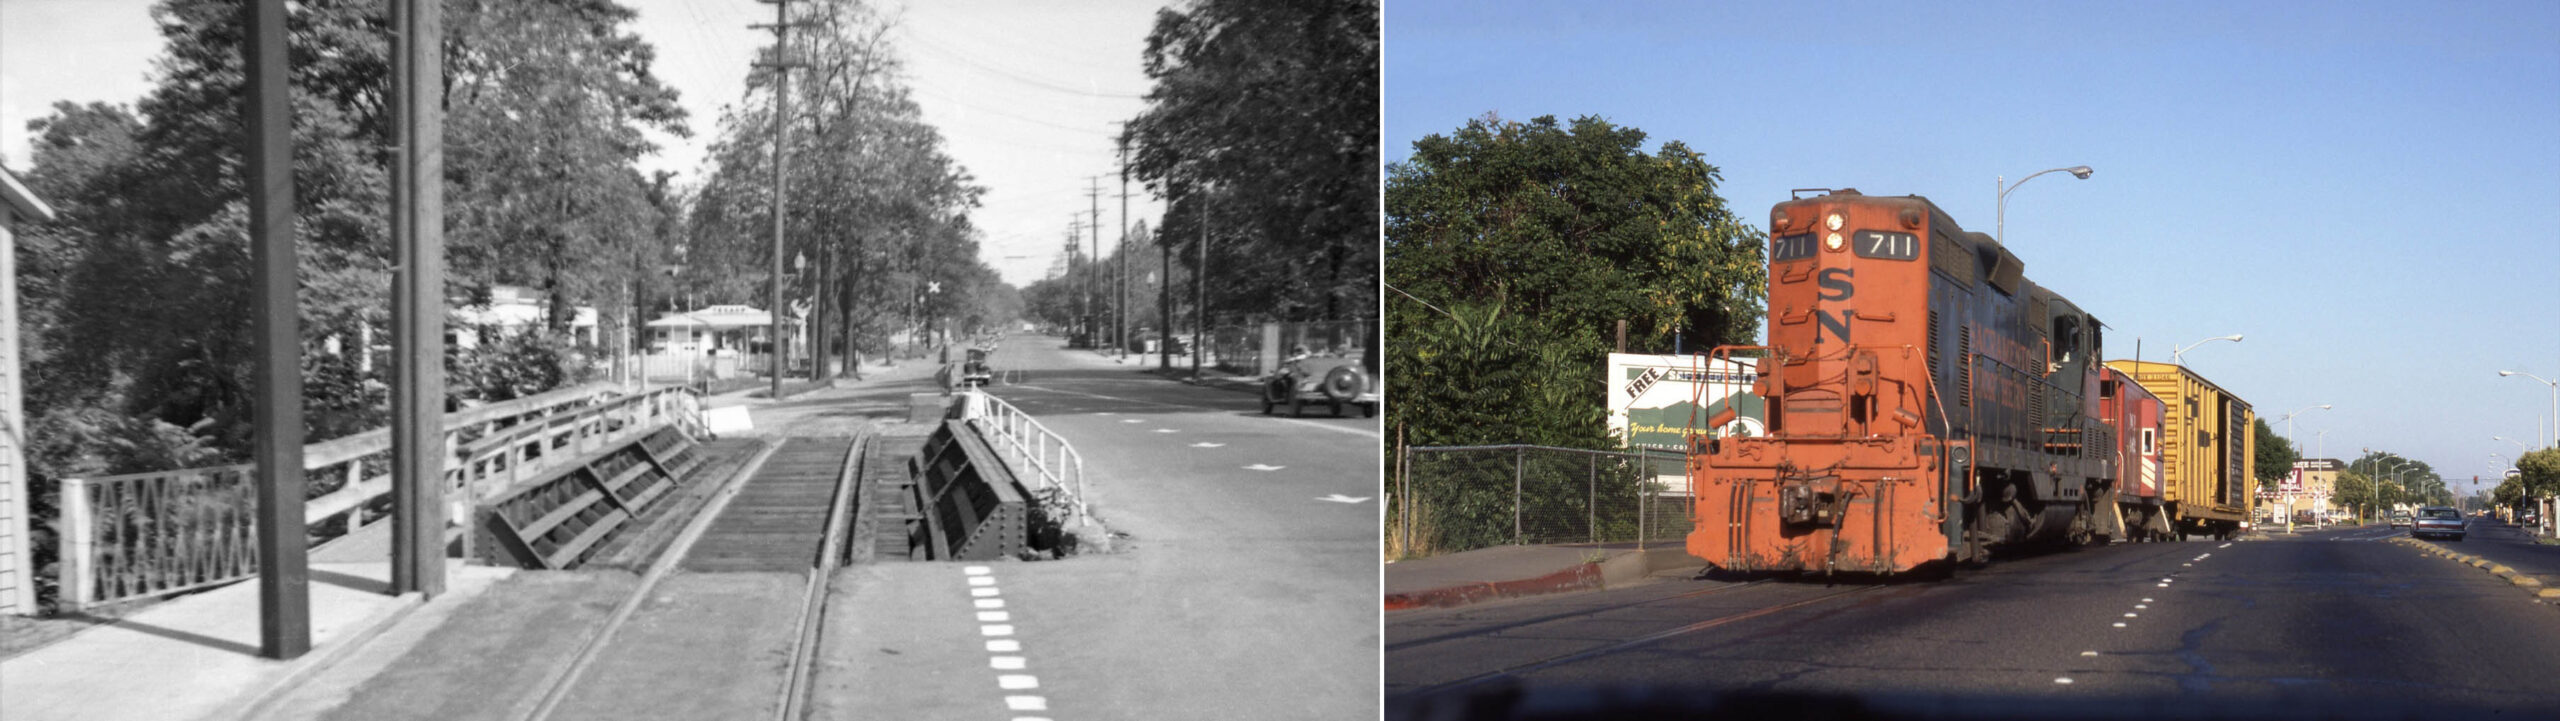
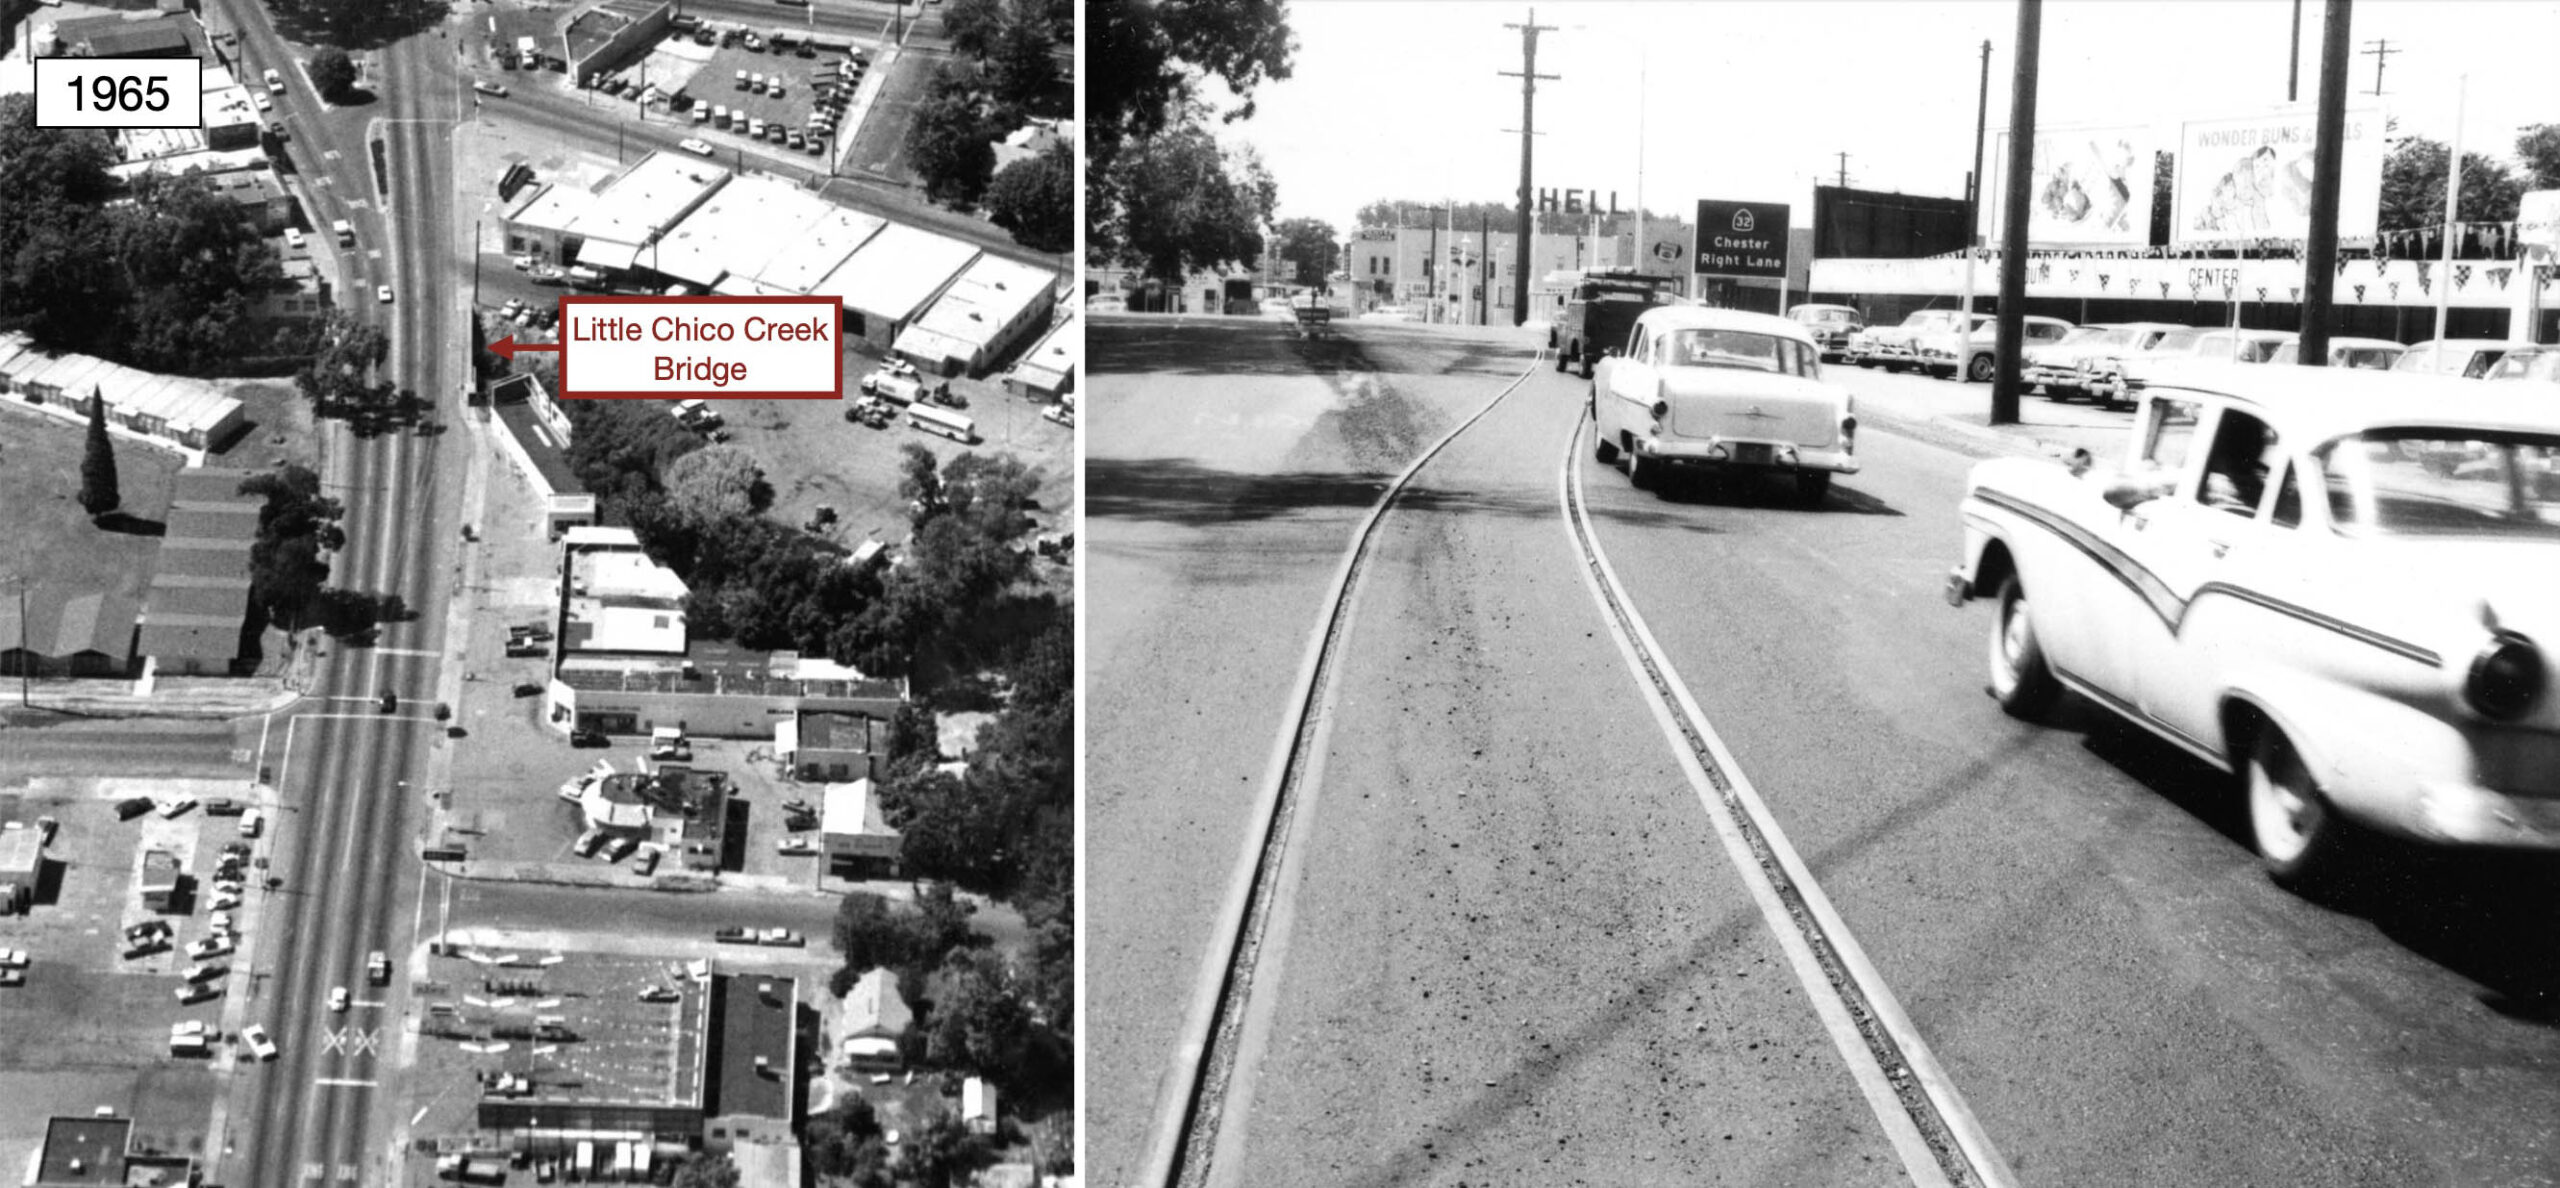
This update will recreate what it was like to take a Birney car ride from Little Chico Creek to the stop within the Diamond Match grounds. But first, appreciate these southeast views from Apr. 28, 1940, left, versus that about four decades later with SN 711 and the Chico Local, right. Recall that the total length of Park Ave. utilized a single track.
L262-05-R. Olson Photo, Courtesy BAERA, WRM Archives, 55716sn, l, and Tom Messer Photo, r, (Image 1 of 34)

The structure built over Little Chico Creek was responsible for car accidents and even death, left, but the awkward arrangement of the train bridge had its roots in an earlier Chico ordinance that required that separate railway bridges be built over the two major creeks, center. Asking the SN to rework the bridge and adjacent track work was a tough sell during the depression, right.
L262-10-Courtesy BAERA, Western Railway Museum Archives, 39679, (Image 2 of 34)
In particular, the SN had no one with whom to share the costs as they did with the revision of the 9th St. crossing of the Southern Pacific, SP, mainline reported in the last update. So the bridge remained unchanged until 1959 when Ordinance 603 forced the SN to do so, with city and state funding partially offsetting the costs. Appreciate there were no requests found to alter the structure over Big Chico Creek.
L262-15-Courtesy BAERA, Western Railway Museum Archives, 39679, (Image 3 of 34)
The deteriorating single track along Park Ave. was replaced by a single track as shown in the northwest view from June 13, 1960, right. A single auto-train creek overpass was created, but the track remained to the east over that structure. Ref: Courtesy Meriam Library, California State University, Chico, sc16546, left; Courtesy BAERA, Western Railway Museum Archives, 164568sn, right
L262-20-Multiple Acknowledgments, (Image 4 of 34)
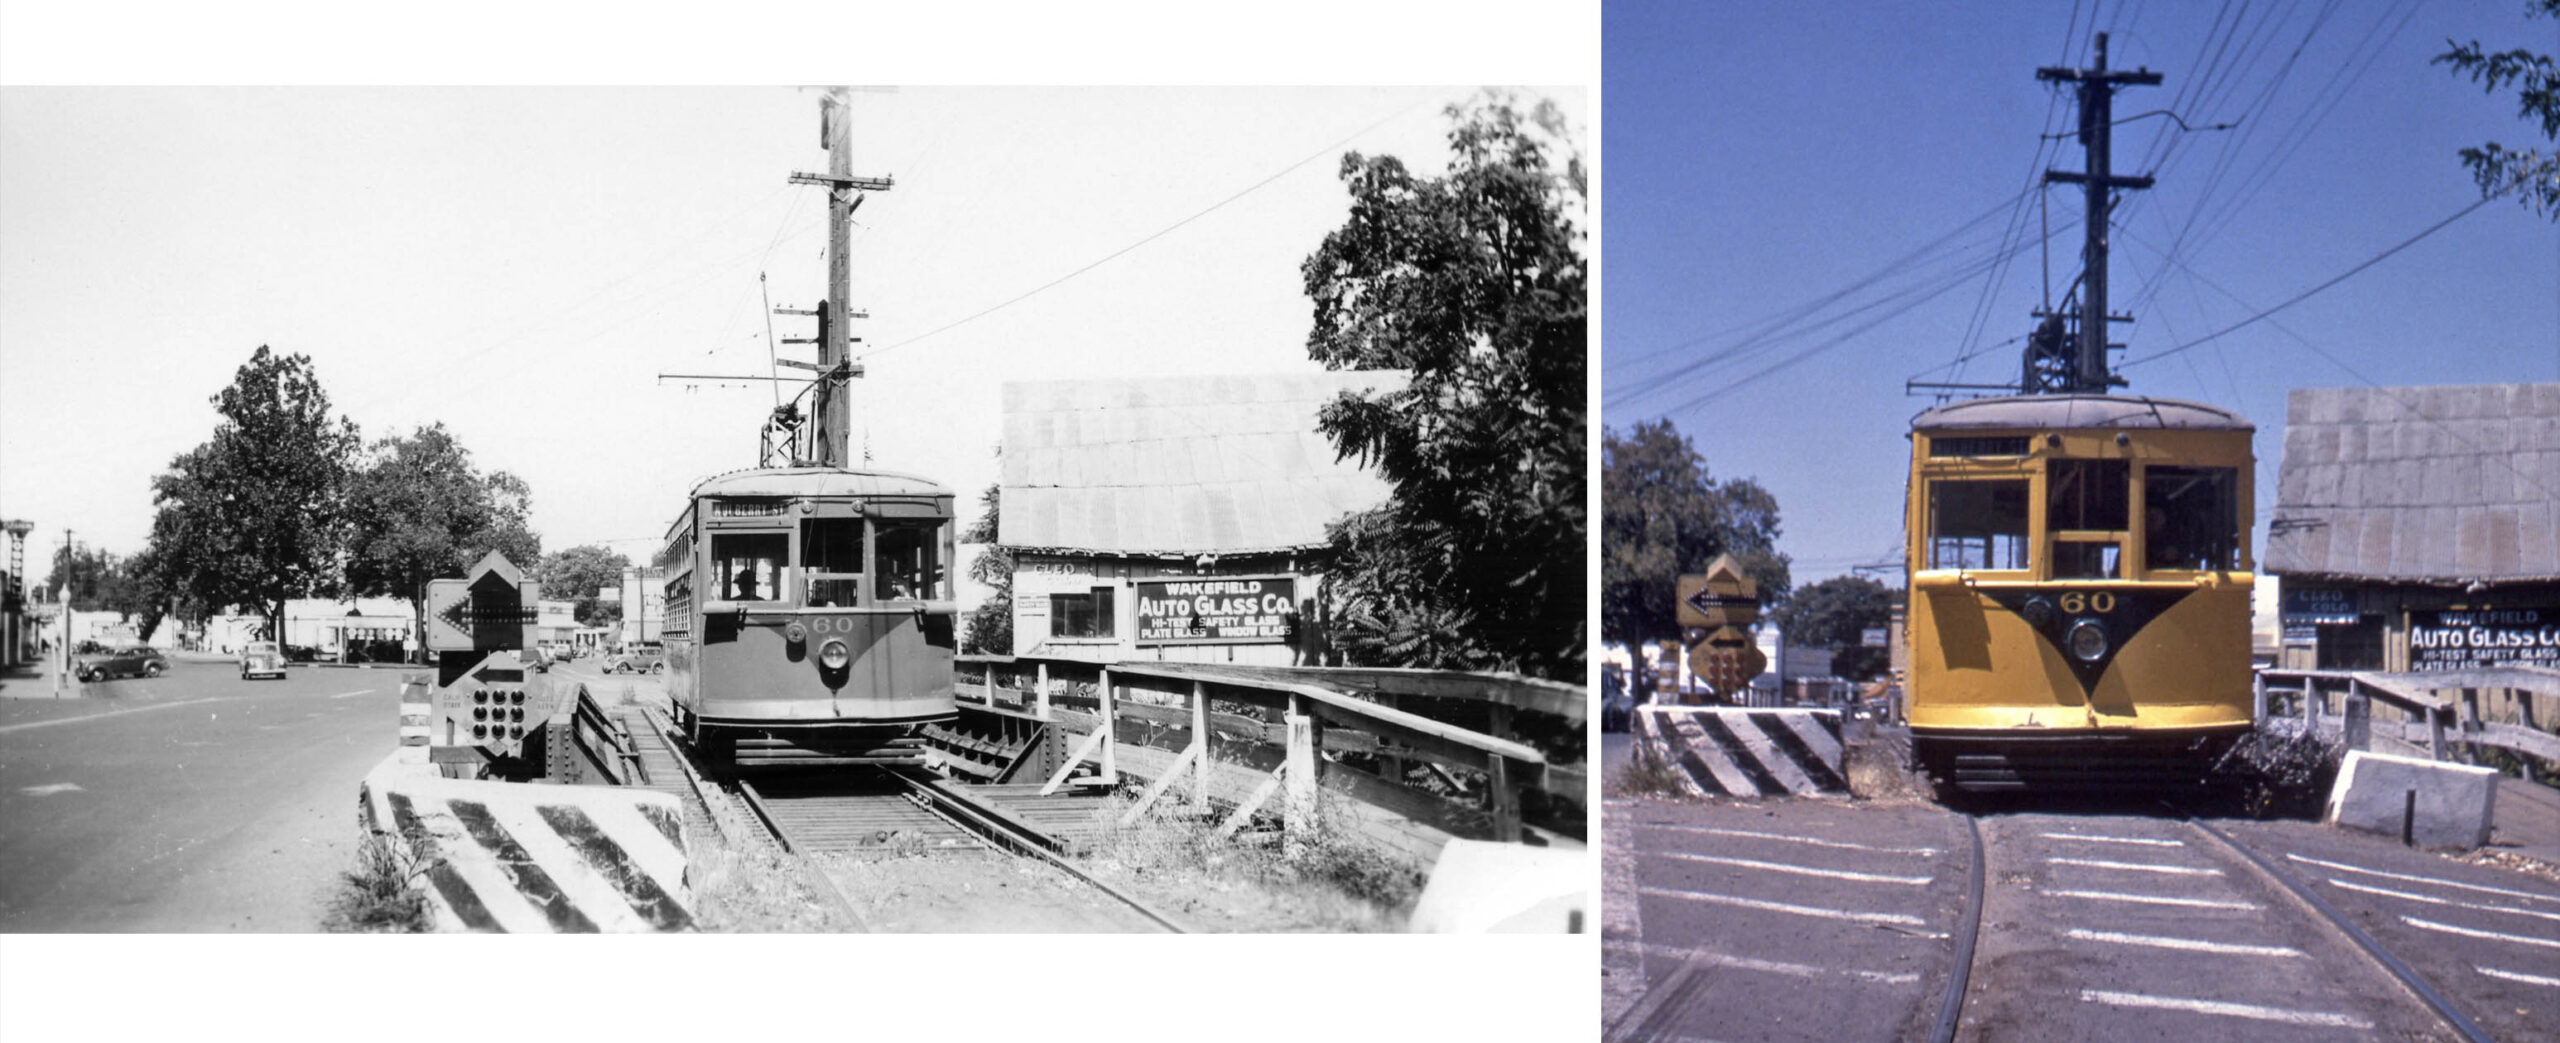
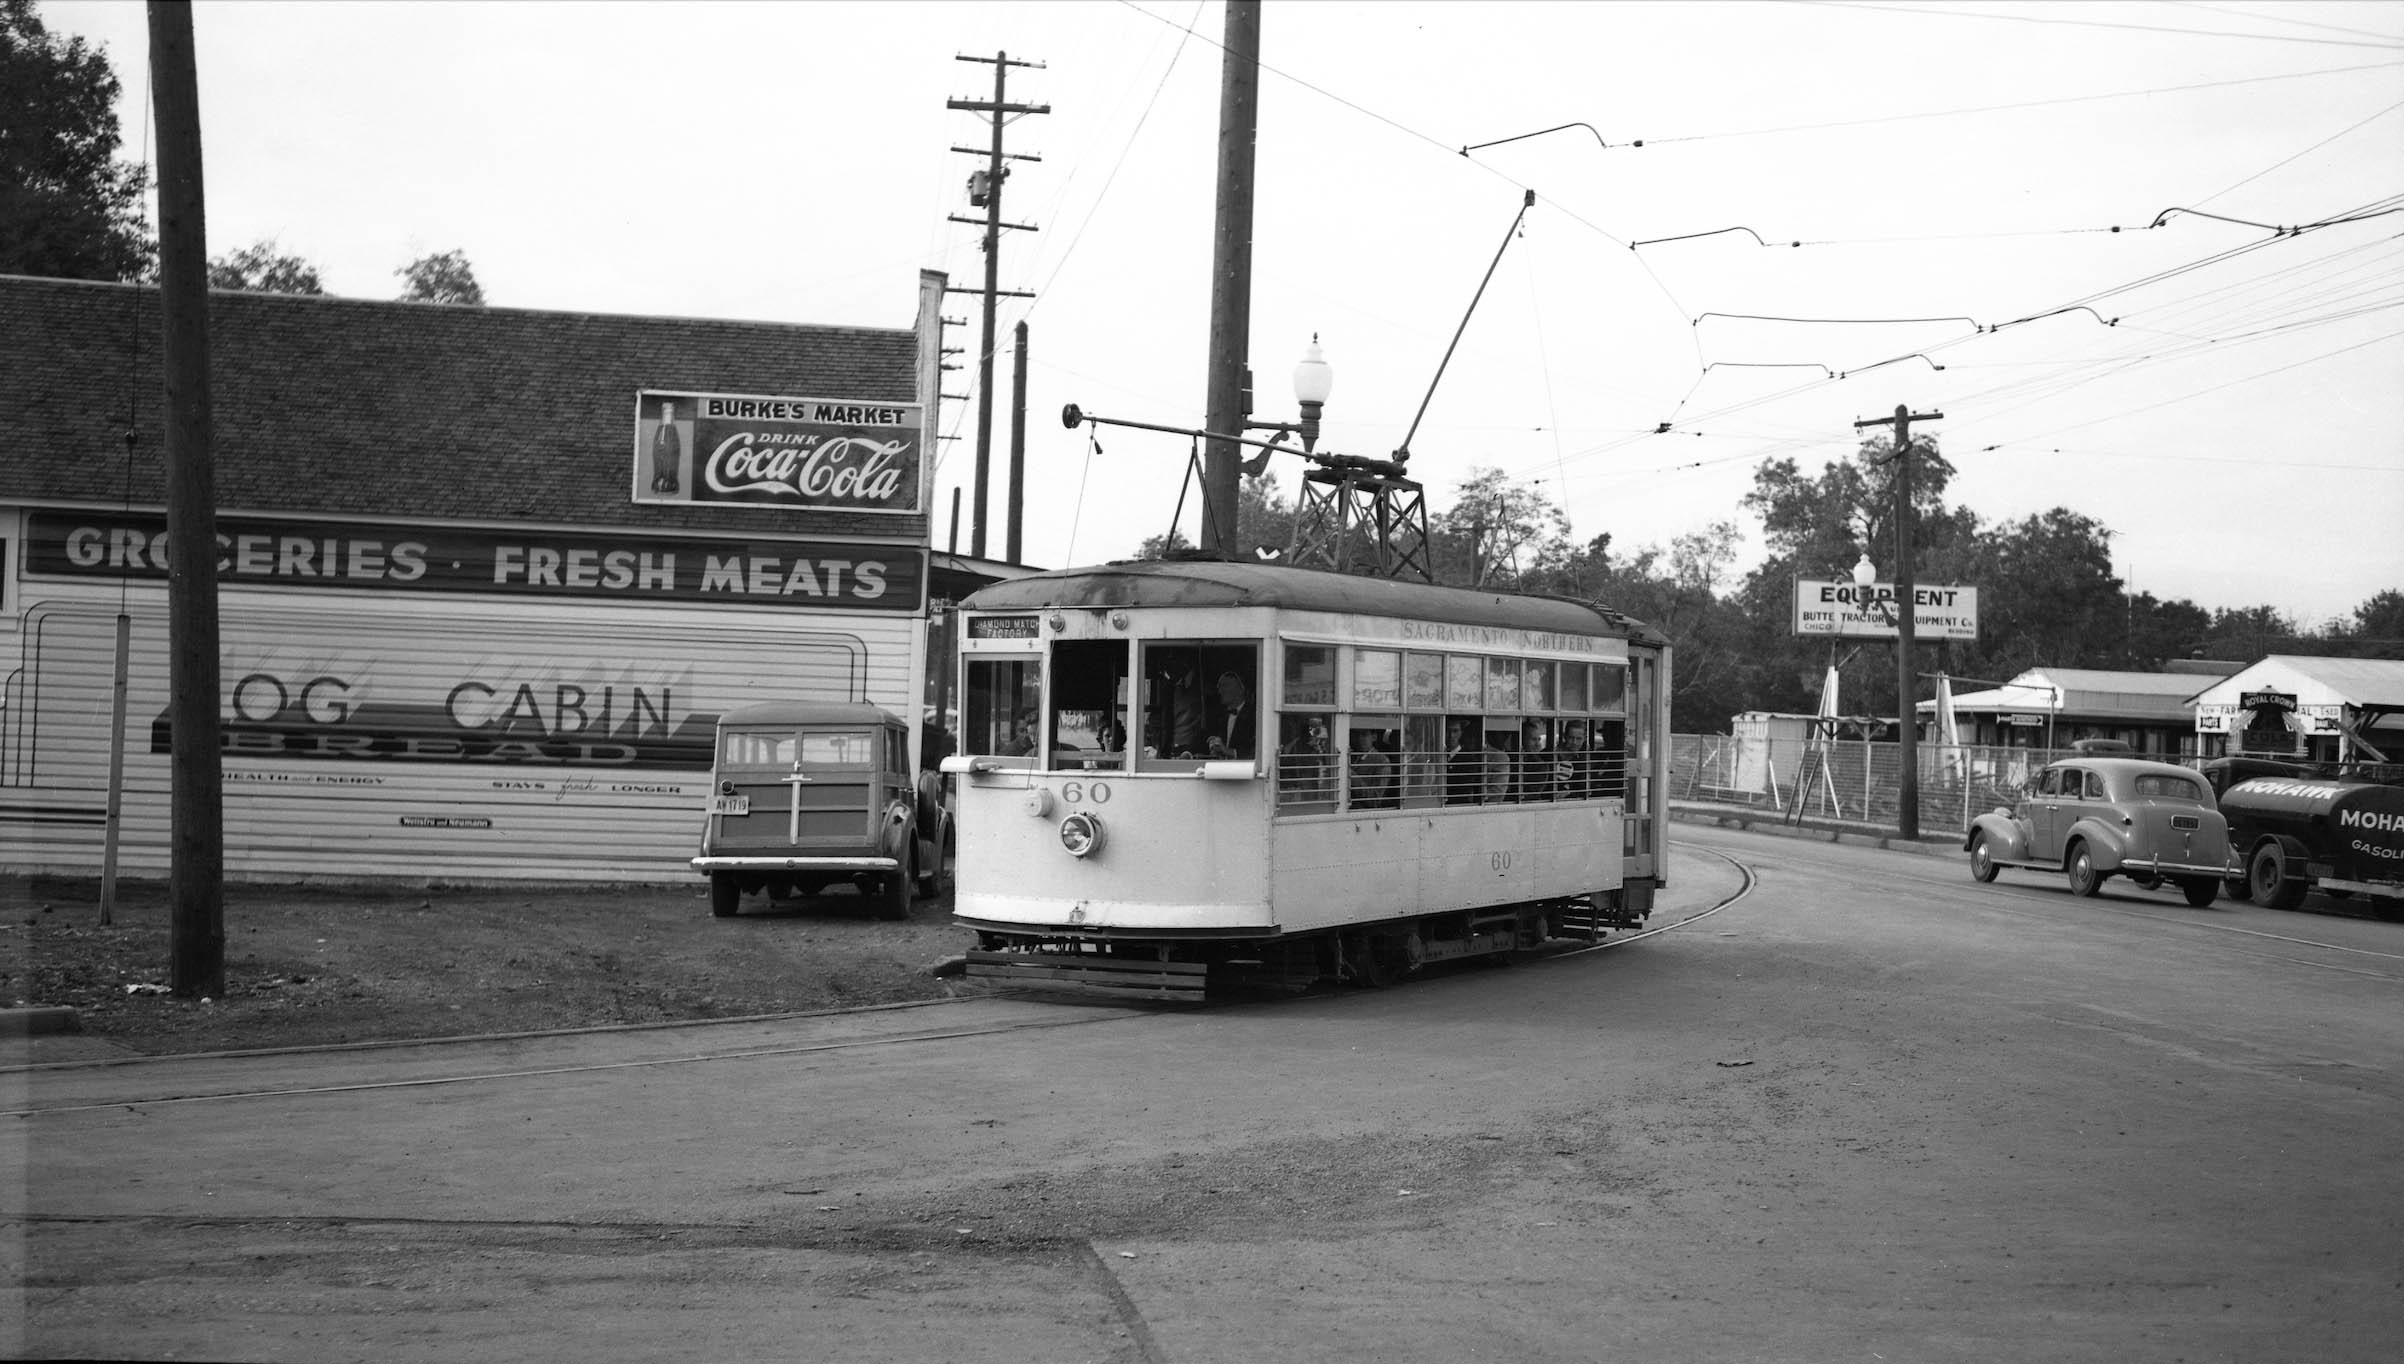
These two views show the south-facing sides of the bridge from 1947 during an excursion with Birney 60. The color image was taken by Robert McVay.
L262-25-Courtesy BAERA, Western Railway Museum Archives, 109558sn, l , 119465sn, r, (Image 5 of 34)
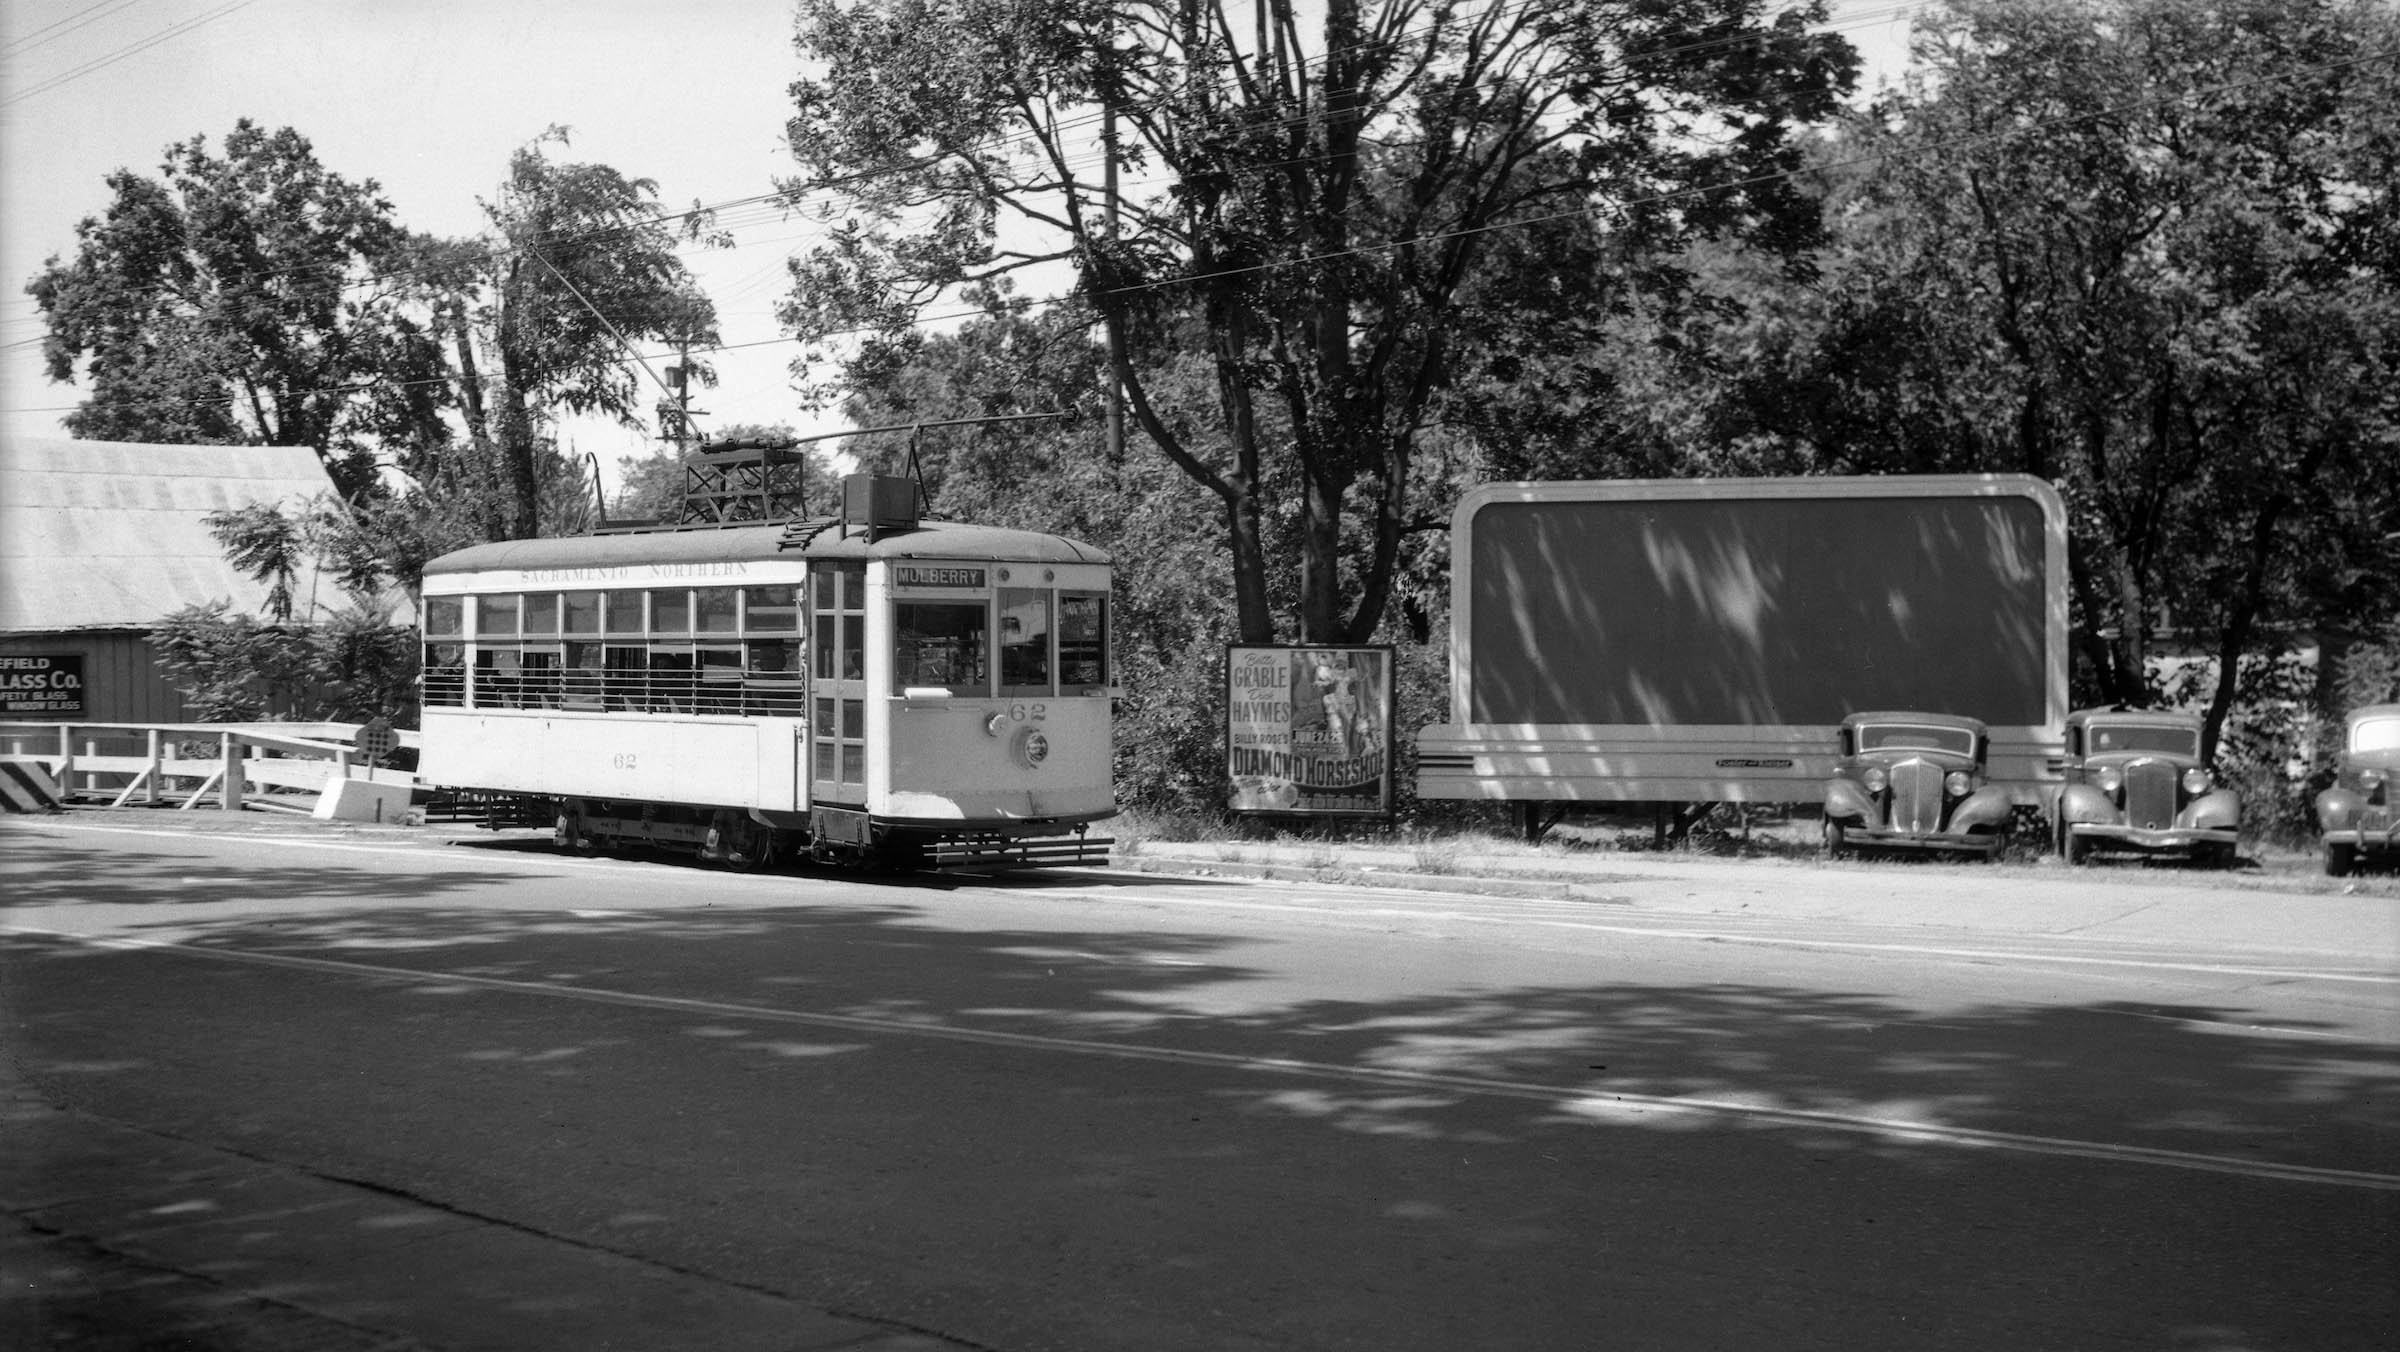
Birney 62 waits by the south side of the creek to take passengers south during this excursion from June 27, 1945. The movie poster confirms the year. East view.
L262-30-Arthur Lloyd Photo, Courtesy BAERA, Western Railway Museum Archives, 114642sn, (Image 6 of 34)
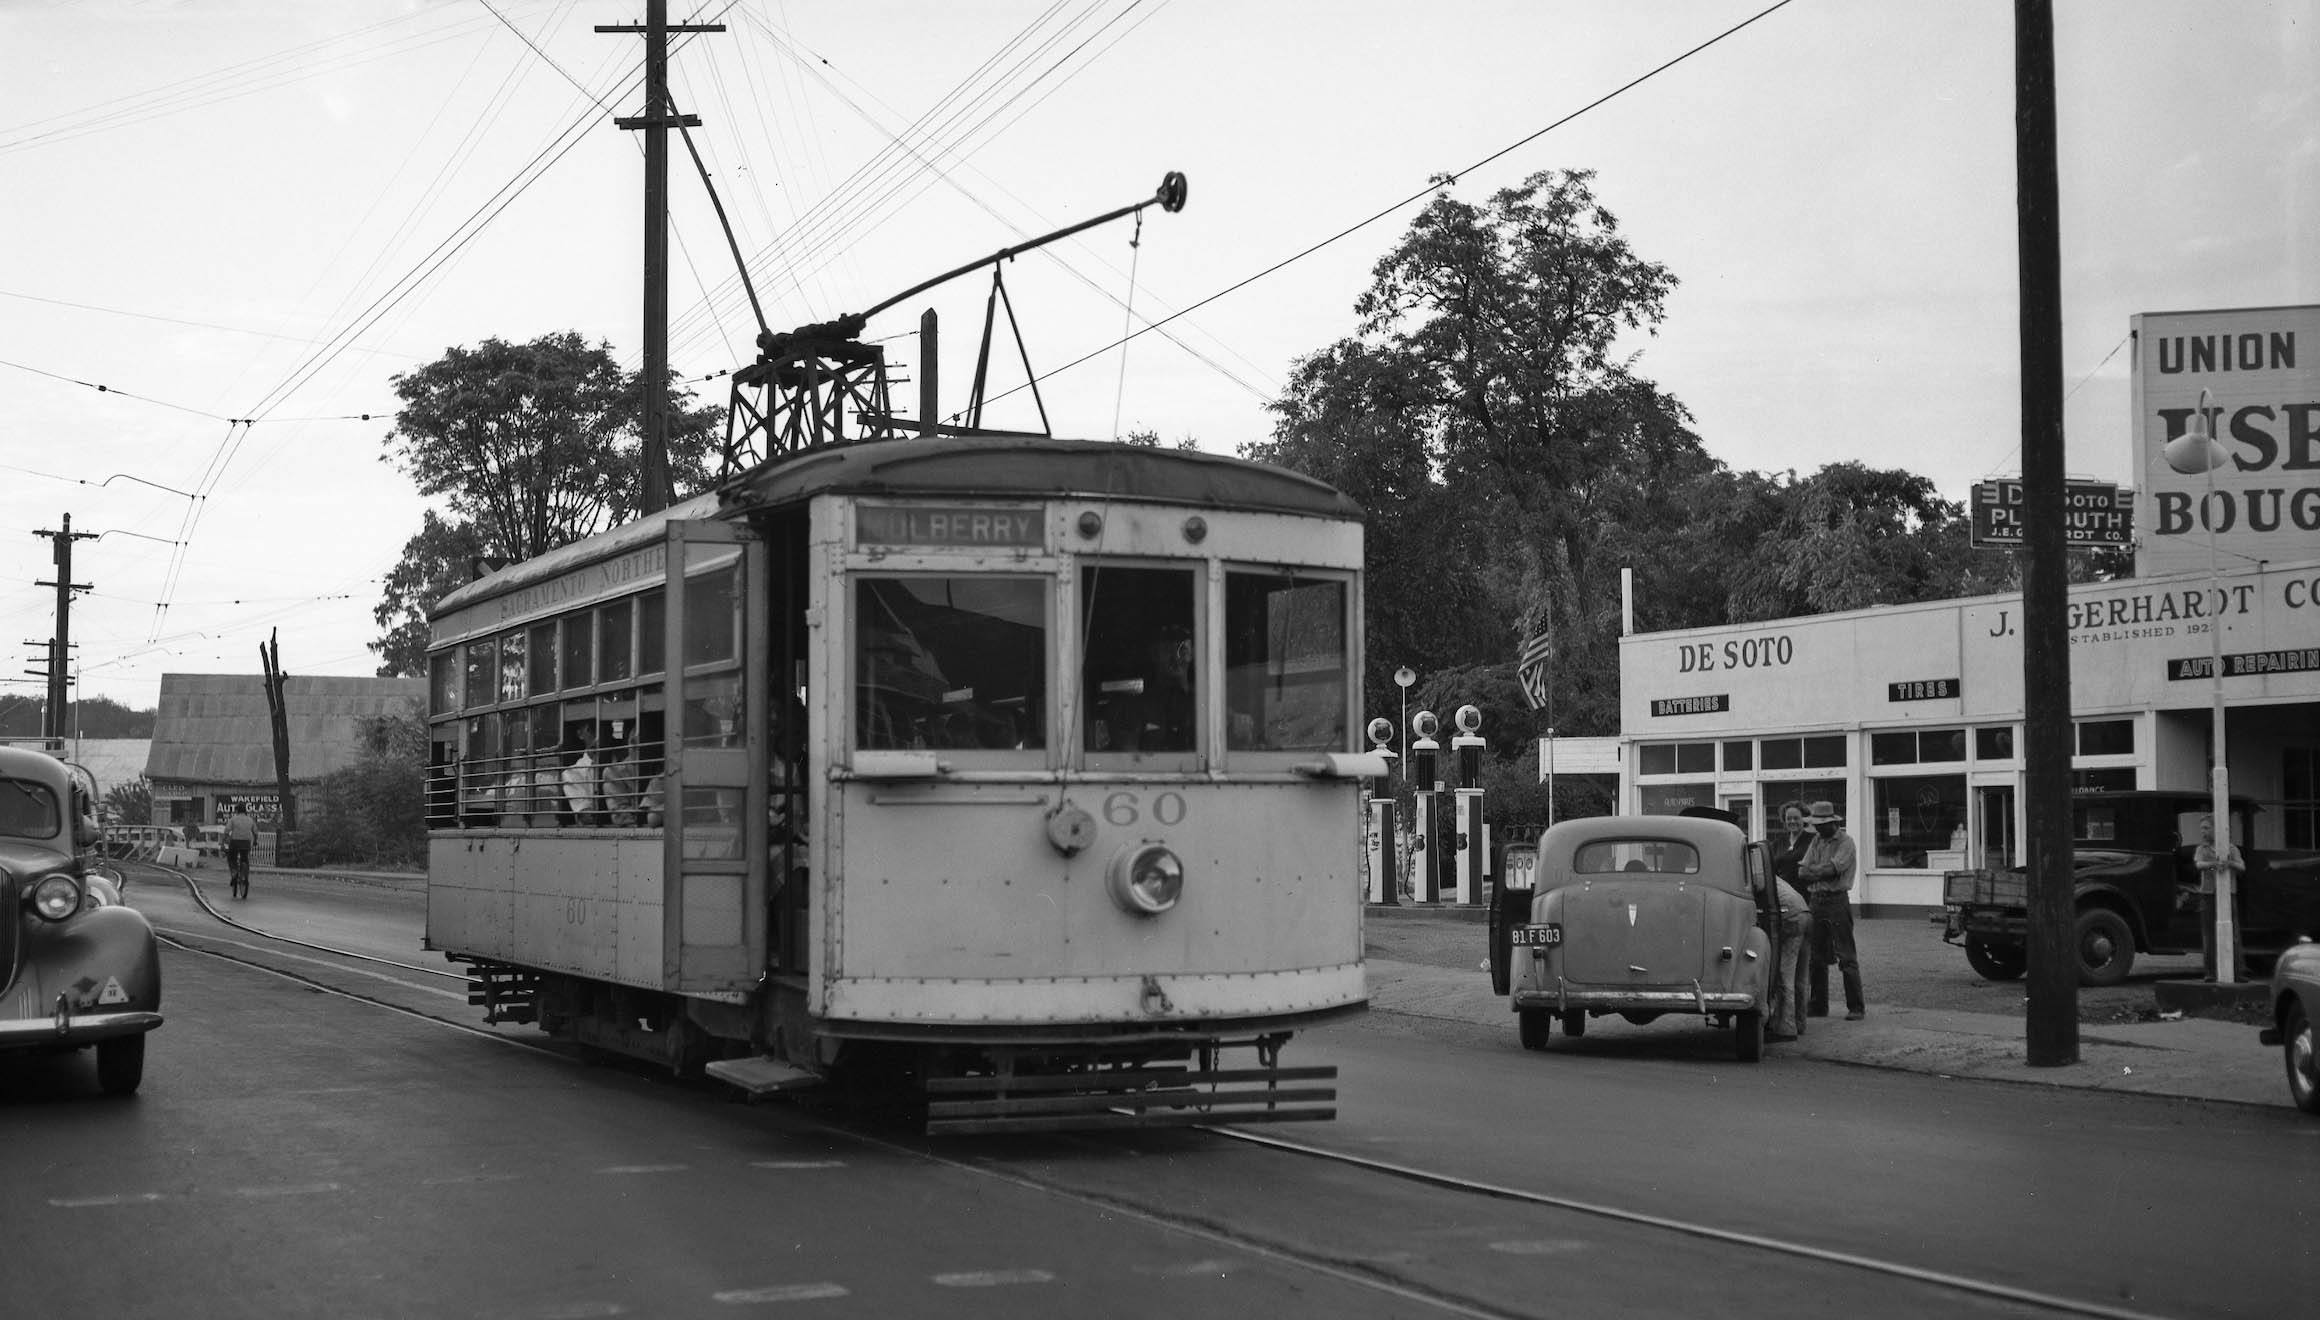
Between 11th and 12th Sts., Birney 60 rolls by J.E. Gerhardt Co. specializing in Plymouth and De Soto autos and used cars at 1015 Park Ave. North view, circa 1940.
L262-35-Sappers Collection, Courtesy BAERA, Western Railway Museum Archives, 107004sn , (Image 7 of 34)
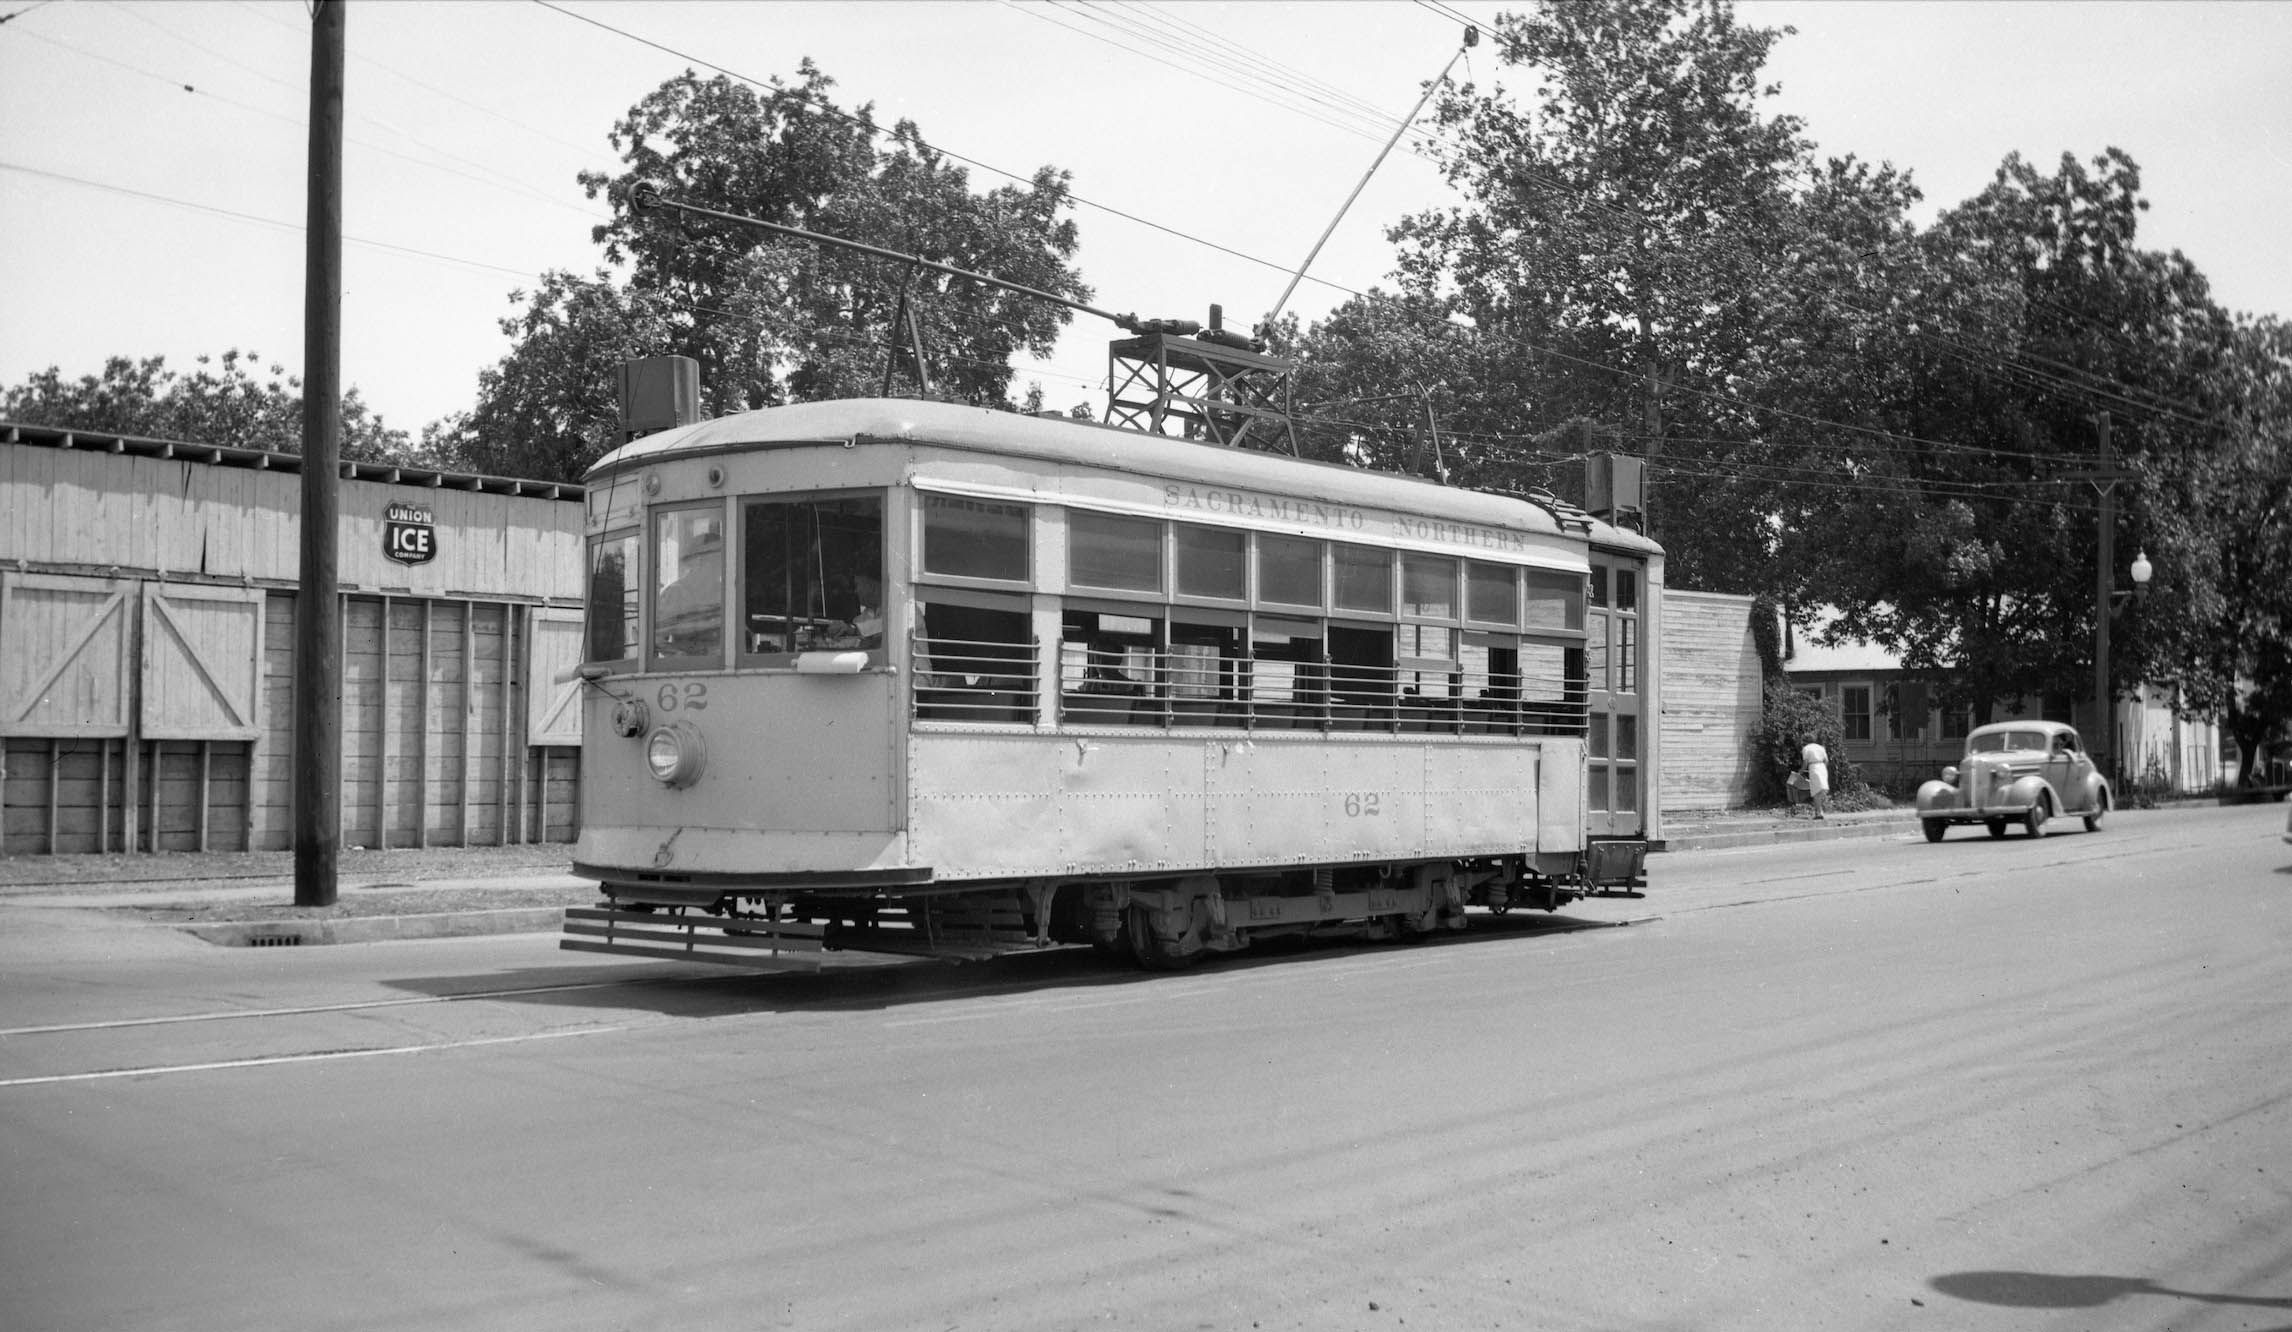
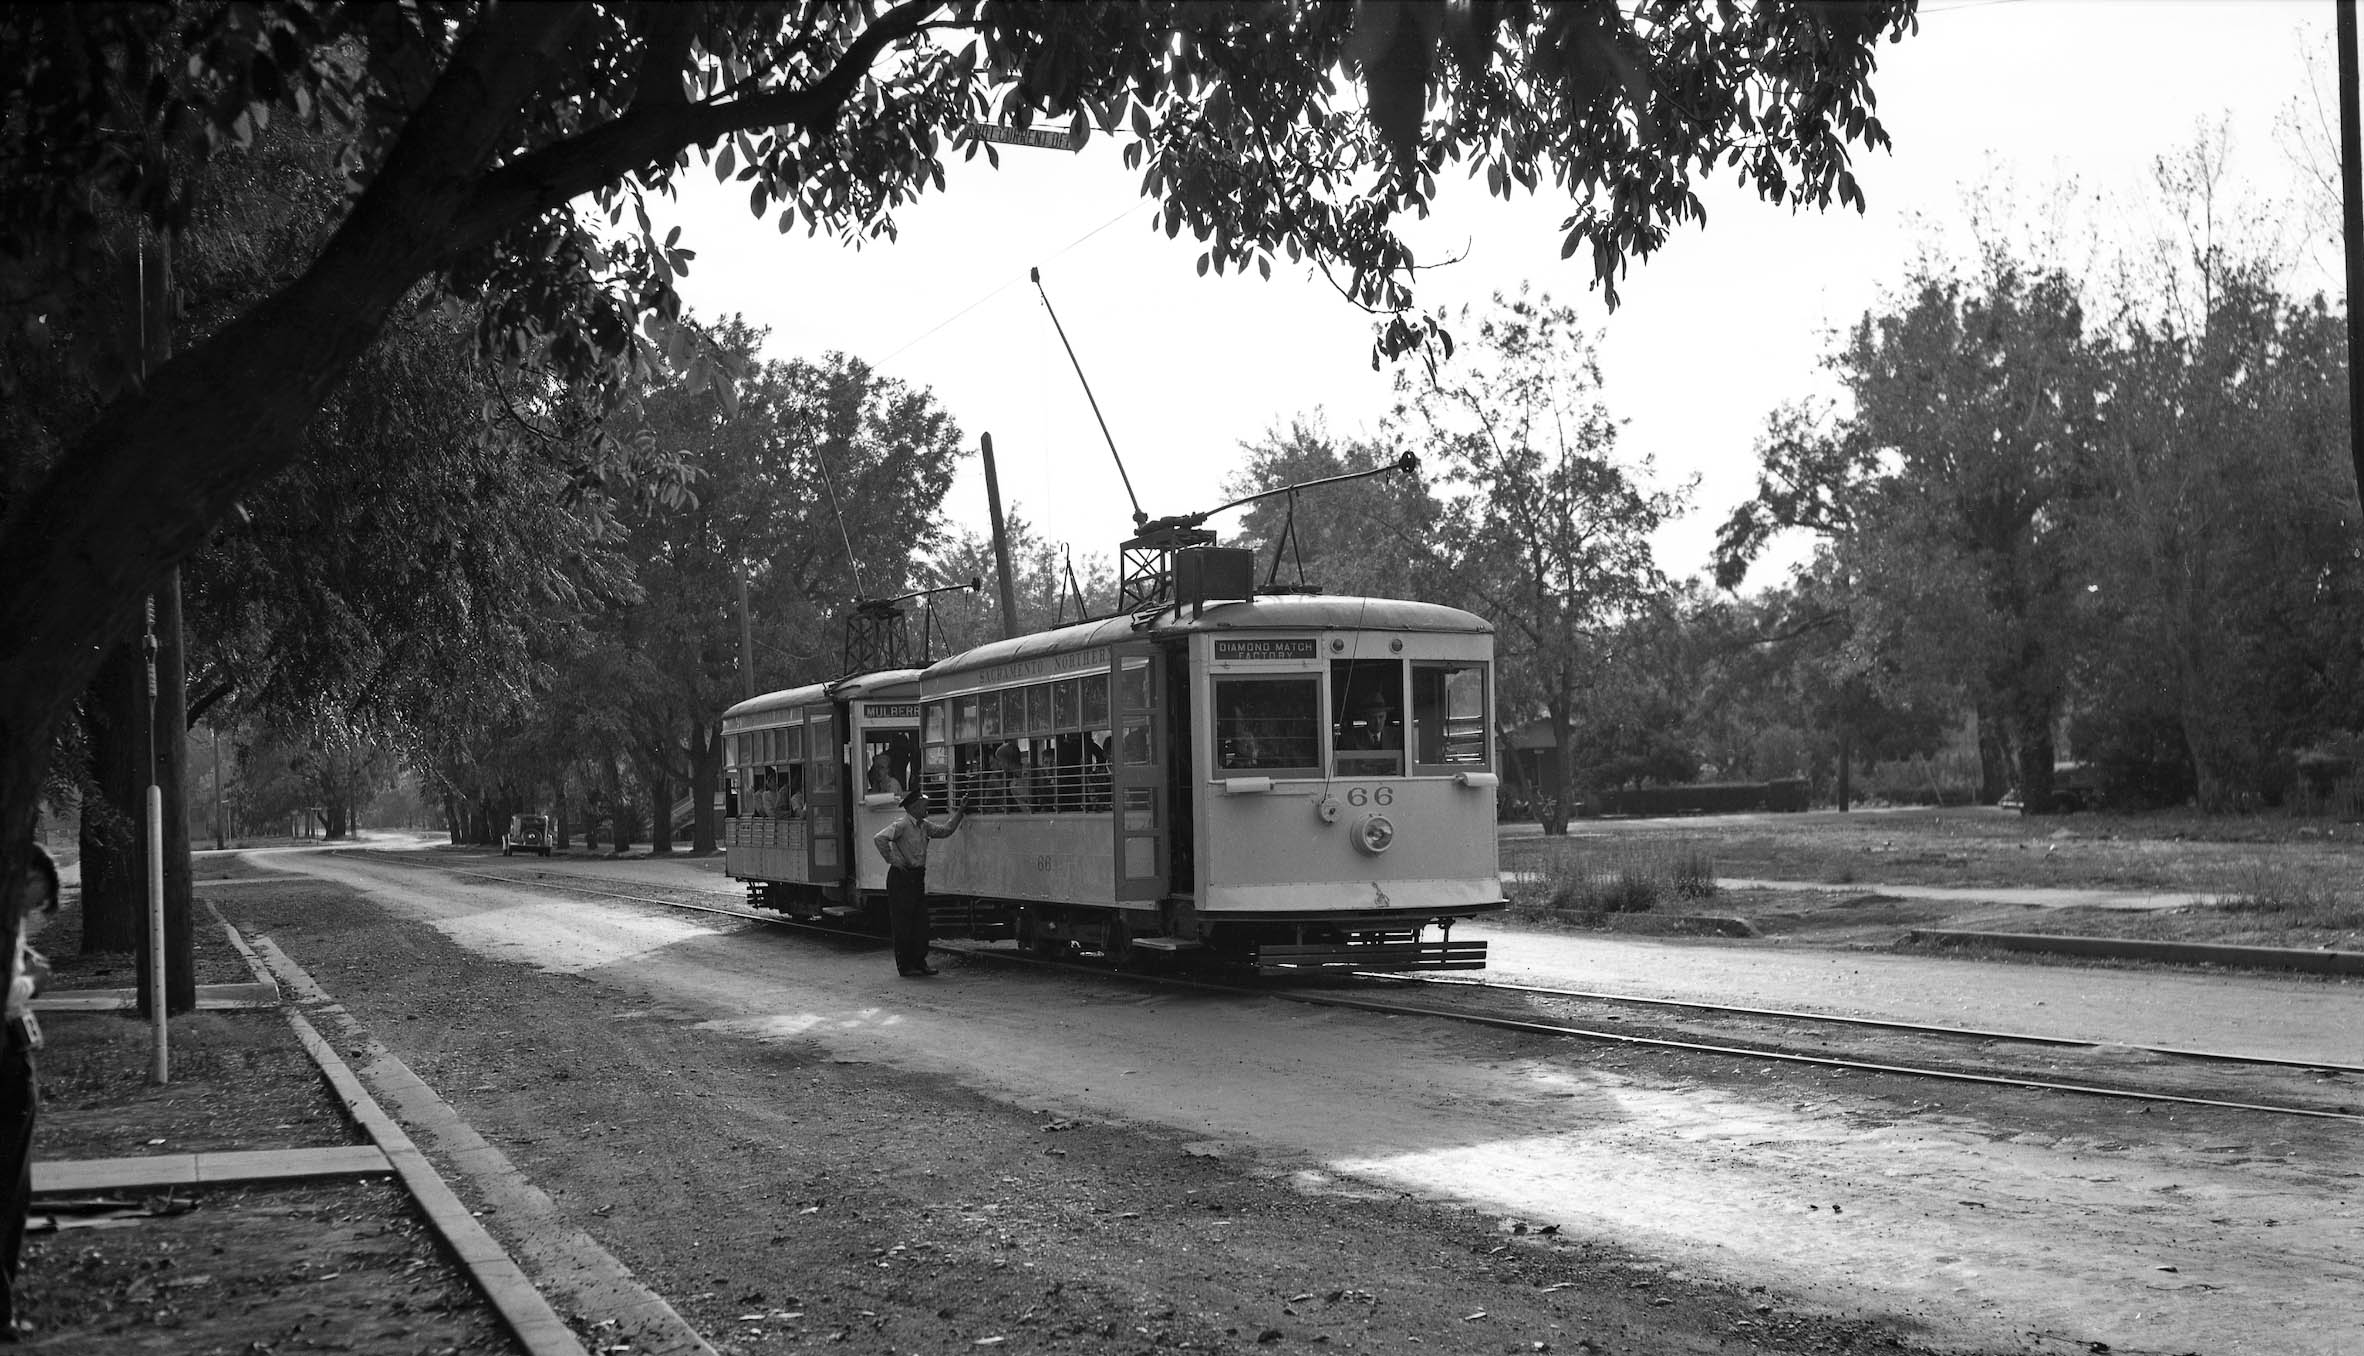
The interval between 12th and 13th Sts. was the site of one of the SN’s most important longtime customers, Union Ice Co. In this southeast view ca. 1940, Birney 62 sits along the two-car SN siding to that company. The siding was still shown on the SN corporate diagrammatic map from Jan. 1, 1972.
L262-40-Tom Gray Collection, Courtesy BAERA, Western Railway Museum Archives, 149845sn, (Image 8 of 34)
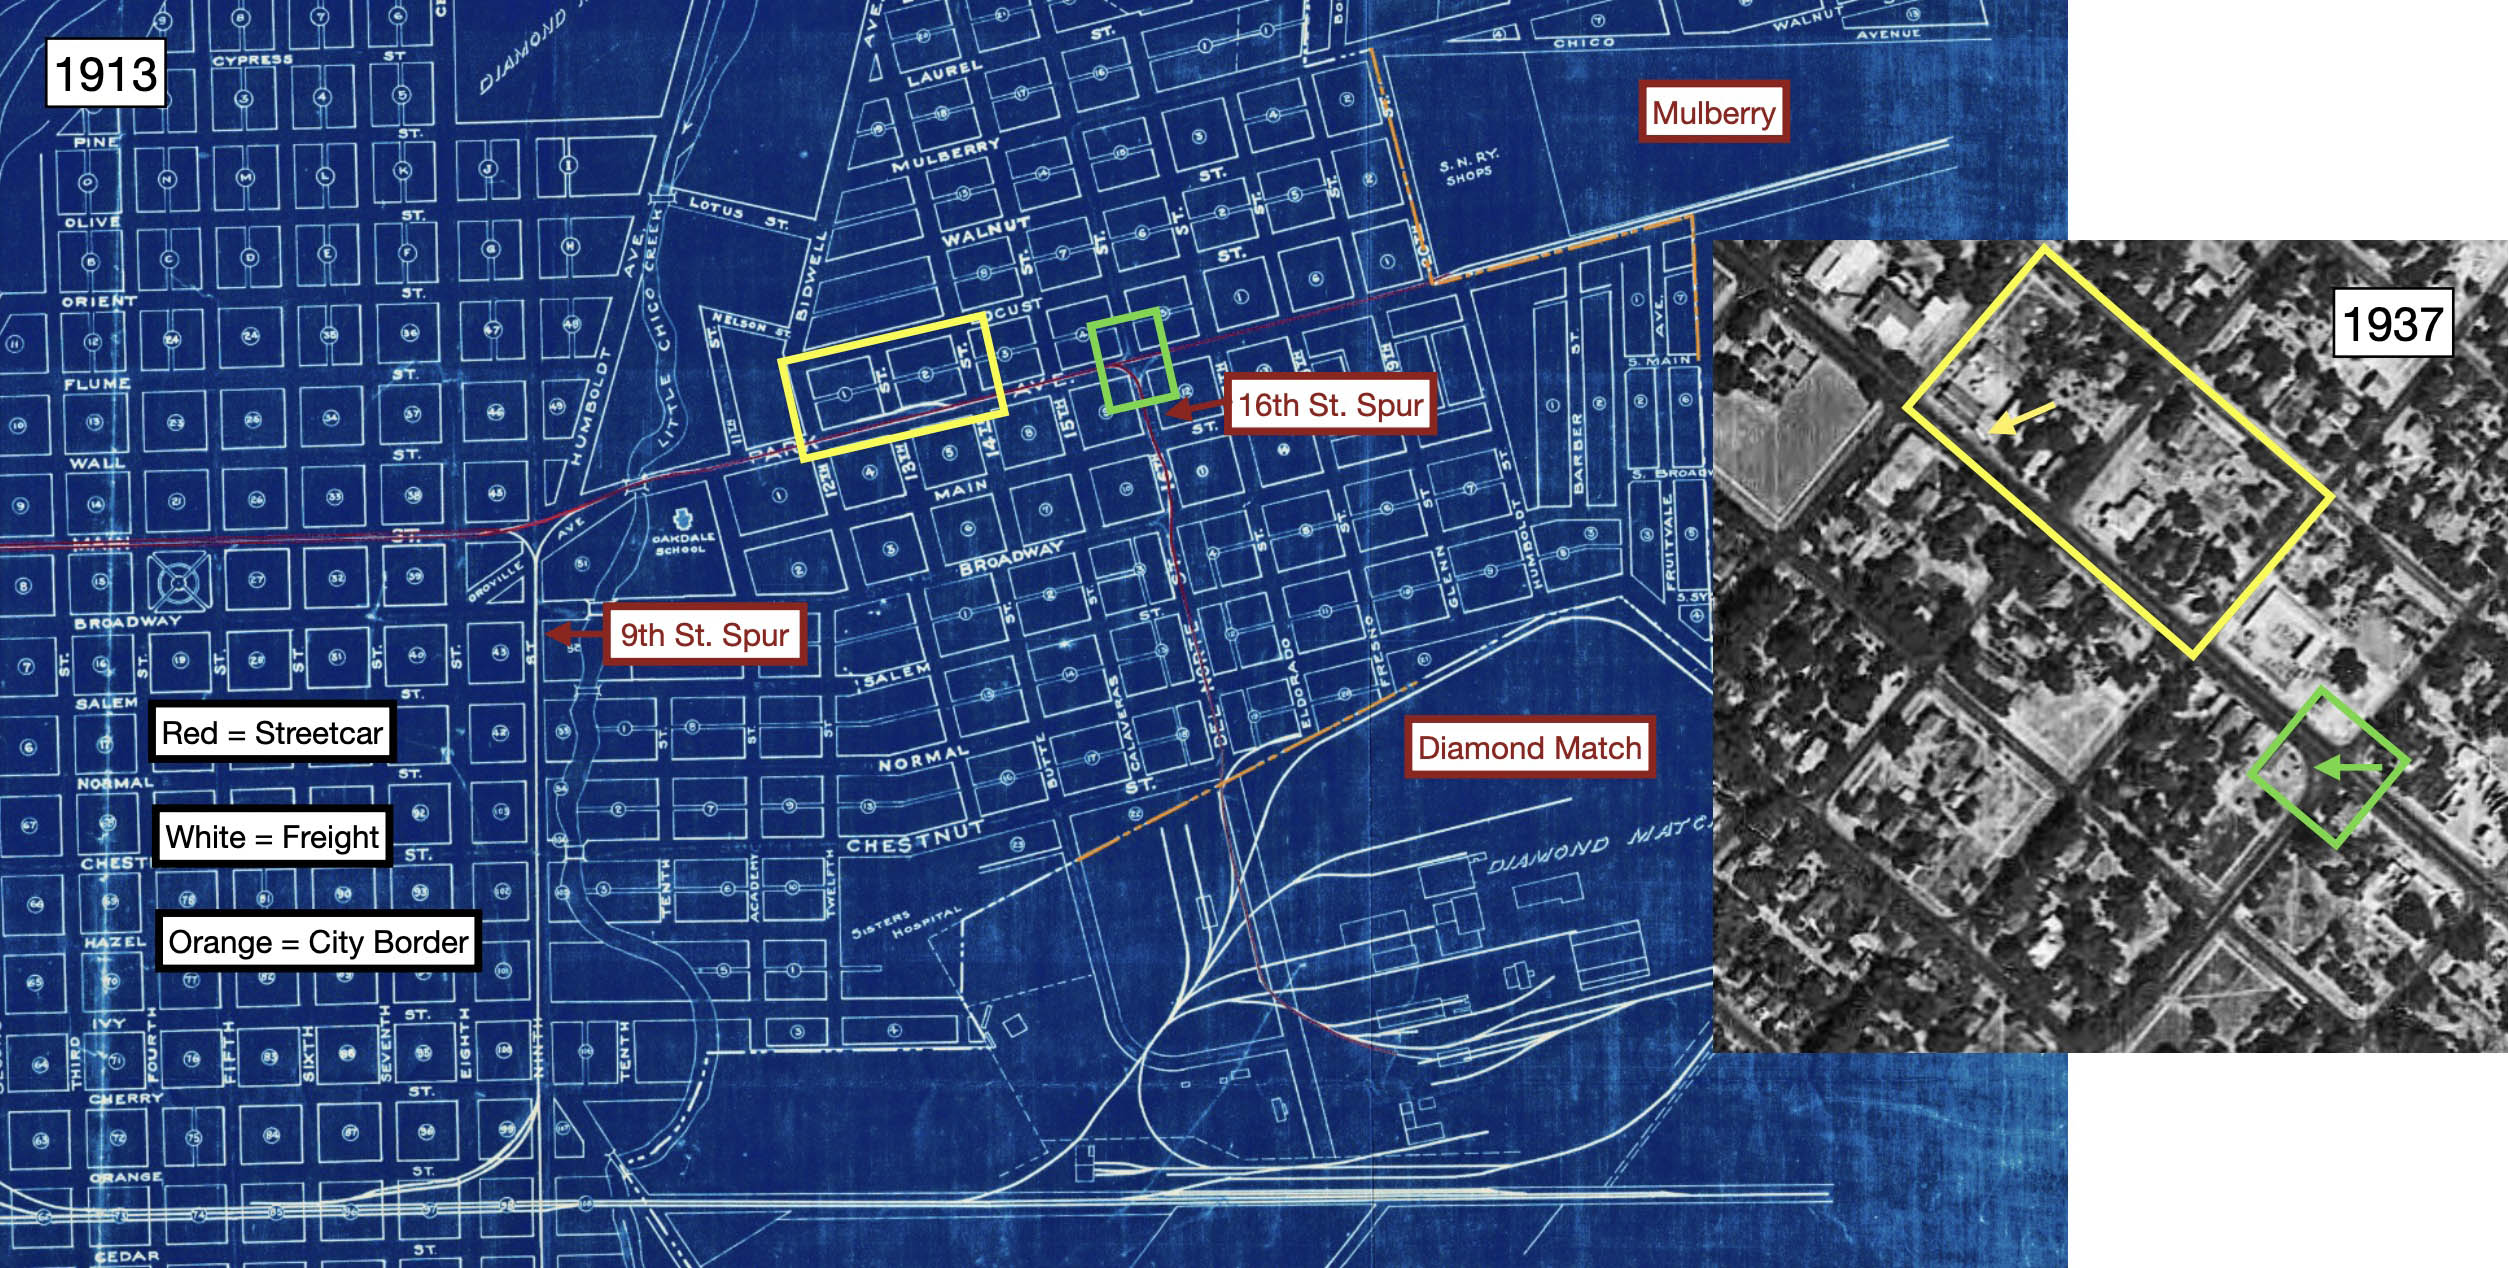
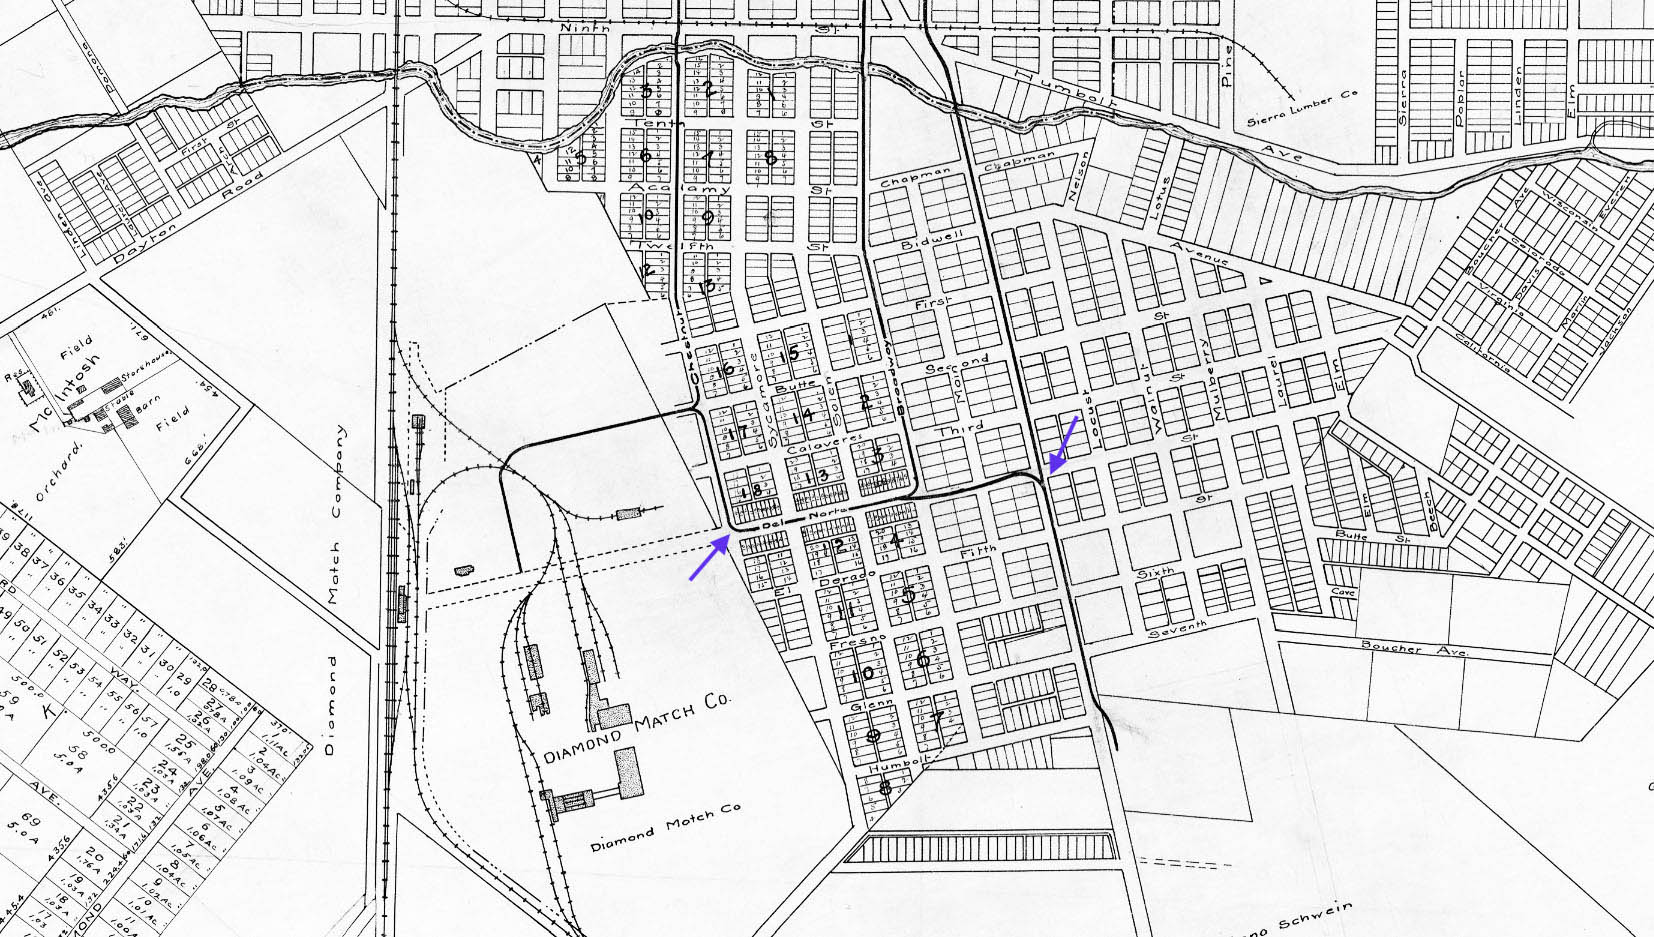
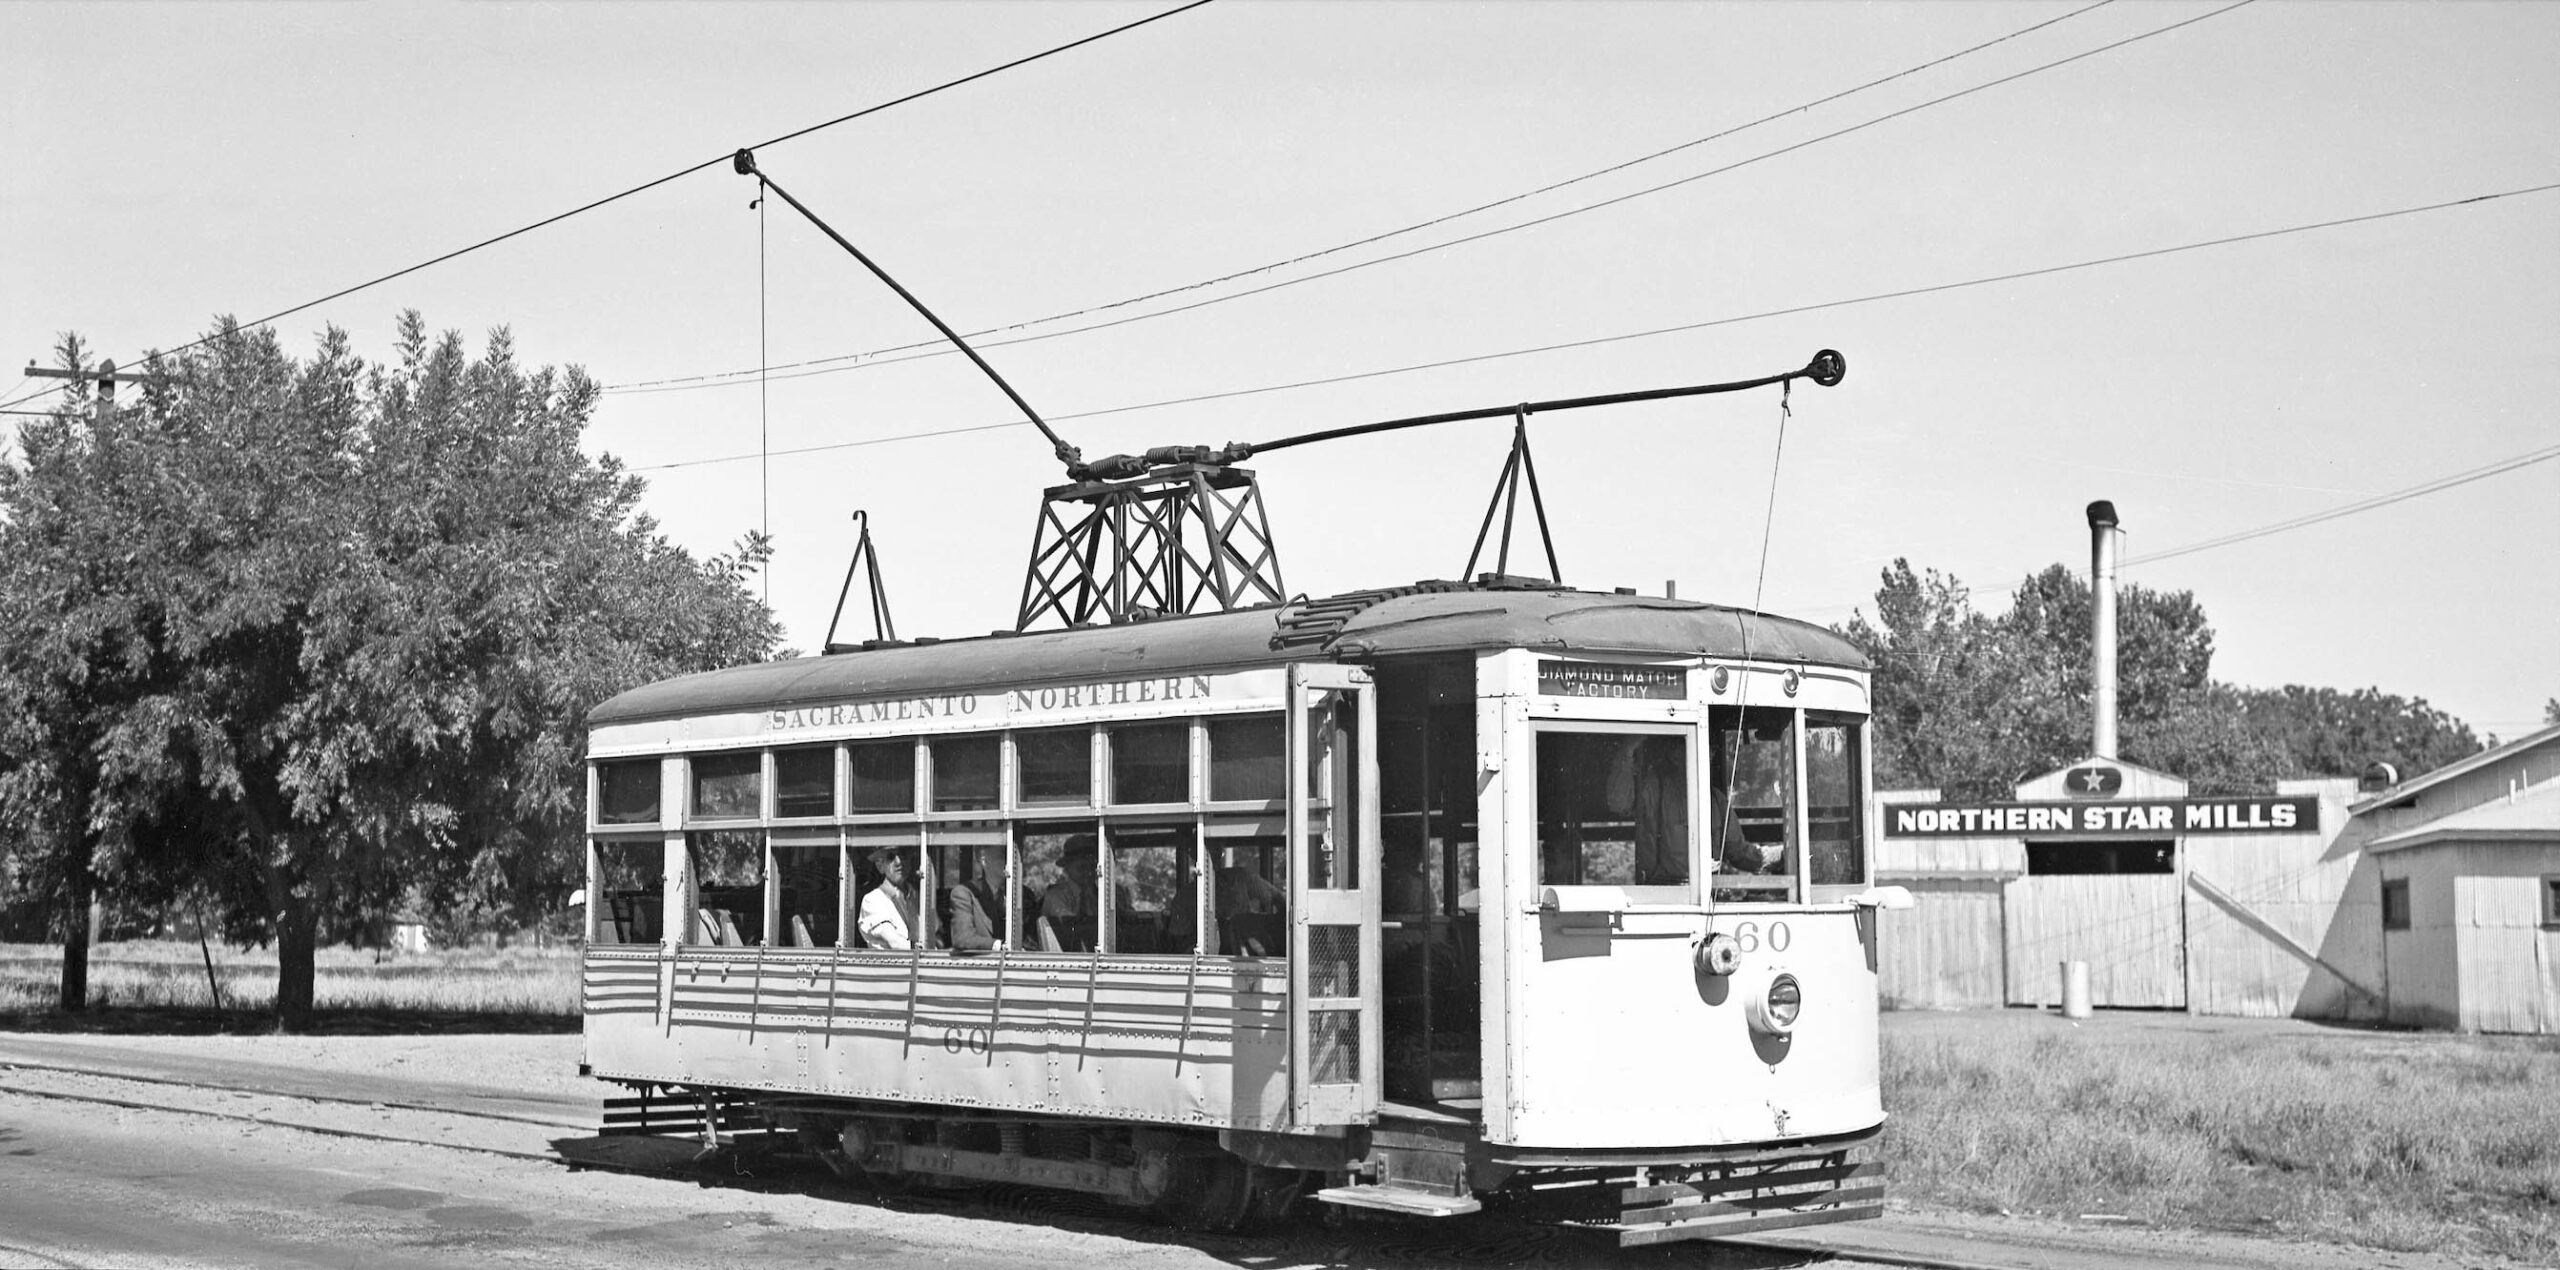
The siding took off from the mainline between 13th and 14th Sts., yellow box, the presence of a boxcar marked, yellow arrow. The next destination was the W. 16th St. turn-off to Northern Star Mills and Diamond Match, green arrow boxed in green. Ref: Courtesy BAERA, Western Railway Museum Archives, 16184sn; Courtesy Meriam Library, California State University, Chico, sc24014
L262-45-Multiple Acknowledgments, (Image 9 of 34)
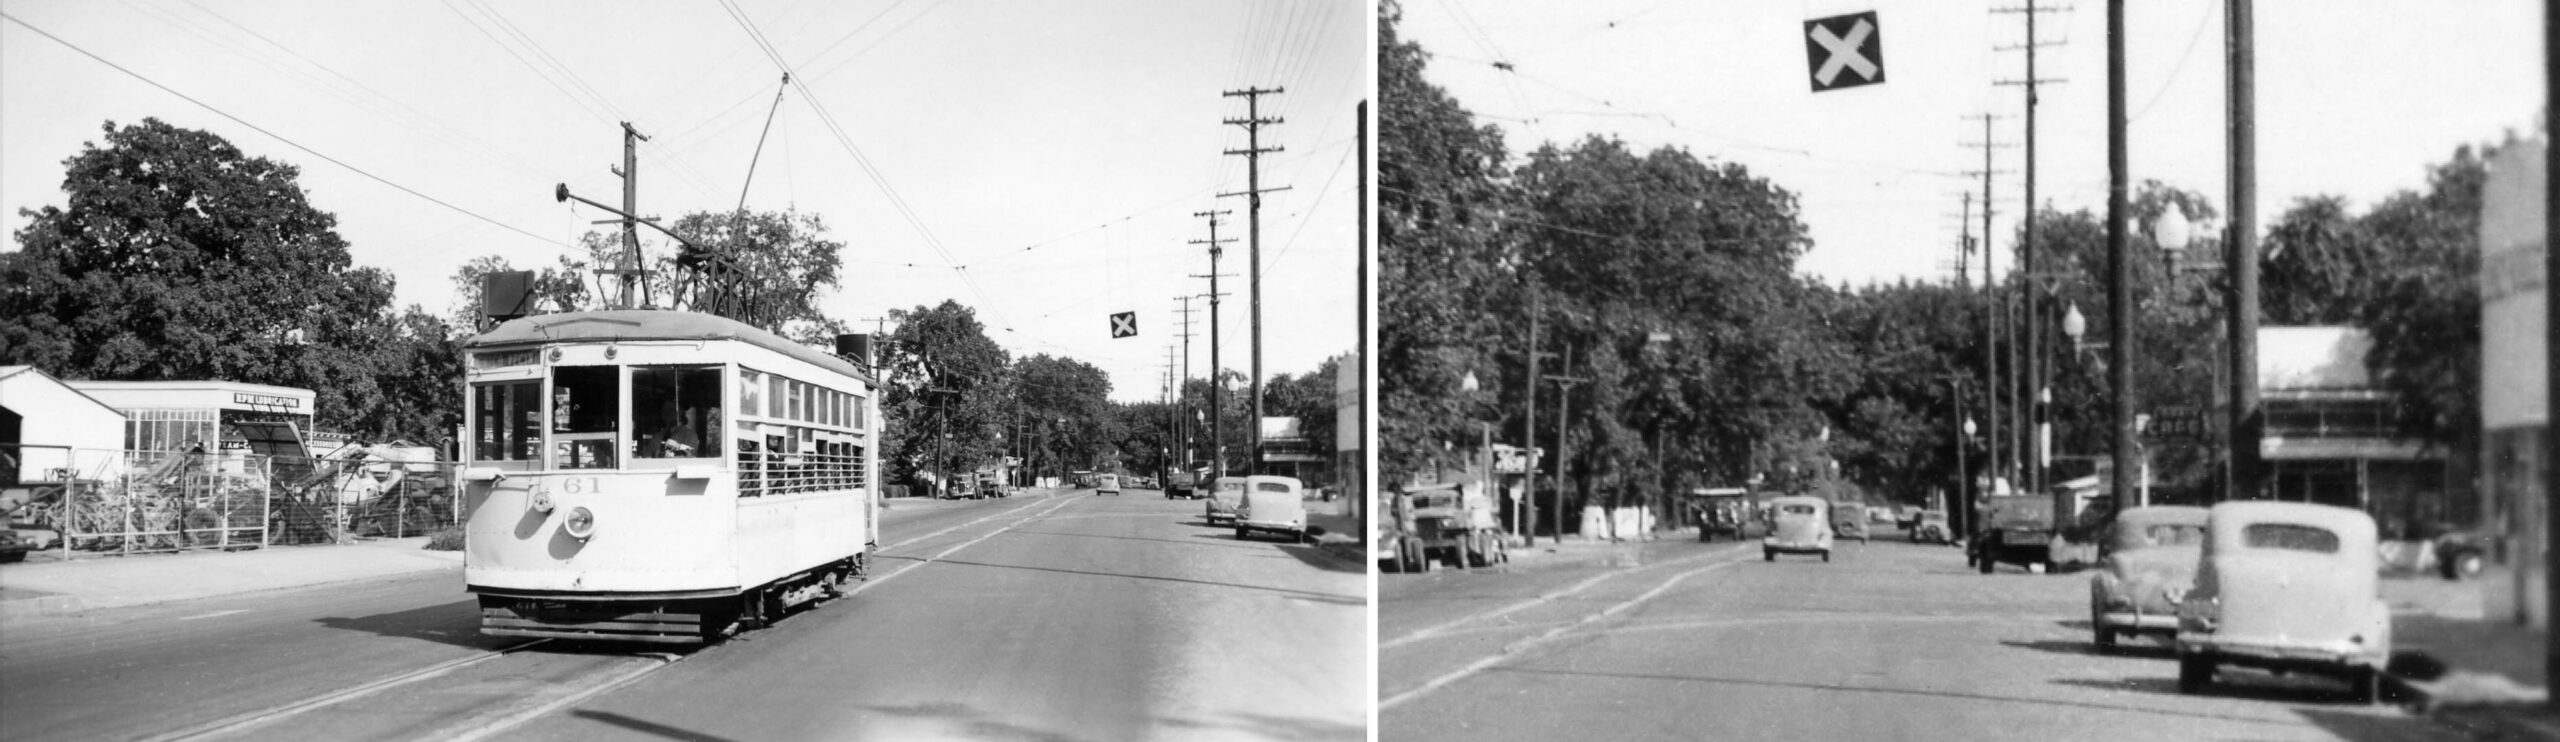
This southeast view down Park Ave. circa 1940 with Birney 61 positioned between 15th and 16th Sts. shows a suspended X marking a spur crossing ahead, with a detail on the right showing the W. 16th spur in the asphalt.
L262-50-Courtesy BAERA, Western Railway Museum Archives, 110728sn. , (Image 10 of 34)
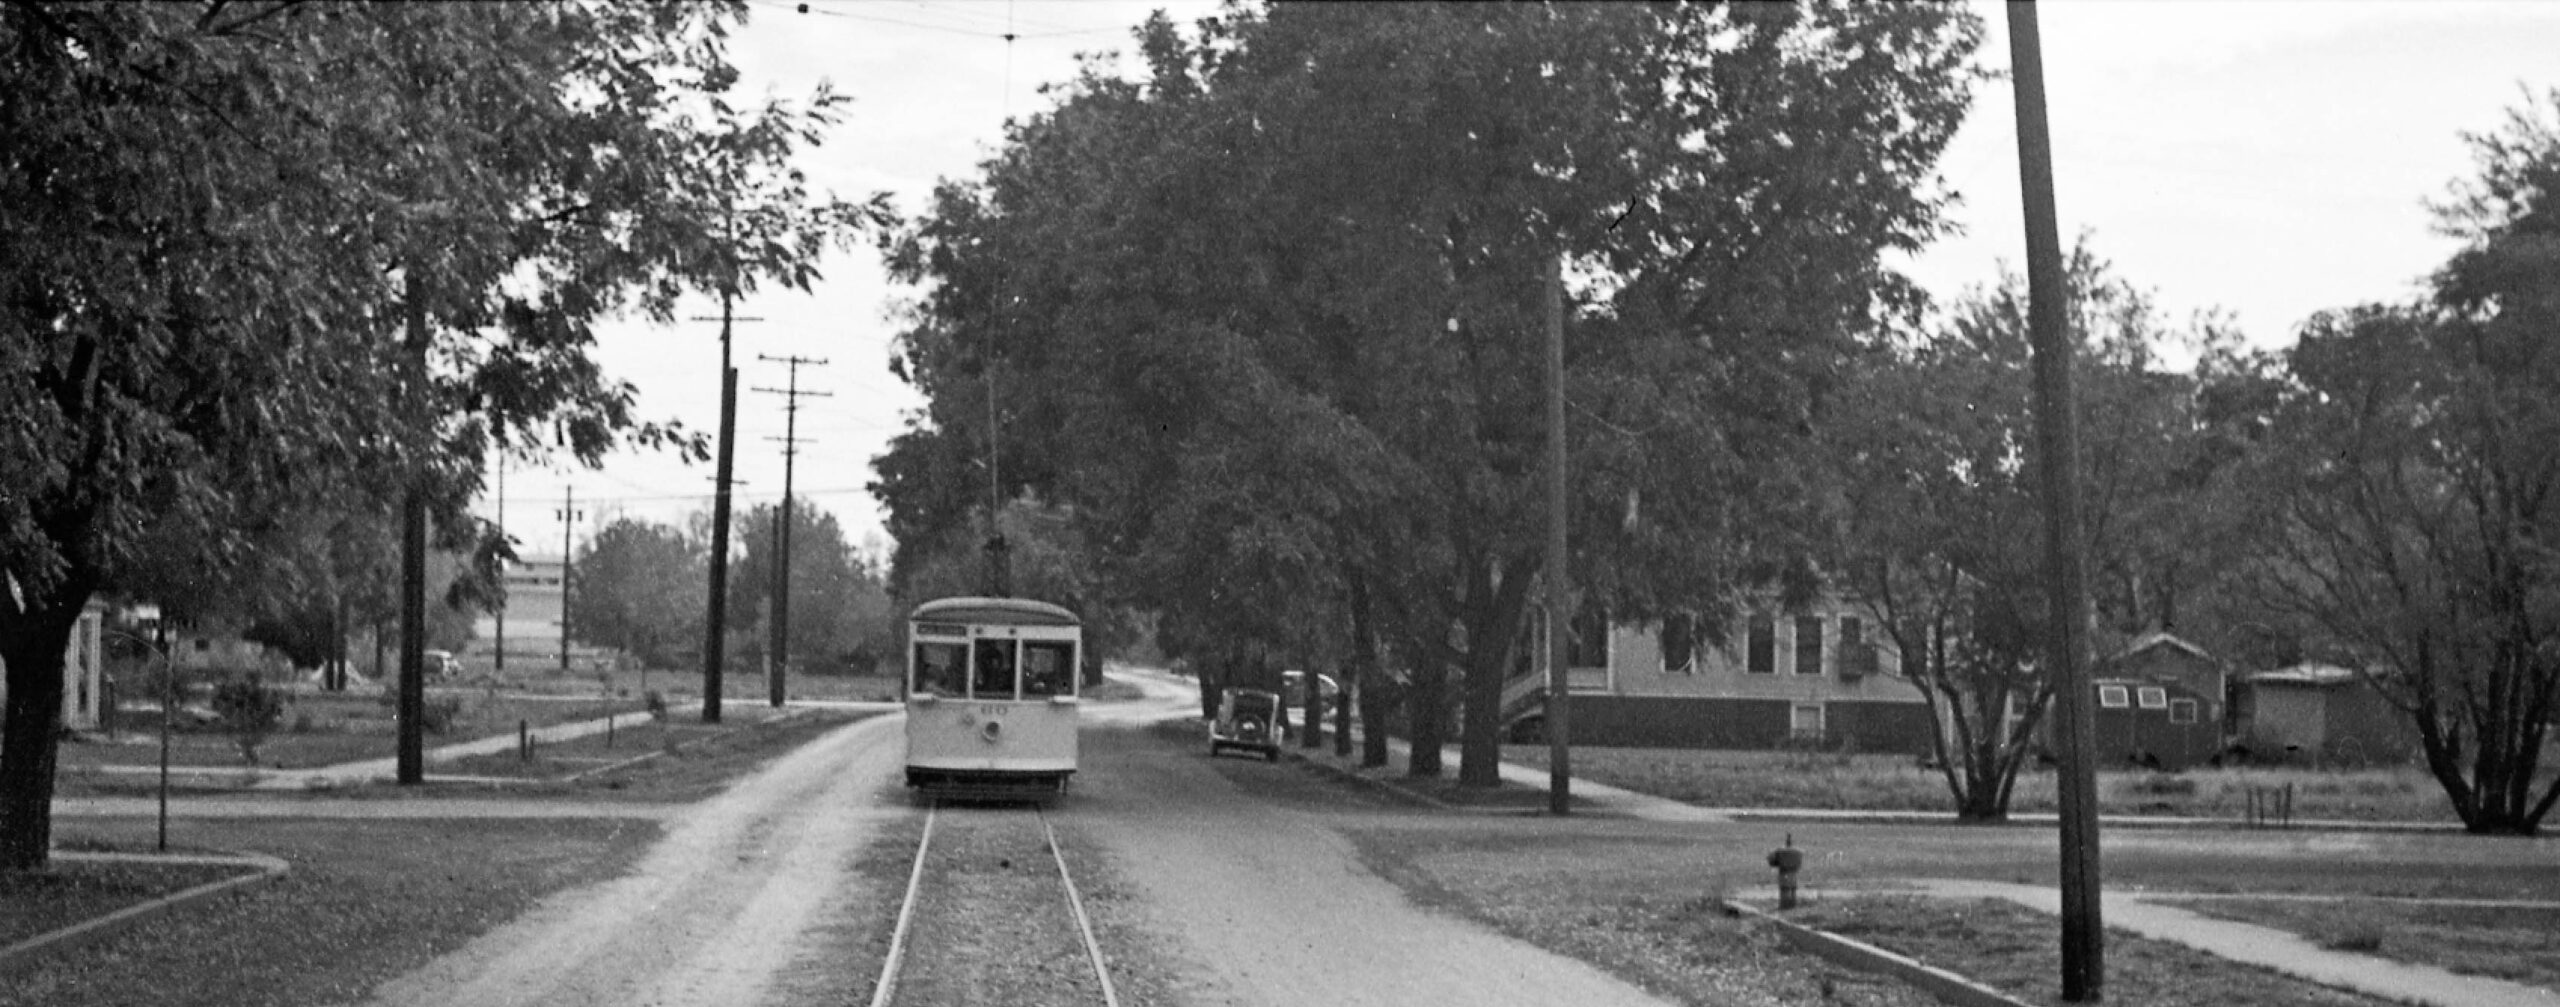
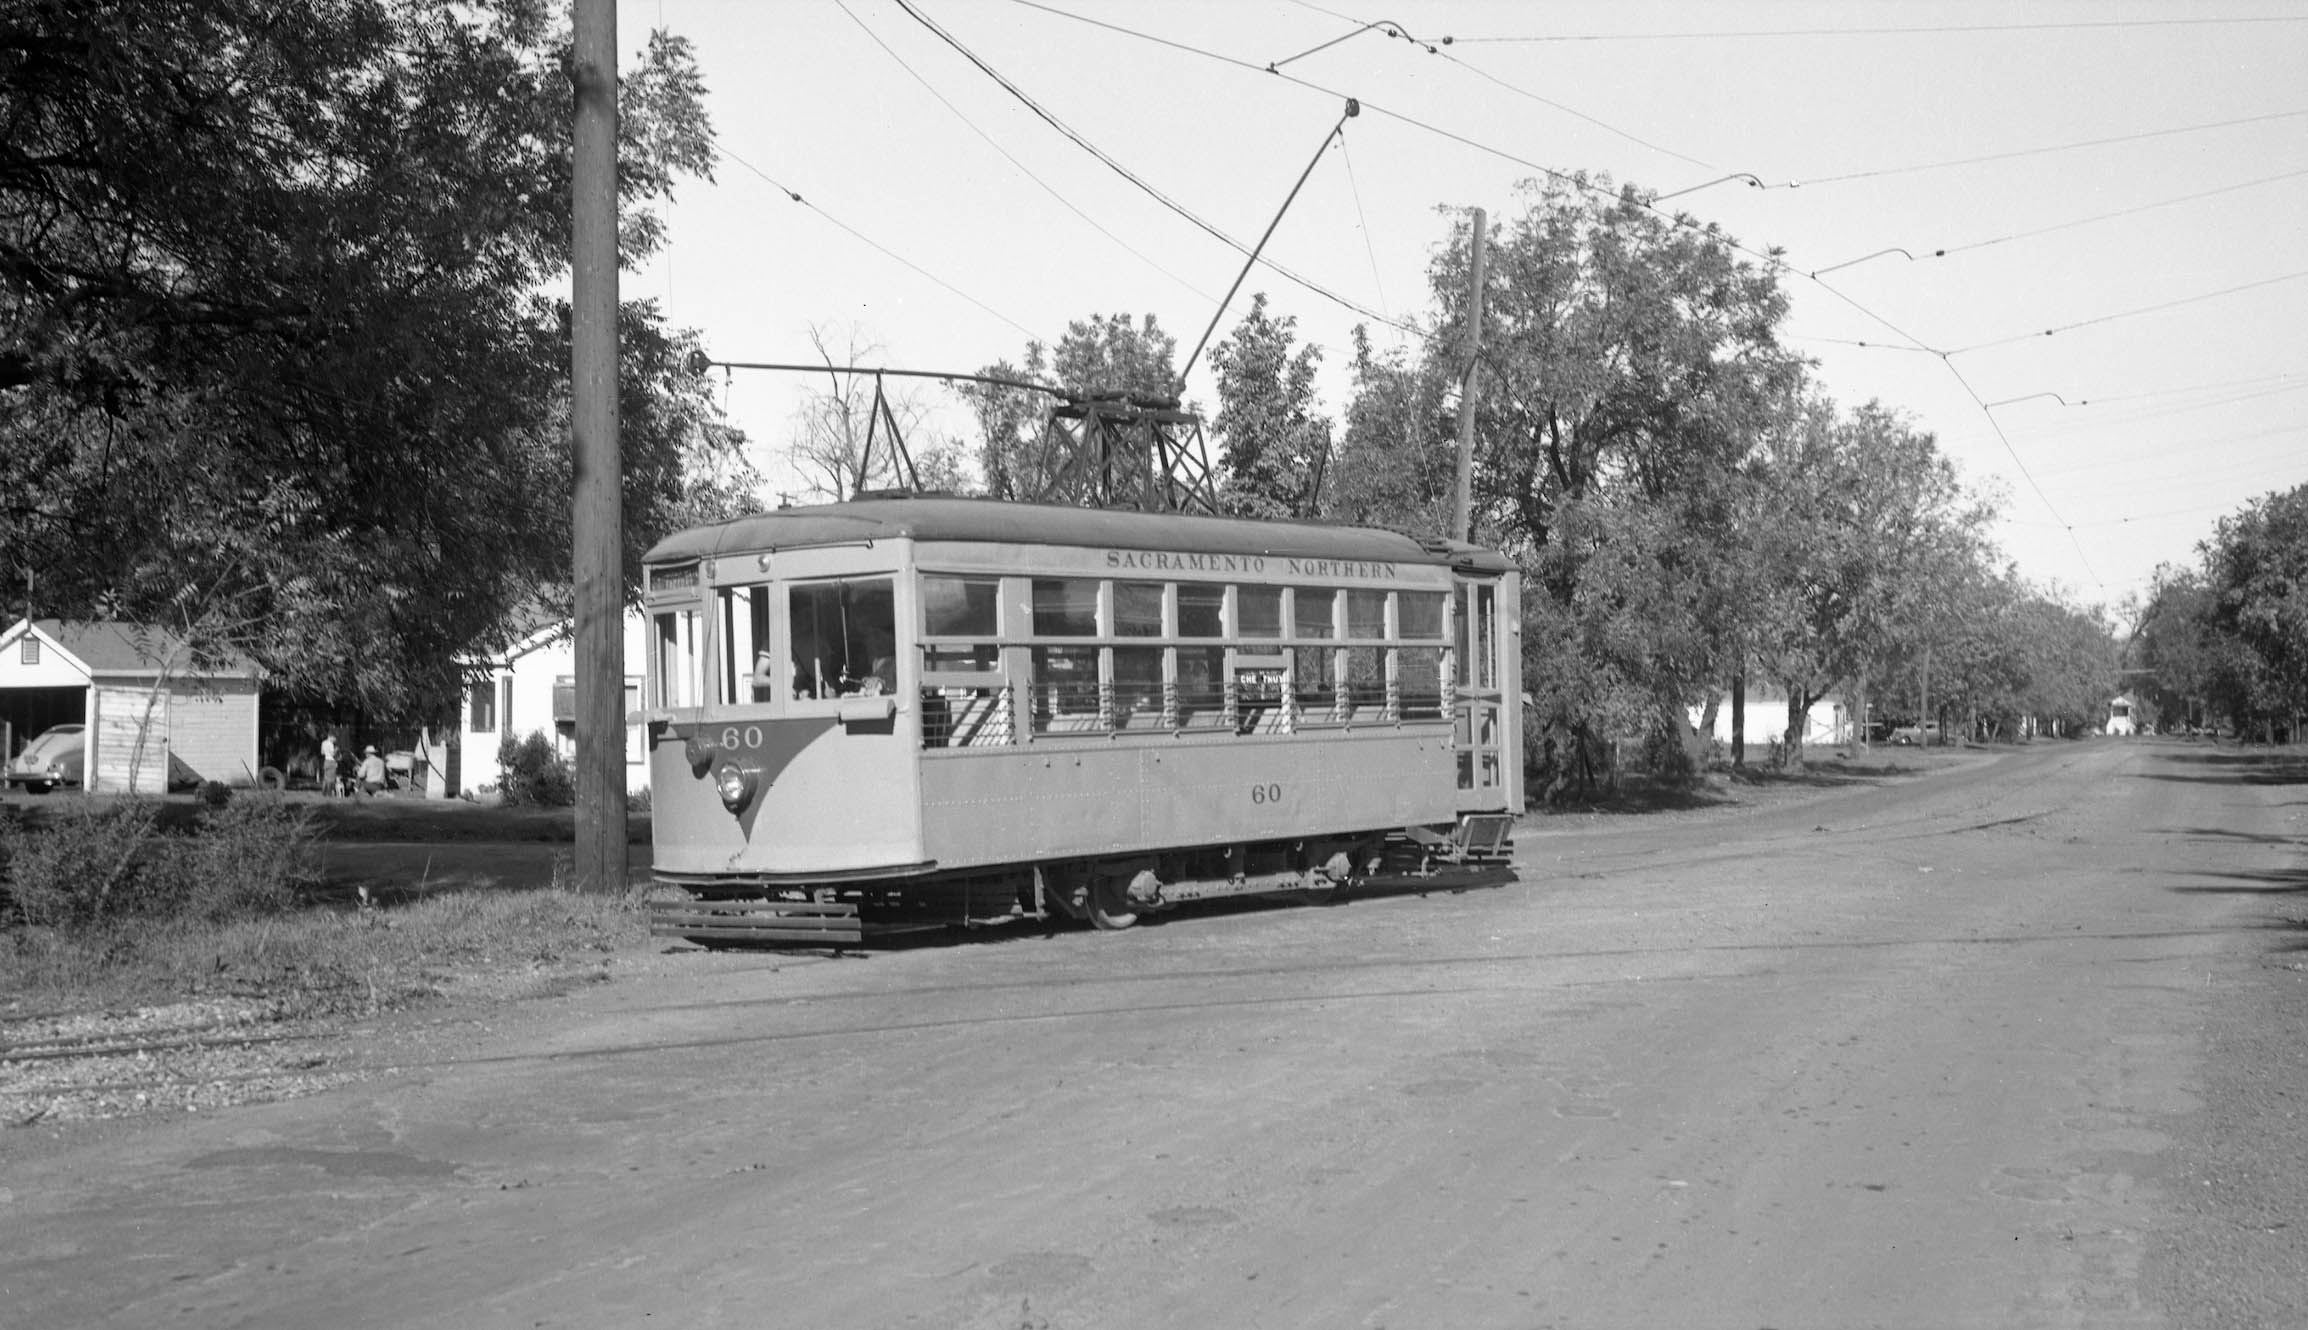
This northwest view circa 1940 shows Birney 60’s destination as it navigates the turn from Park Ave. onto W. 16th St.
L262-55-Moreau Collection, Courtesy BAERA, Western Railway Museum Archives, 163716sn, (Image 11 of 34)
A reminder here that the Northern Electric, NE, had the spur from Park Ave. via Del Norte, soon to be W. 16th St., to Chestnut St., to the gates of Diamond Match. Once the Chestnut St. and Broadway St. lines were eliminated, the NE negotiated the extension into the plant for workers’ convenience, while also supplying the NE with freight access and a second interchange with the SP.
L262-60-Courtesy BAERA, Western Railway Museum Archives, 26997sn, Detail , (Image 12 of 34)
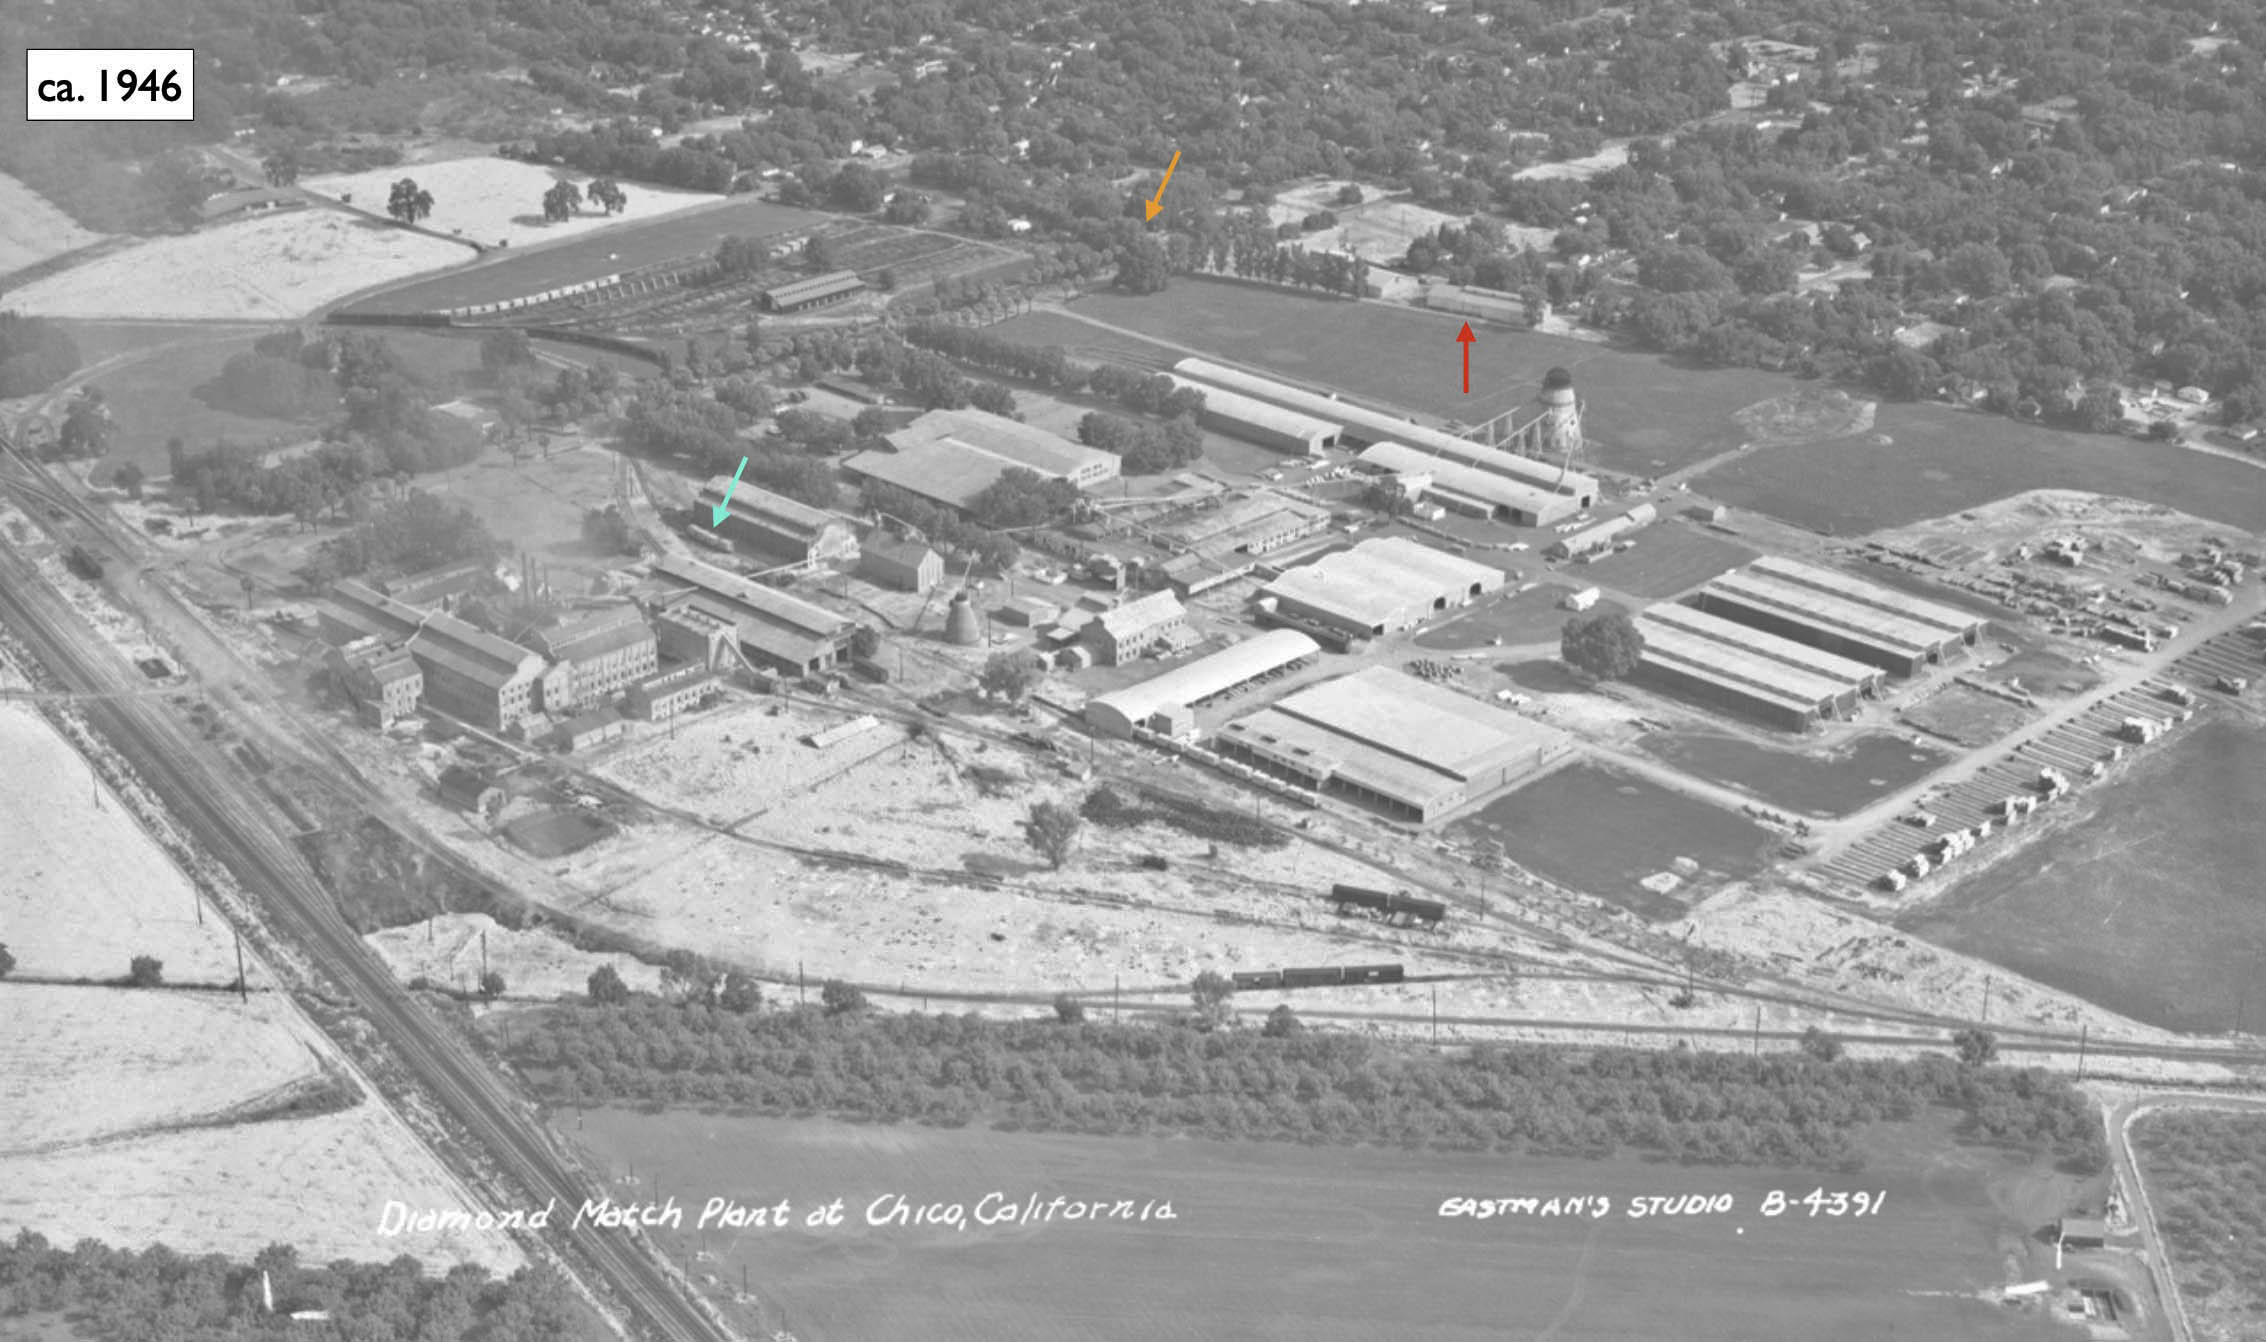
A circa 1946 aerial northeast view shows the route from Park Ave., upper, right, to the gate of Diamond Match, lower left. Note the curve along the route just below Broadway St. and the position of the Northern Star Mills plant. Ref: Image DO51, Detail
L262-65-Eastman Studio Photo B-4391, Courtesy Special Collections, U. of California, Davis, Library, (Image 13 of 34)
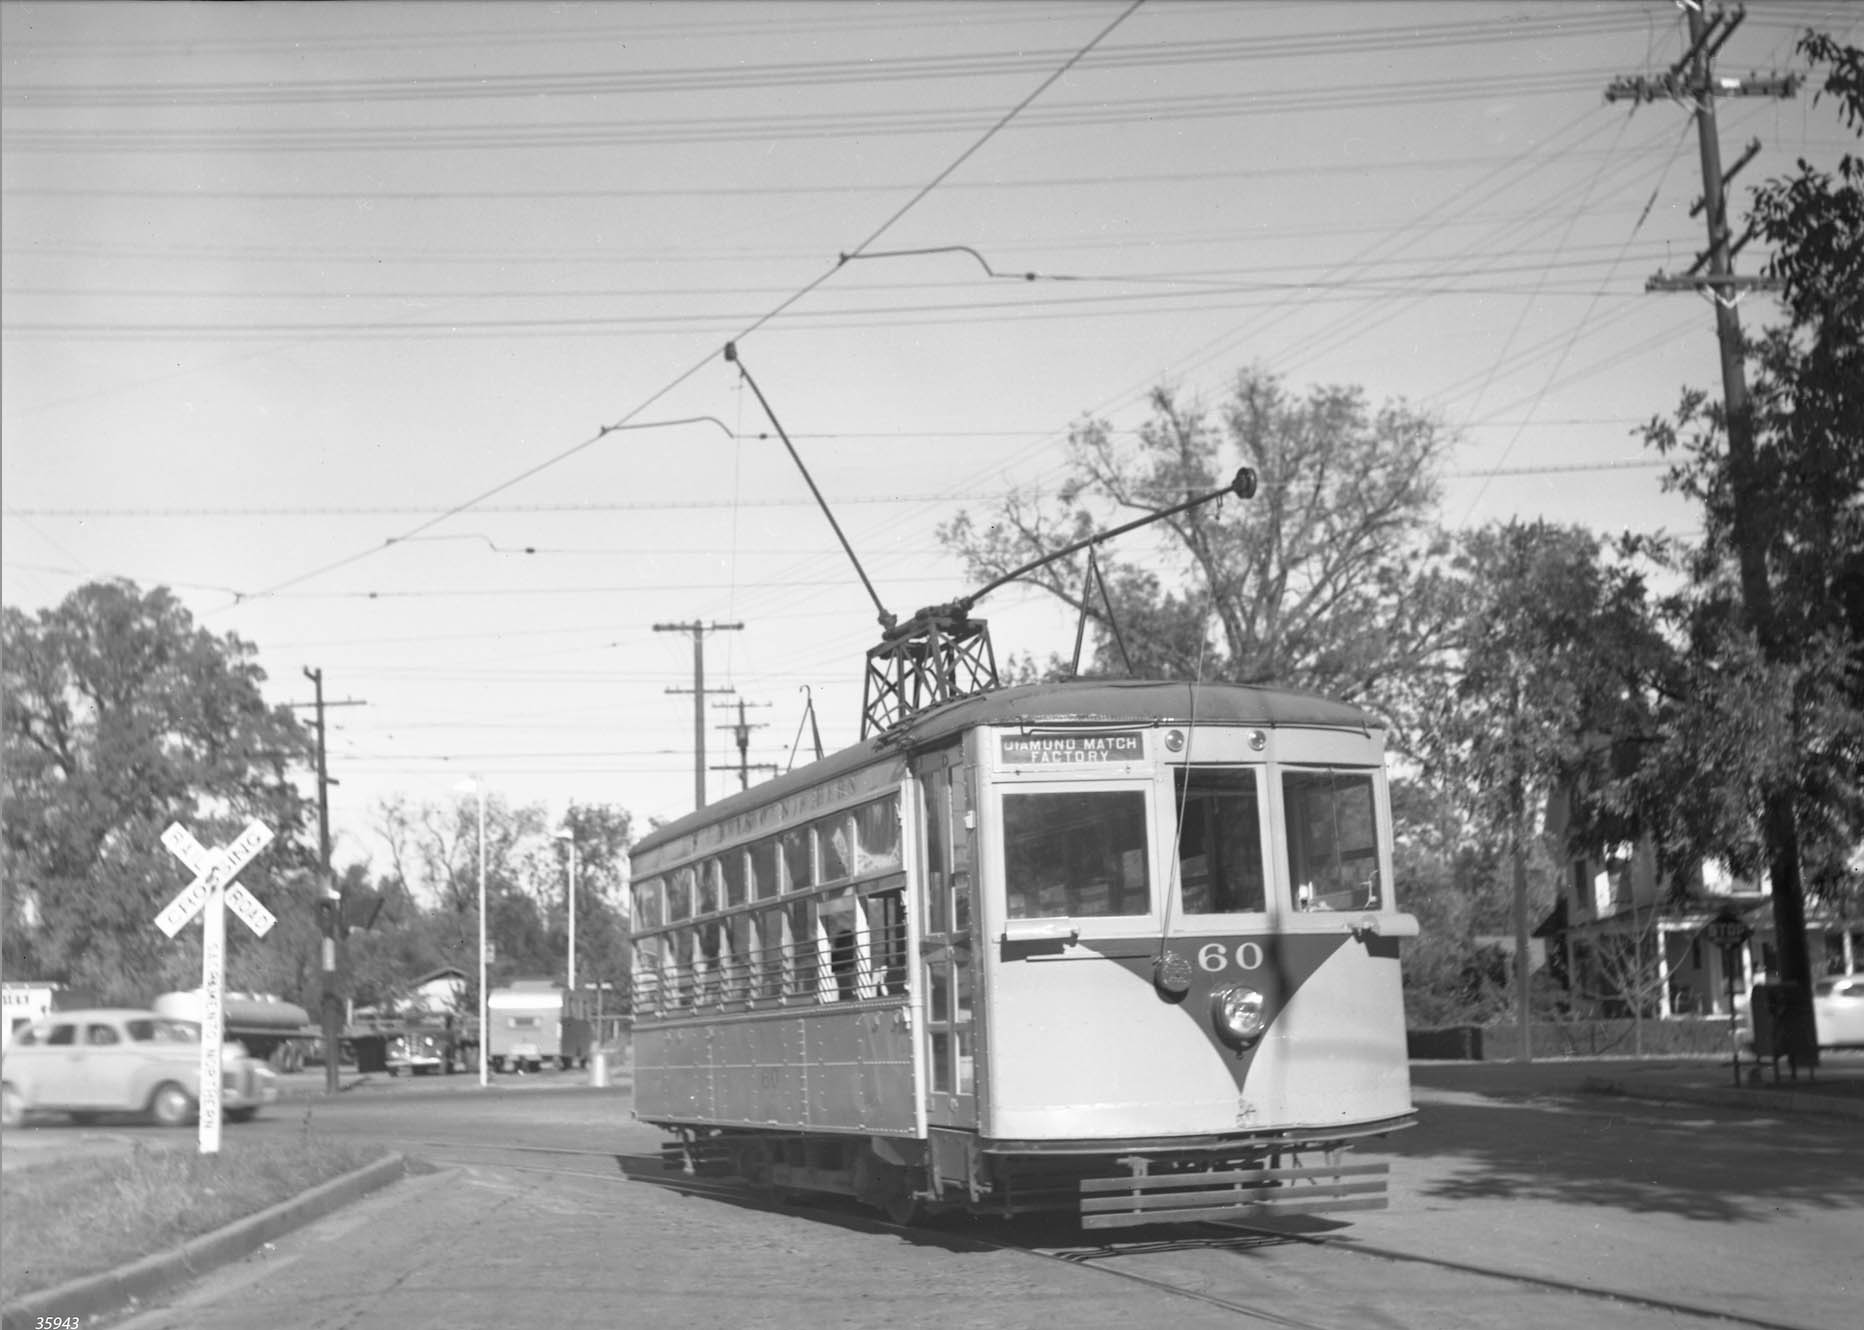
Next, a ride down 16th St. starting with this east view at the Park Ave. turn-off with Birney 60 during the Nov. 9, 1947 excursion.
L262-70-Alvon Thoman Courtesy BAERA, Western Railway Museum Archives, 35943sn, (Image 14 of 34)
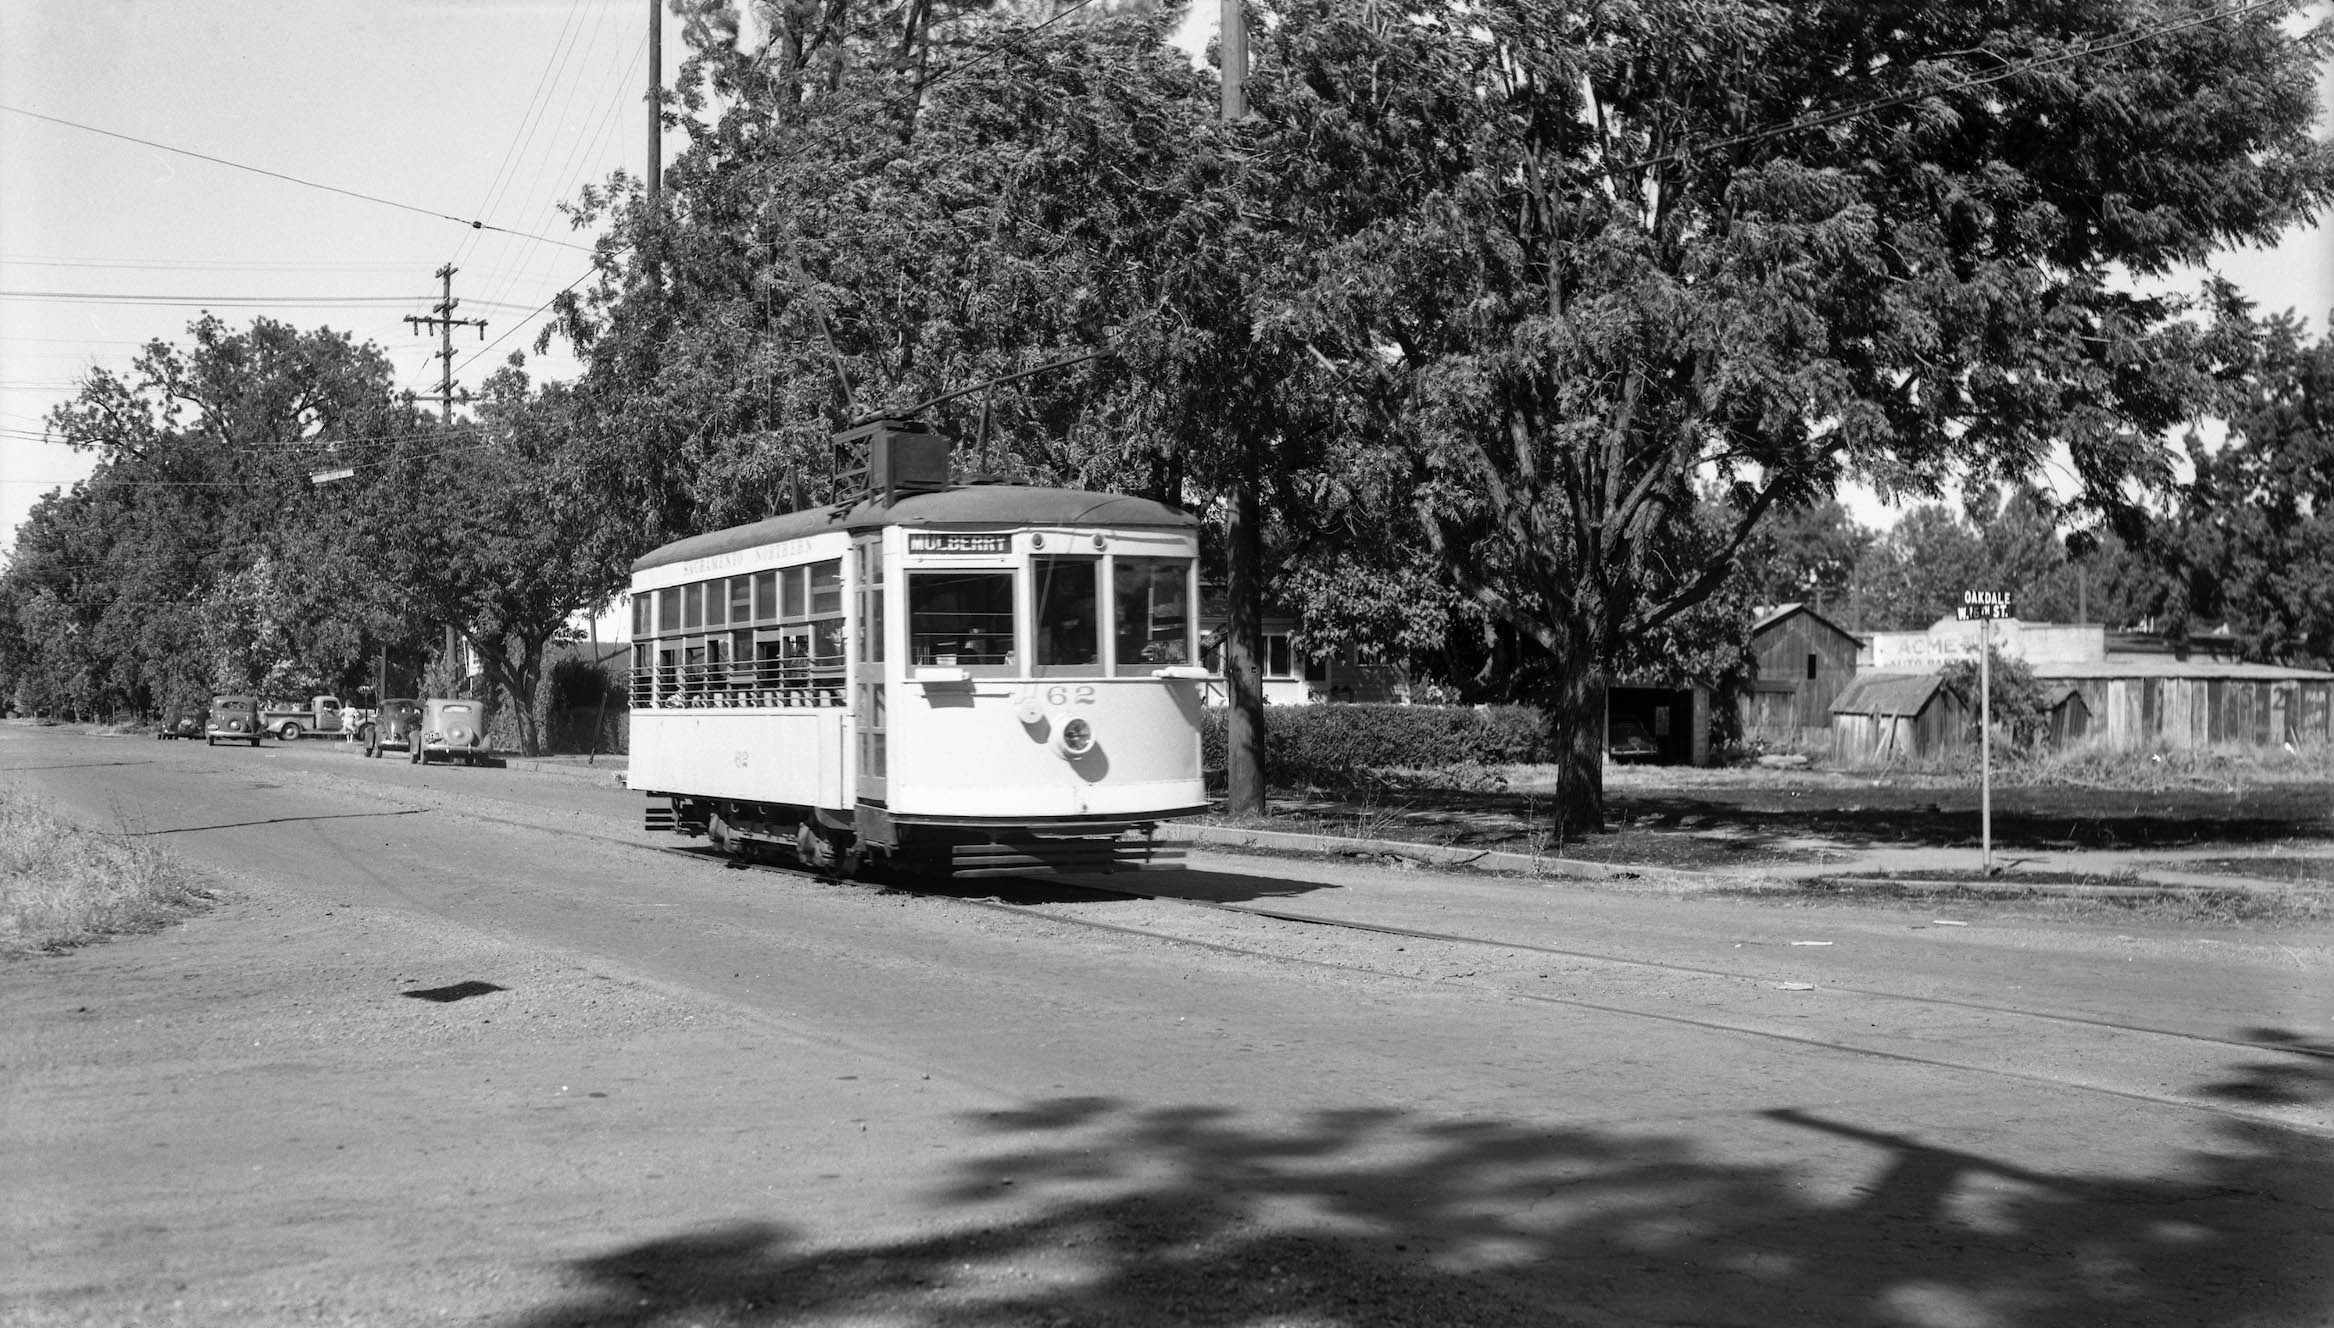
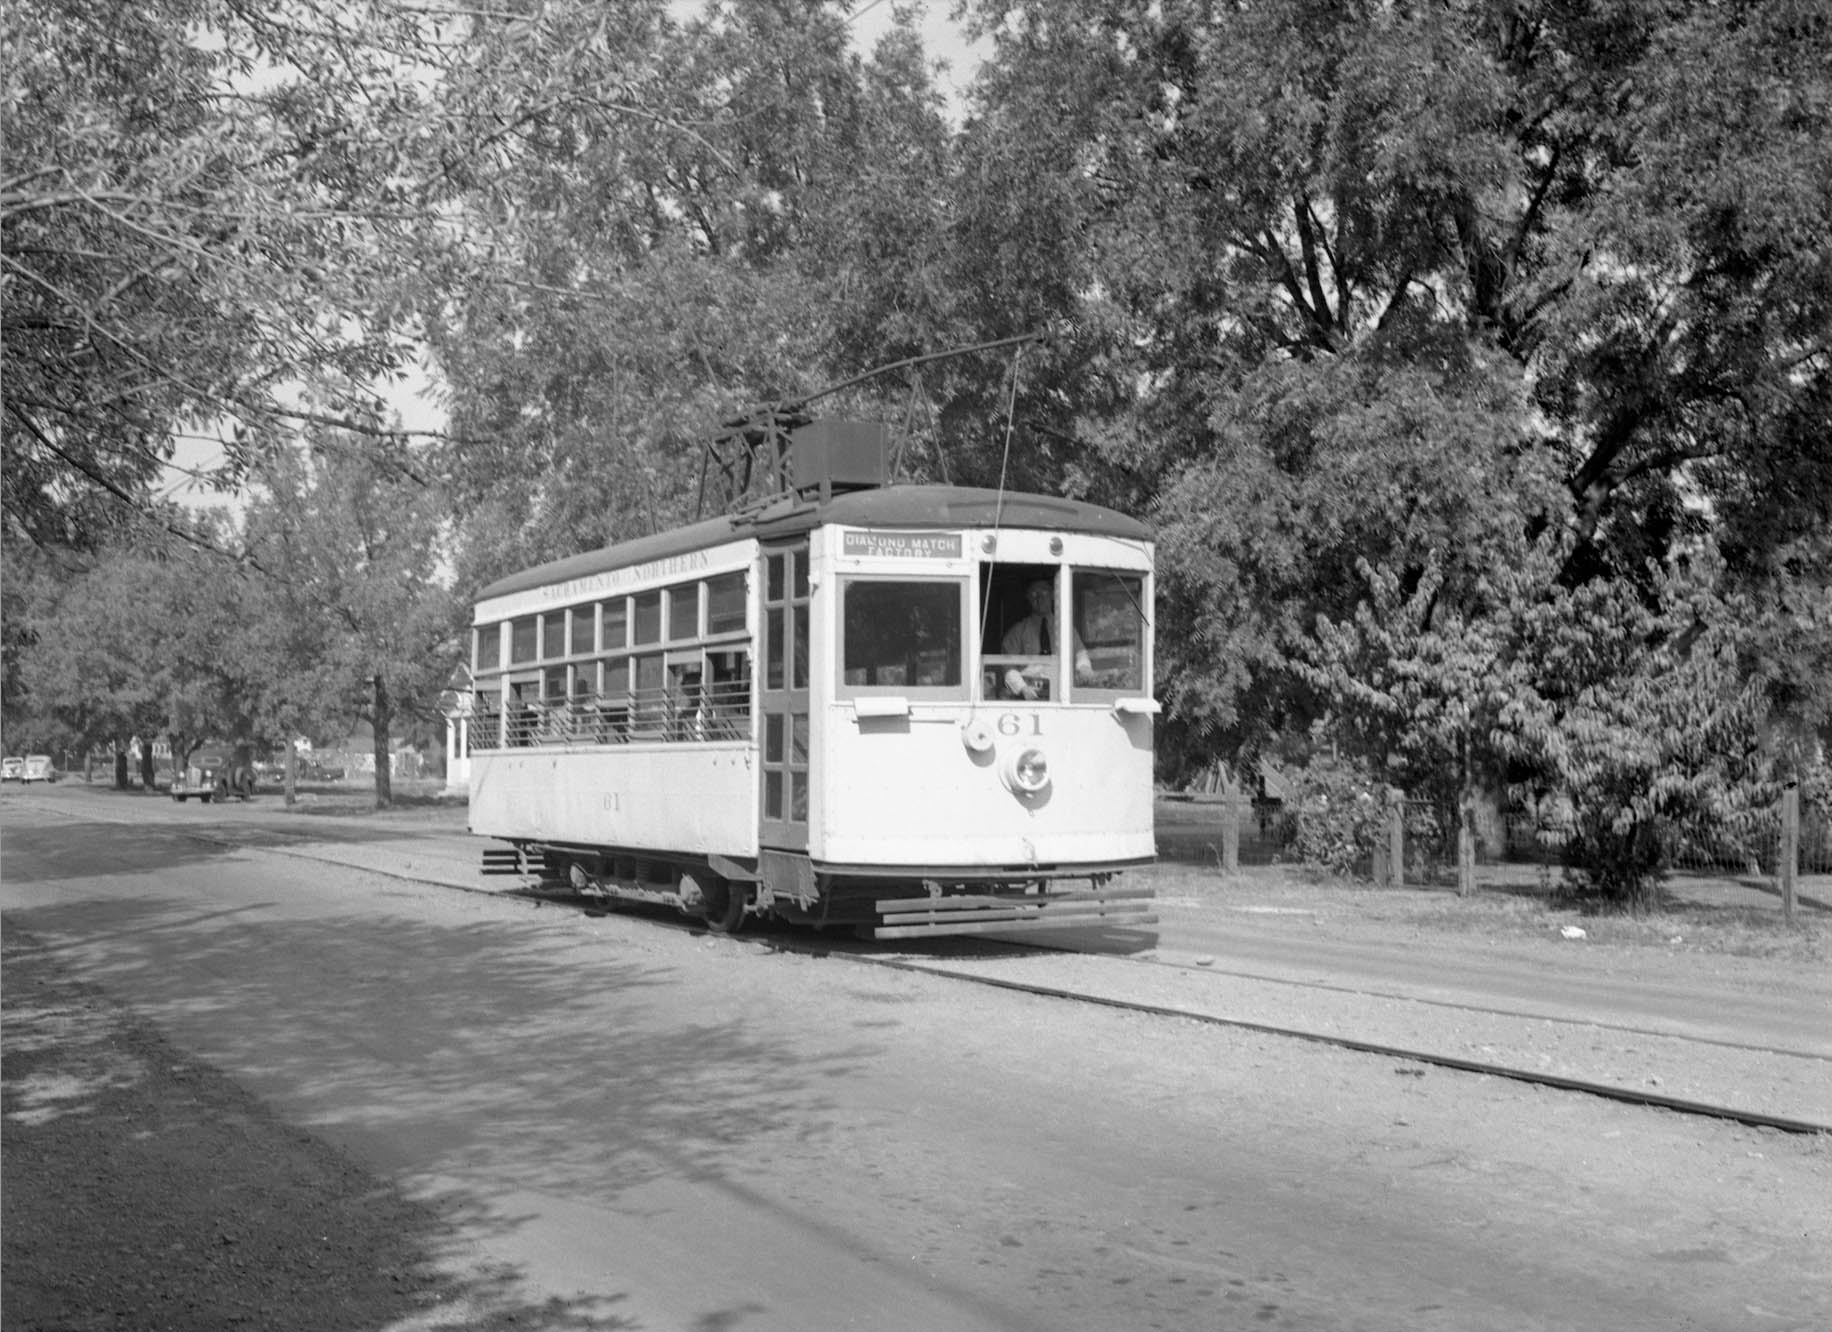
Although Birney 62 indicates that Mulberry is the destination, the street signs at 16th St. and Oakdale St. indicate this excursion trip is heading west for Diamond Match on June 27, 1945.
L262-75-Arthur Lloyd Photo, Courtesy BAERA, Western Railway Museum Archives, 113776sn, (Image 15 of 34)
Arthur Lloyd’s panoramic west view from Oct. 20, 1946 of Birneys 66 and 60 also highlights the north side of W. 16th St. The interval between Park Ave. and Oakdale St. is to the right of Birney 66, while the interval between Broadway St. and Oakdale Sts. is to the left of Birney 60.
L262-77-Arthur Lloyd Photo, Courtesy BAERA, Western Railway Museum Archives, 130707sn, (Image 16 of 34)
During the same Oct. 20, 1946 excursion, Walt Vielbaum faced west toward Oakdale St. to shoot Birney 60 at the intersection, but also captured a panoramic view of the interval between Oakdale and Broadway Sts., as well as the curve to the west of the latter.
L262-80-Walt Vielbaum Photo, Courtesy BAERA, Western Railway Museum Archives, 133693sn, (Image 17 of 34)
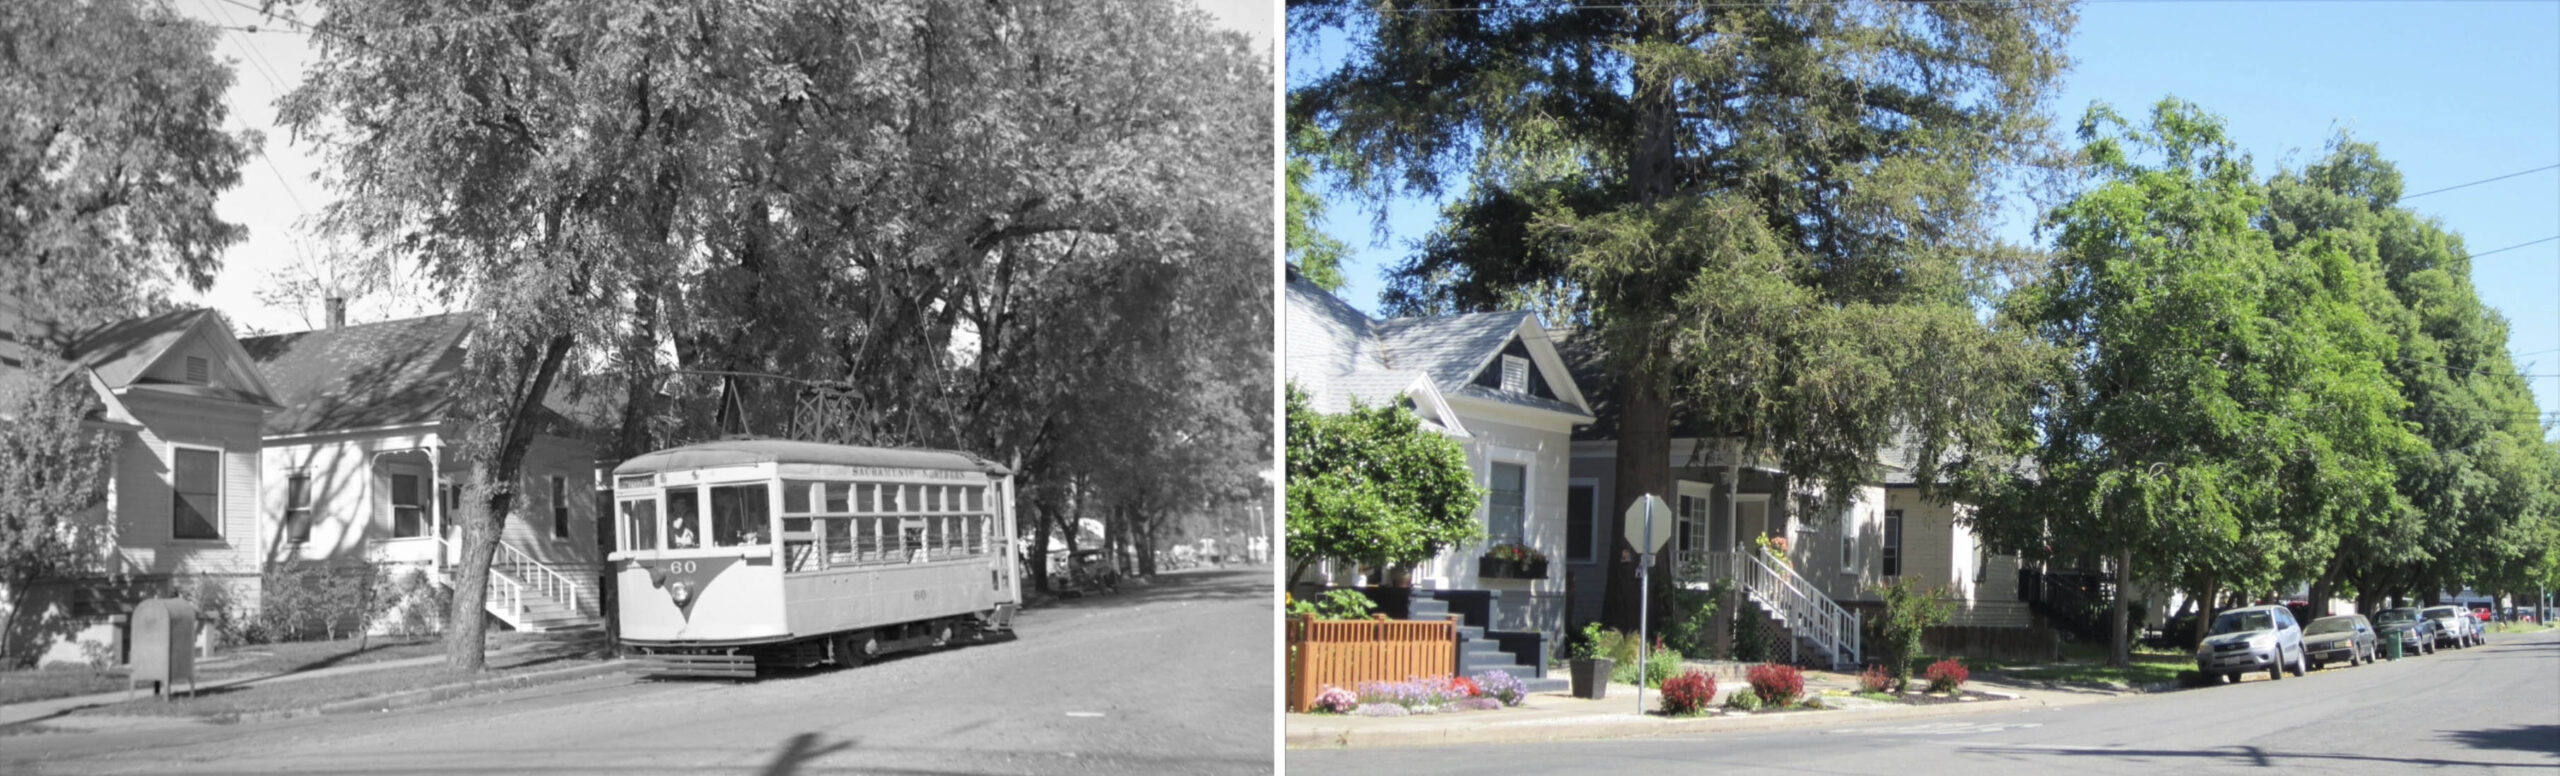
Back to the lens of Alvon Thoman, and another view of gold-and-green Birney 60 on the Nov. 9, 1947 excursion in an east view at the Broadway St. intersection, left, versus a spring day in 2018, right.
L262-85-Alvon Thoman, Courtesy BAERA, Western Railway Museum Arch., 35944sn and Stuart Swiedler, (Image 18 of 34)
Only one image was found between Broadway St. and Normal Ave., this east view of Birney 61 circa 1940. The auto in the distance is making a left turn from Salem St. onto 16th St., the house to the right of the car is 305 W. 16th St., still standing in 2022.
L262-90-Walt Vielbaum Photo Courtesy BAERA, Western Railway Museum Archives, 132720sn, (Image 19 of 34)
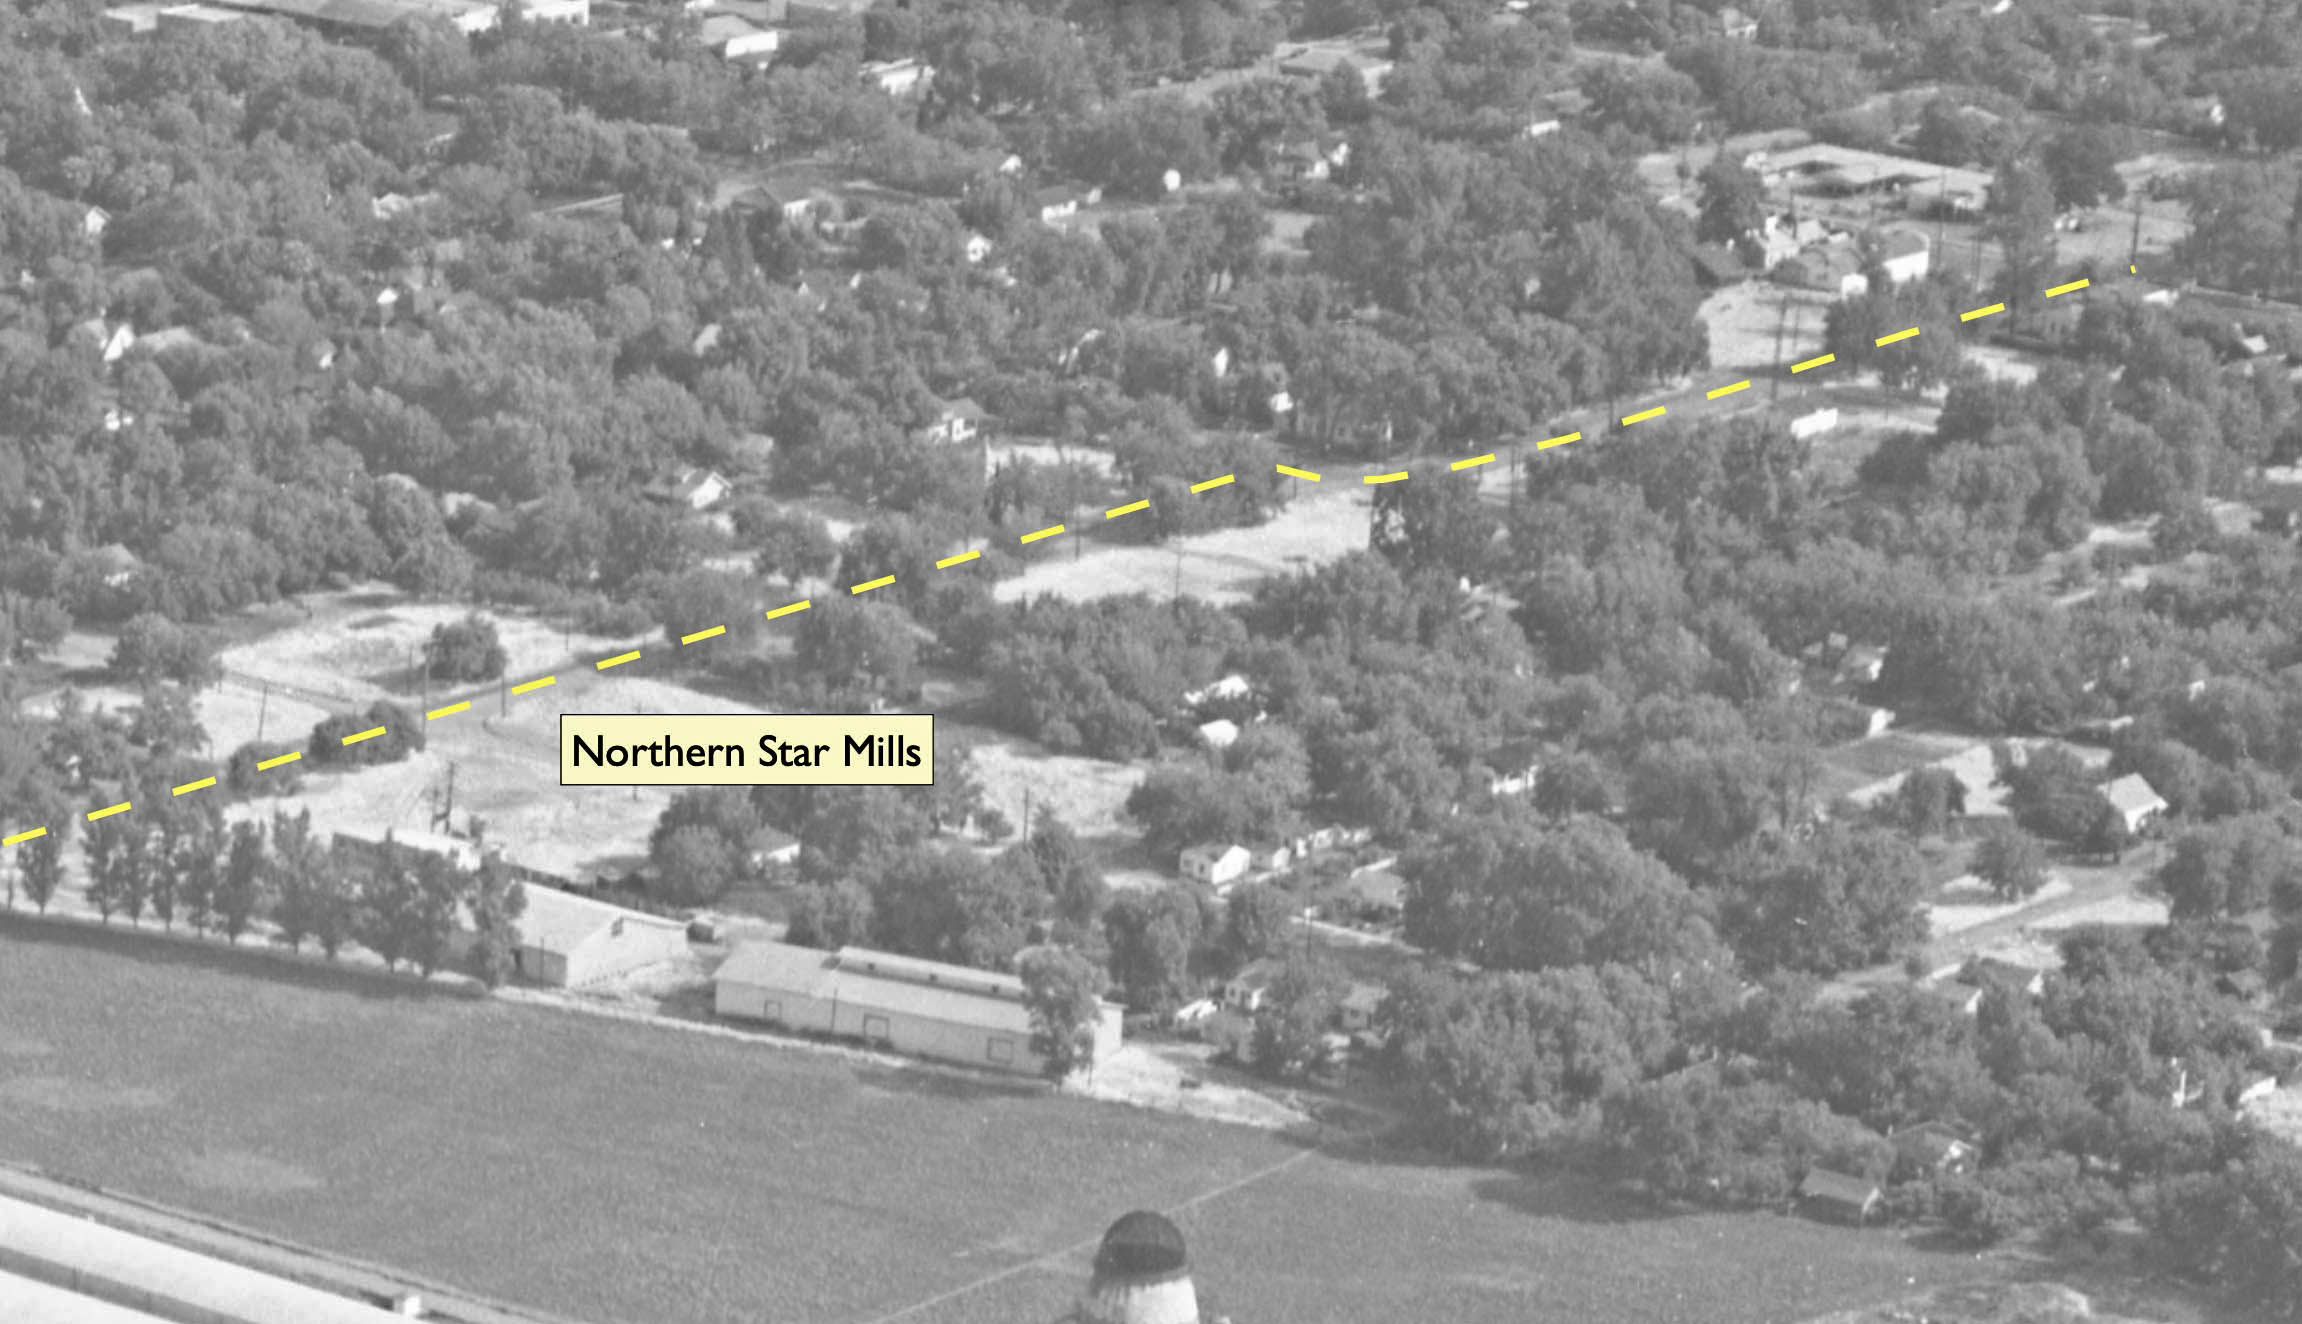
The interval between Normal Ave. and Chestnut St. featured Northern Star Mills’ Chico plant on the south side of the street. Birney 60 is shown passing the plant on Aug. 16, 1942, east view.
L262-95-Richard Jenevein Photo, Courtesy BAERA, Western Railway Museum Archives, 13167sn, (Image 20 of 34)
Having reached Chestnut St., Birney 60 veers to the northwest onto its private right-of-way into Diamond Match during the Nov. 9, 1947 excursion in this northeast view. The track in front of the Birney is the short spur into Northern Star Mills.
L262-100-Courtesy BAERA, Western Railway Museum Archives, 163758sn , (Image 21 of 34)
A northeast panoramic view of the Diamond Match plant is marked to indicate the position of the entrance at Chestnut St., orange arrow, the location of the streetcar stop in the plant, turquoise arrow, and the location of the spur into Northern Star Mills, red arrow. Ref: Image DO51, Detail
L262-105-Eastman Studio Photo B-4391, Courtesy Special Collection, U. of California, Davis, Library , (Image 22 of 34)
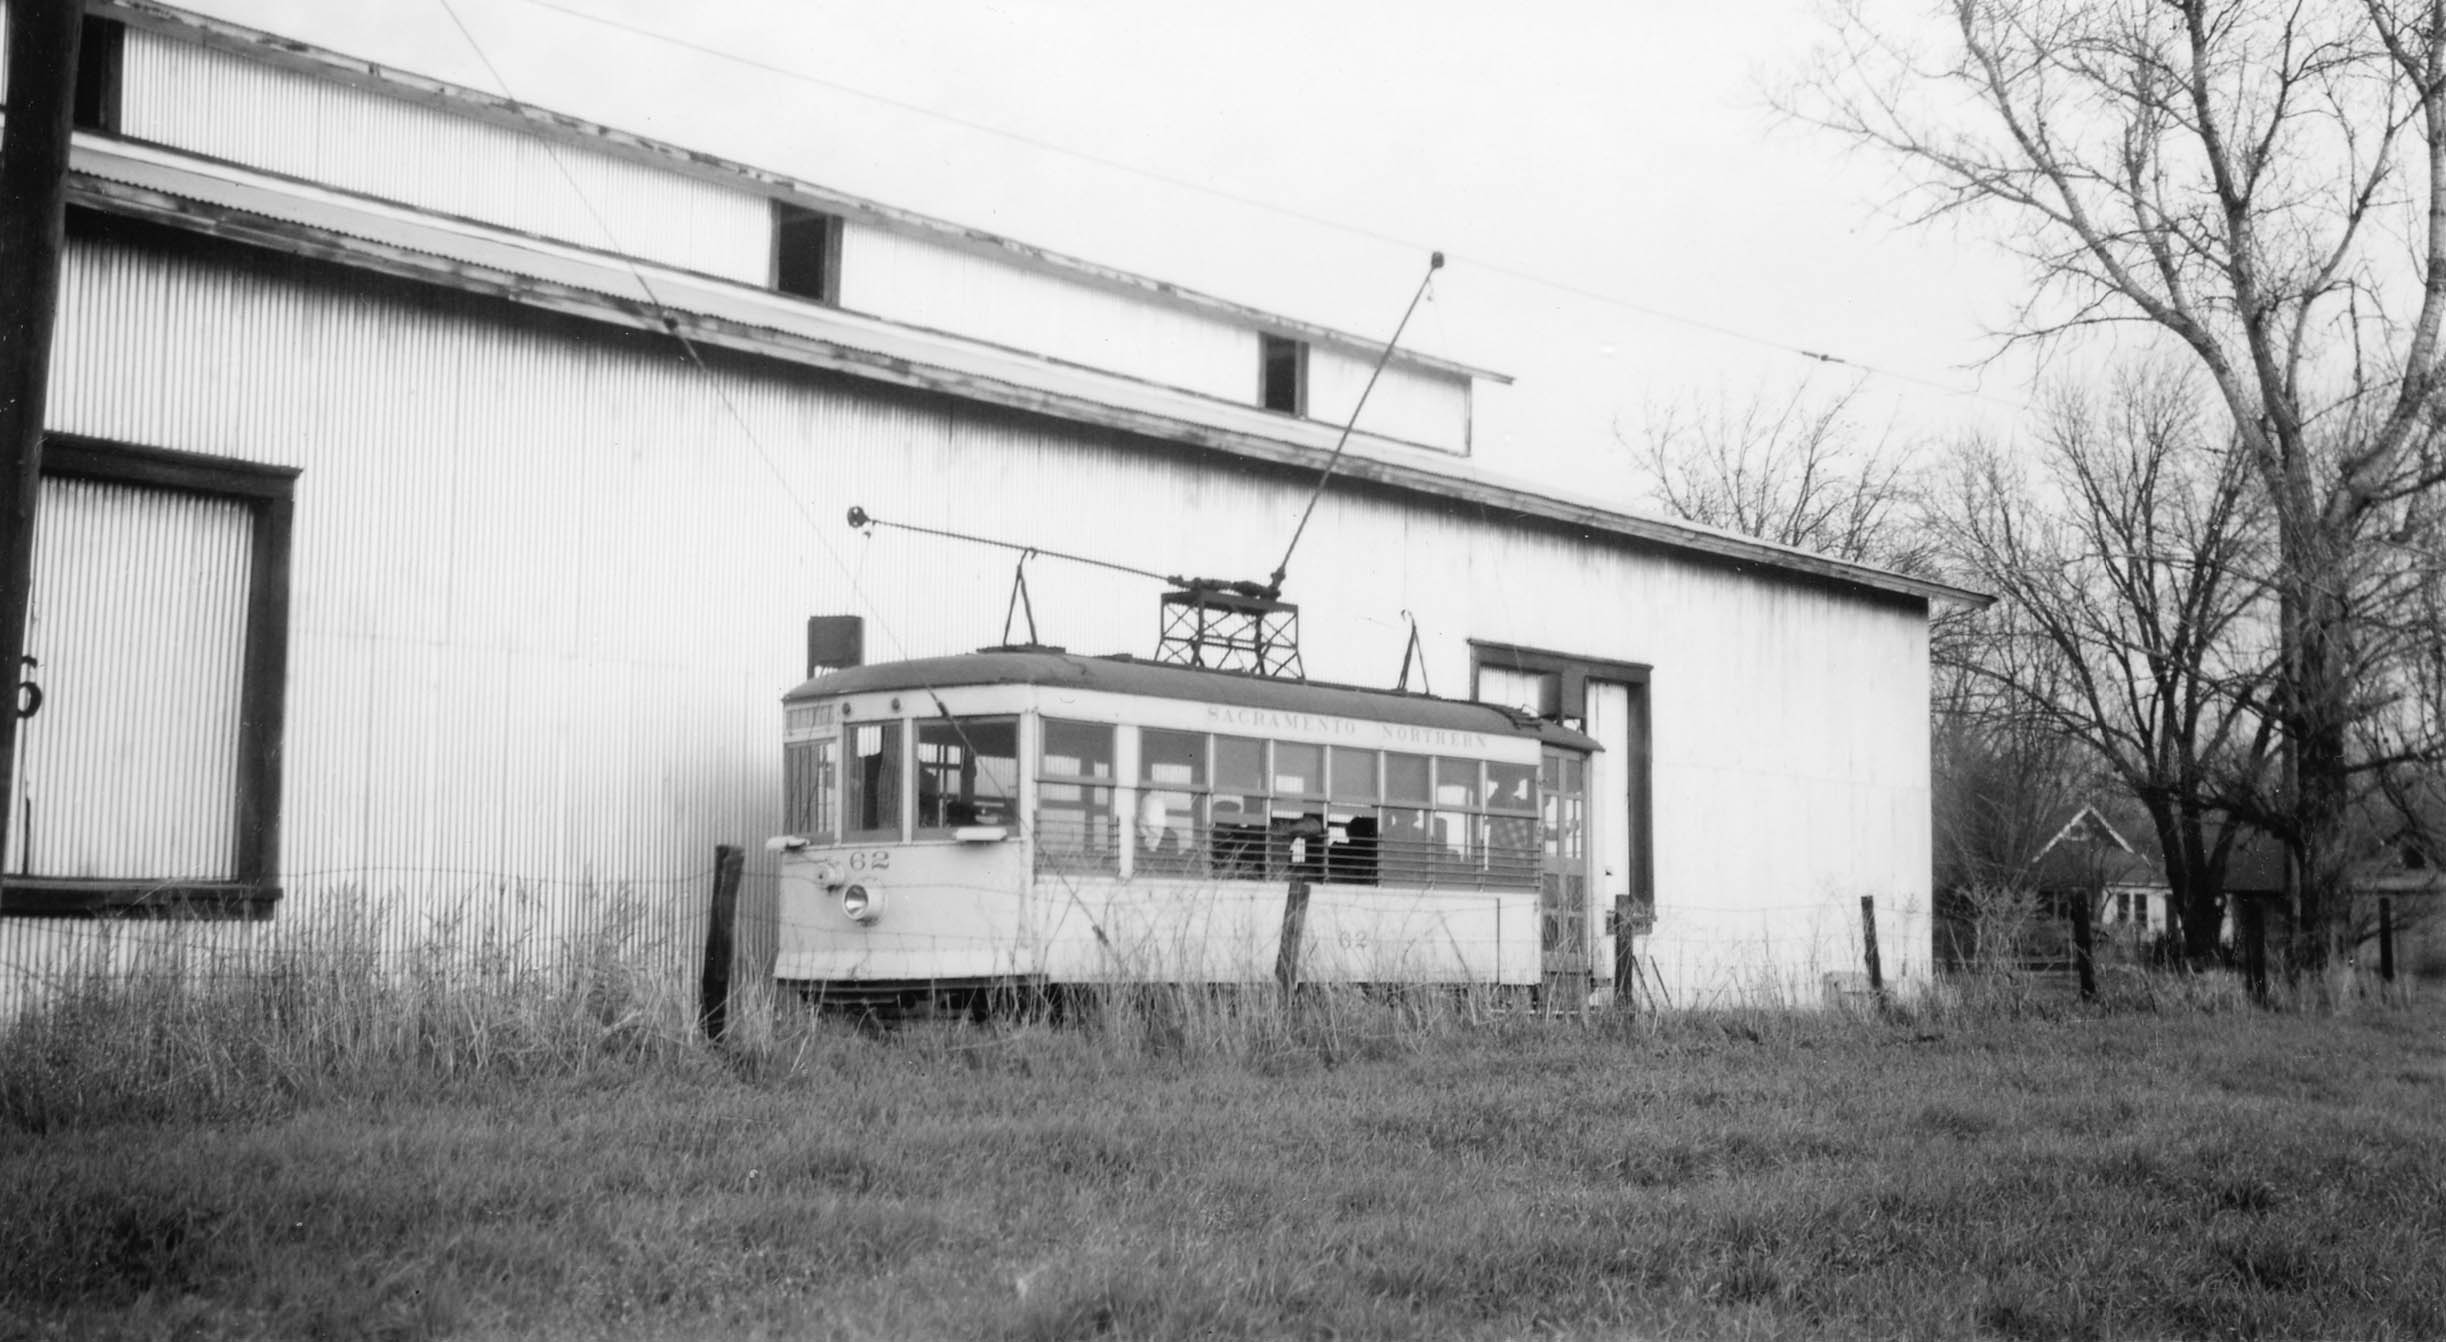
First, relative to the red arrow in the last image, Birney 62 is pictured at the end of the spur at Northern Star Mills during a 1940s excursion, southeast view. There is no record of streetcars serving this site during regular service.
L262-110-Courtesy BAERA, Western Railway Museum Archives, 77971sn, (Image 23 of 34)
Relative to the turqouise arrow in the last image, the site of the streetcar stop was beside the Diamond Match plant’s original engineering building. The date is June 1940, northeast view. More on Diamond Match in a future update.
L262-115-Sappers Collection, Courtesy BAERA, Western Railway Museum Archives, 107341sn, (Image 24 of 34)
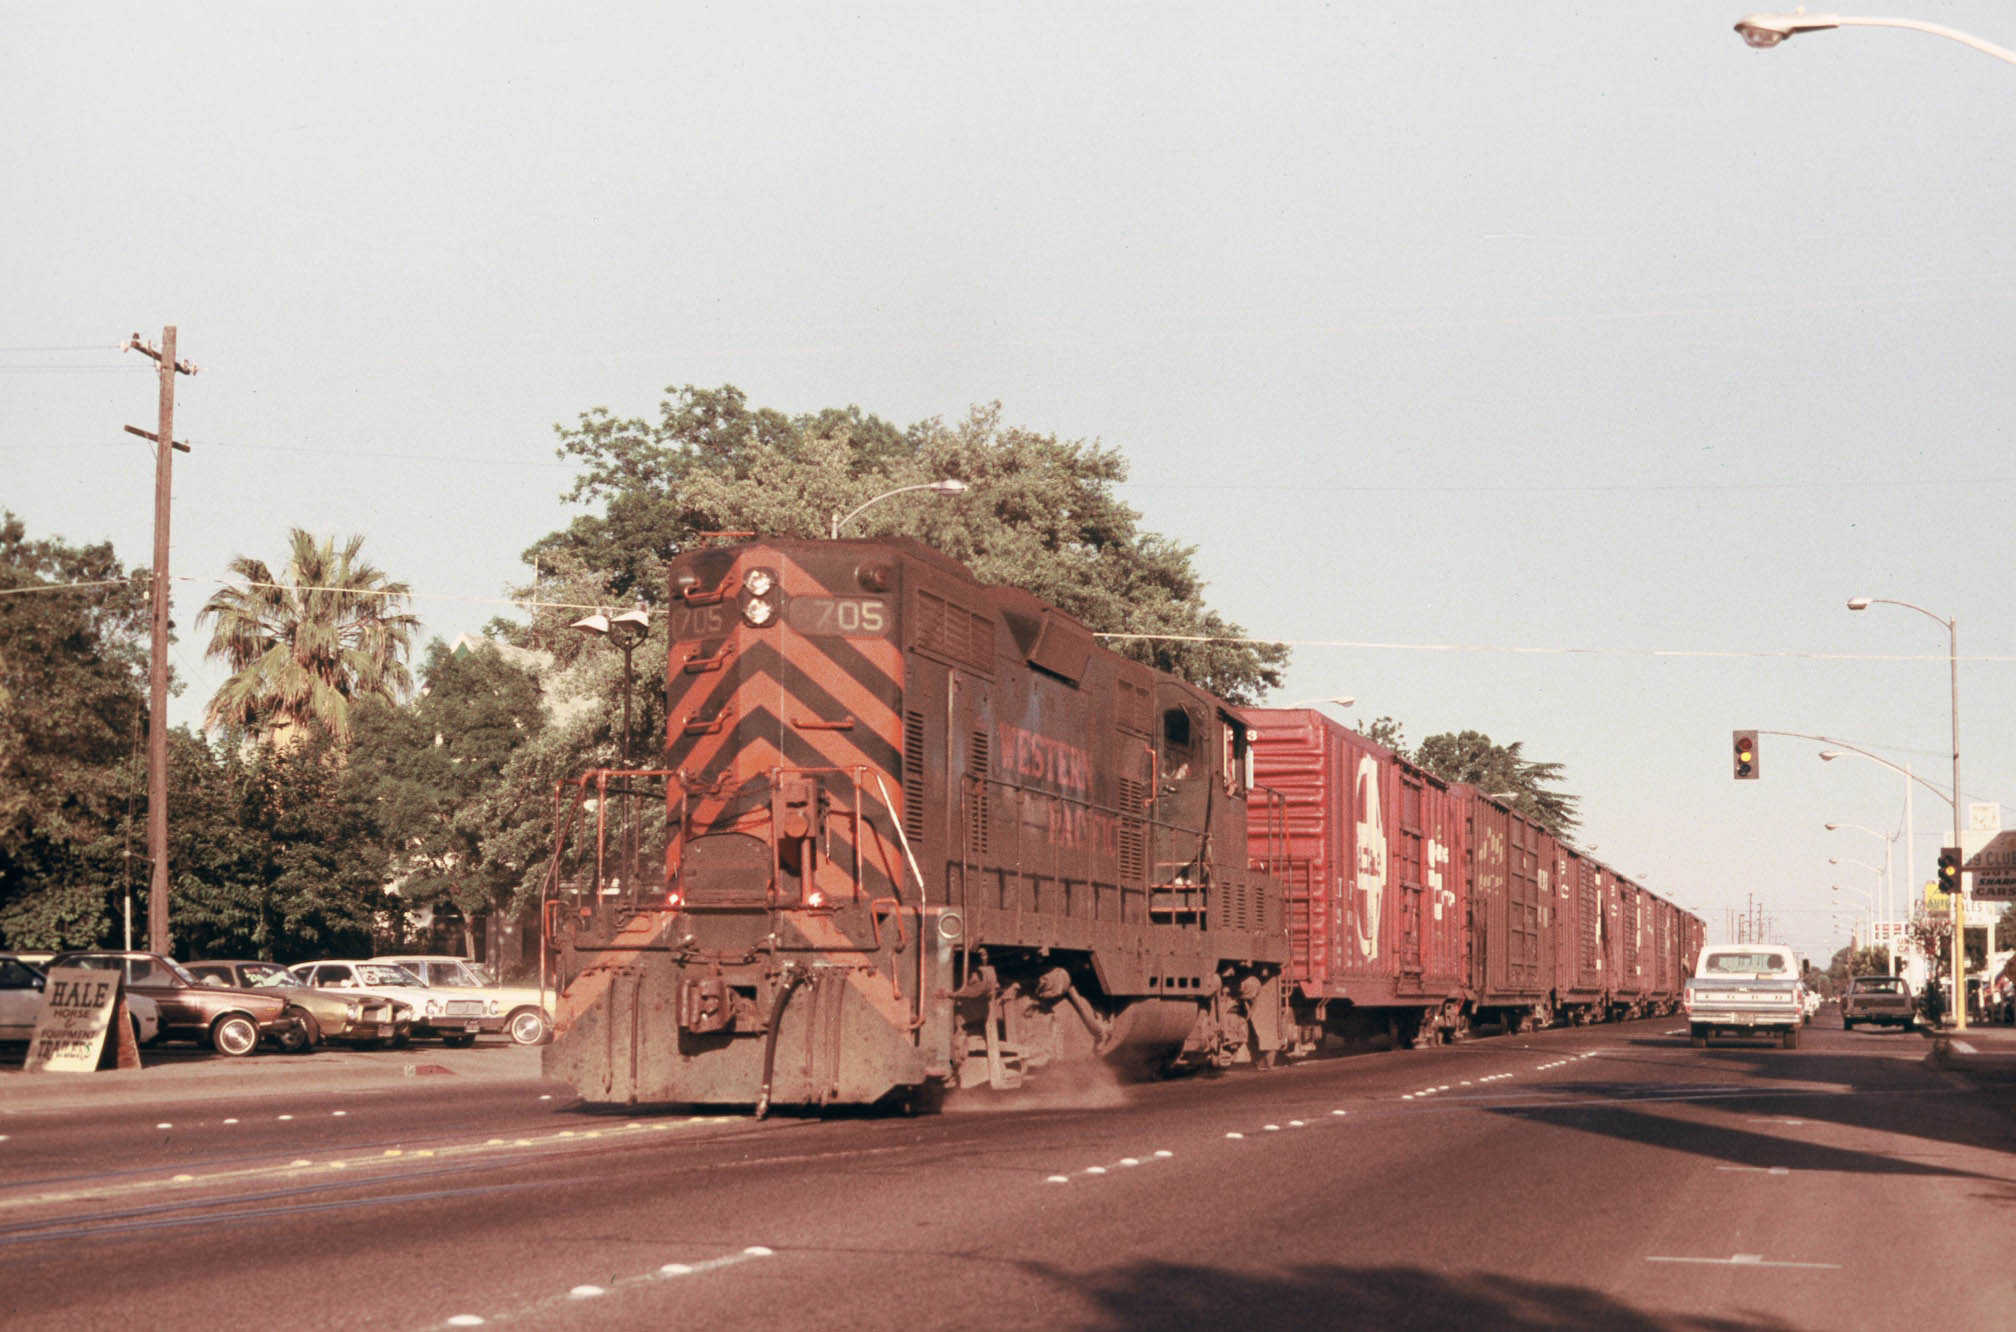
Images from the electric era of freights on this segment have not been found. Images from the last decade of the Chico Local, 1976-1985, fill in many gaps on this topic. This early evening southeast view from 1980 taken by Dan Engstrom of WP 705 shows a string of boxcars on Park Ave. at the spur take-off.
L262-120-Dan Engstrom Photo, Courtesy Dan Engstrom, (Image 25 of 34)
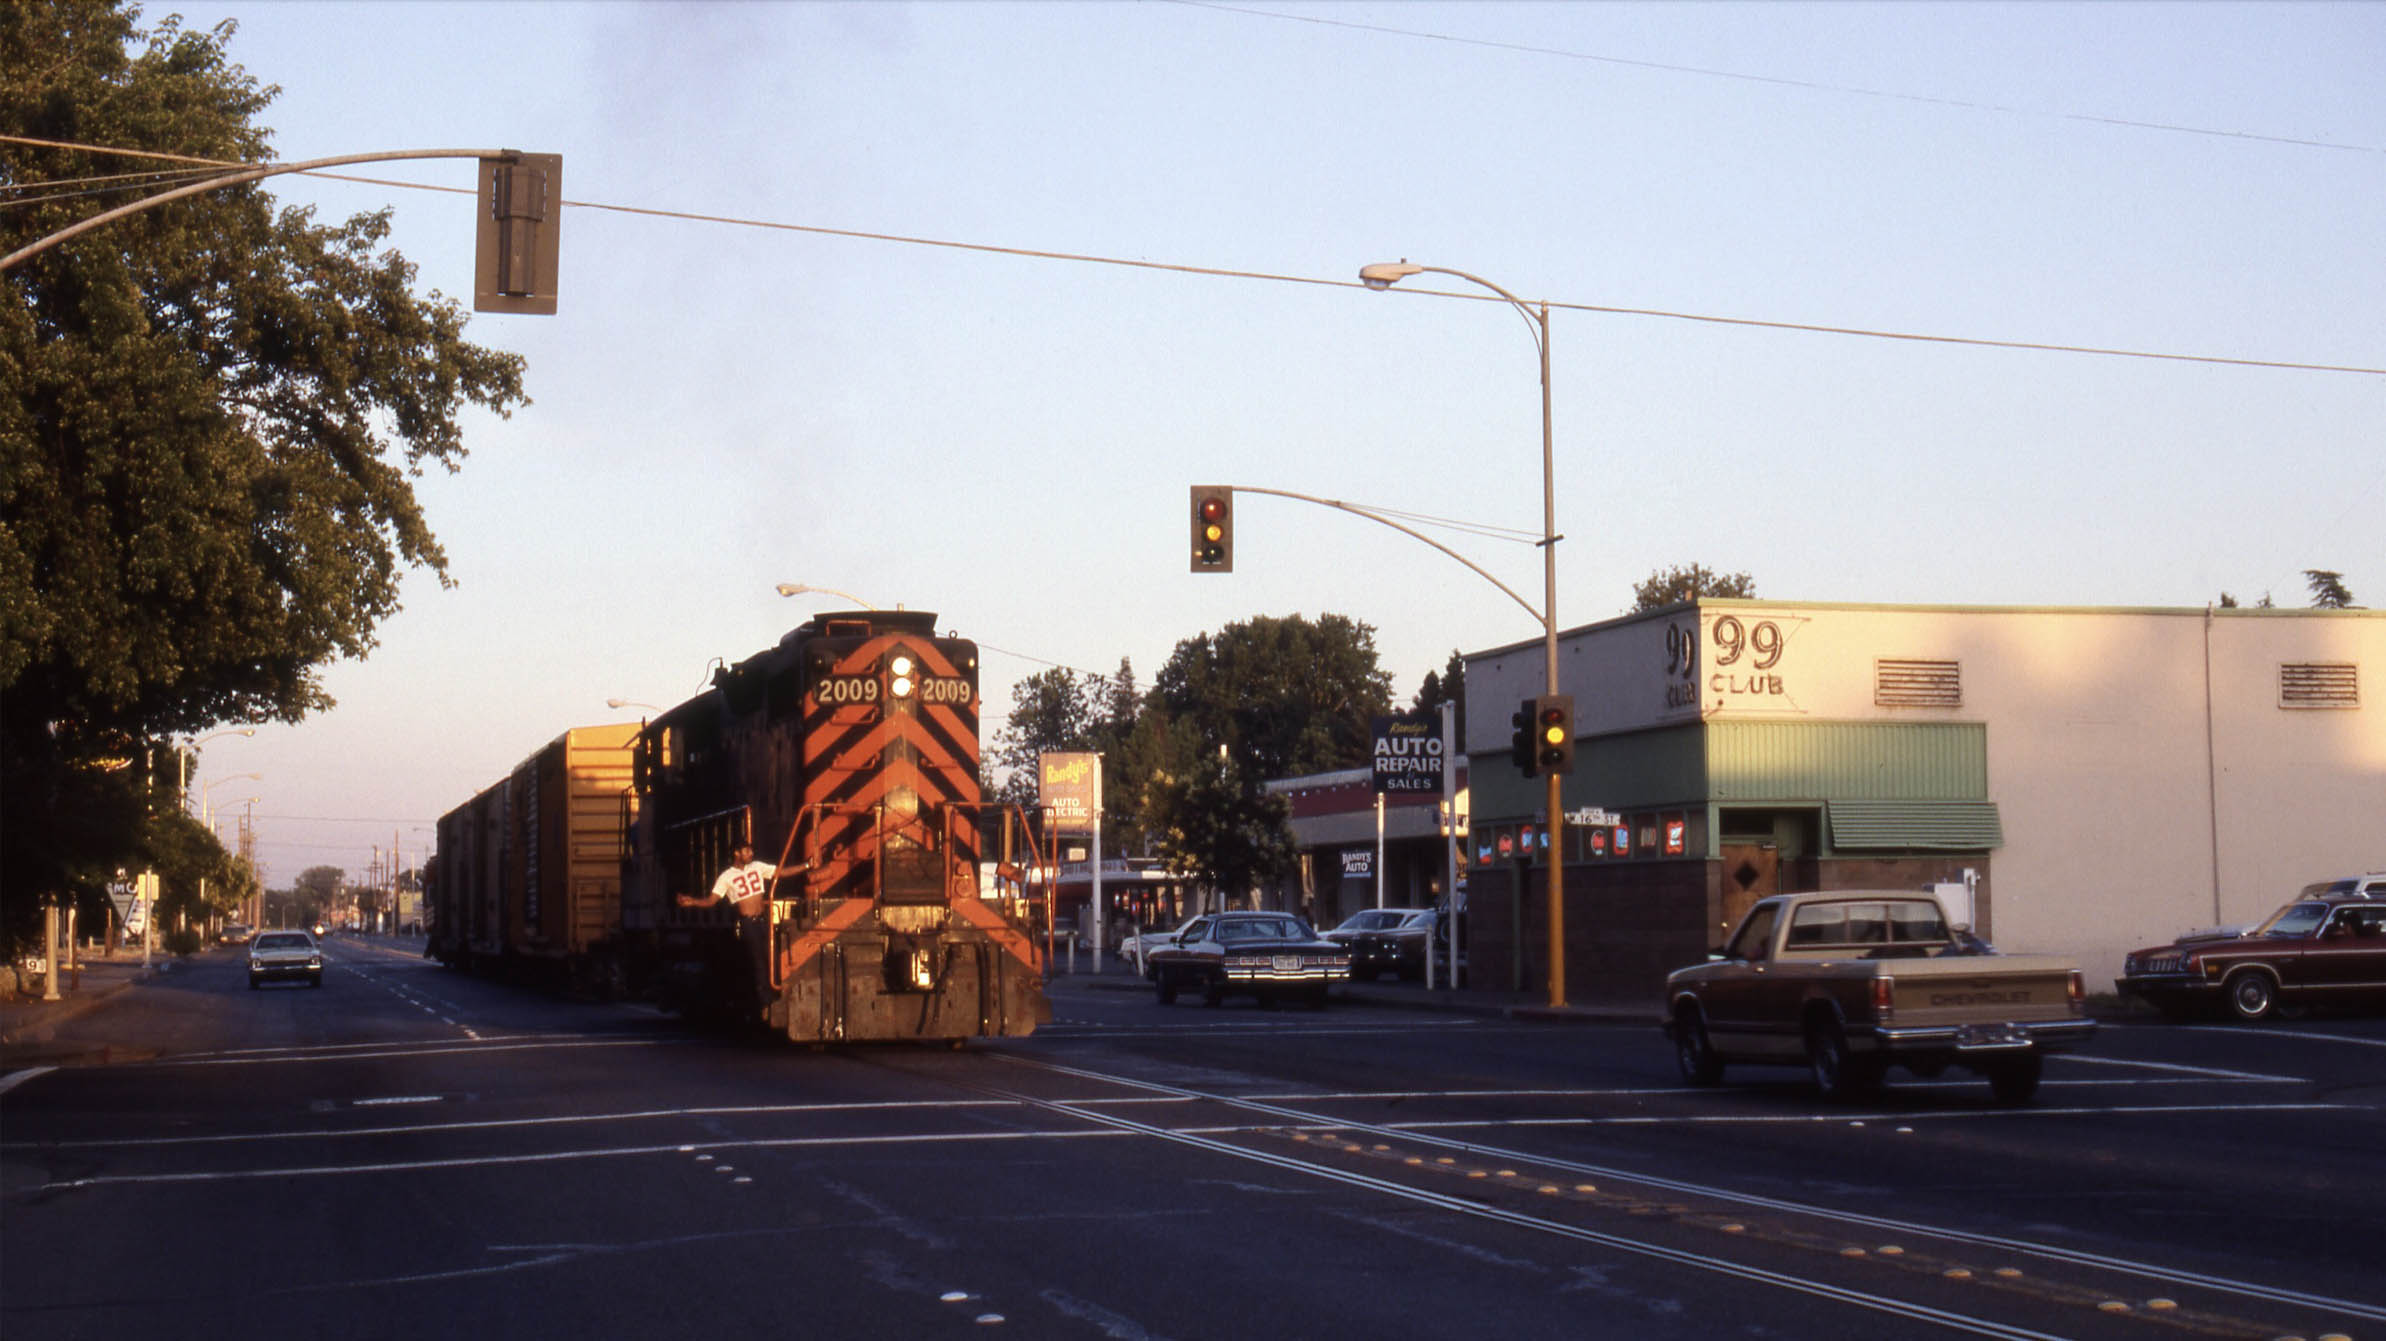
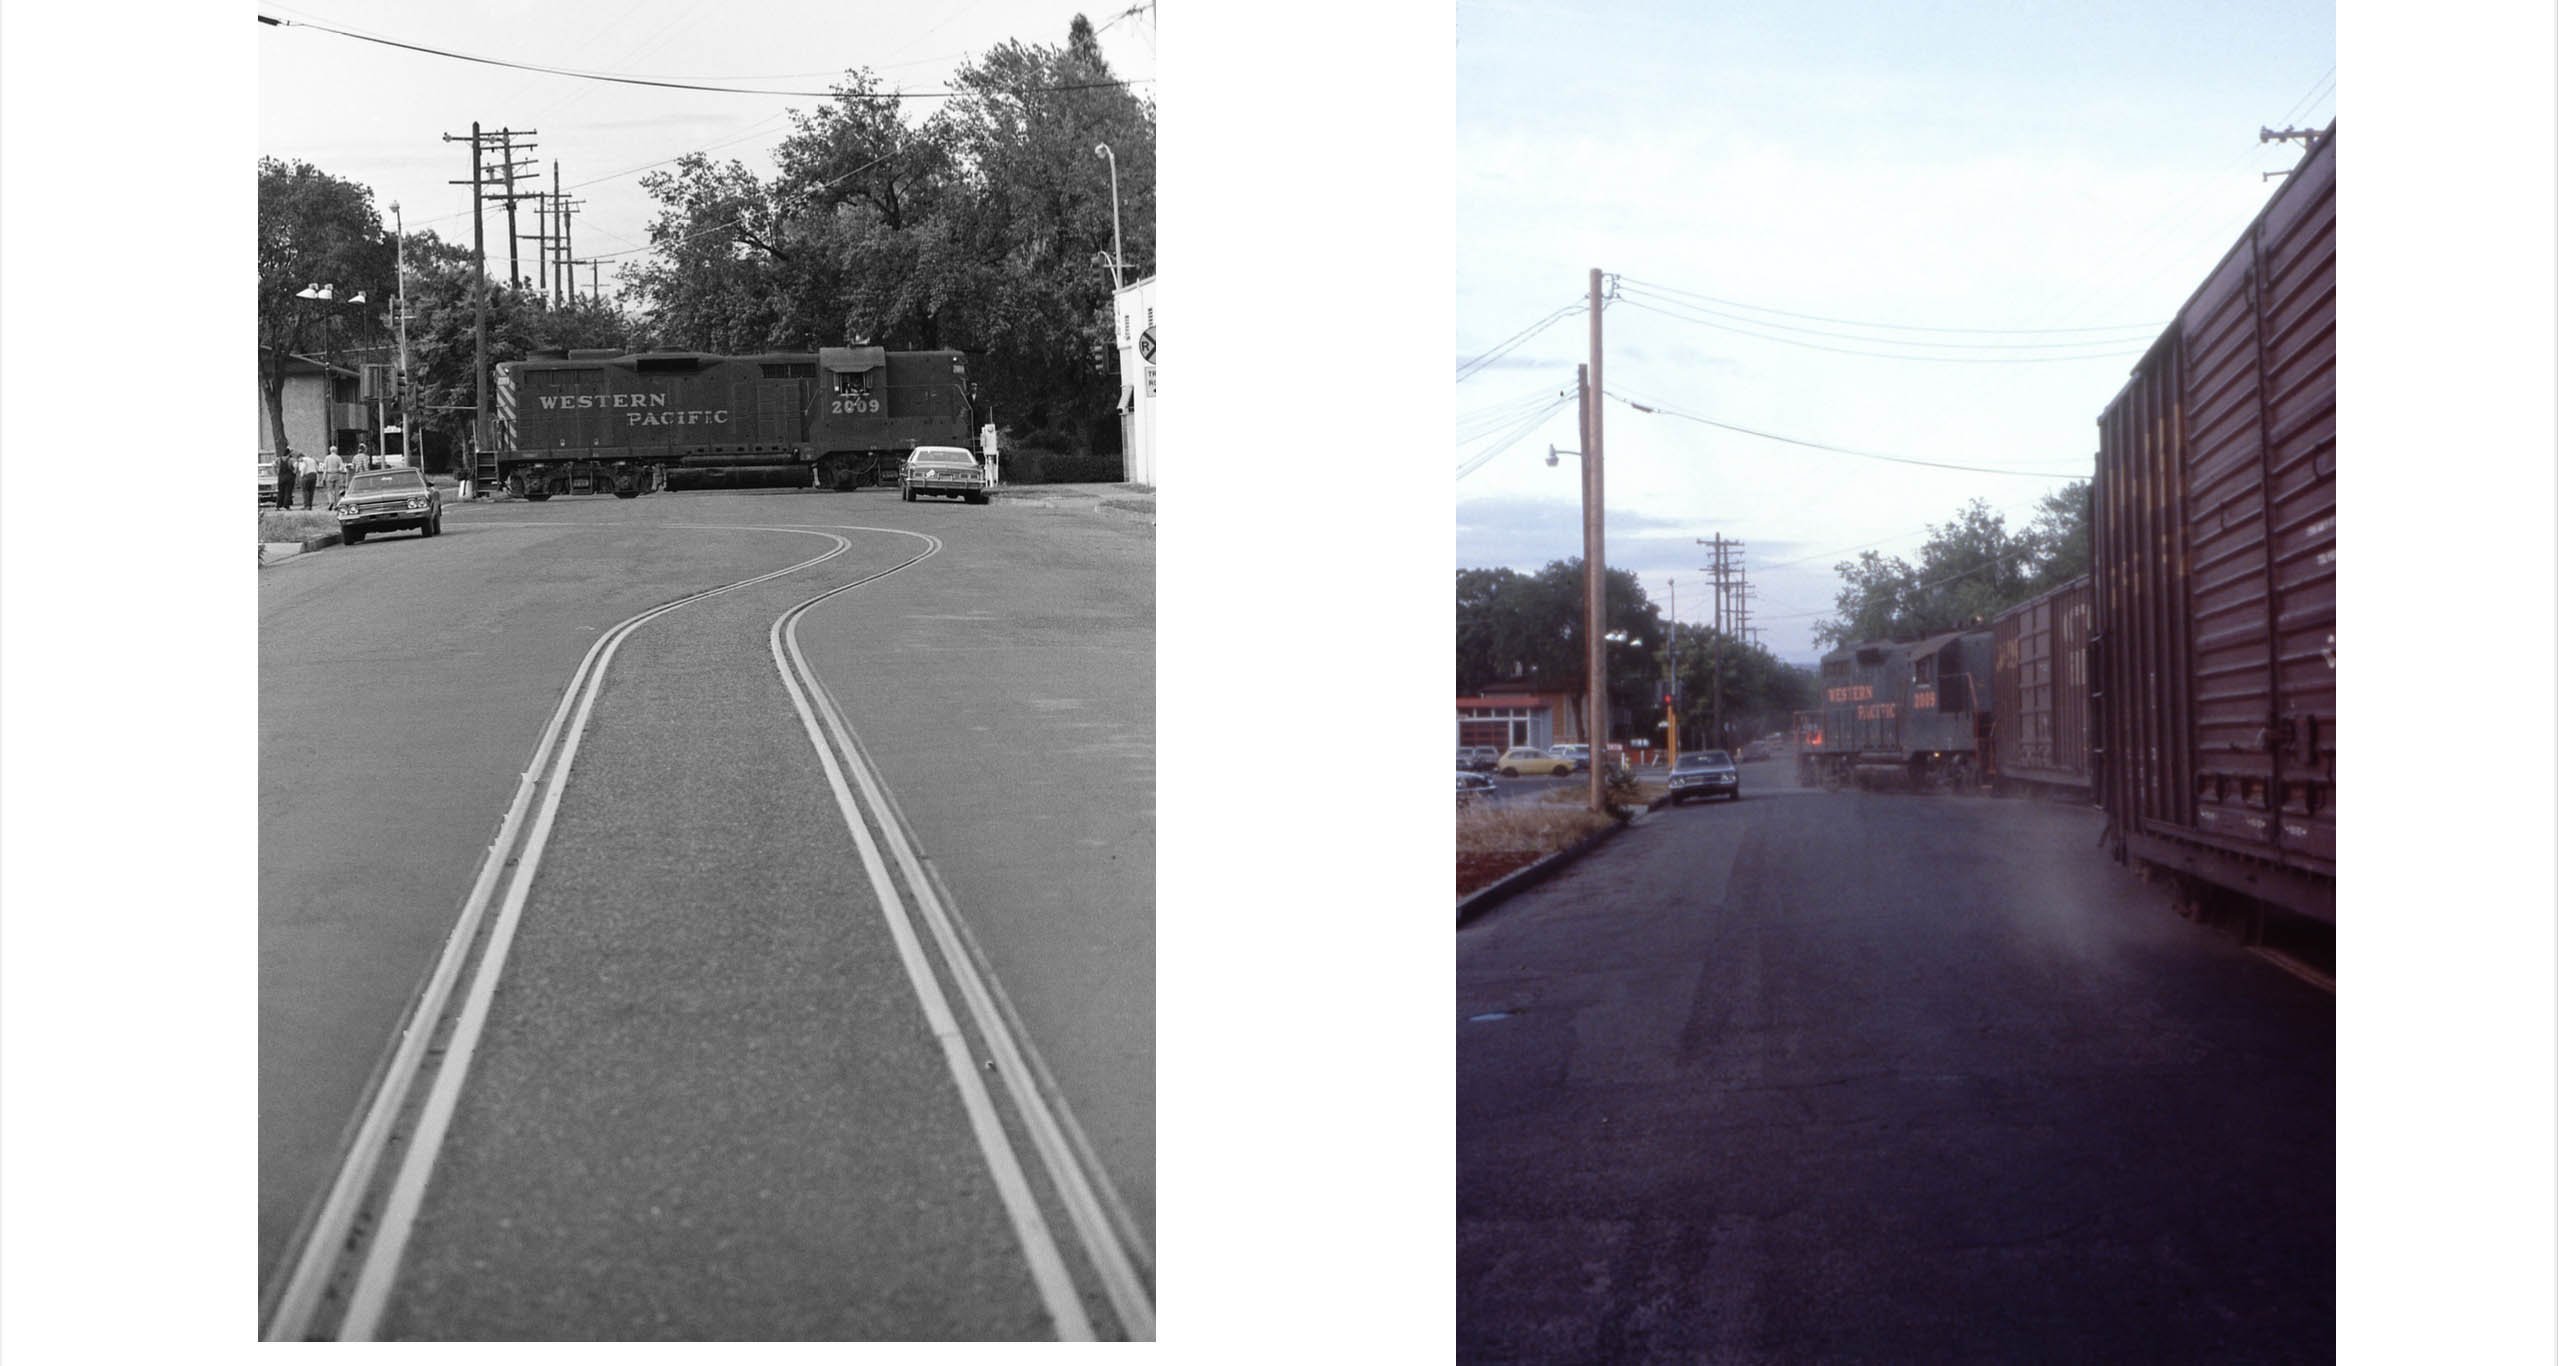
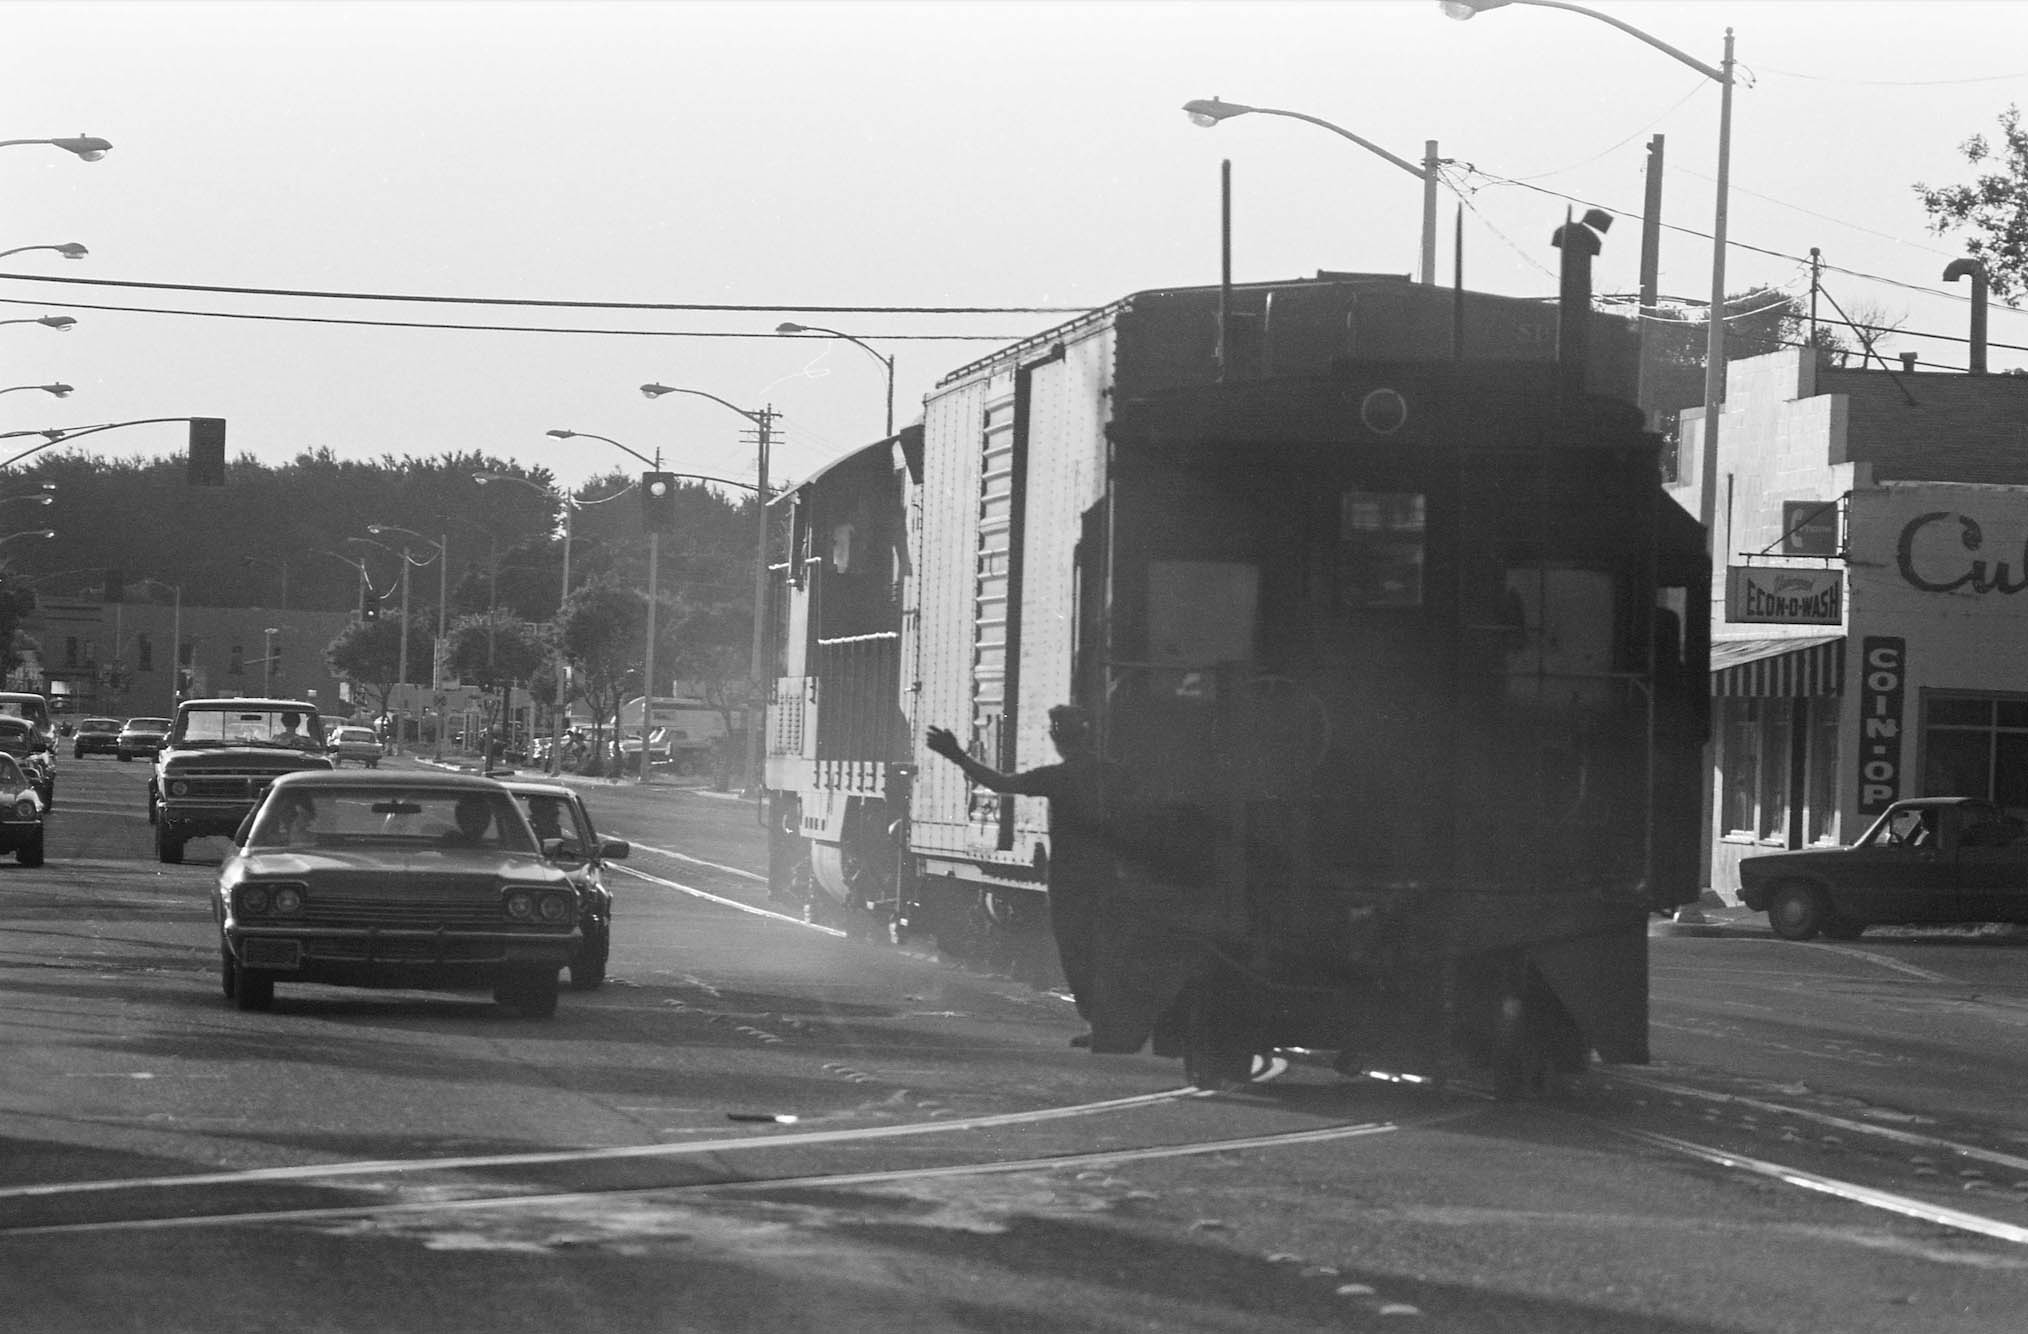
WP 2009 waits across from the 99 Club for the crew to prepare for its journey down 16th St. in this southeast view circa 1980. Wayne Monger explains in his article “SN’s Chico Local” in the CTC Board September 1981 Issue 75 that what got dragged down the spur depended on the length of the train, what needed to be interchanged, and what made sense to leave behind.
L262-125-Tom Messer Photo, Courtesy Tom Messer , (Image 26 of 34)
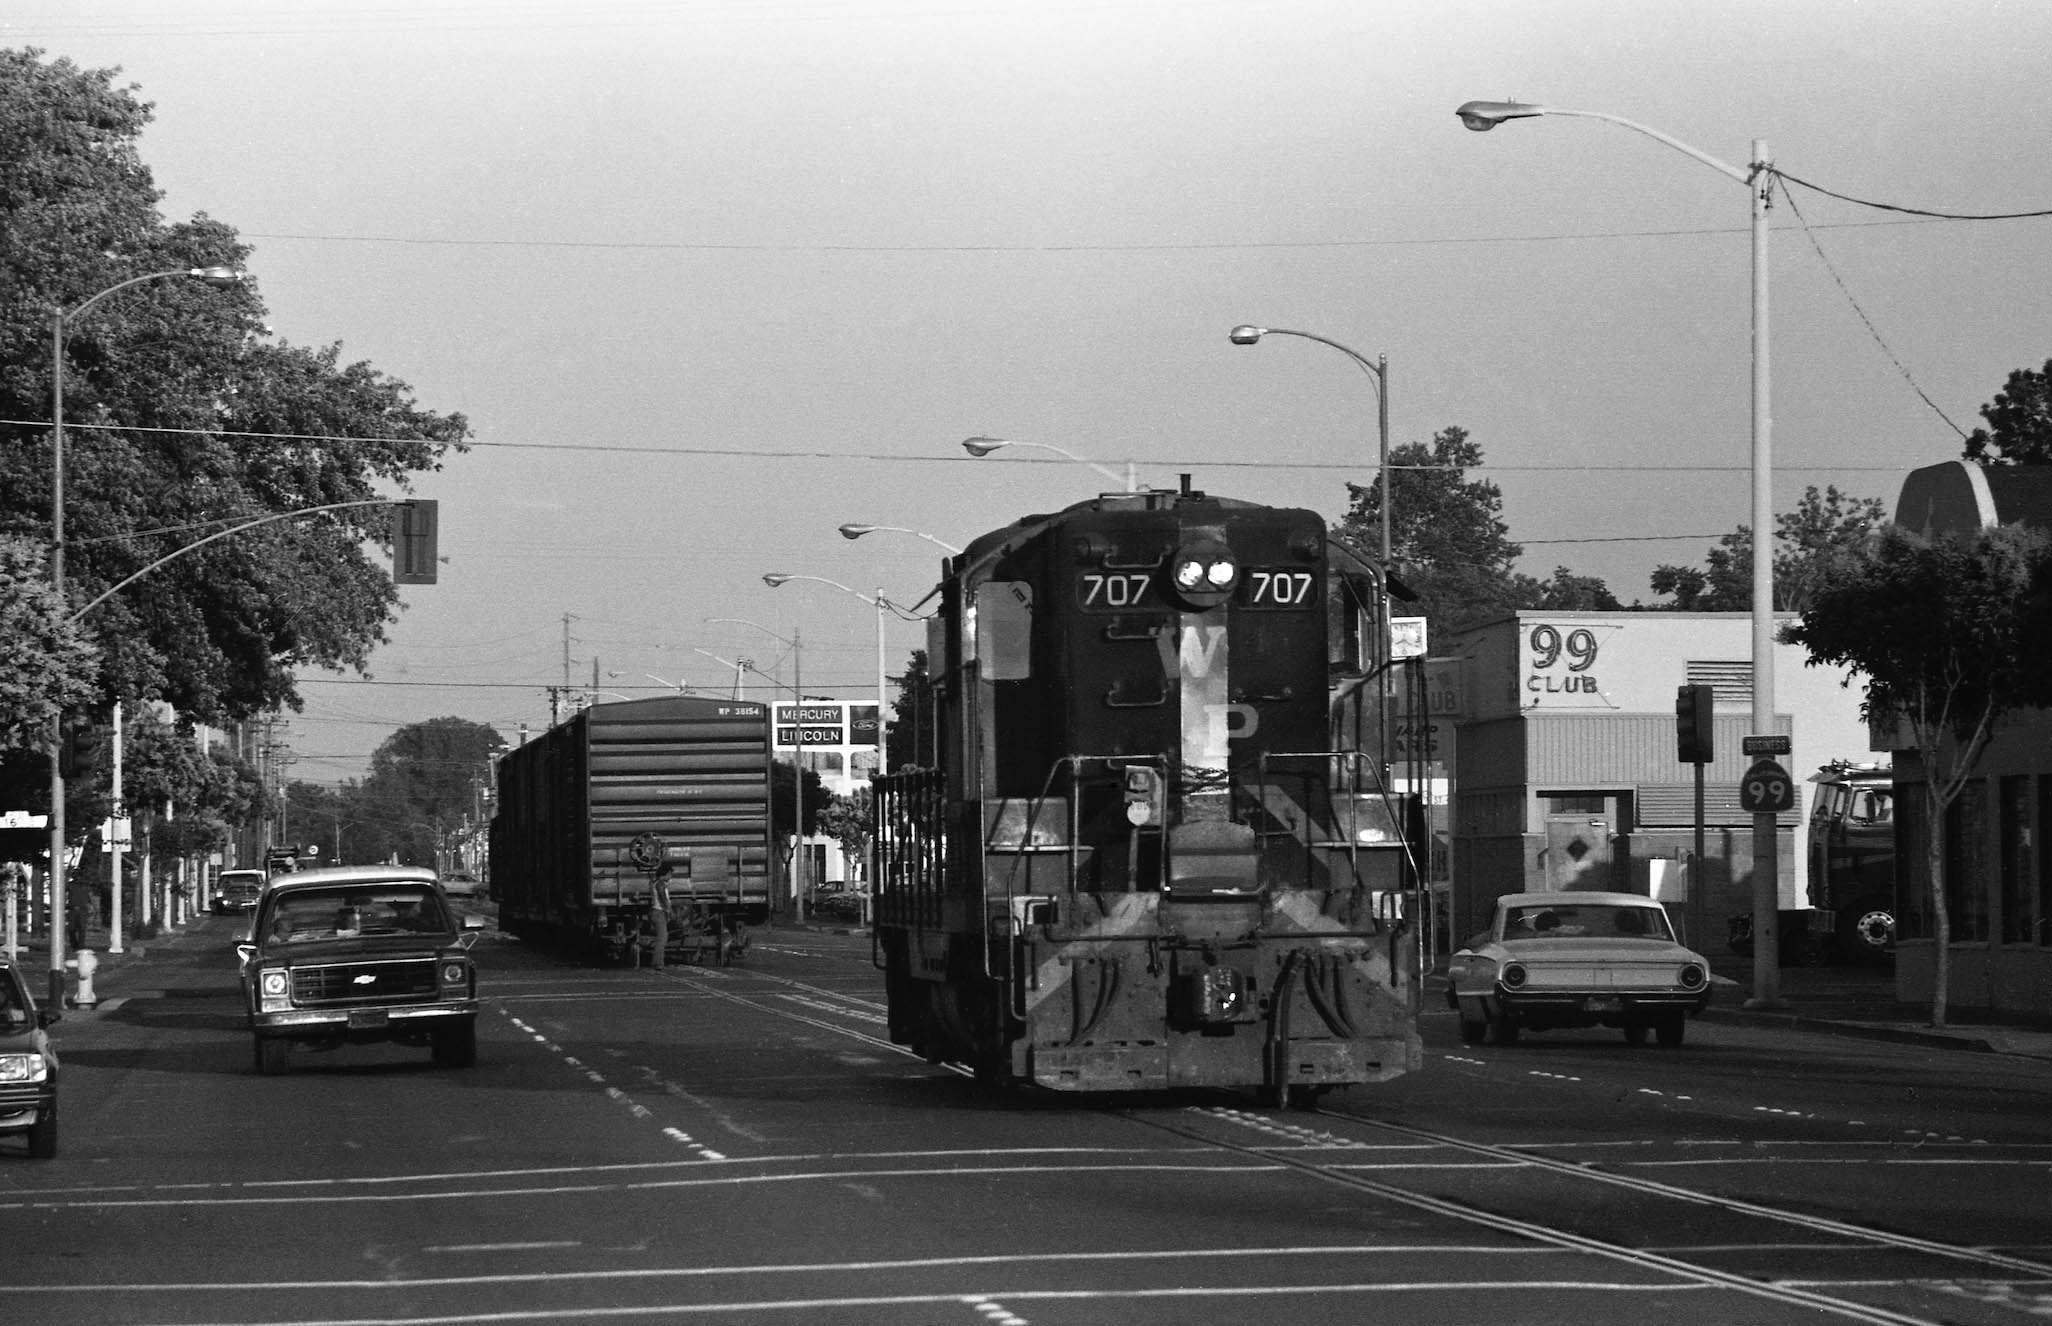
As an example provided by Wayne, his southeast shot of WP 707 circa 1980 shows it has left its small freight contingent on Park Ave. north of the spur switch as it prepares to reverse course to take the spur route unaccompanied.
L262-130-Wayne Monger Photo, Courtesy Wayne Monger, (Image 27 of 34)
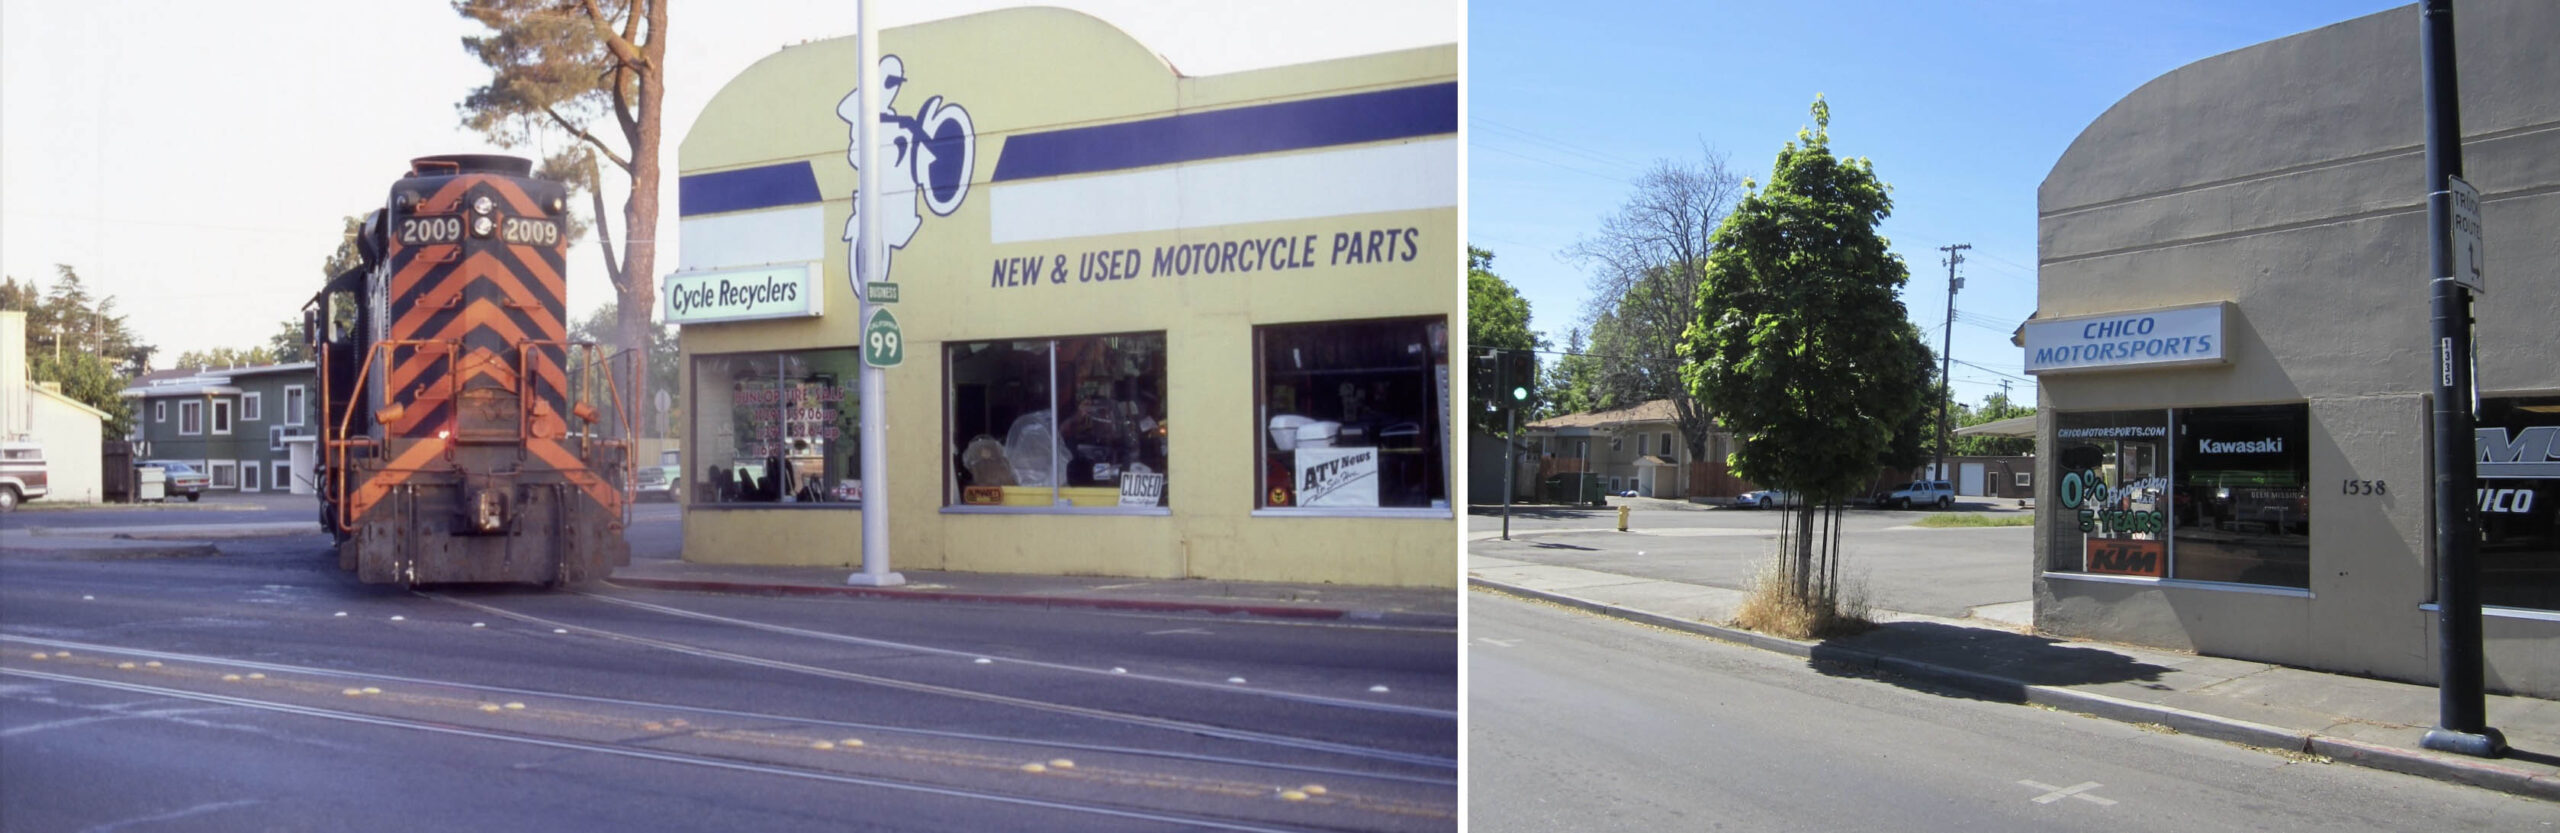
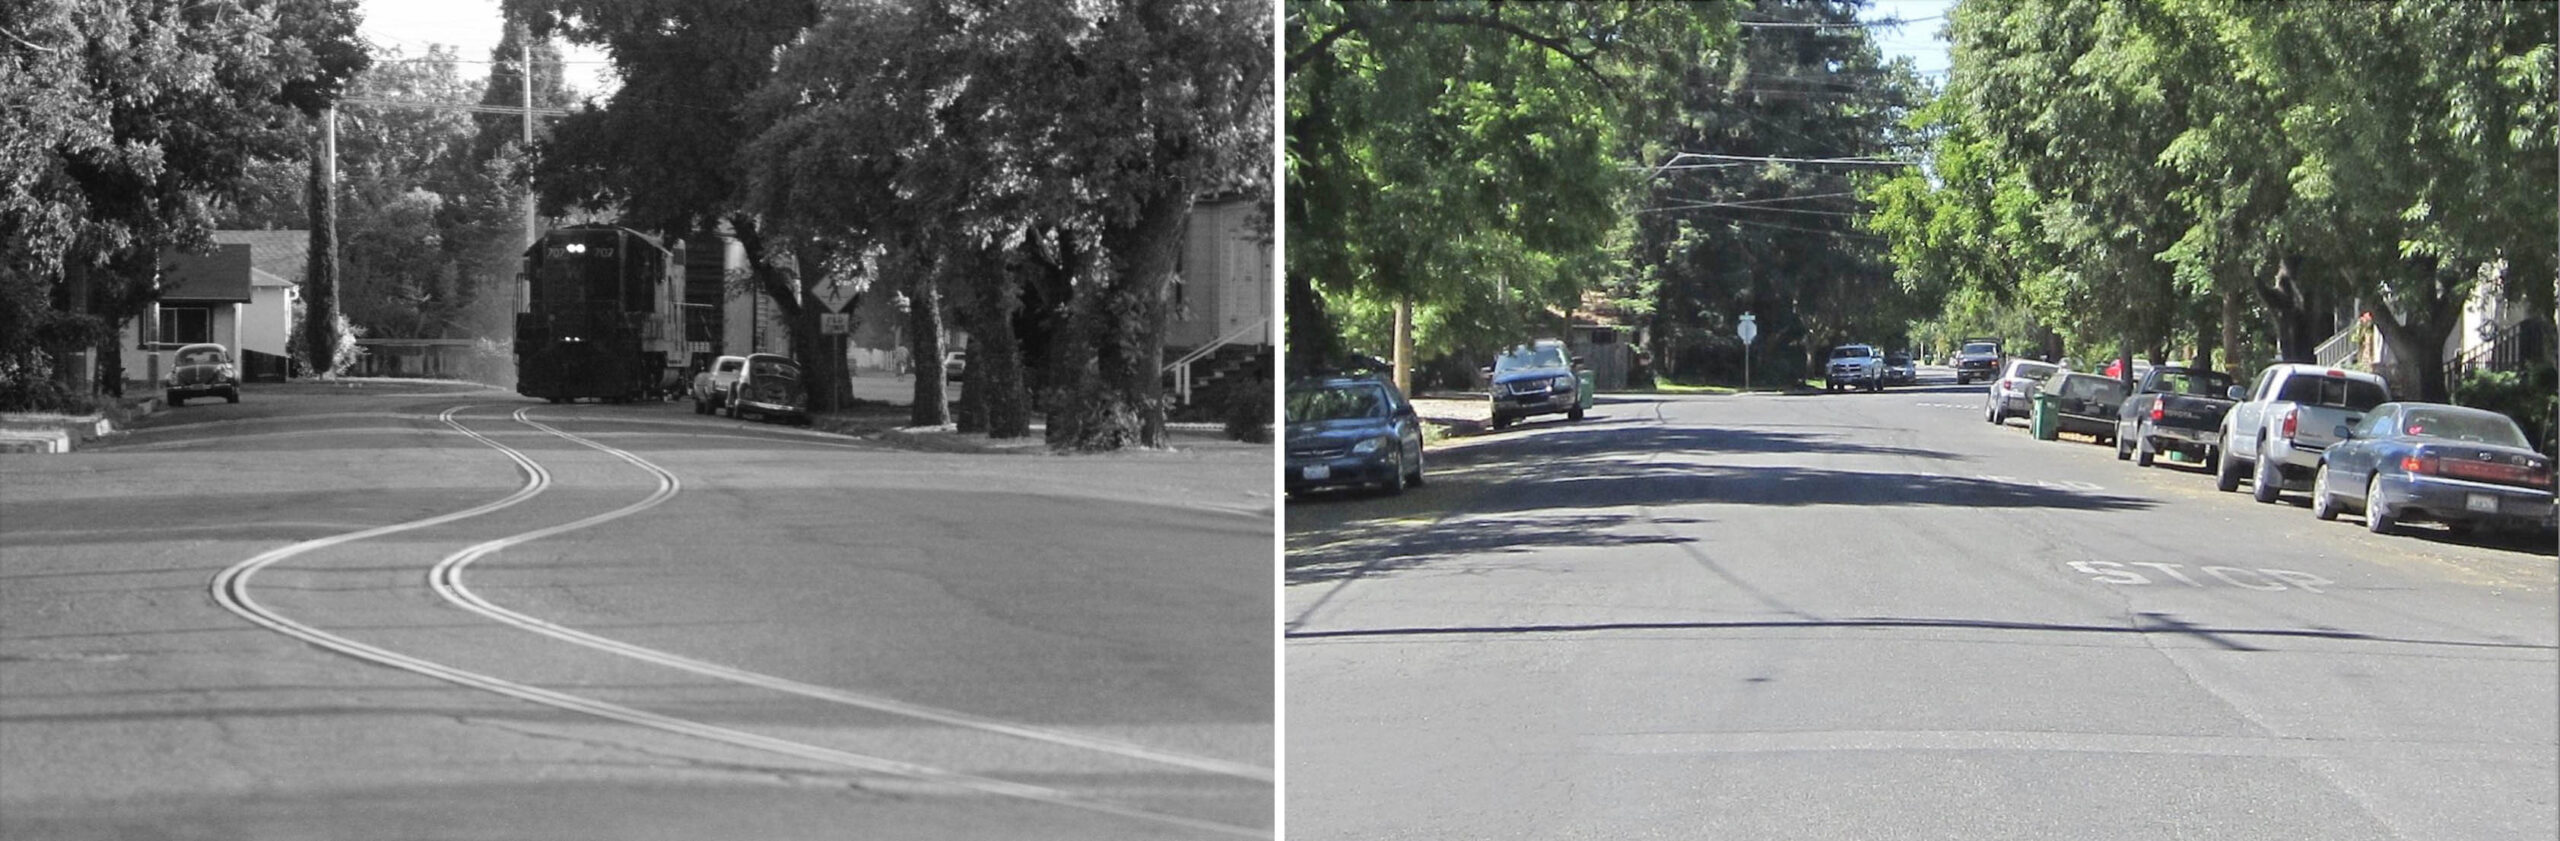
As with the previous example, WP 2009 sets out solo down 16th St. It is hard to believe that the spurs path in 2018 would be blocked by a tree, and the cut-out at the northwest corner of the Park Ave.-W. 16th intersection remains as part of the lot for the cycle store.
L262-135-Tom Messer Photo, Courtesy Tom Messer, l, and Stuart Swiedler Photo, r, (Image 28 of 34)
Wayne Monger used the gentle flow and tranquility of the curve of the track to contrast with the block-like bulk of WP 2009 in the northeast from W. 16th St. toward Park Ave. circa 1980, left, while Tom Messer’s shot from a nearby spot reminds us that dragging long freights along any segment of track is noisy and dirty work.
L262-140-Wayne Monger Photo, l, Tom Messer Photo, r, Courtesy of the Authors, (Image 29 of 34)
Wayne Monger’s lens compresses the block between Broadway St. and Oakdale St. to accentuate the curves WP 707 must navigate in this west view circa 1980, left. The Cypress tree seen in the image is still present, but the overgrowth of adjacent trees has obscured its presence in the 2018 image seen to the right.
L262-145-Wayne Monger Photo, Courtesy Wayne Monger, l, Stuart Swiedler Photo, r, (Image 30 of 34)
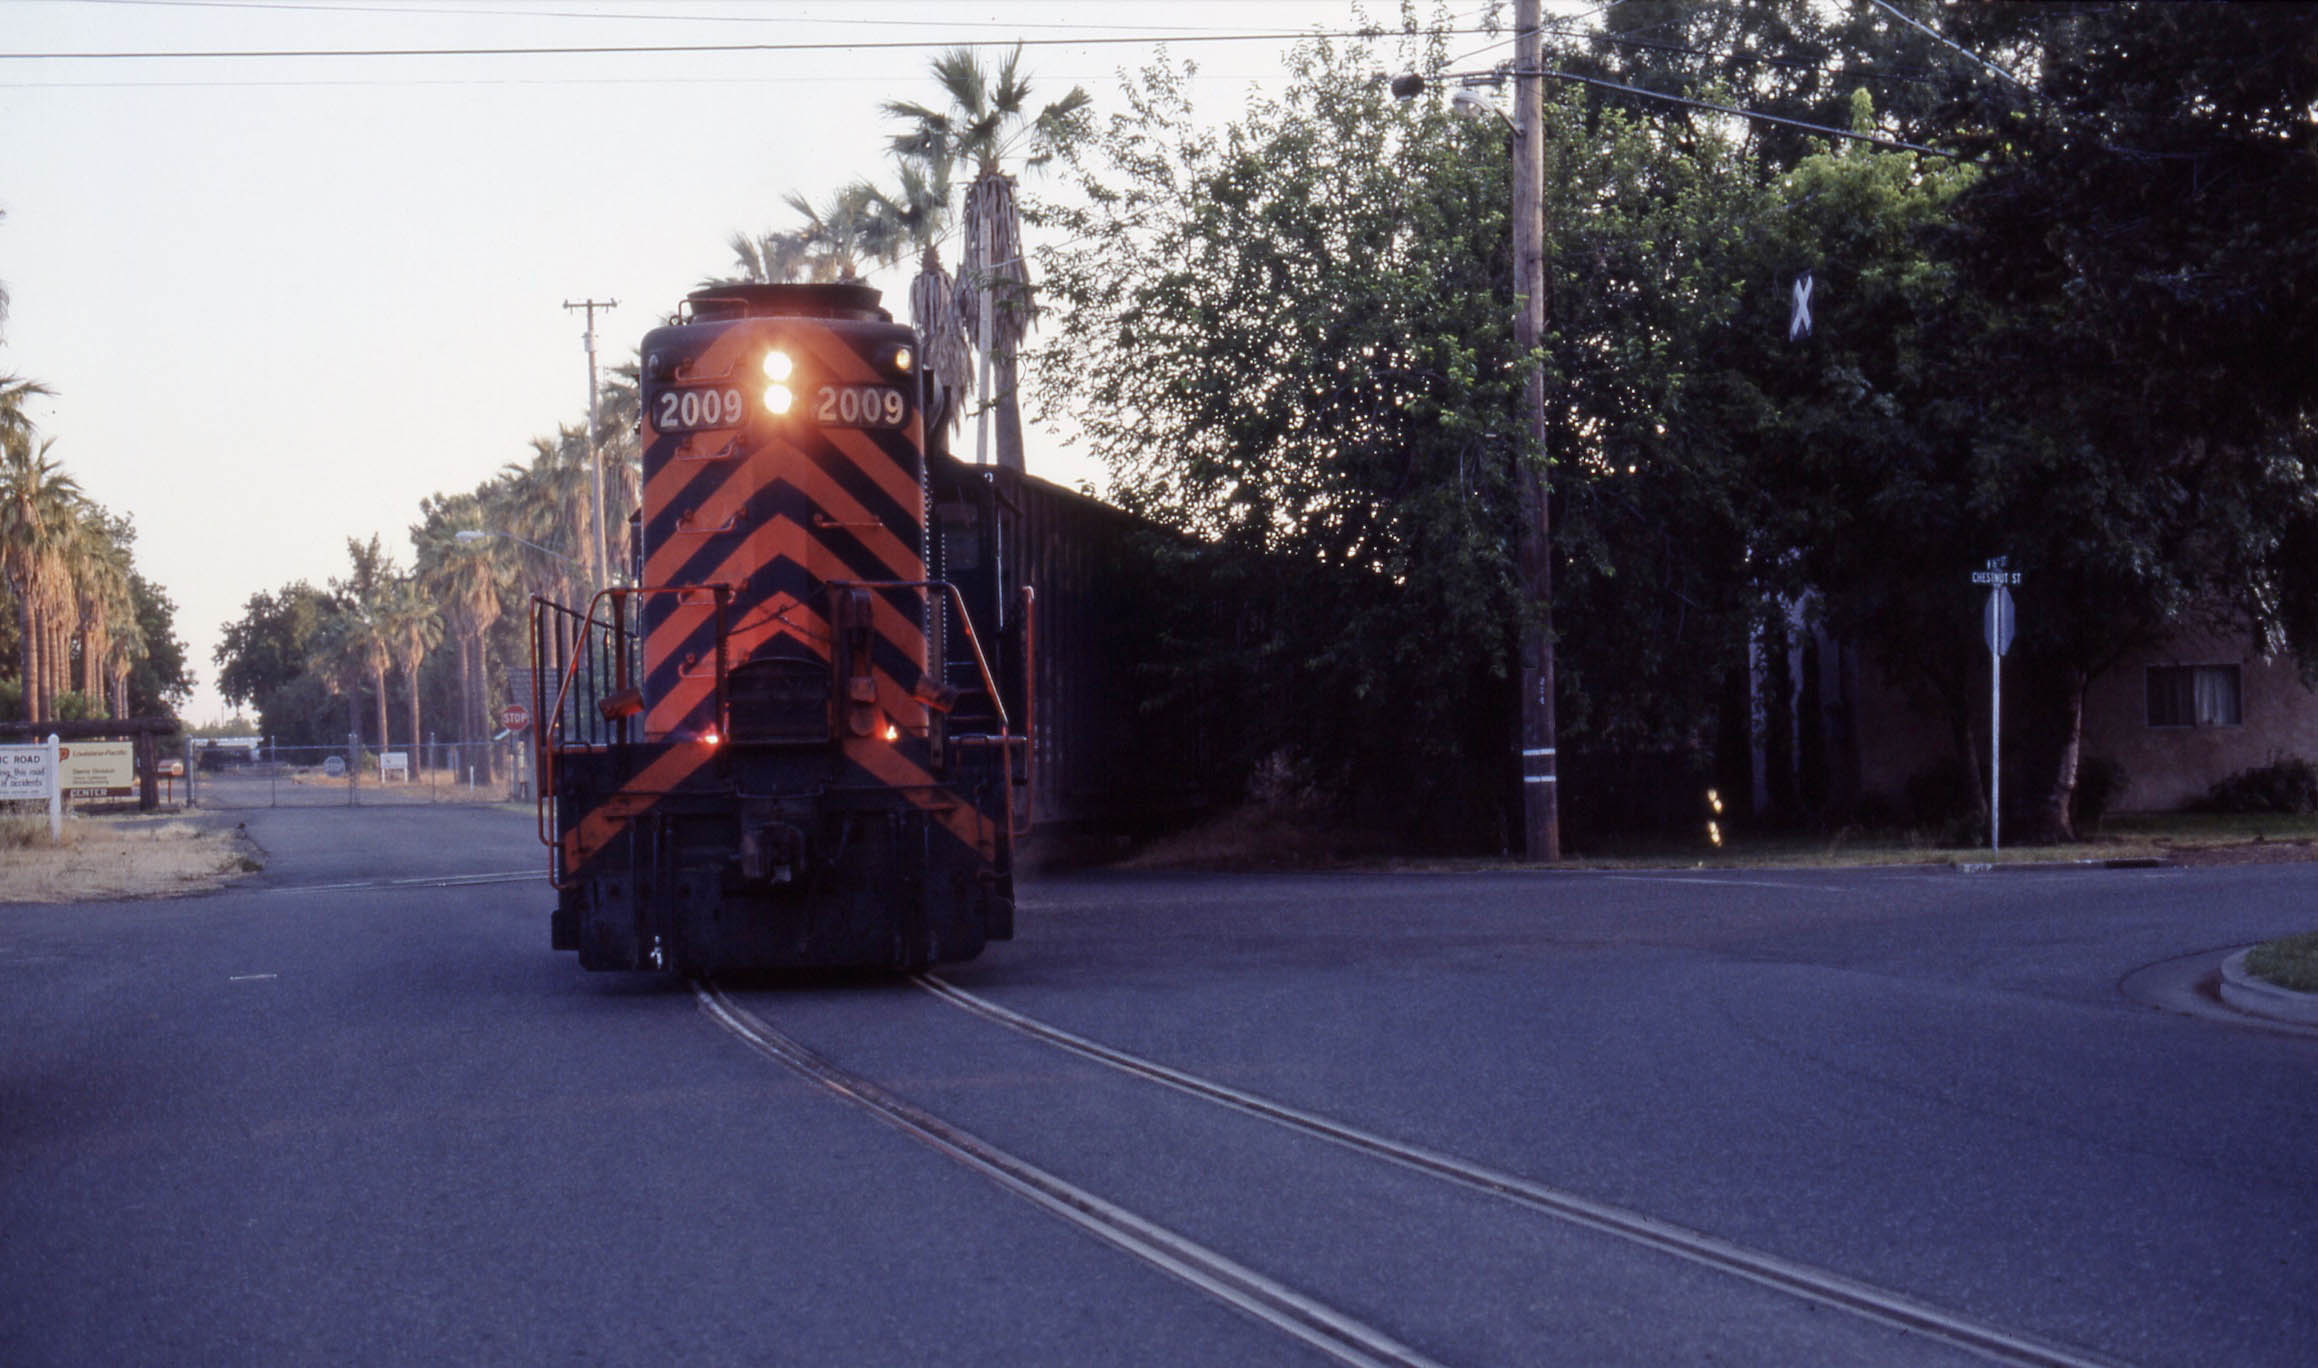
SN 2009 emerges from its Diamond Match private right-of-way onto 16th St. in this southwest view circa 1980, left. The same view in 2018 leaves no trace, unless you can convince yourself that the markings on the asphalt are the old track bed making its former presence known.
L262-150-Tom Messer Photo, Courtesy Tom Messer, l, and Stuart Swiedler Photo, r, (Image 31 of 34)
Tom Messer’s southwest view circa 1980 of WP 2009 and freight provides all the landmark to locate the small space that trains used to enter and exit the mill. Note the spur to Northern Star Mills to the left of the diesel.
L262-155-Tom Messer Photo, Courtesy Tom Messer, (Image 32 of 34)
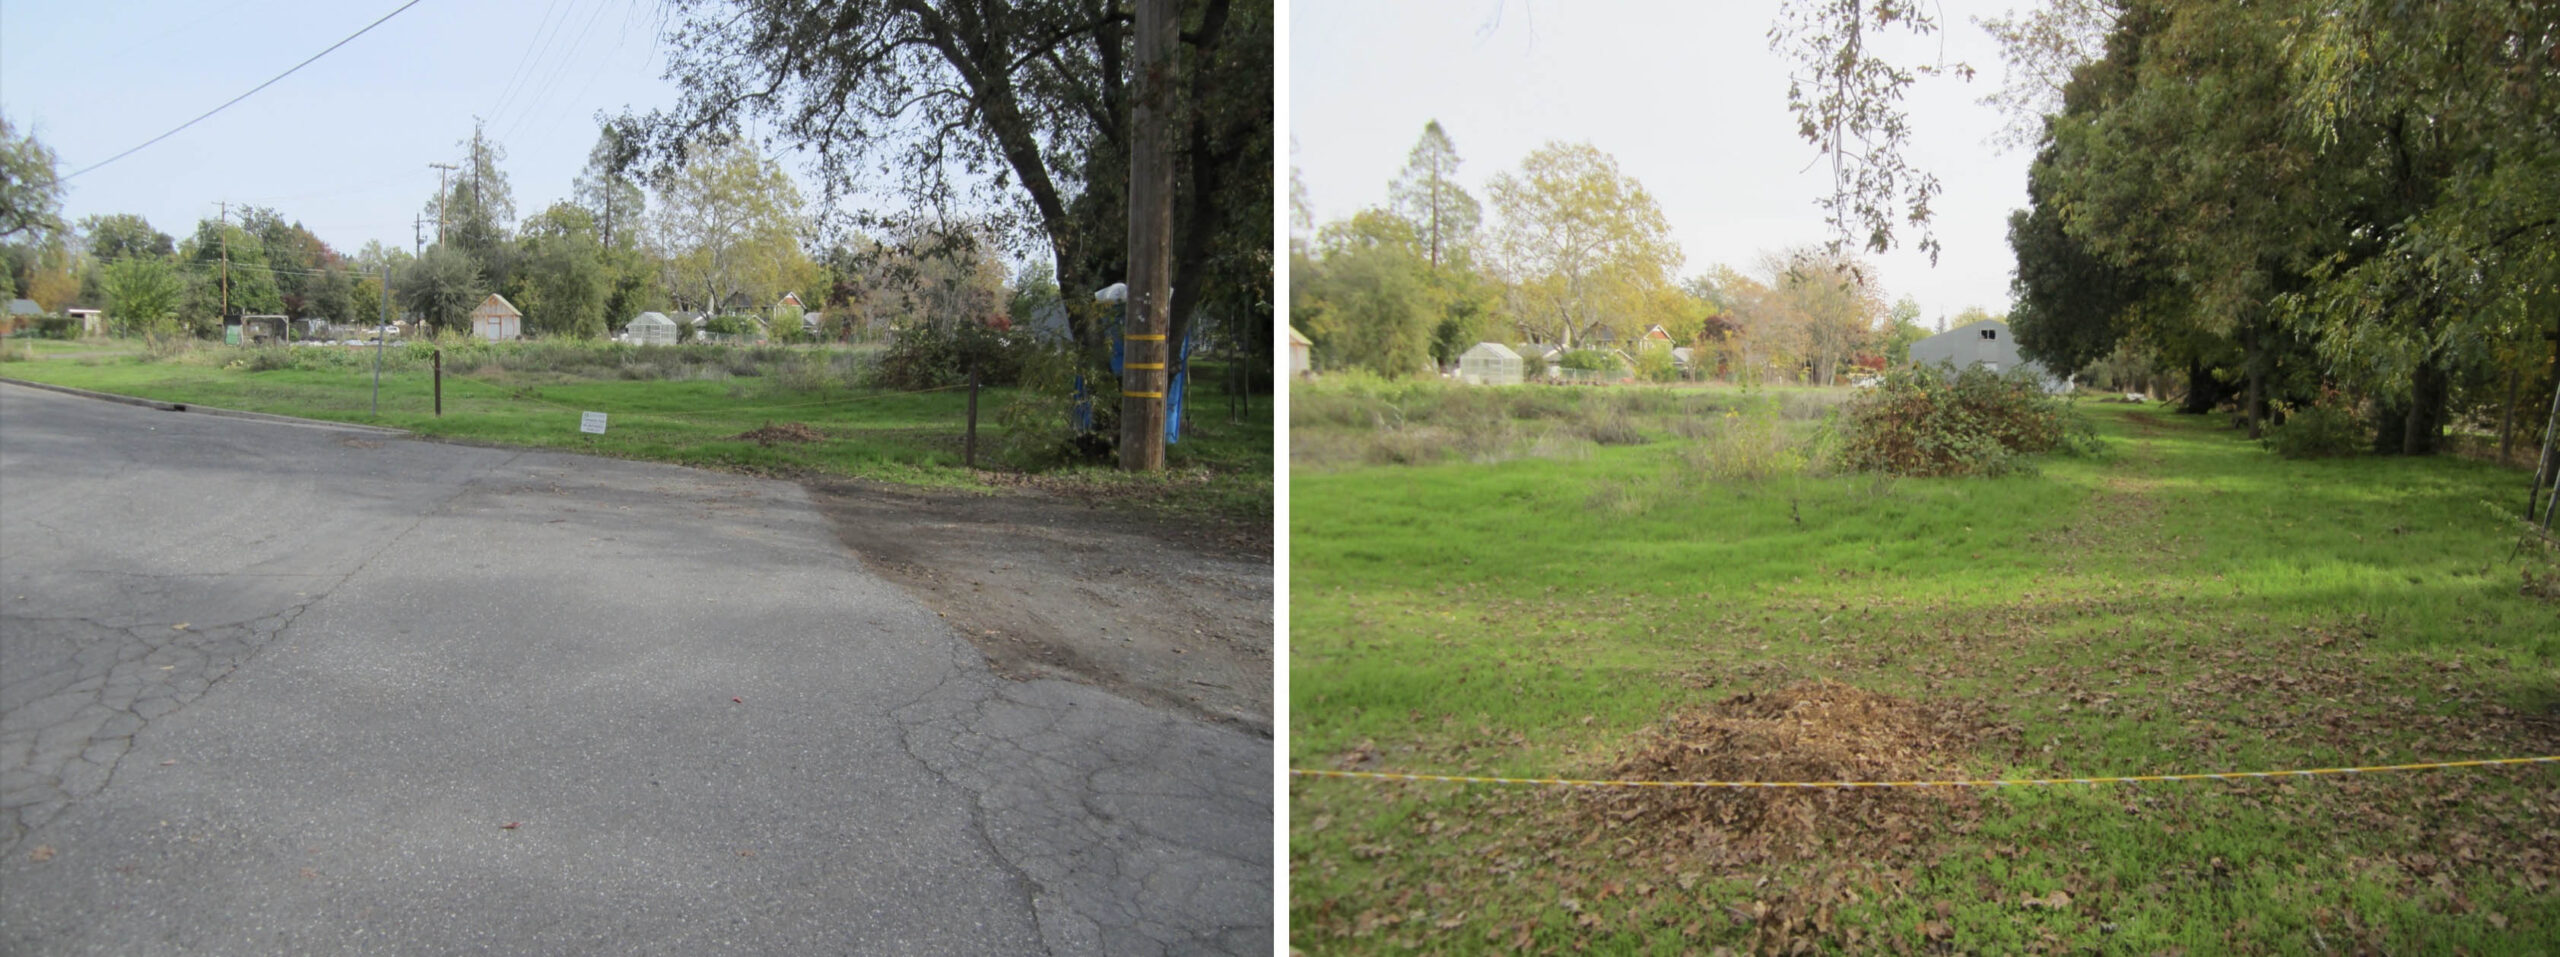
A south view of the location of the spur in the street, l, and into what appeared to be abandoned property in 2017, r, leaves only what had been to the imagination.
L262-160-Stuart Swiedler Photos, (Image 33 of 34)
The screeching sound of the wheels of the caboose can be “heard” in Wayne Monger’s northwest view circa 1980. Time to bid so long to the 16th St. spur and prepare for the trip to Mulberry.
L262-165-Wayne Monger Photo, Courtesy Wayne Monger, (Image 34 of 34)