Spur of the Moment – Bygone Days on Bridge Street
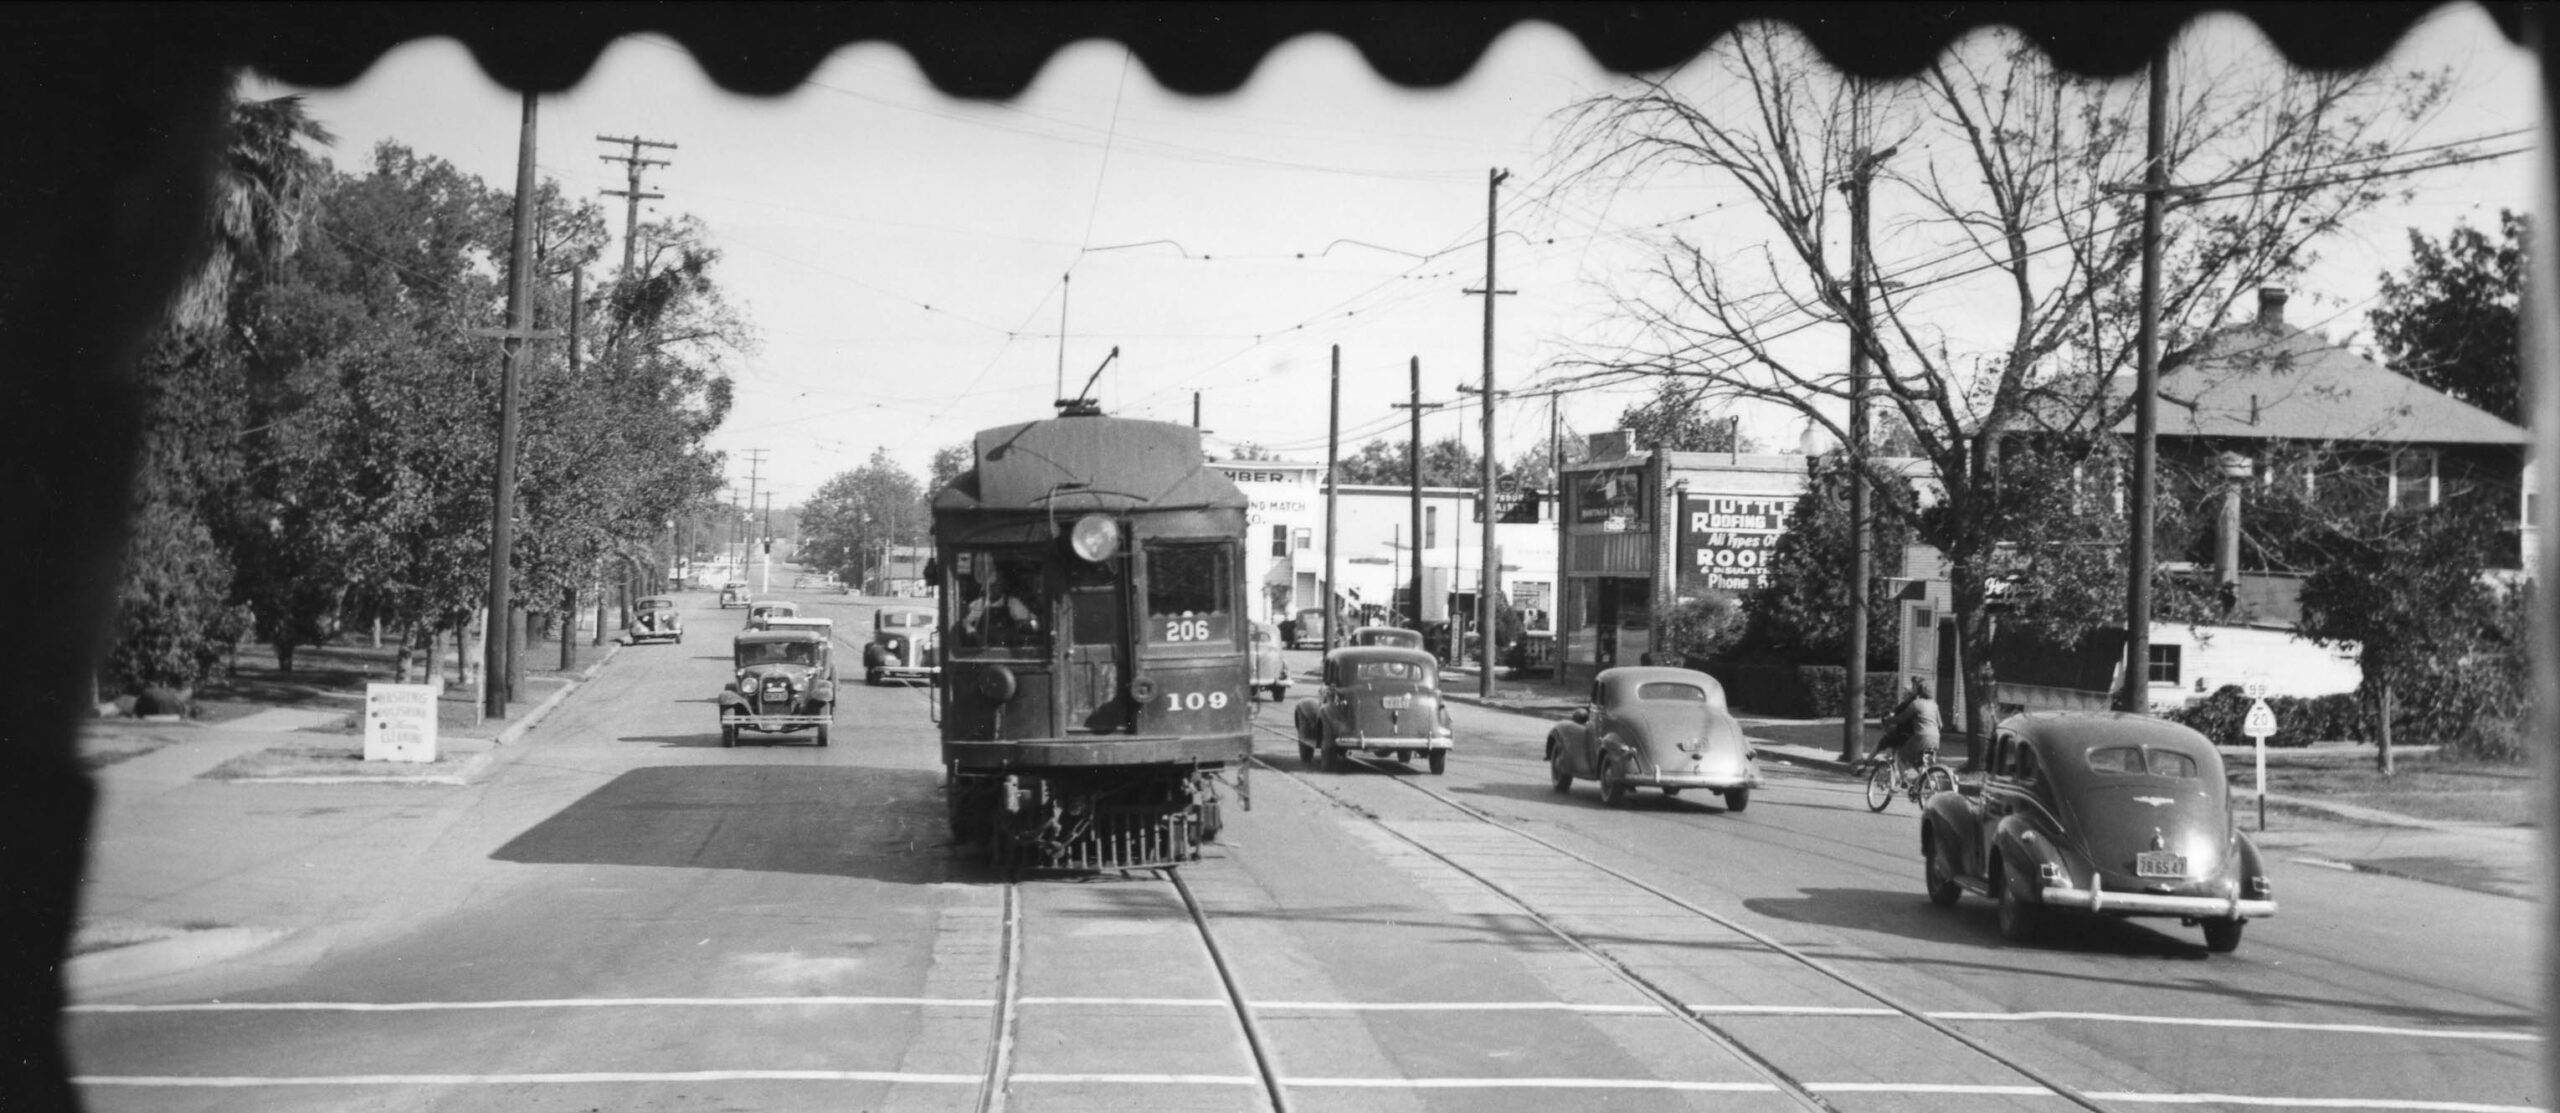
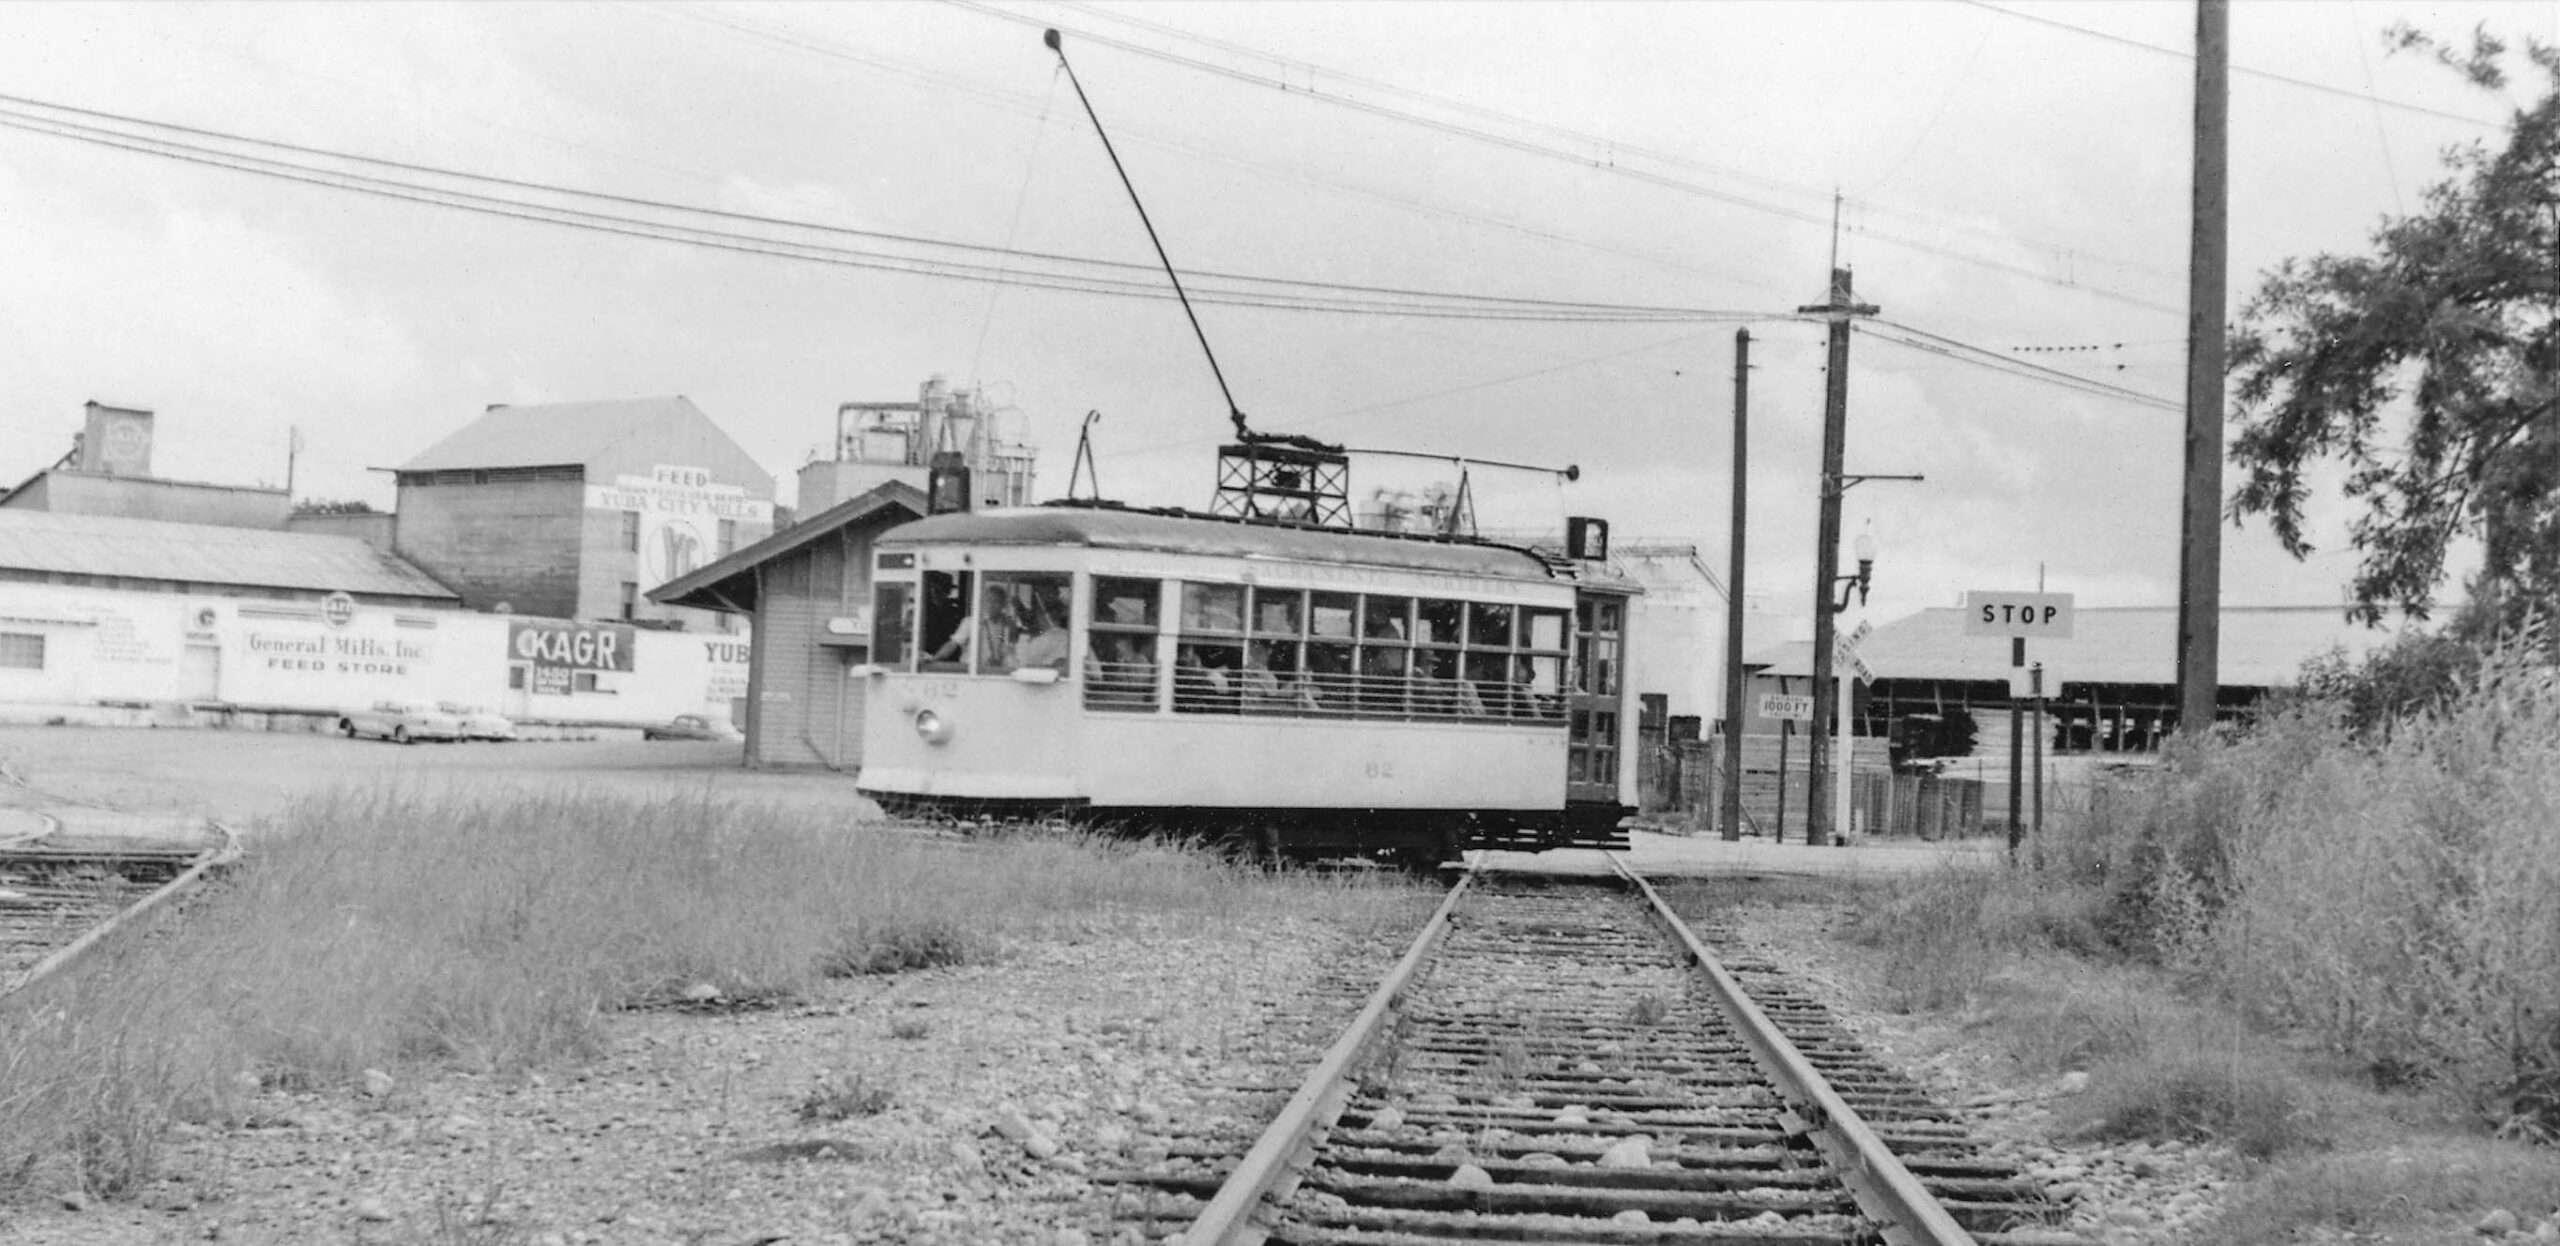
The Sacramento Northern, SN, and its relatives ran on Bridge St. in Yuba City for a century. No alternative was created to keep freight traffic off the street as was done in Marysville using Western Pacific track. This update will review the Bridge St. environs from the berm to Plumas St., illustrated in this Oct. 27, 1940 northeast view from a SN parlor car of Colusa Local SN 109 at Plumas St. An inventory of houses, structures and businesses long gone, as well as those persisting in 2023, such as the one occupied by Tuttle Roofing Co., will be displayed.
L303-05-Vernon Sappers Photo, Courtesy BAERA, Western Railway Museum Archives, 218743sn, (Image 1 of 32)

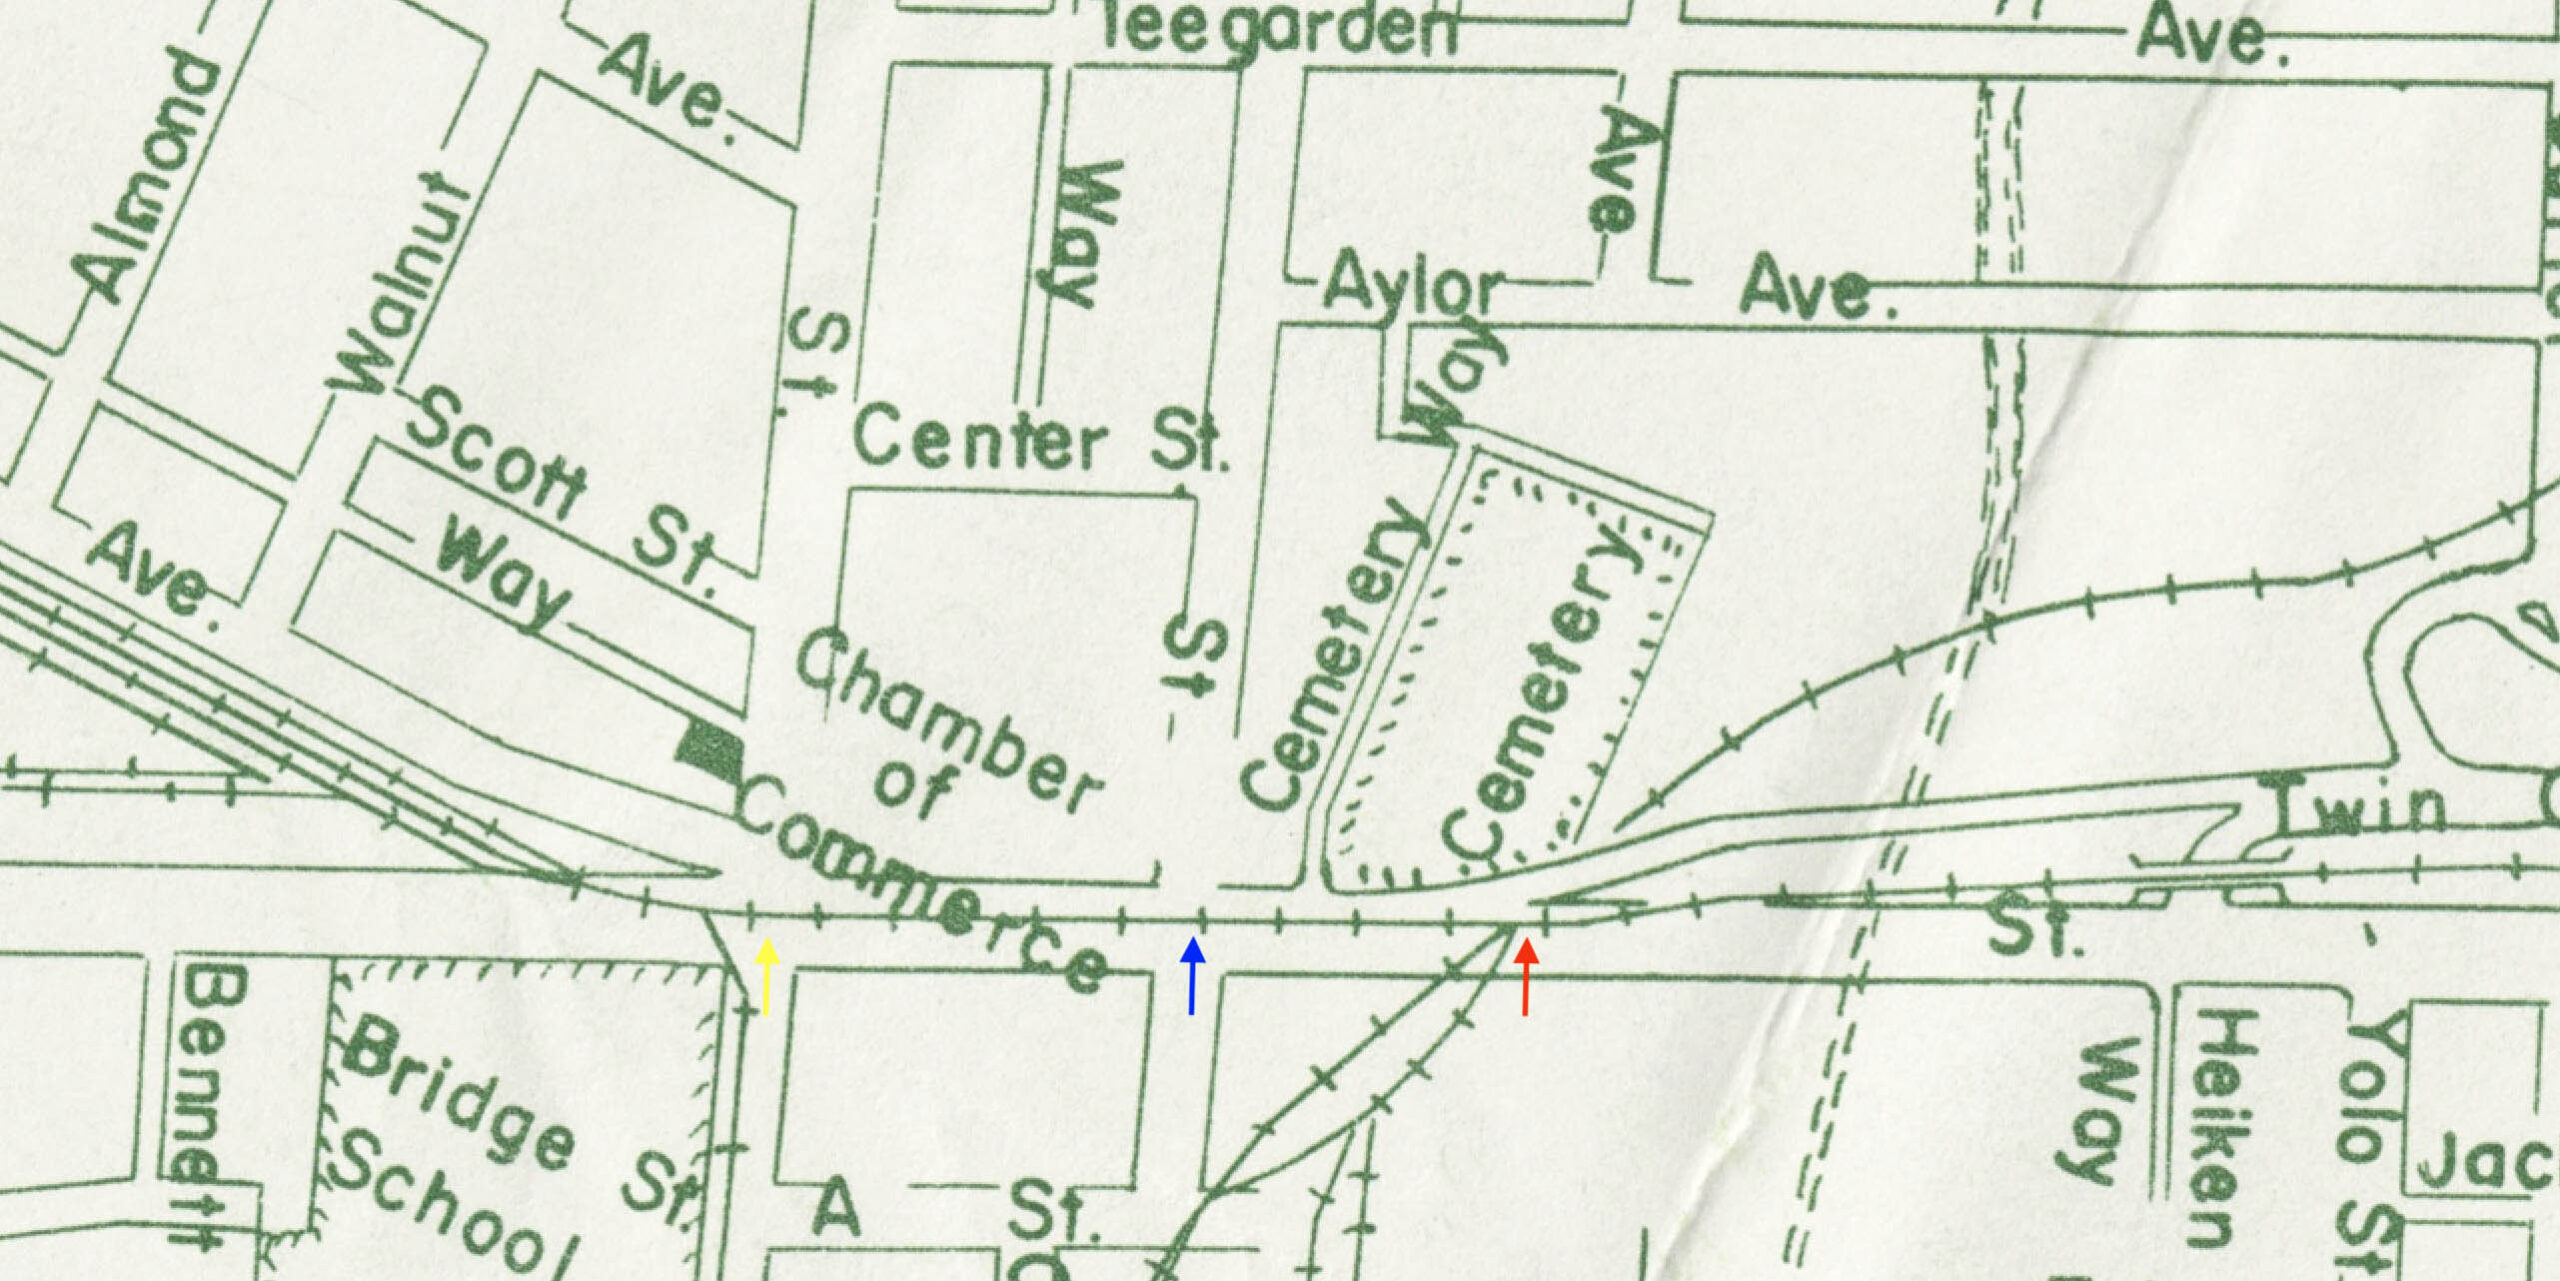
The area to be covered is provided on this detail from a 1960 map. After coming off the berm, the SN crossed the Southern Pacific, SP, tracks, red arrow, passed the Shasta St. intersection, blue arrow, and reached Plumas St., yellow arrow, just across the intersection from the combined passenger-freight depot to the west. Ref: G4364 Y8 1960 S8 Case D, Rotated 25 degrees clockwise
L303-10-Courtesy Earth Sciences and Map Library, University of California, Berkeley, (Image 2 of 32)
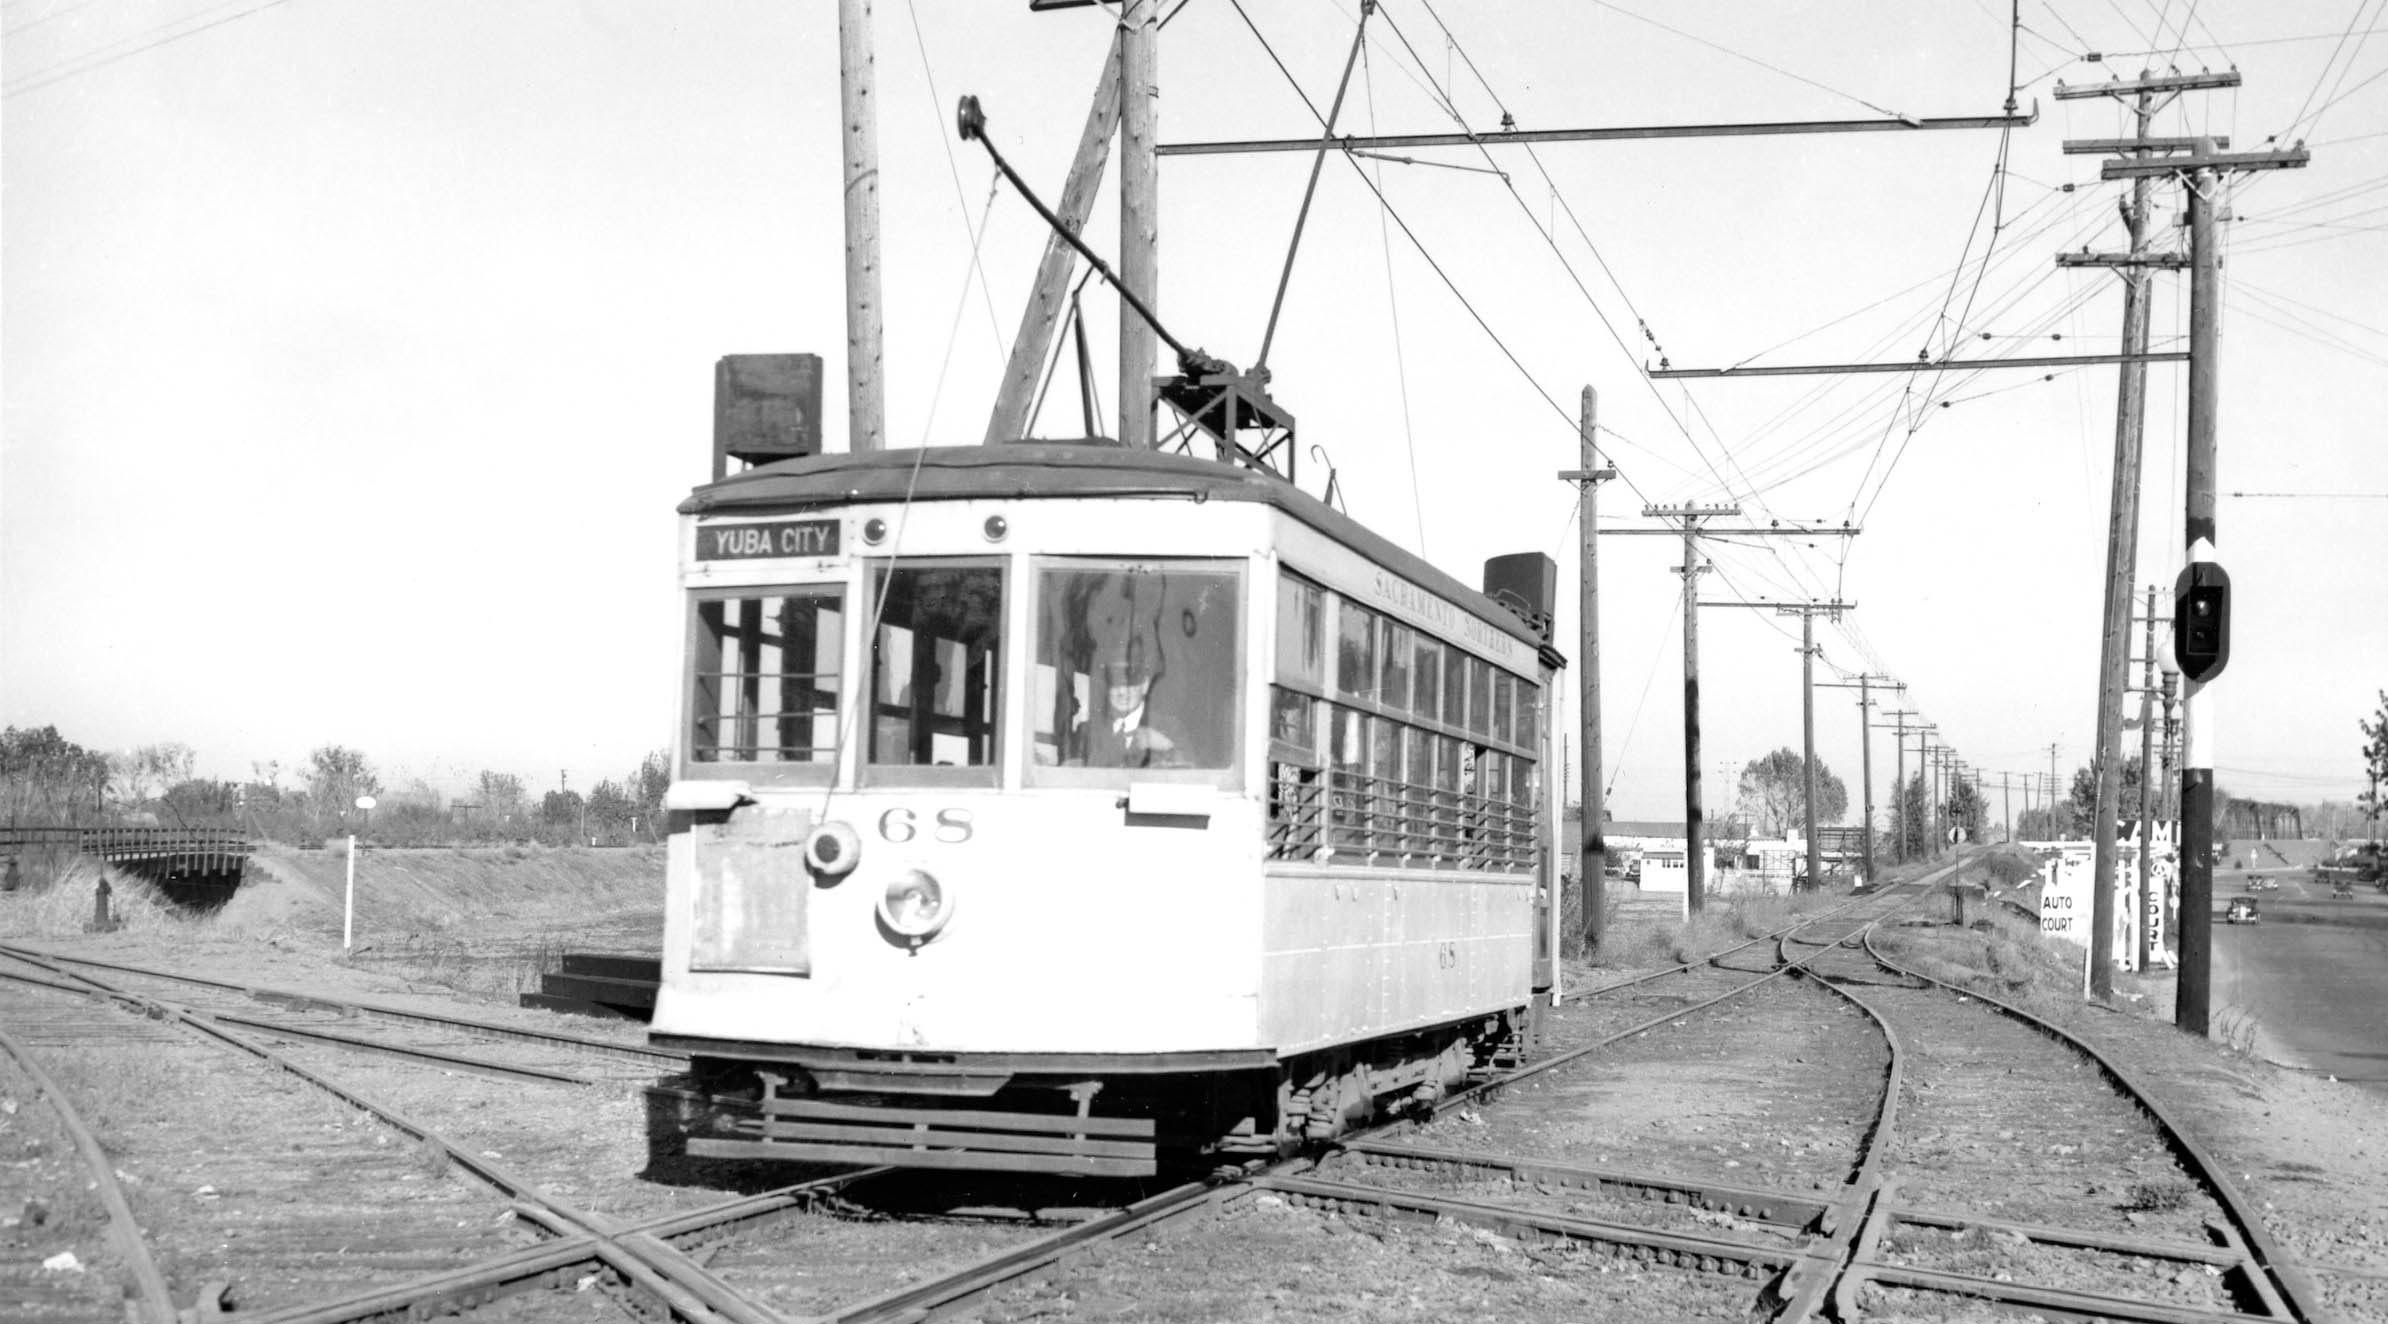
The earliest dated image found from the SN-SP crossing is courtesy Will Whittaker, a northeast view from Nov. 11, 1938 of Birney 68 coming off the berm. The details, right to left, show the SN Feather River Bridge in the distance, the Gilsizer Slough Trestle on the SN berm, the addition of a second SN track before reaching Bridge St., two tracks from the SP crossing over, and the SP Gilsizer Slough Trestle in the distance.
L303-15-Wilbur C. Whittaker Photo, Vielbaum Coll., Courtesy BAERA, Western Railway Museum Archives, 132733sn, (Image 3 of 32)
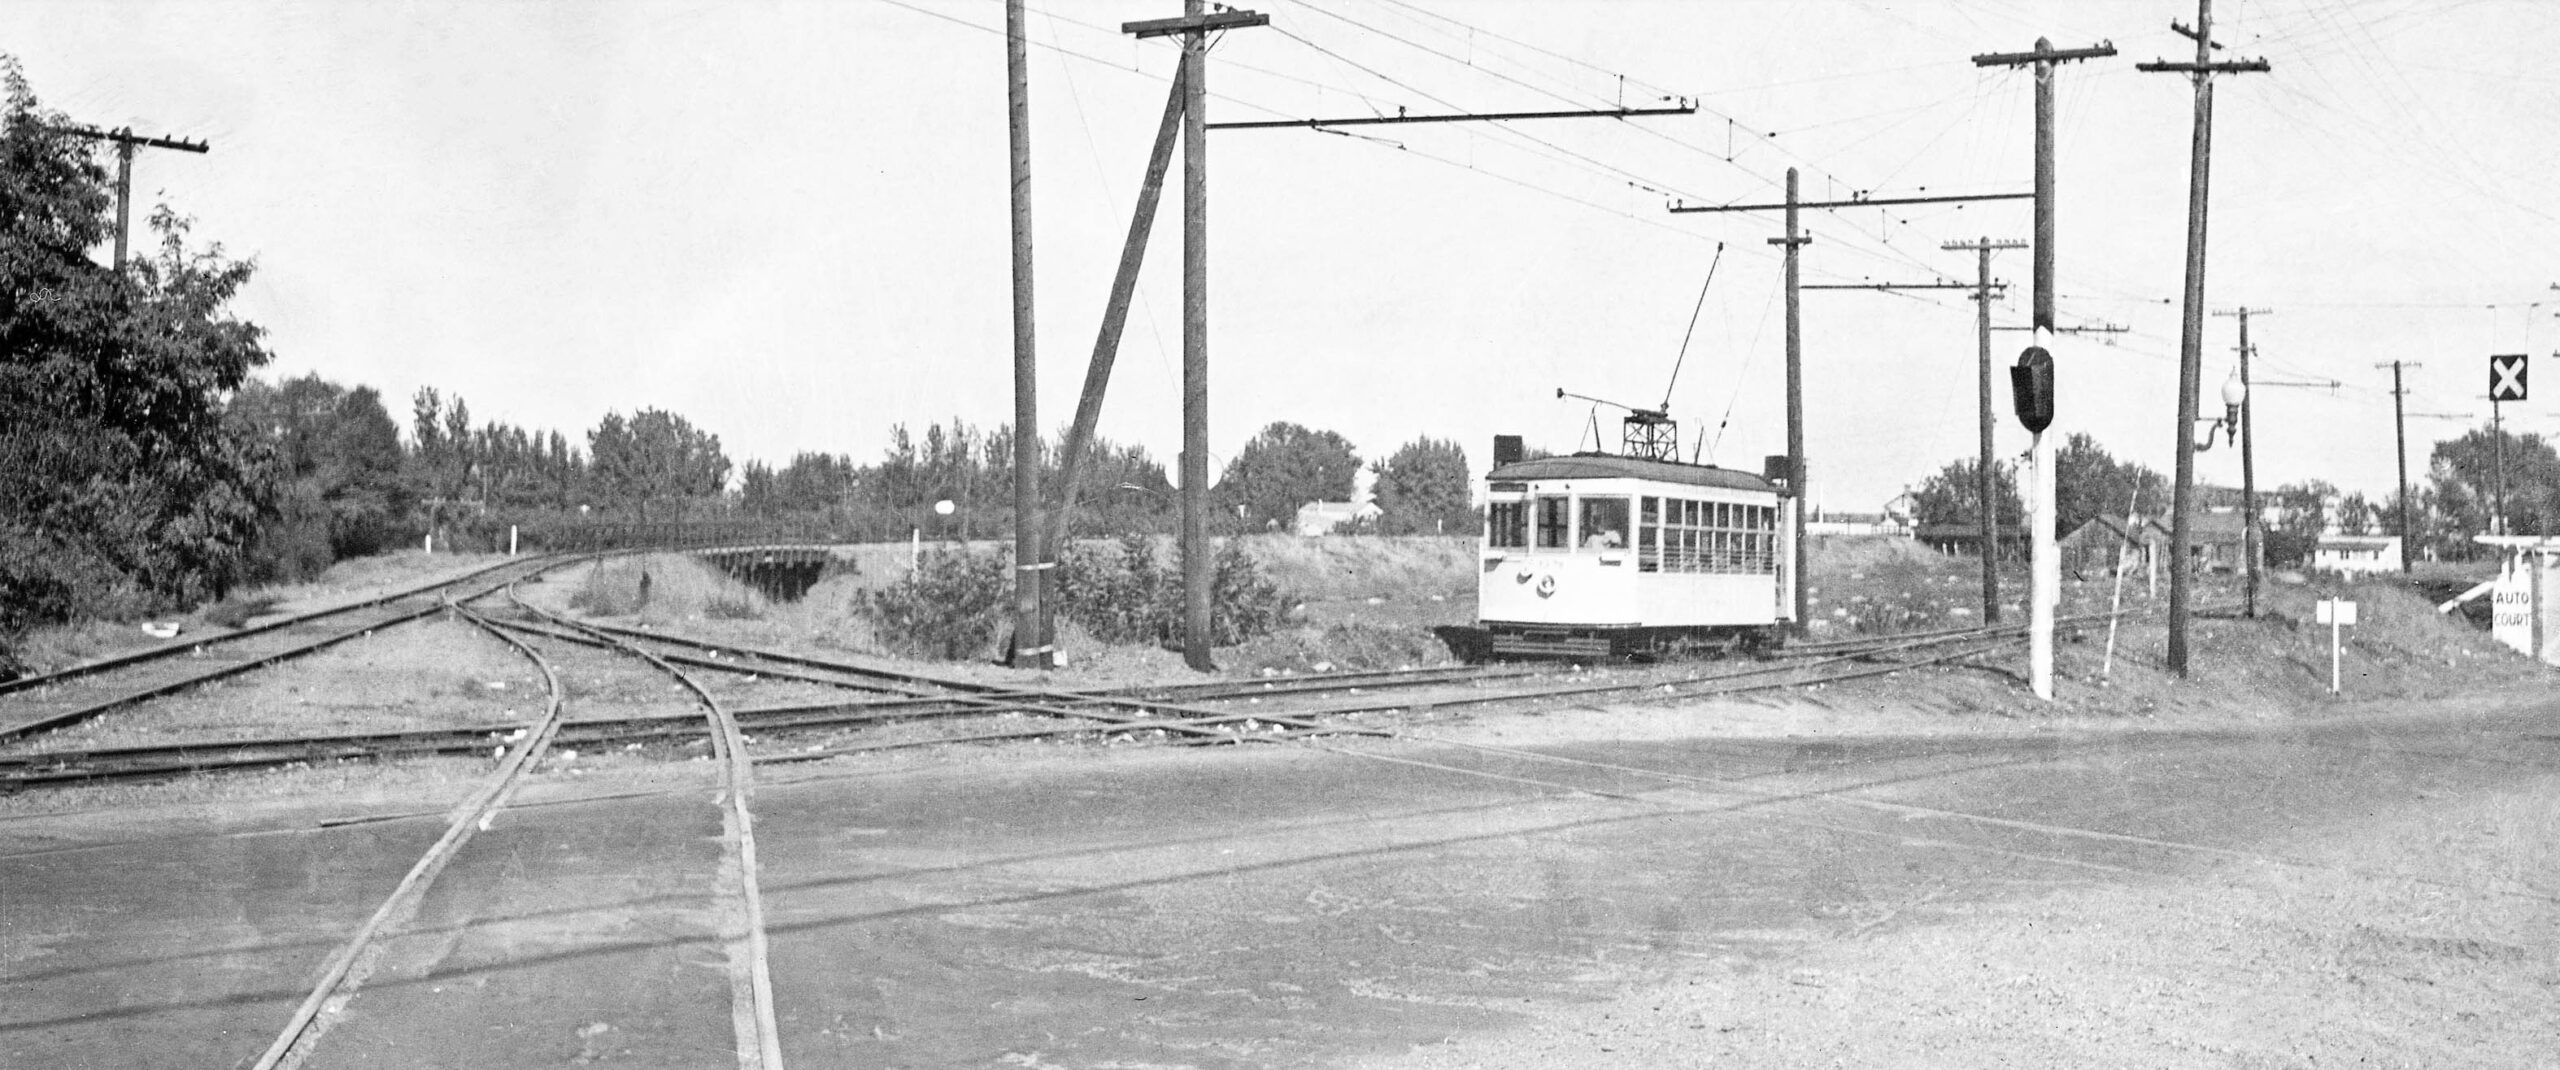
Jerry Graham’s north view of Birney 68 from a similar time period adds the third SP track, the one to the far left or west that will be the one SP trains used to access the SP depot. This view displays the SP berm reviewed last time, and the SP bridge in the far distance, seen just below the lamp on the telephone pole.
L303-20-John G. Graham Photo, Courtesy BAERA, Western Railway Museum Archives, 174902sn, (Image 4 of 32)
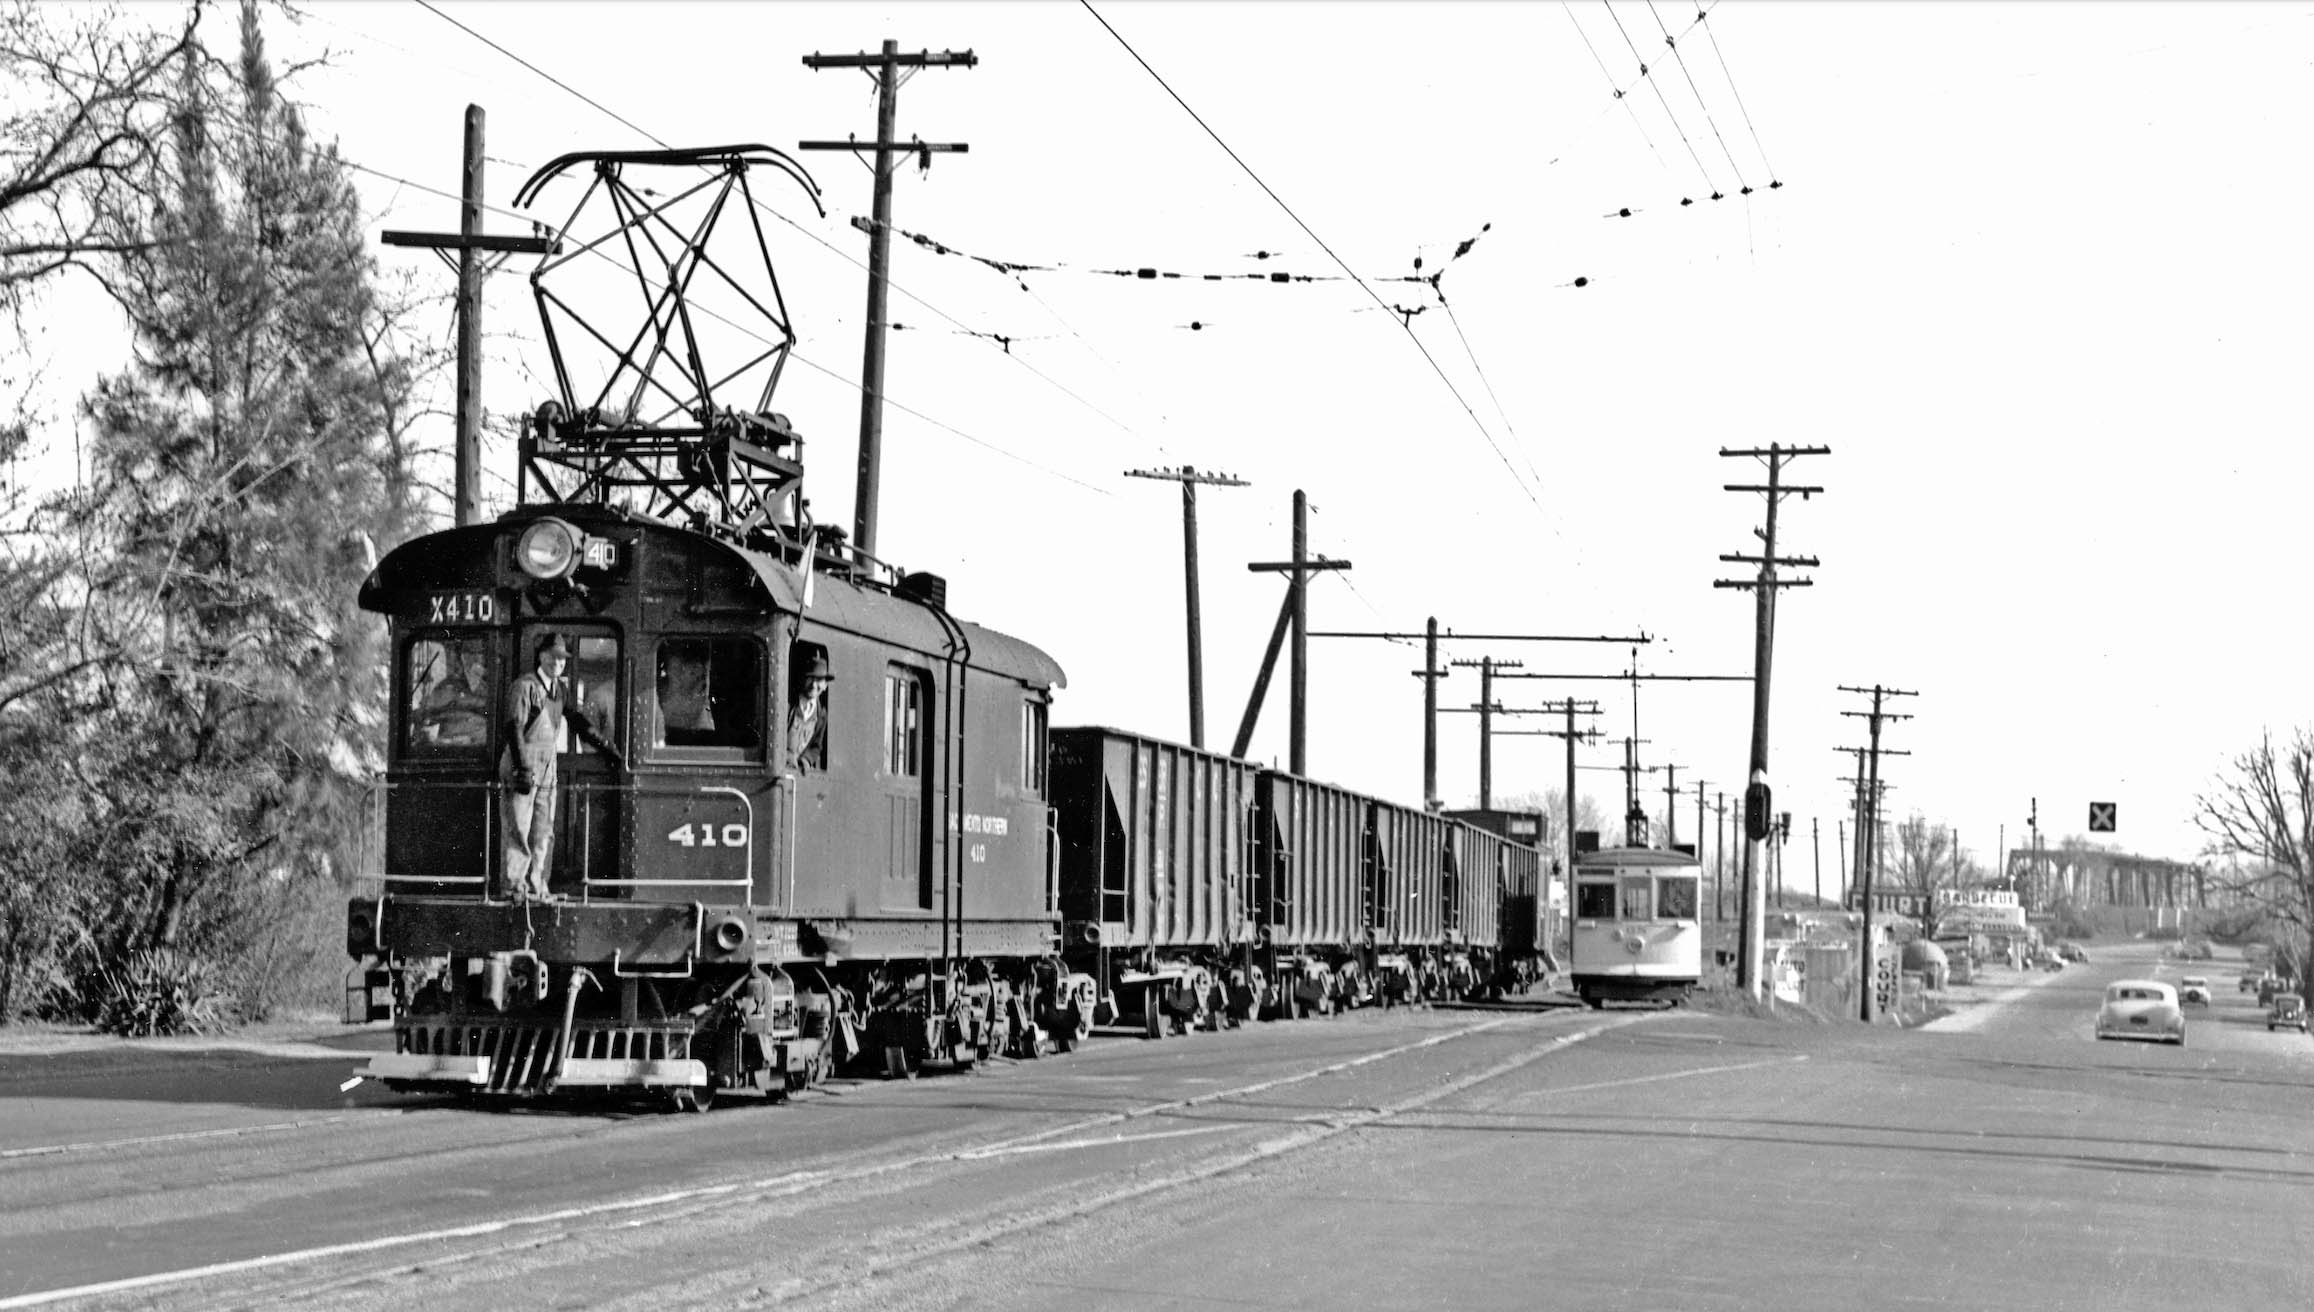
Ahead to the freight contingent of hoppers led by SN 410 that this set of presentations has followed beginning with its journey over the Feather River Bridge on the final day of streetcar operations in Marysville-Yuba City, Feb. 15, 1942. The crew seems to be enjoying the moment as Birney 68 heads up the berm back to Marysville.
L303-25-Moreau Collection, Courtesy BAERA, Western Railway Museum Archives, 218738sn, (Image 5 of 32)
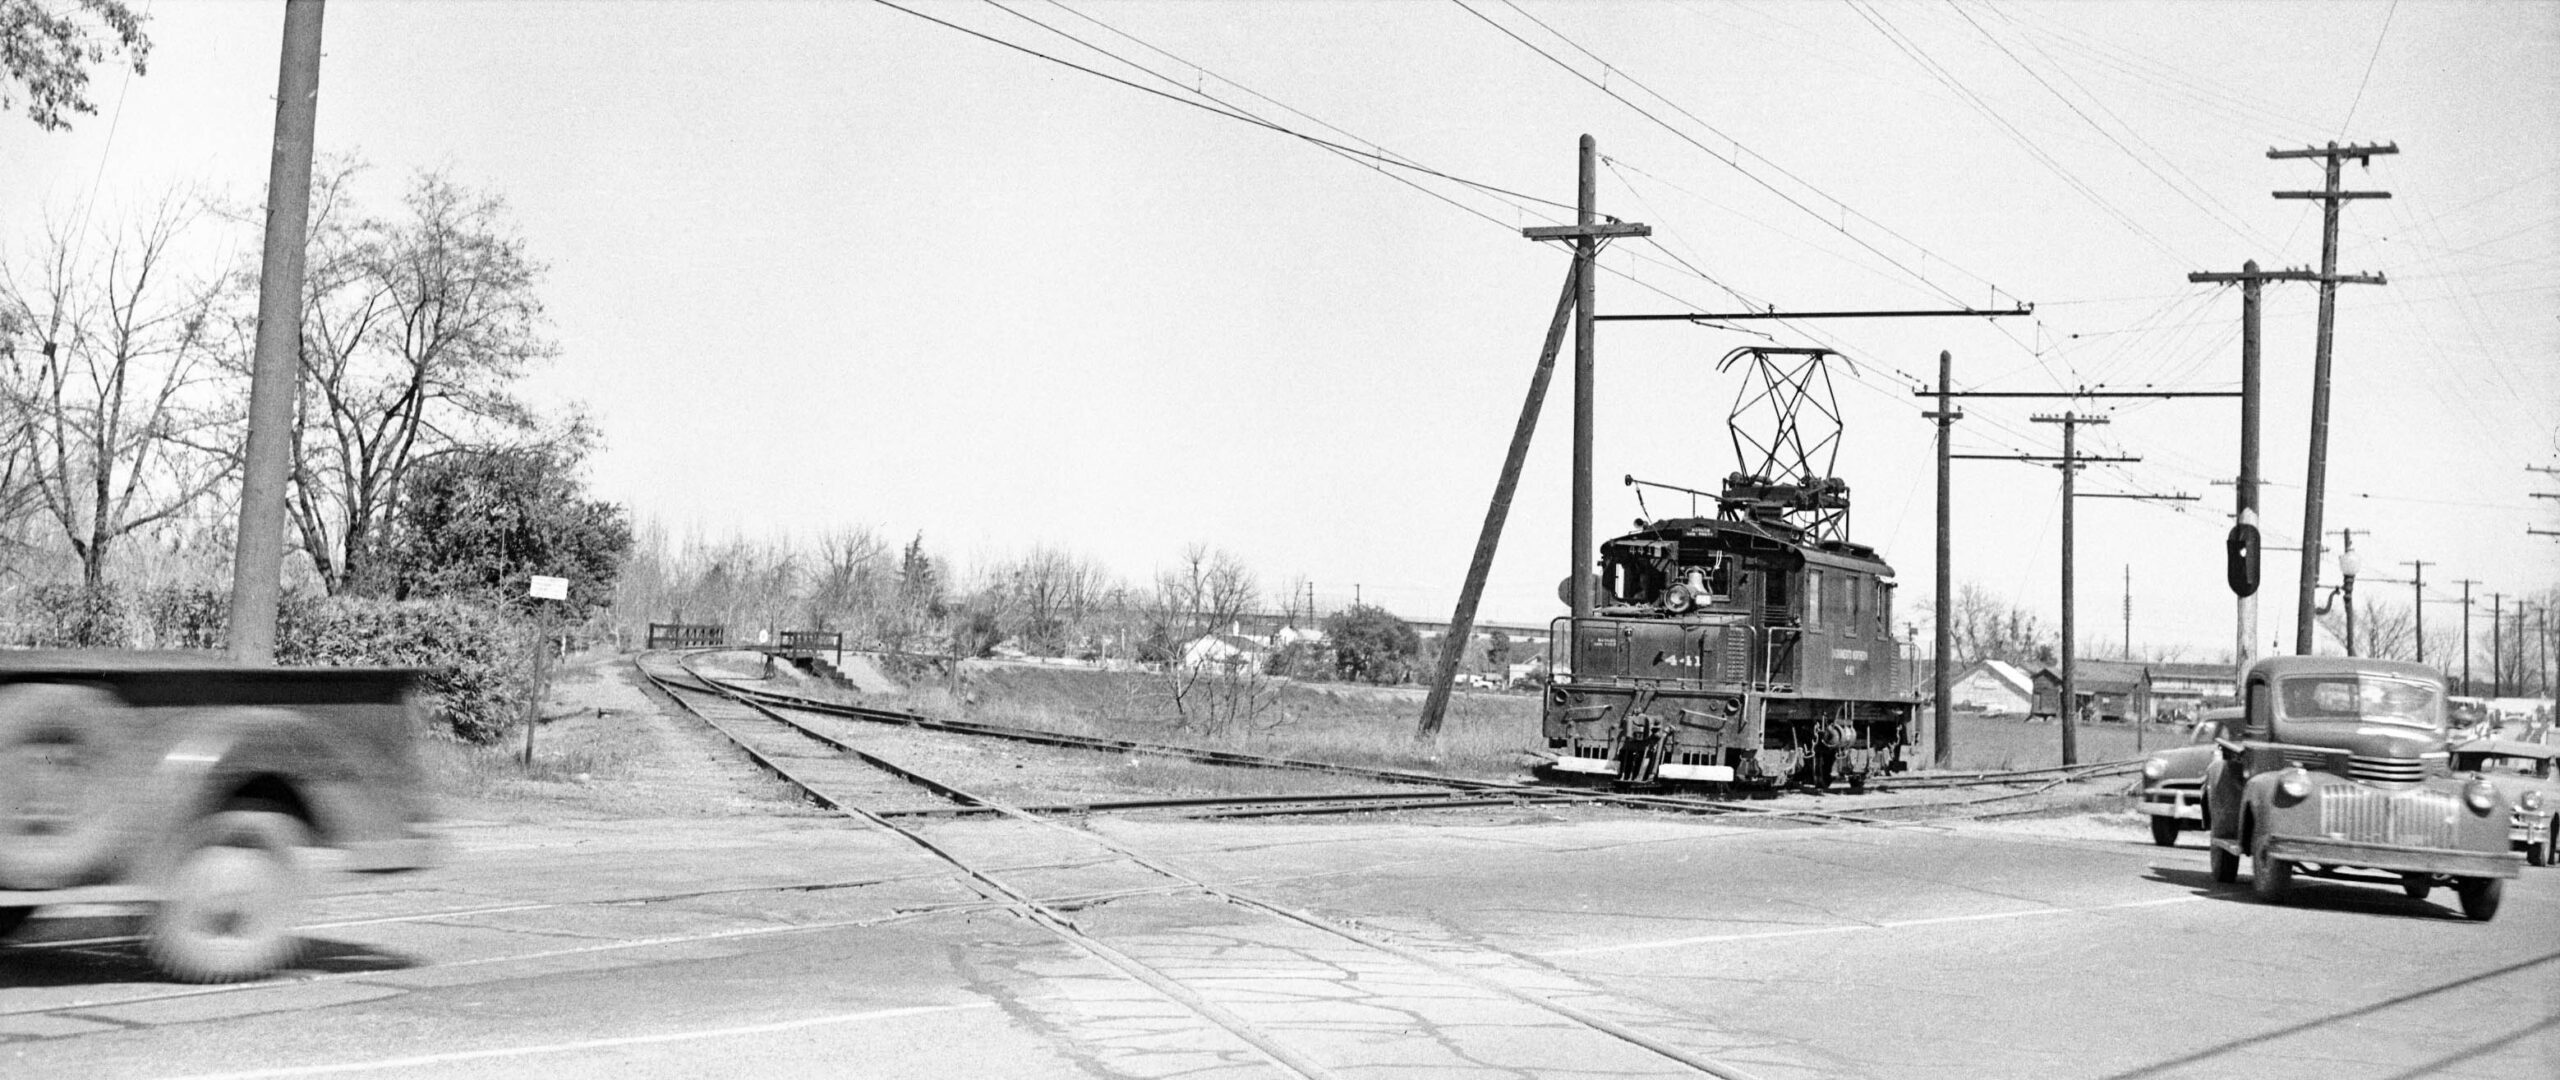
The Holmes Brothers made an impromptu visit to the crossing on June 6, 1949, catching SN 441 with Mr. Jenkins at the controls in this north view. The importance of this image is that it shows the number of SP tracks at the crossing has been reduced to two, the new SP approach and trestle over Gilsizer Slough from Berg is in place, and the 10th Street Bridge for cars connecting Marysville to Yuba City is in place.
L303-30-Holmes Bros. Photo, Courtesy BAERA, Western Railway Museum Archives, 99530sn, (Image 6 of 32)
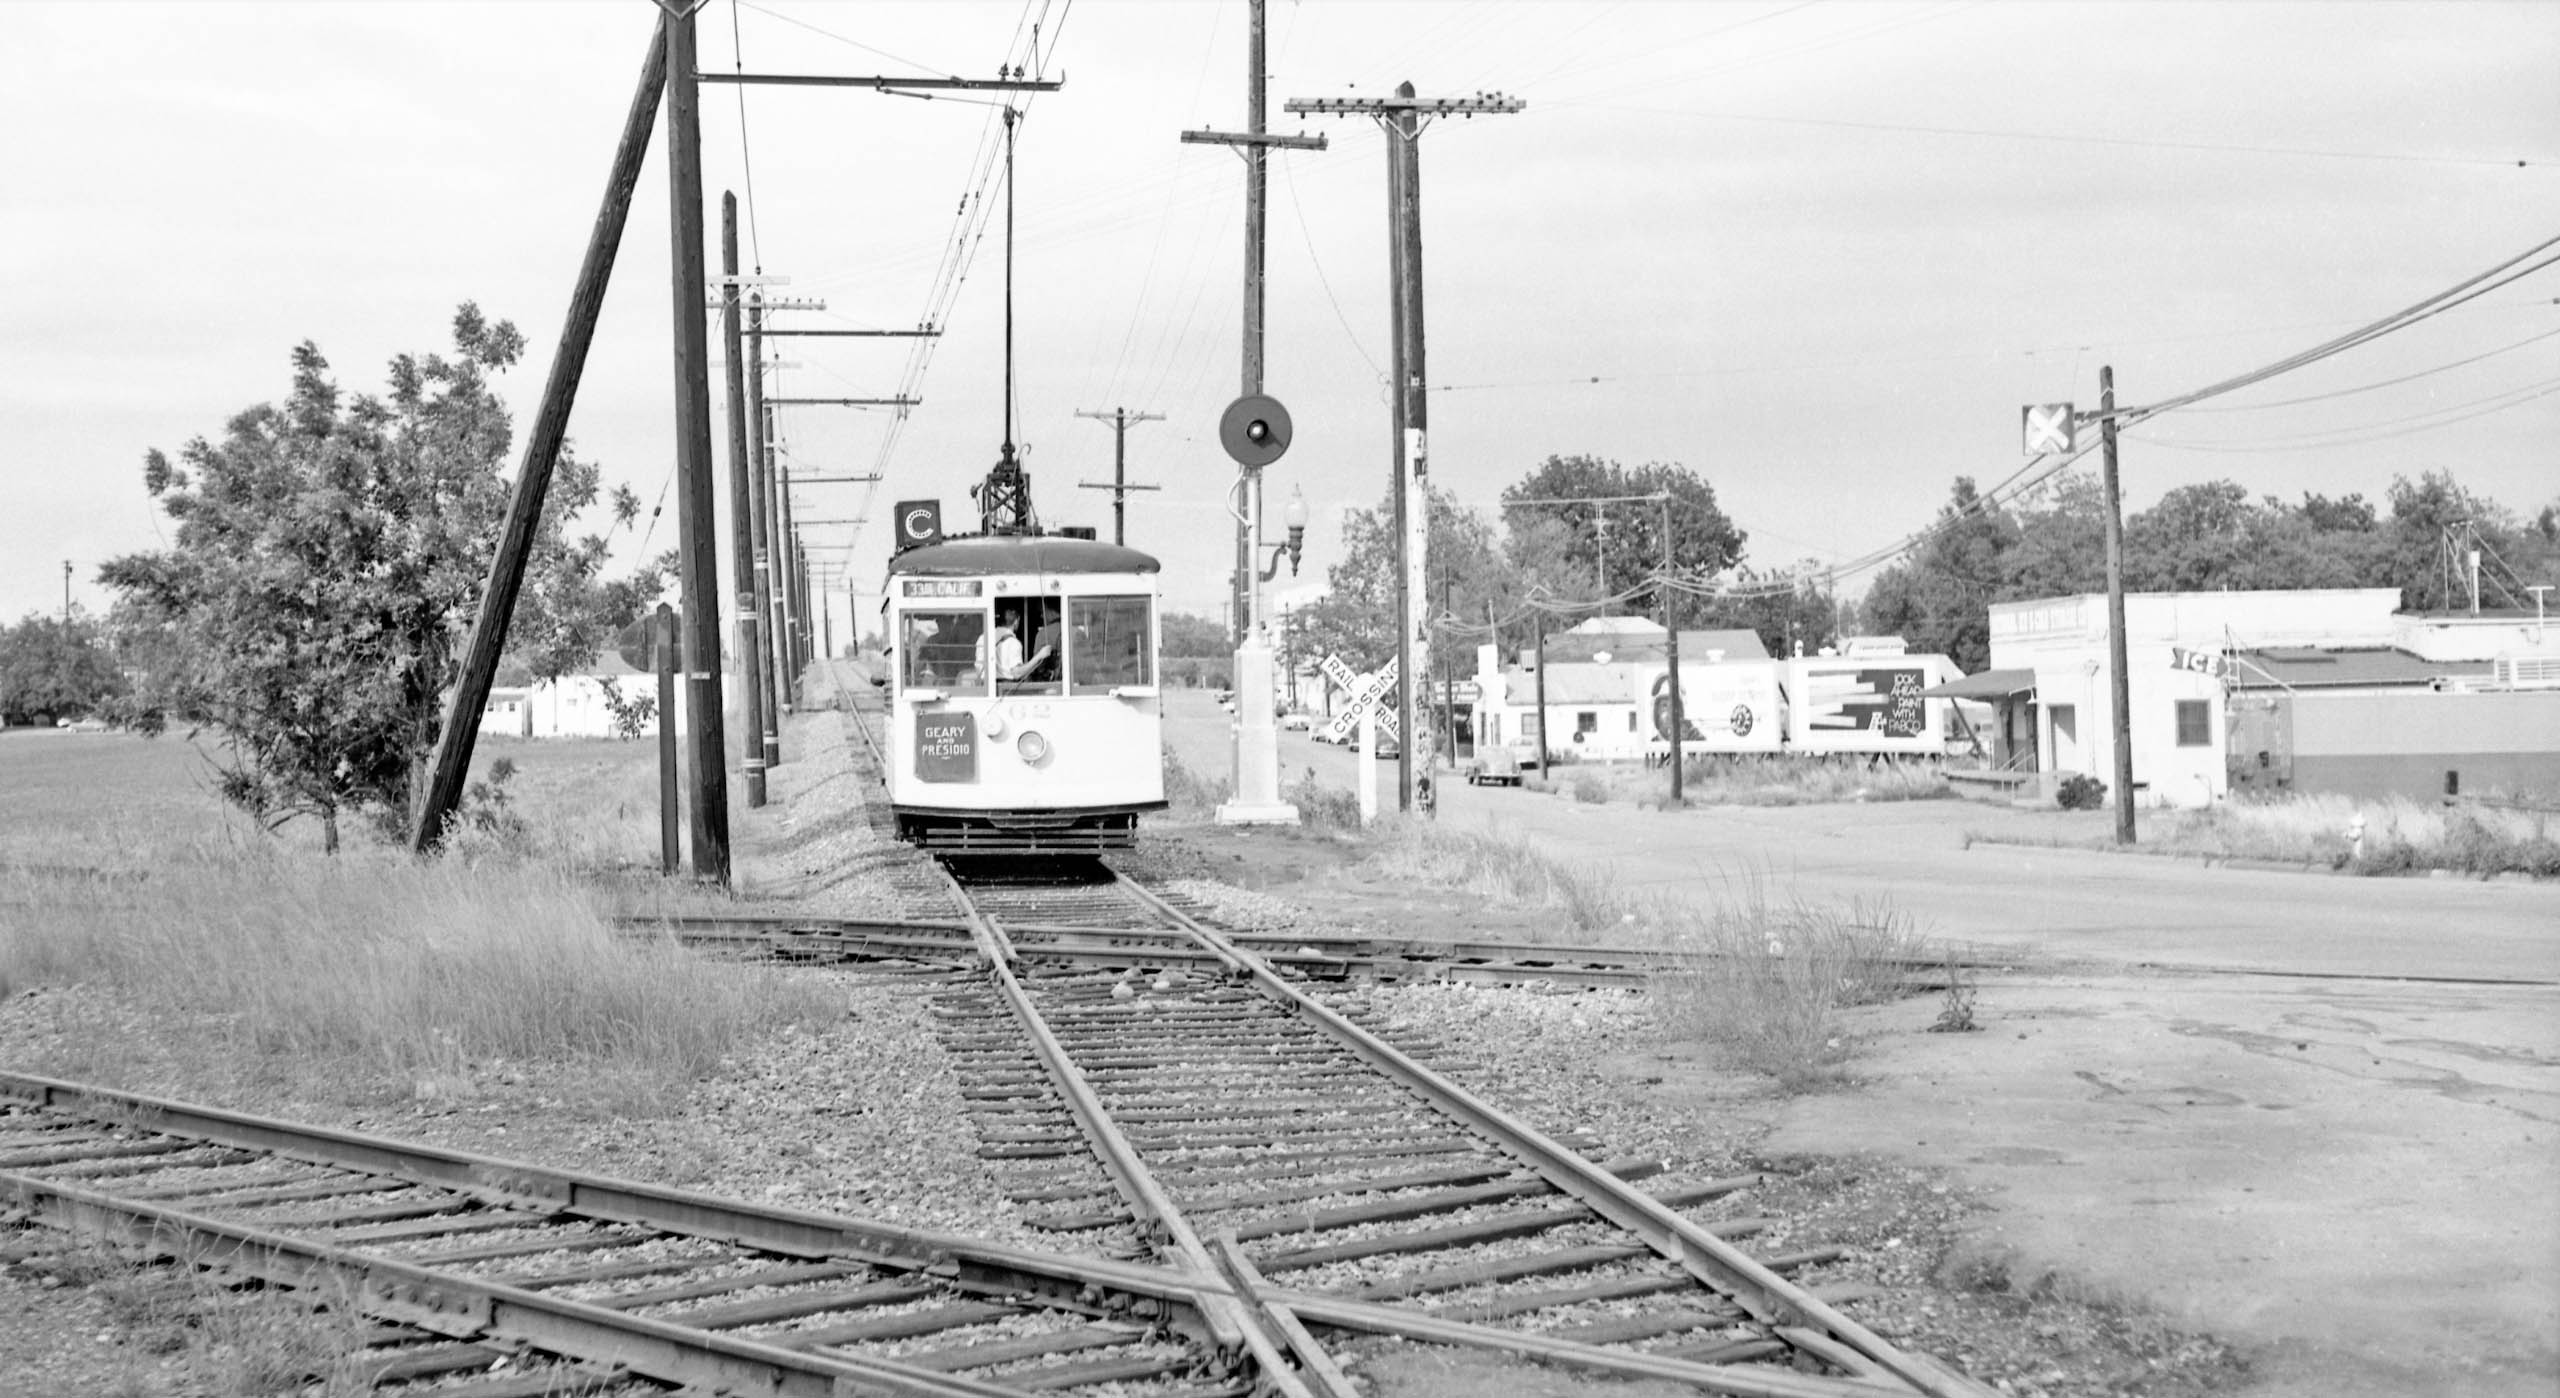
Walt Vielbaum was one of the many participants of the May 18-19, 1957 excursion into Yuba City oil Birney 62. His northeast view at the SP crossing of the streetcar documents that the SN tracks at the crossing had been reduced to one in number. Note to the right or east, the truck loading area for National Ice and Cold Storage at 340 Bridge St., an SN customer that the railway will access from C St., to be examined in a later presentation.
L303-35-Walt Vielbaum Photo, Courtesy BAERA, Western Railway Museum Archives, 133529sn, (Image 7 of 32)
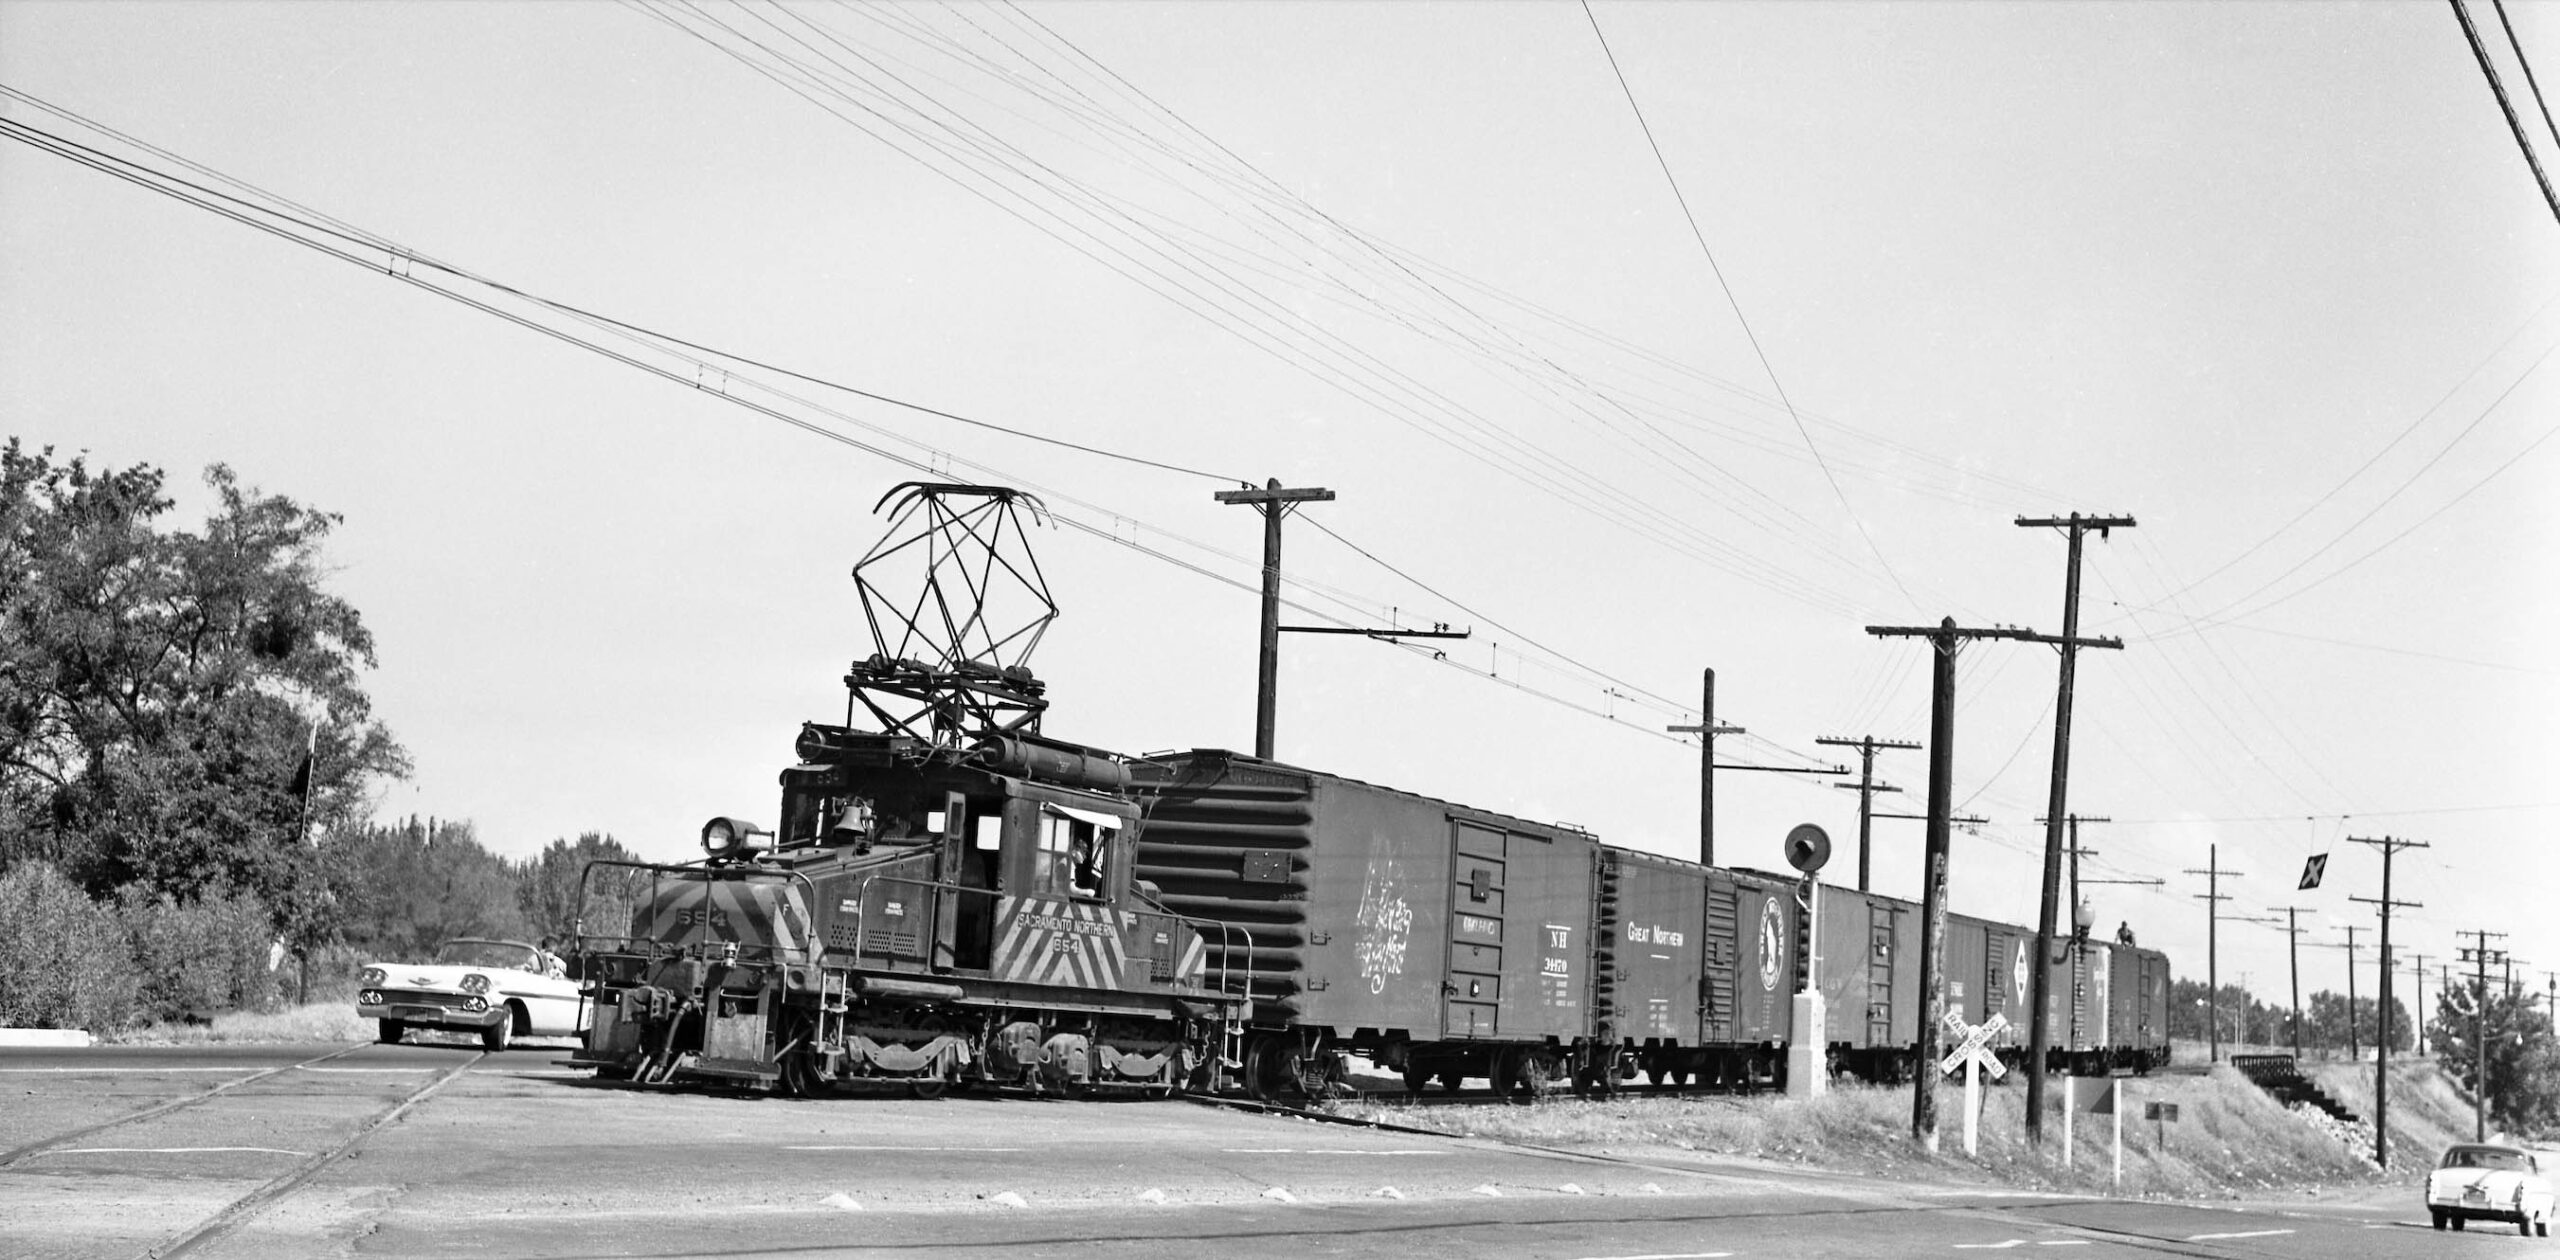
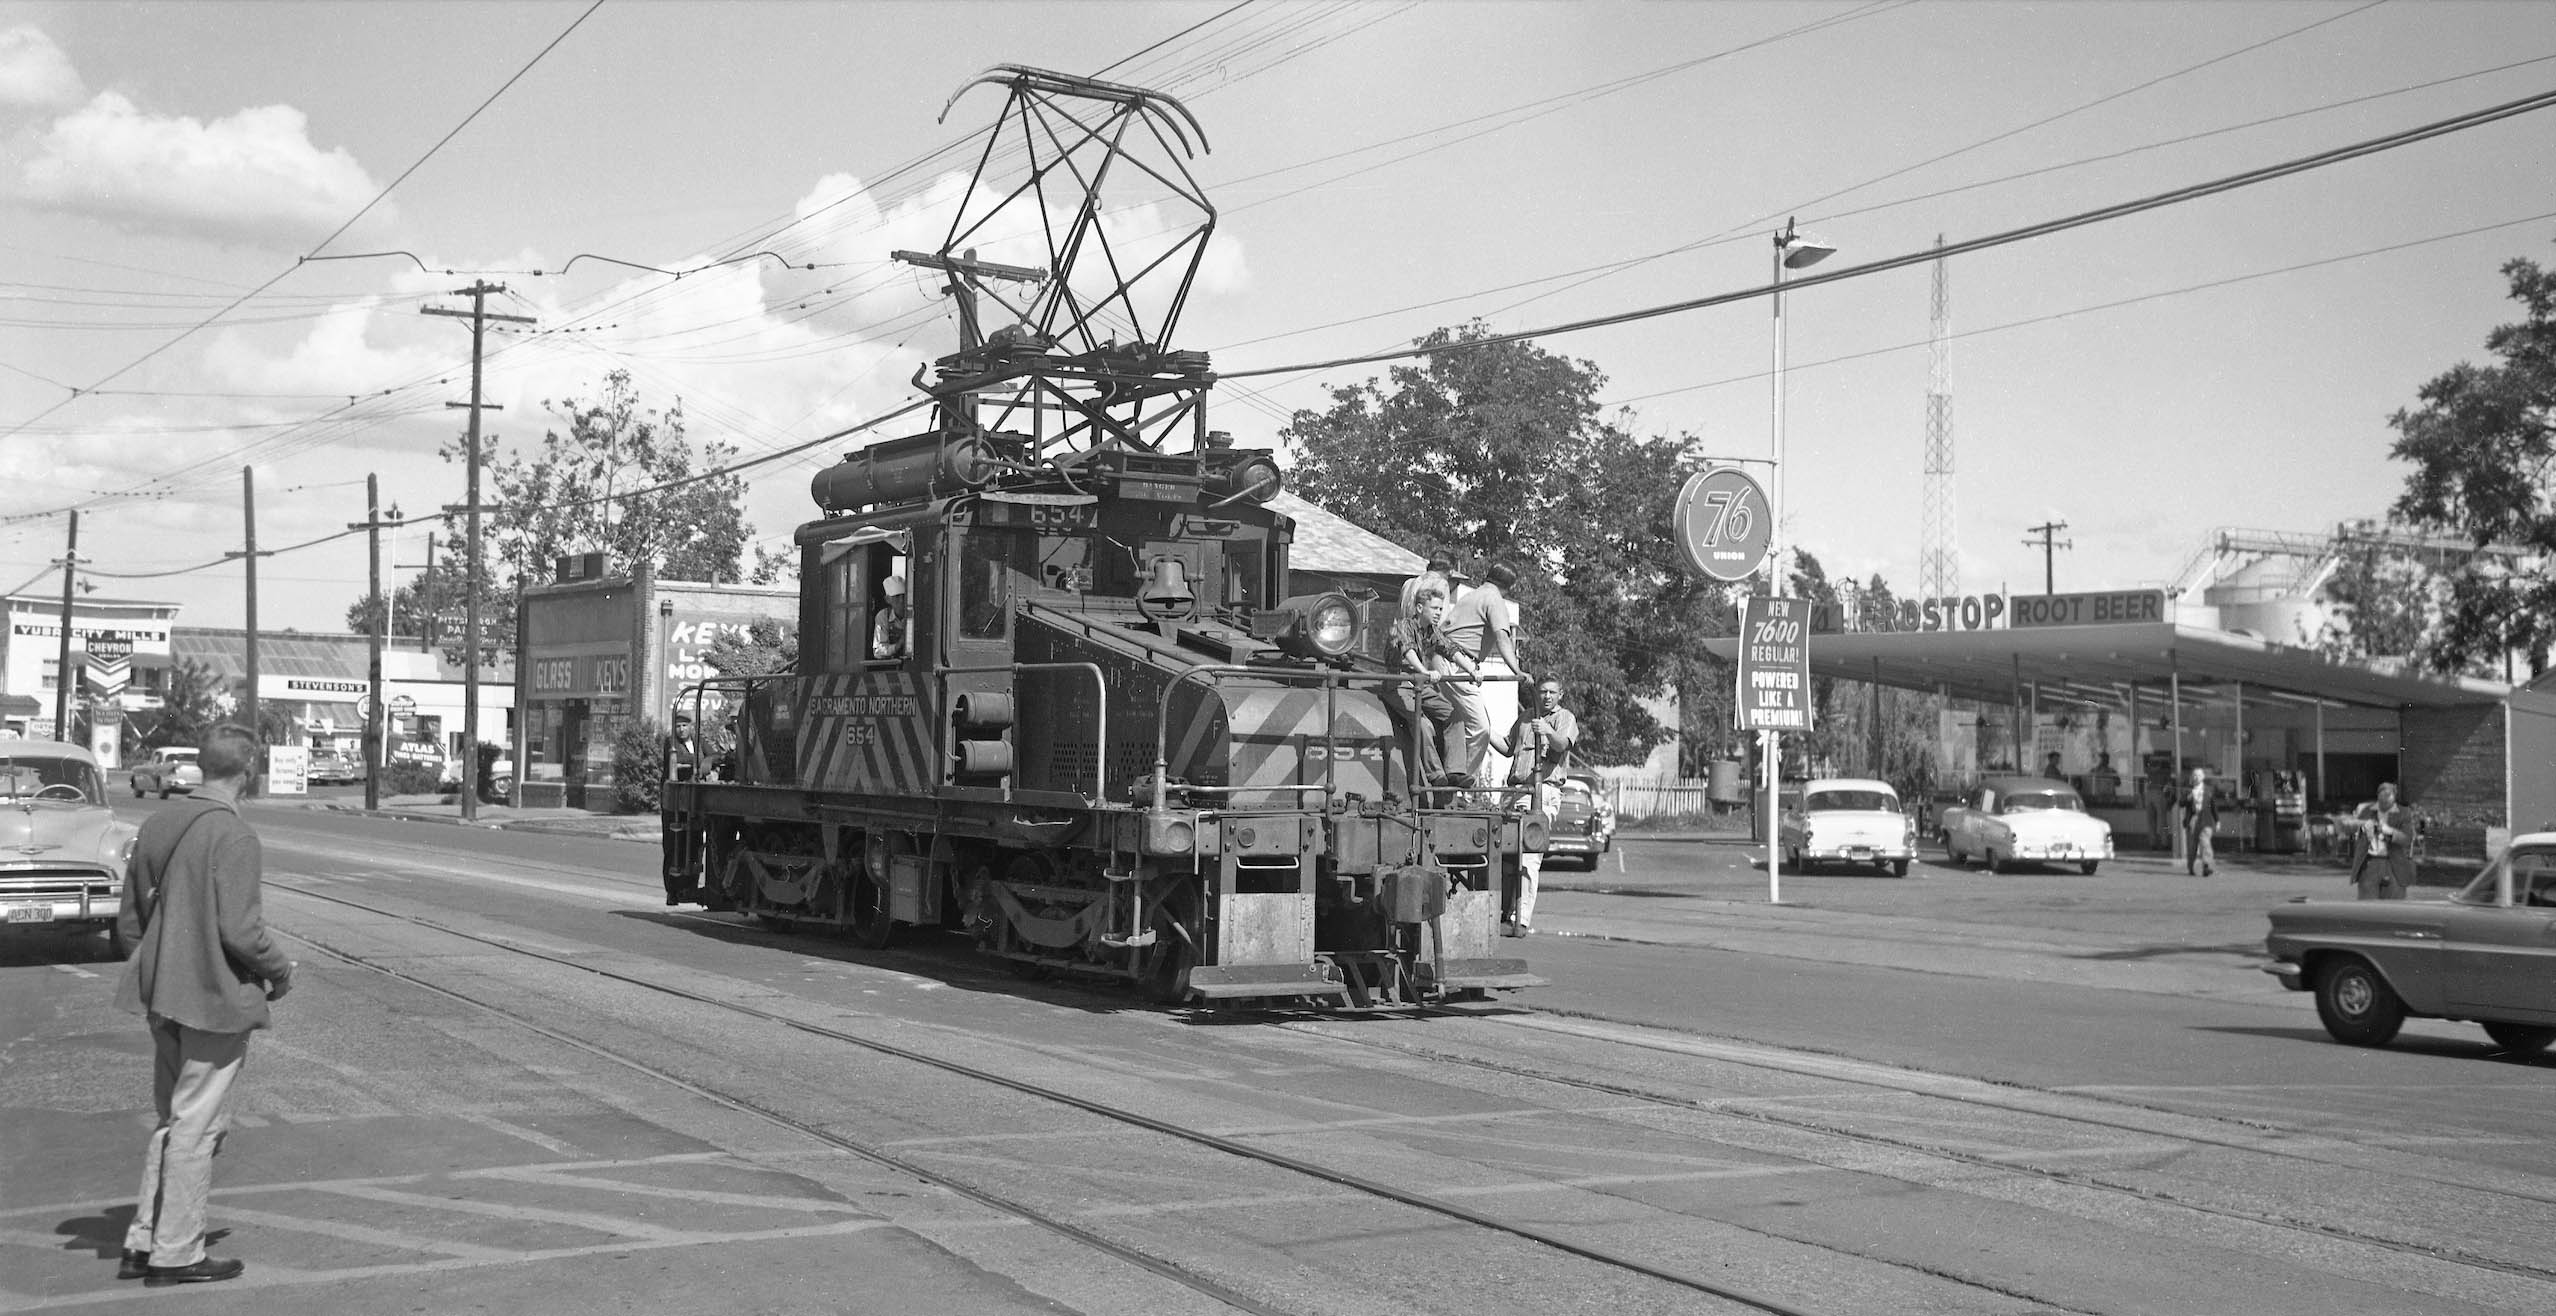
The train operator appears to be backing SN 654 and freight toward the Gilizer Slough Trestle on Sept. 9, 1959. No track changes seen here, but just a great shot by Vernon Sappers with the convertible and the documentation of a freight at this juncture.
L303-40-Vernon Sappers Photo, Courtesy BAERA, Western Railway Museum Archives, 125295sn, (Image 8 of 32)
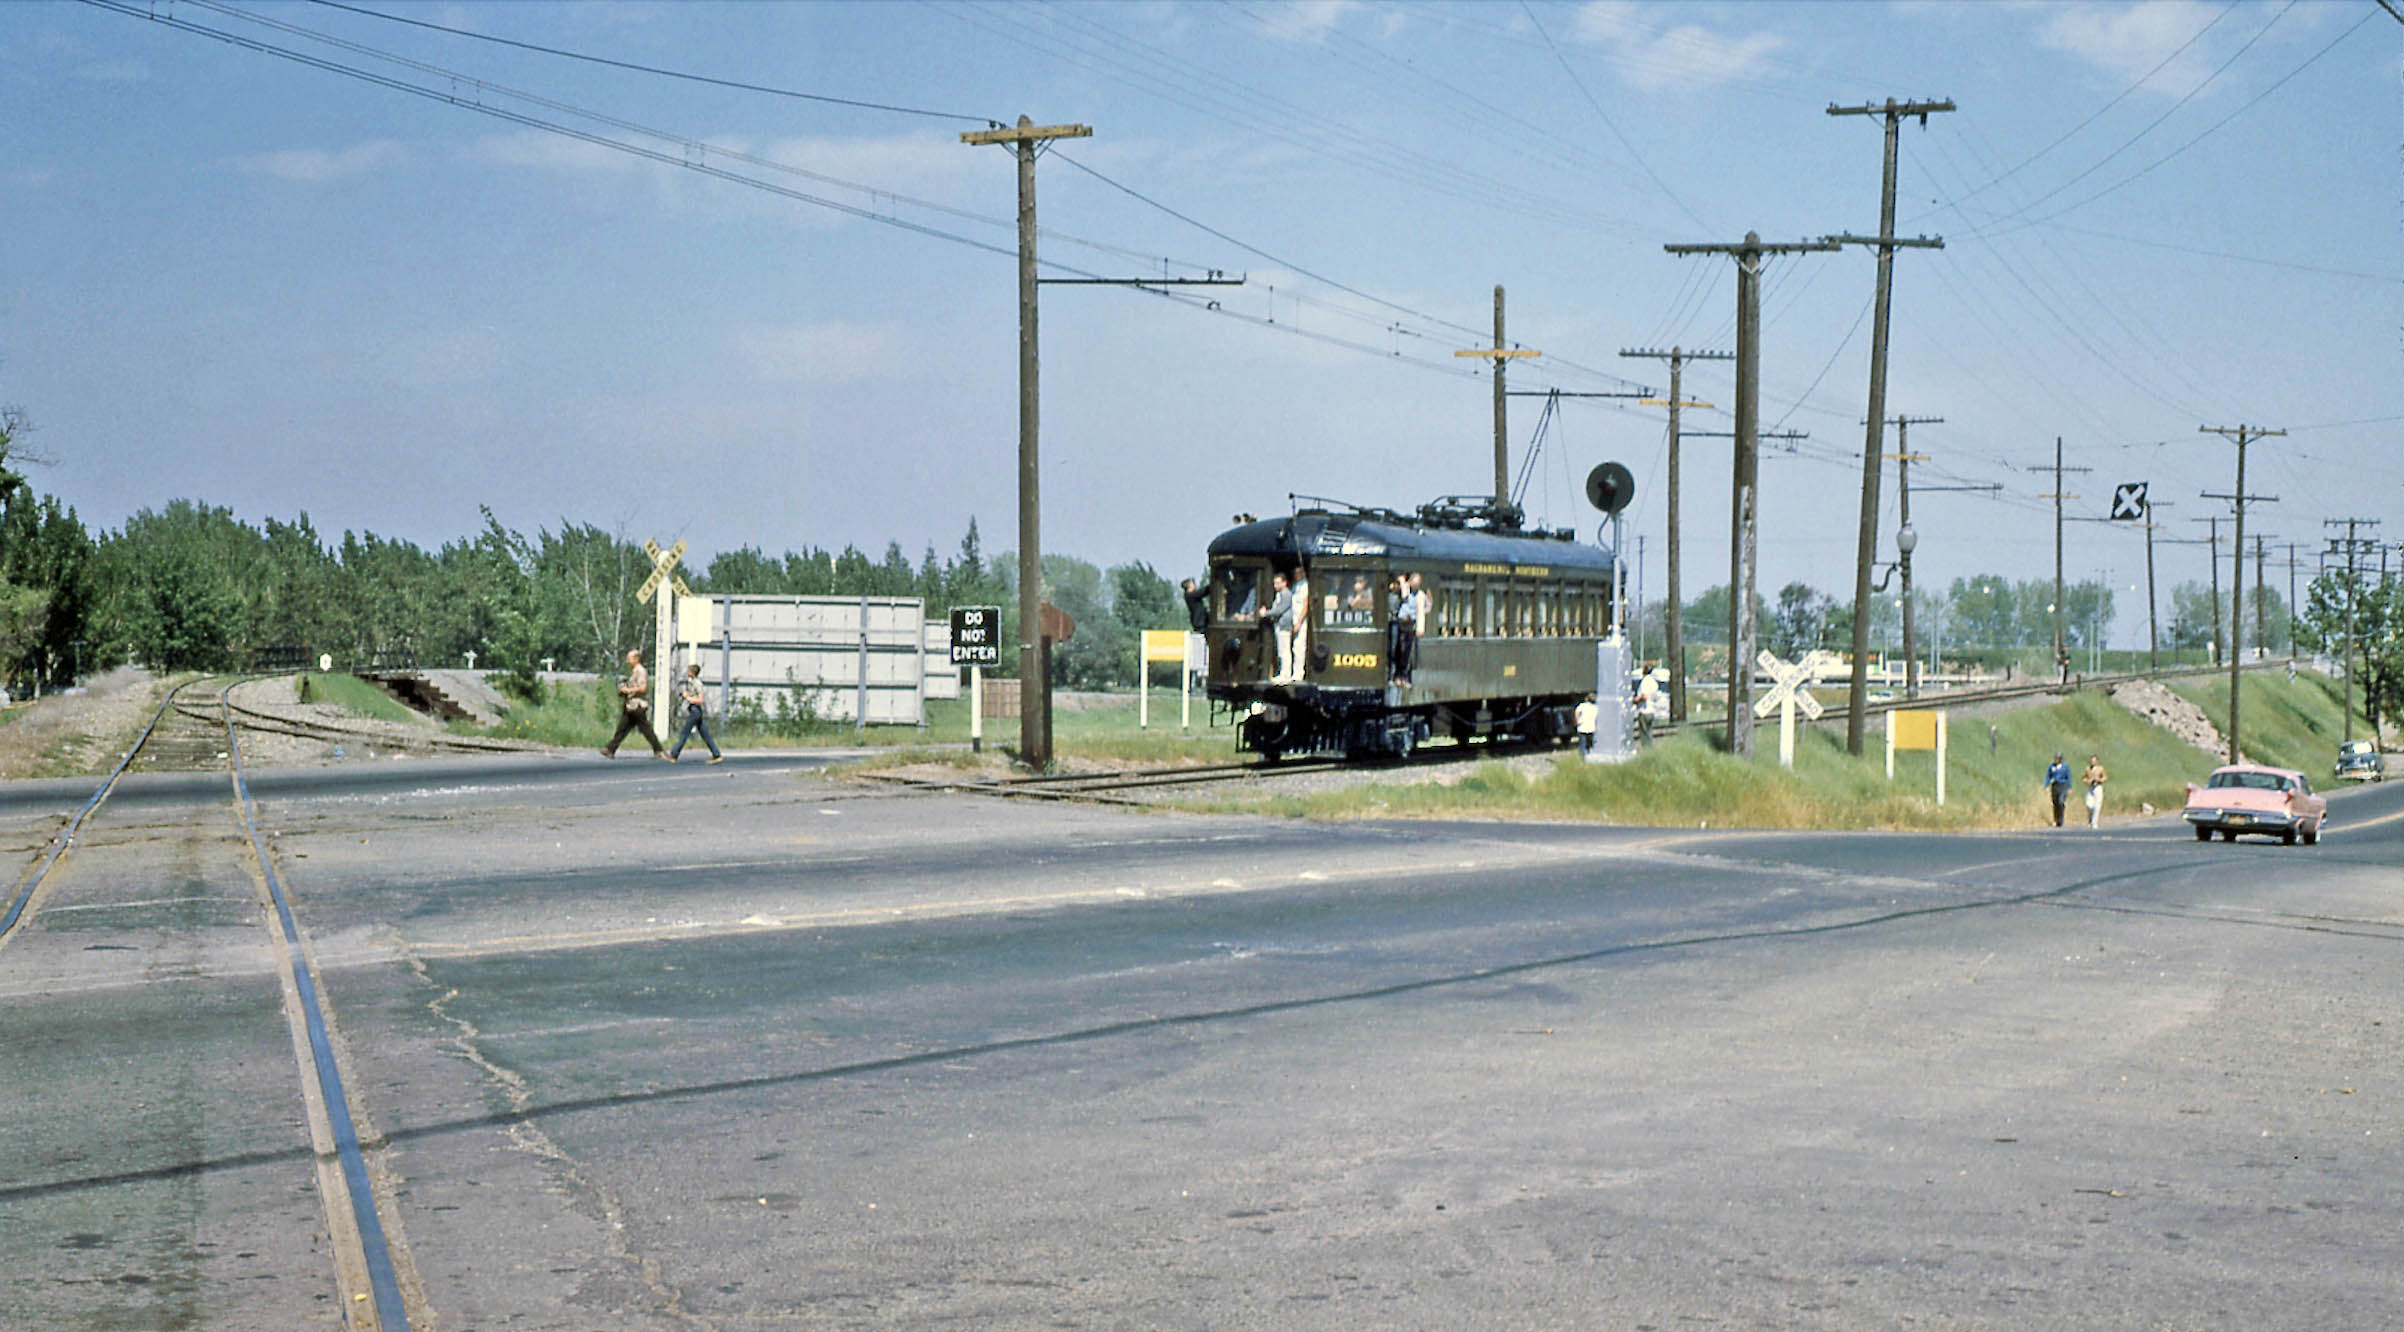
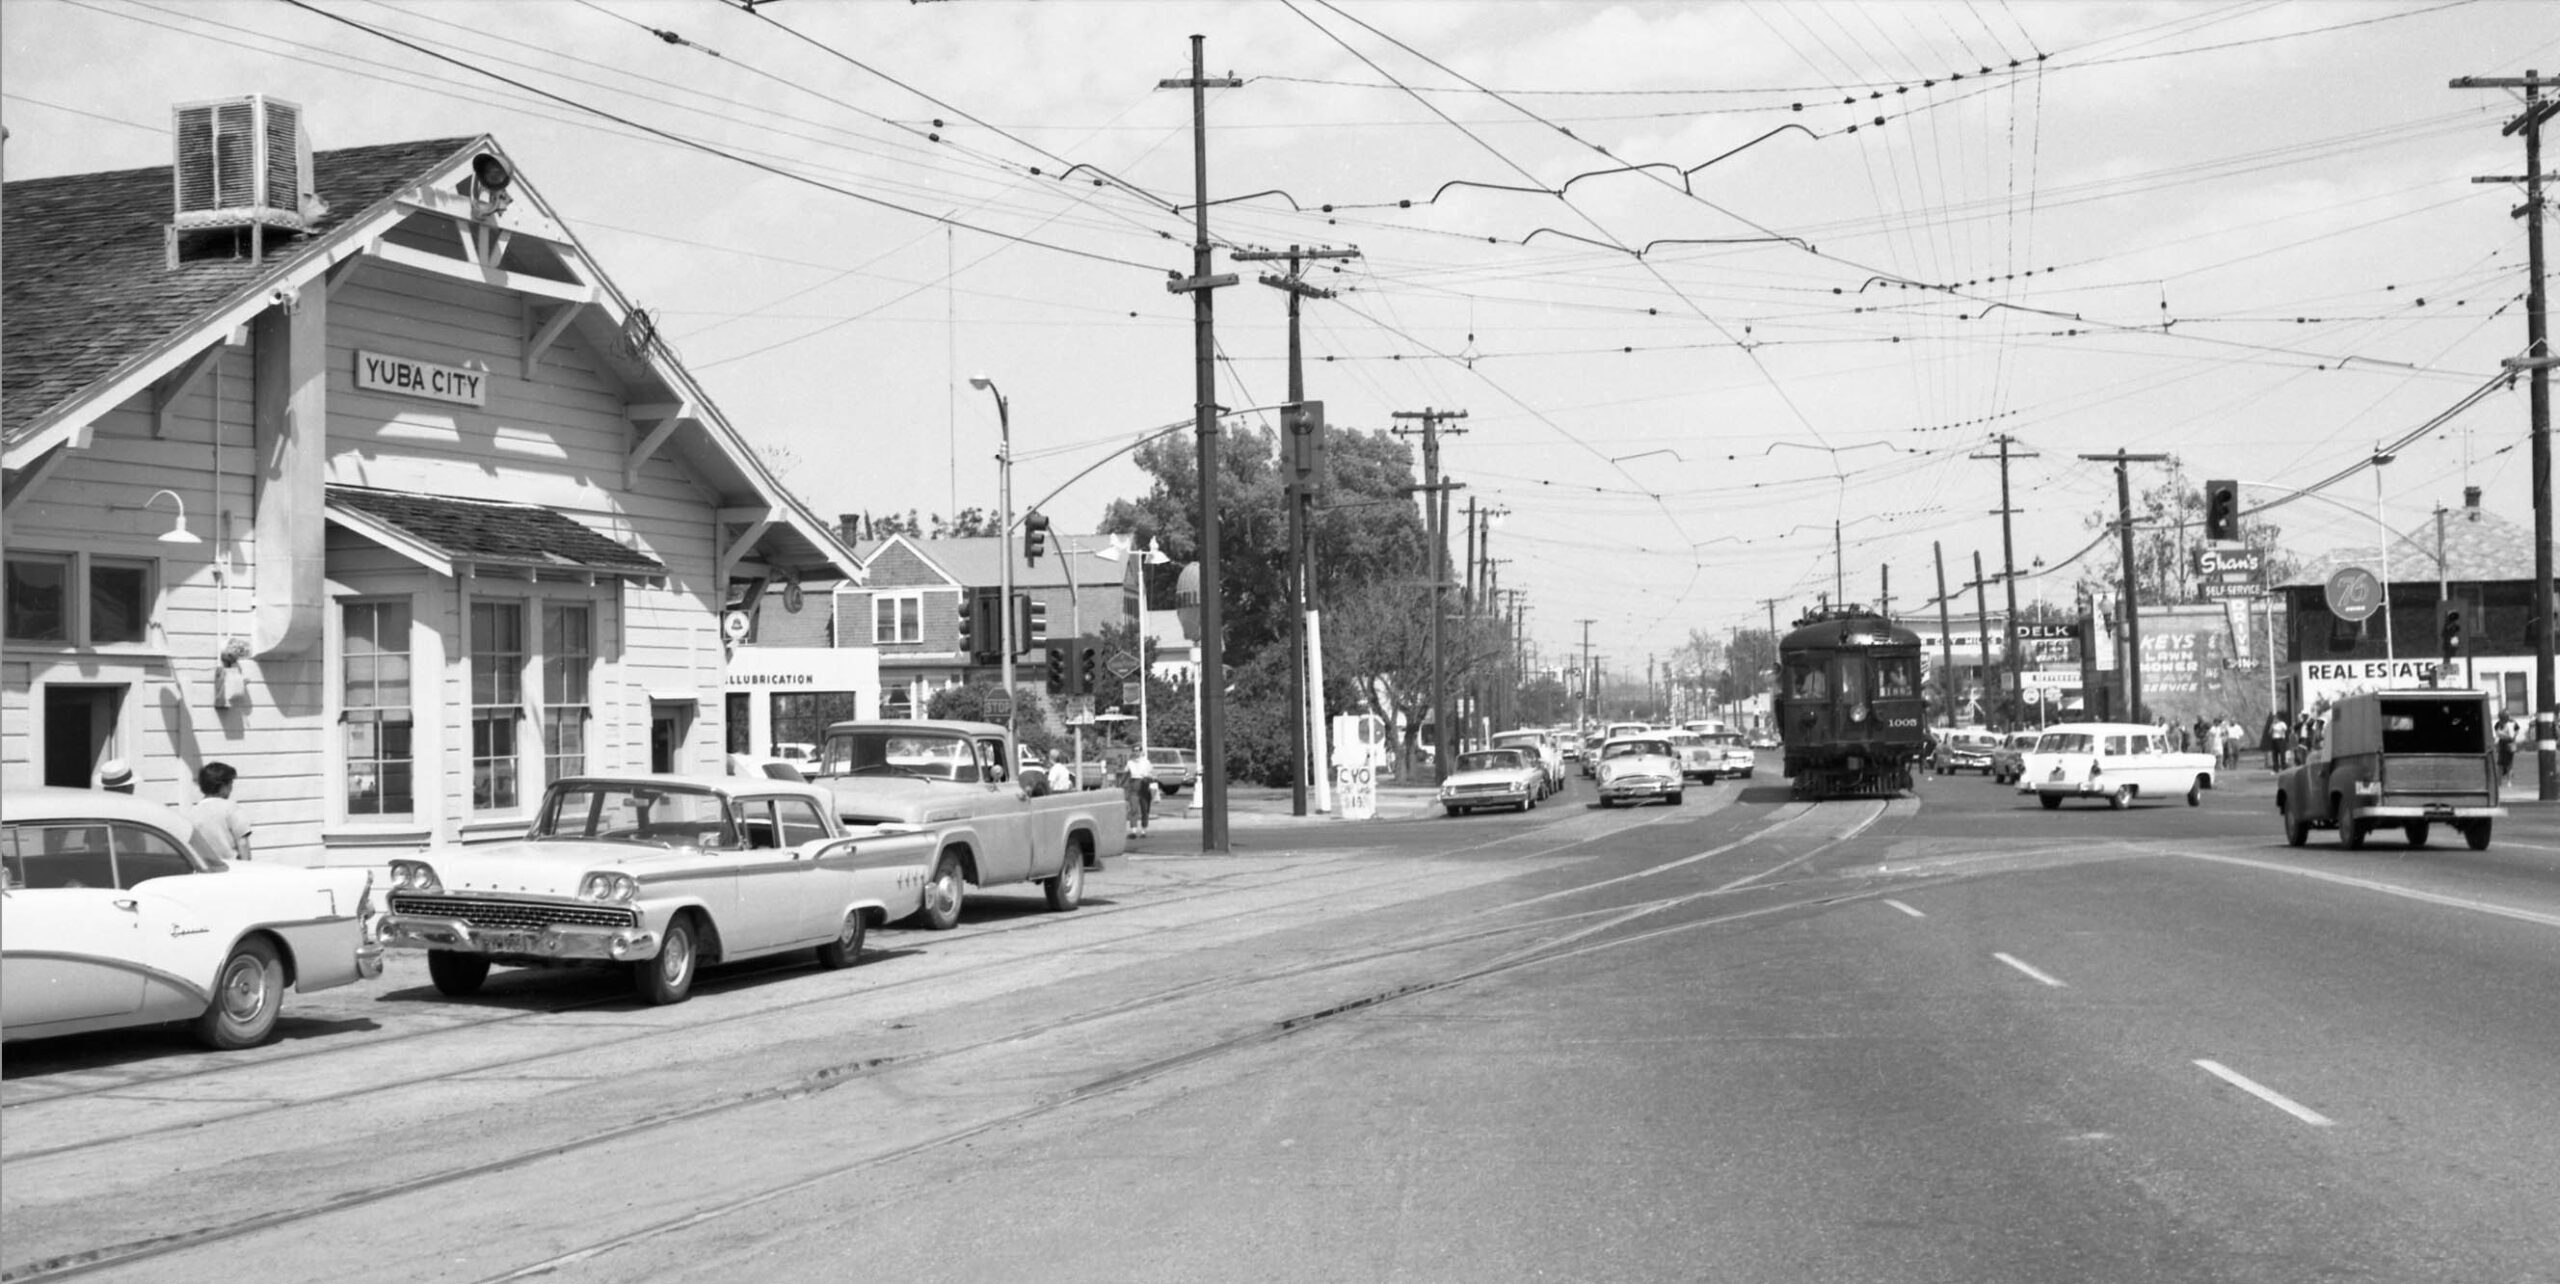
This last shot from the SN-SP crossing is a north view with SN 1005 from the BAERA-sponsored Apr. 14, 1962 excursion. The SP track alignment is unchanged from the previous image.
L303-45-Moreau Collection, Courtesy BAERA, Western Railway Museum Archives, (Image 9 of 32)
The SP was still running freights across the SN tracks when this south view of Birney 62 from the SP right-of-way was taken during the May 18-19, 1957 excursion. The SP had been running at least one passenger train a day through this crossing in the 1930s, but there is no evidence passenger trains survived the Berg connection. Henry Bender’s “Southern Pacific Lines Standard-Design Depots”, Signature Press, 2013, notes that 13 miles of the Woodland-Marysville line north of Knights Landing was abandoned in 1945.
L303-50-Ken Lass Collection, Courtesy BAERA, Western Railway Museum Archives, 161484sn, (Image 10 of 32)
Tony Perles image from June 17, 1962 documents SP ALCO S4 diesel switcher 1479 westbound with local freight crossing the SN tracks in this north view. Henry Bender in the aforementioned reference dates the end of freight service on the SP line to 1983, with abandonment of the track two years later.
L303-55-Anthony Perles Photo, Courtesy BAERA, Western Railway Museum Archives, 79170sp, (Image 11 of 32)
The flood of Dec. 1955 brought significant damage to the bi-city area, but also some very detailed oblique views such as this northeast view from Dec. 24, 1955. Although the SN-SP crossing is under water, the SP depot stands out with a boxcar tucked alongside the freight section of the structure. The freight portion had not been enclosed early in the century as shown in Bender’s book. Note Yuba City Mills to the right or south of the depot.
L303-60-Copyright California Department of Transportation, 4724-14, (Image 12 of 32)
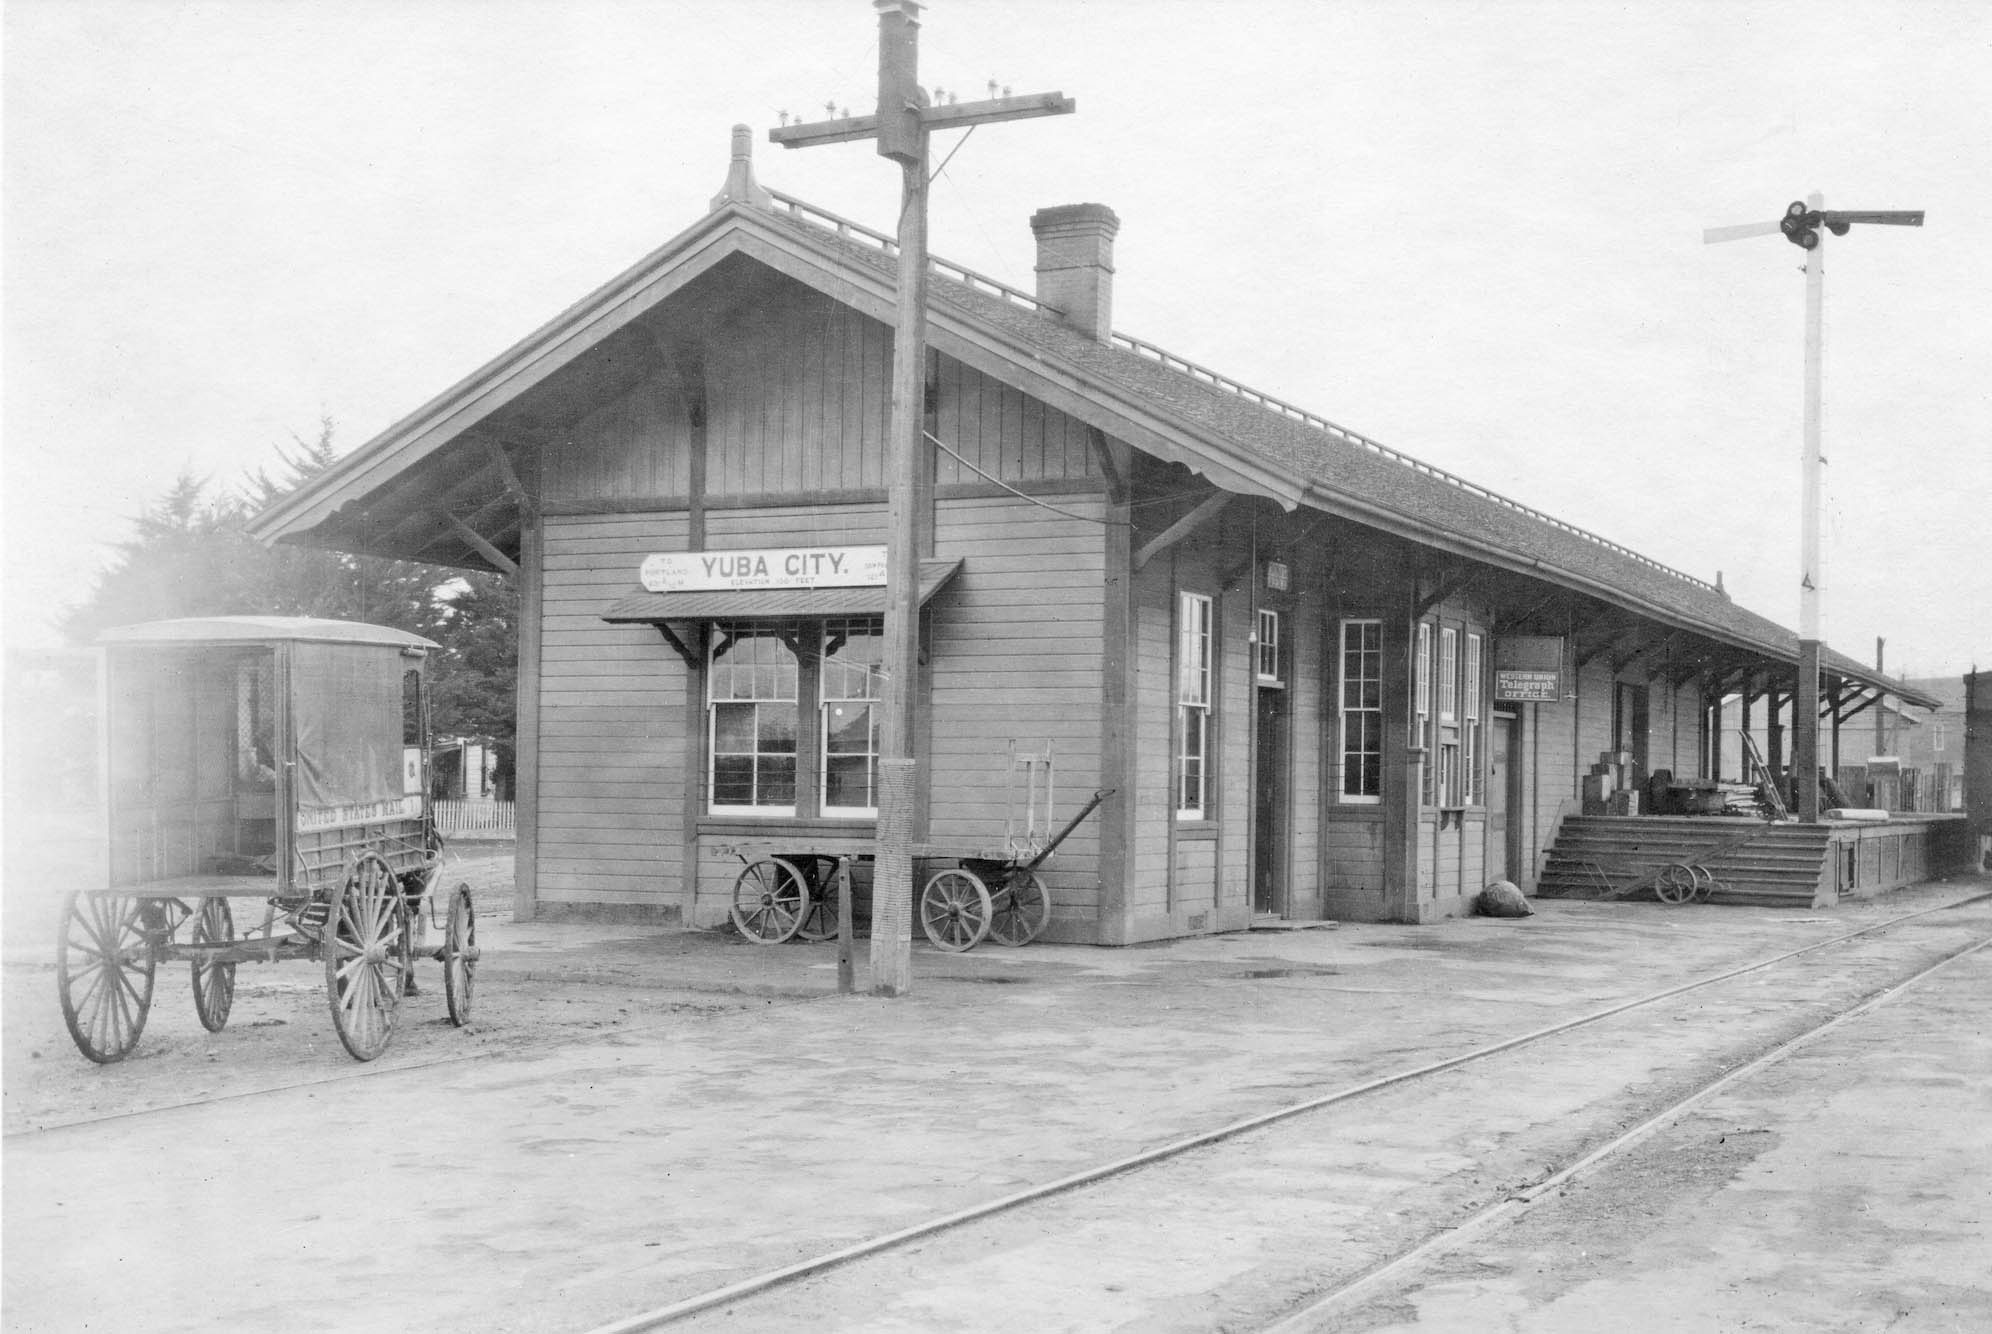
The SP depot is shown here in a southwest view ca. 1913. Henry Bender provides a very detailed and amusing account of the depot’s history from its creation in 1892, its closing in 1958 for train use, and its sale on eBay in 2005 after many years of being leased mostly as a real estate office, but also to one concern storing bat guano. Read the account of its sale by clicking here.
L303-65-SP Official Photo, Courtesy BAERA, Western Railway Museum Archives, 74909sp, (Image 13 of 32)
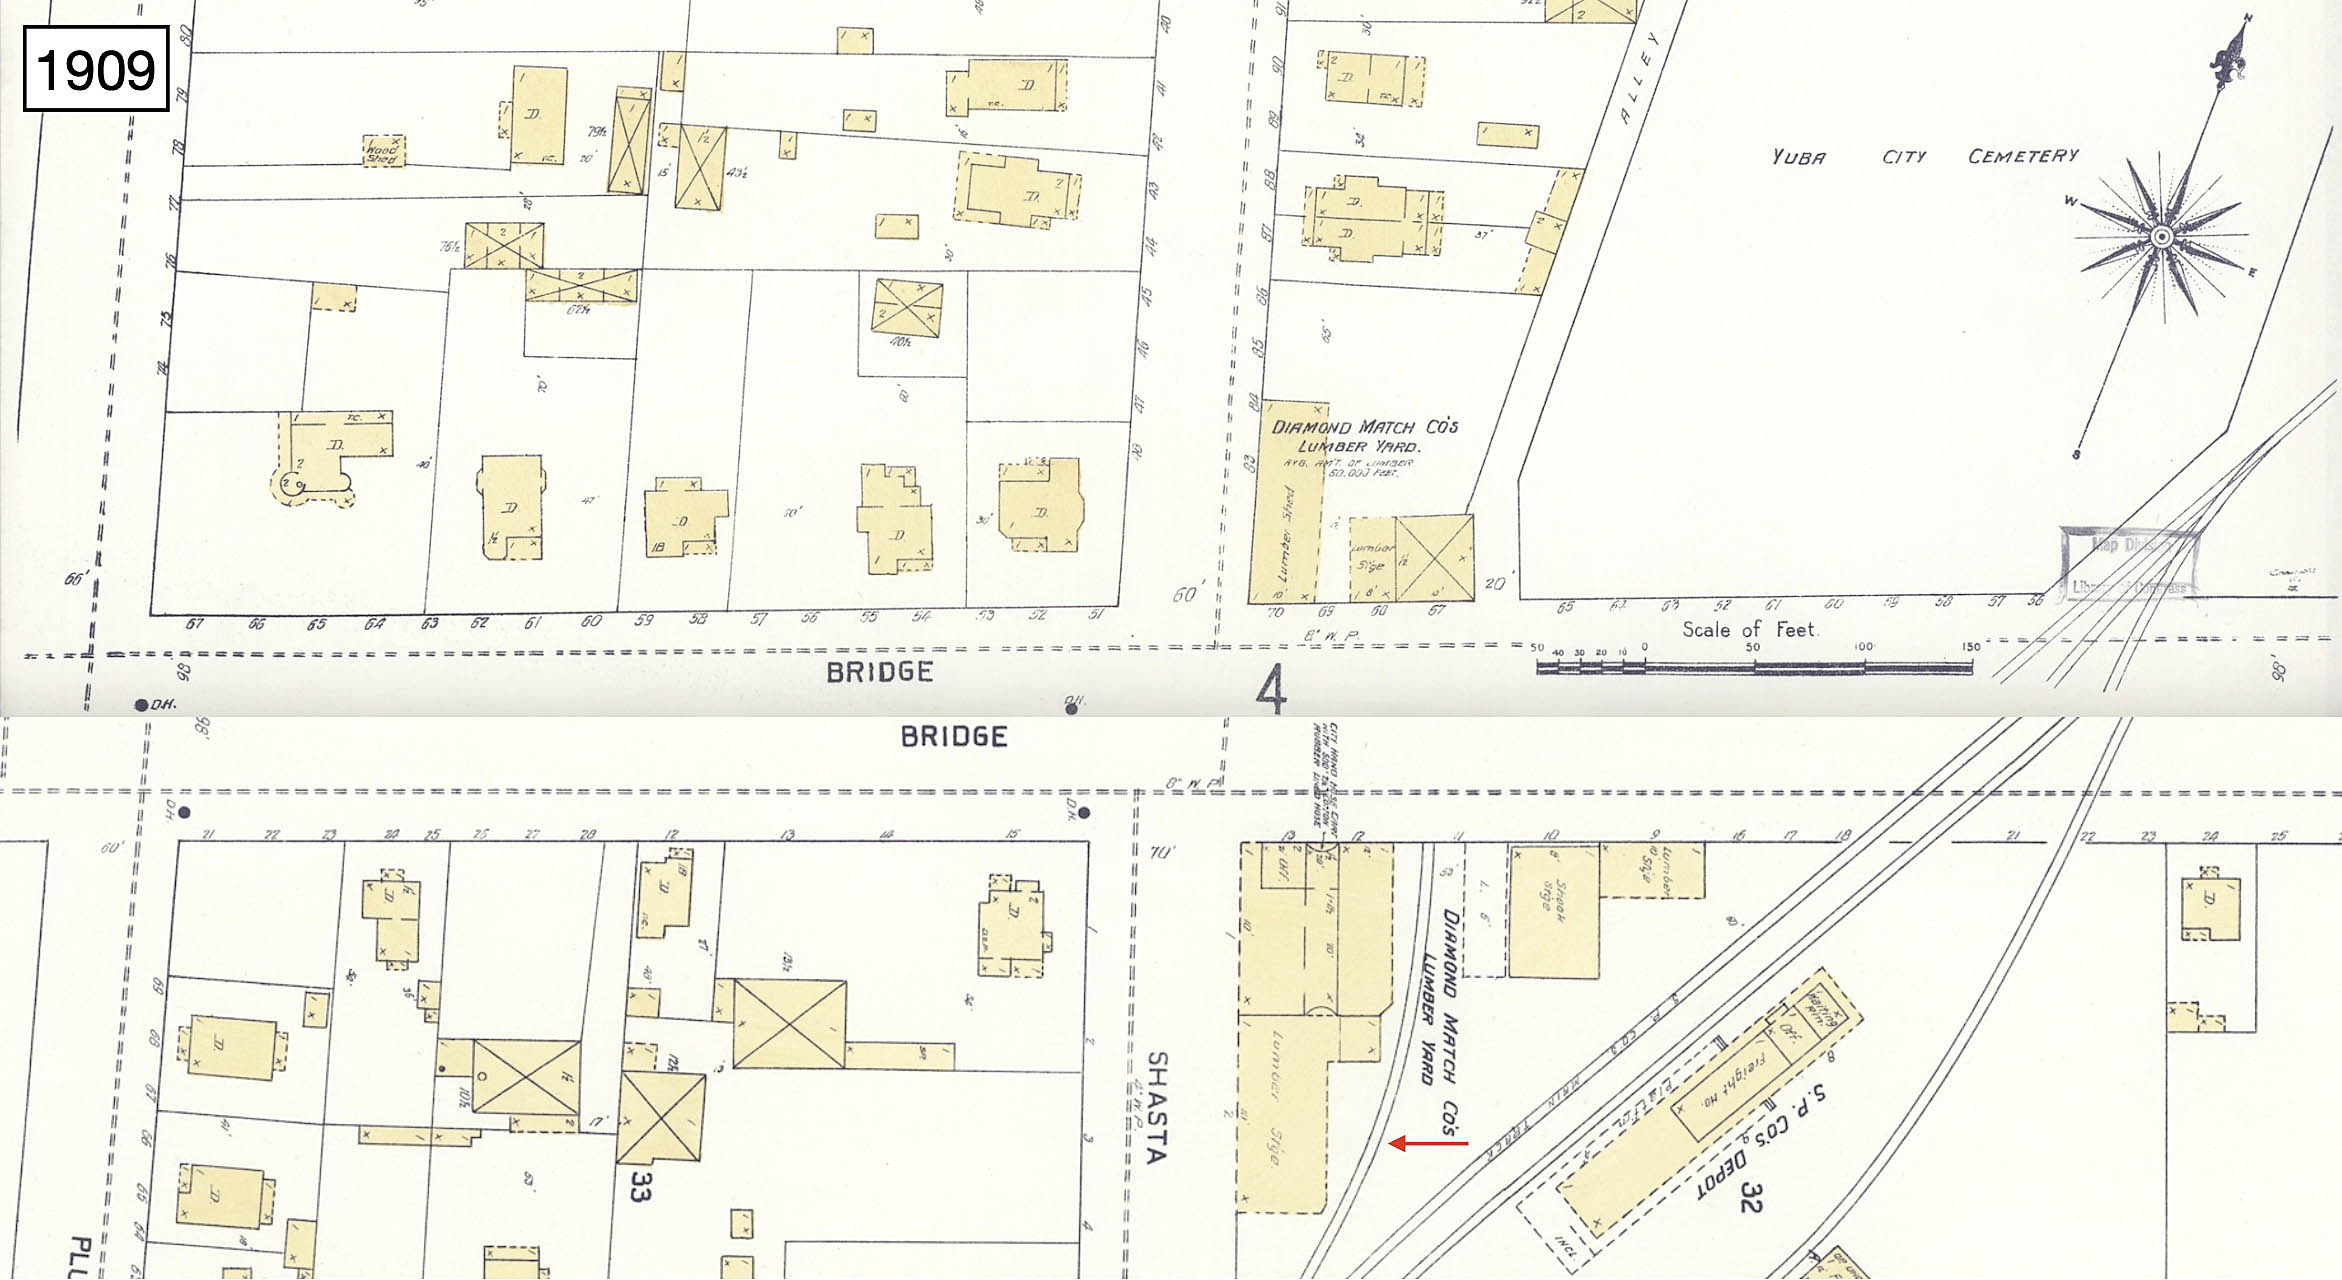
These two panels from the 1909 Sanborn maps provide a baseline for examining structures for a 20th century tour of Bridge St. The cemetery persists in 2023, and there is the just reviewed SP depot across from it. On both sides of the street on the east side of the Shasta St. intersection was Diamond Match Co., the south side yard receiving a spur from the SP, red arrow. All seven structures between Shasta St. and Plumas St. are marked “D” for dwelling. For reasons unknown, the map does not show Northern Electric tracks.
L303-70-Library of Congress, Geography and Map Division, Sanborn Maps Collection, Nov. 1909, (Image 14 of 32)
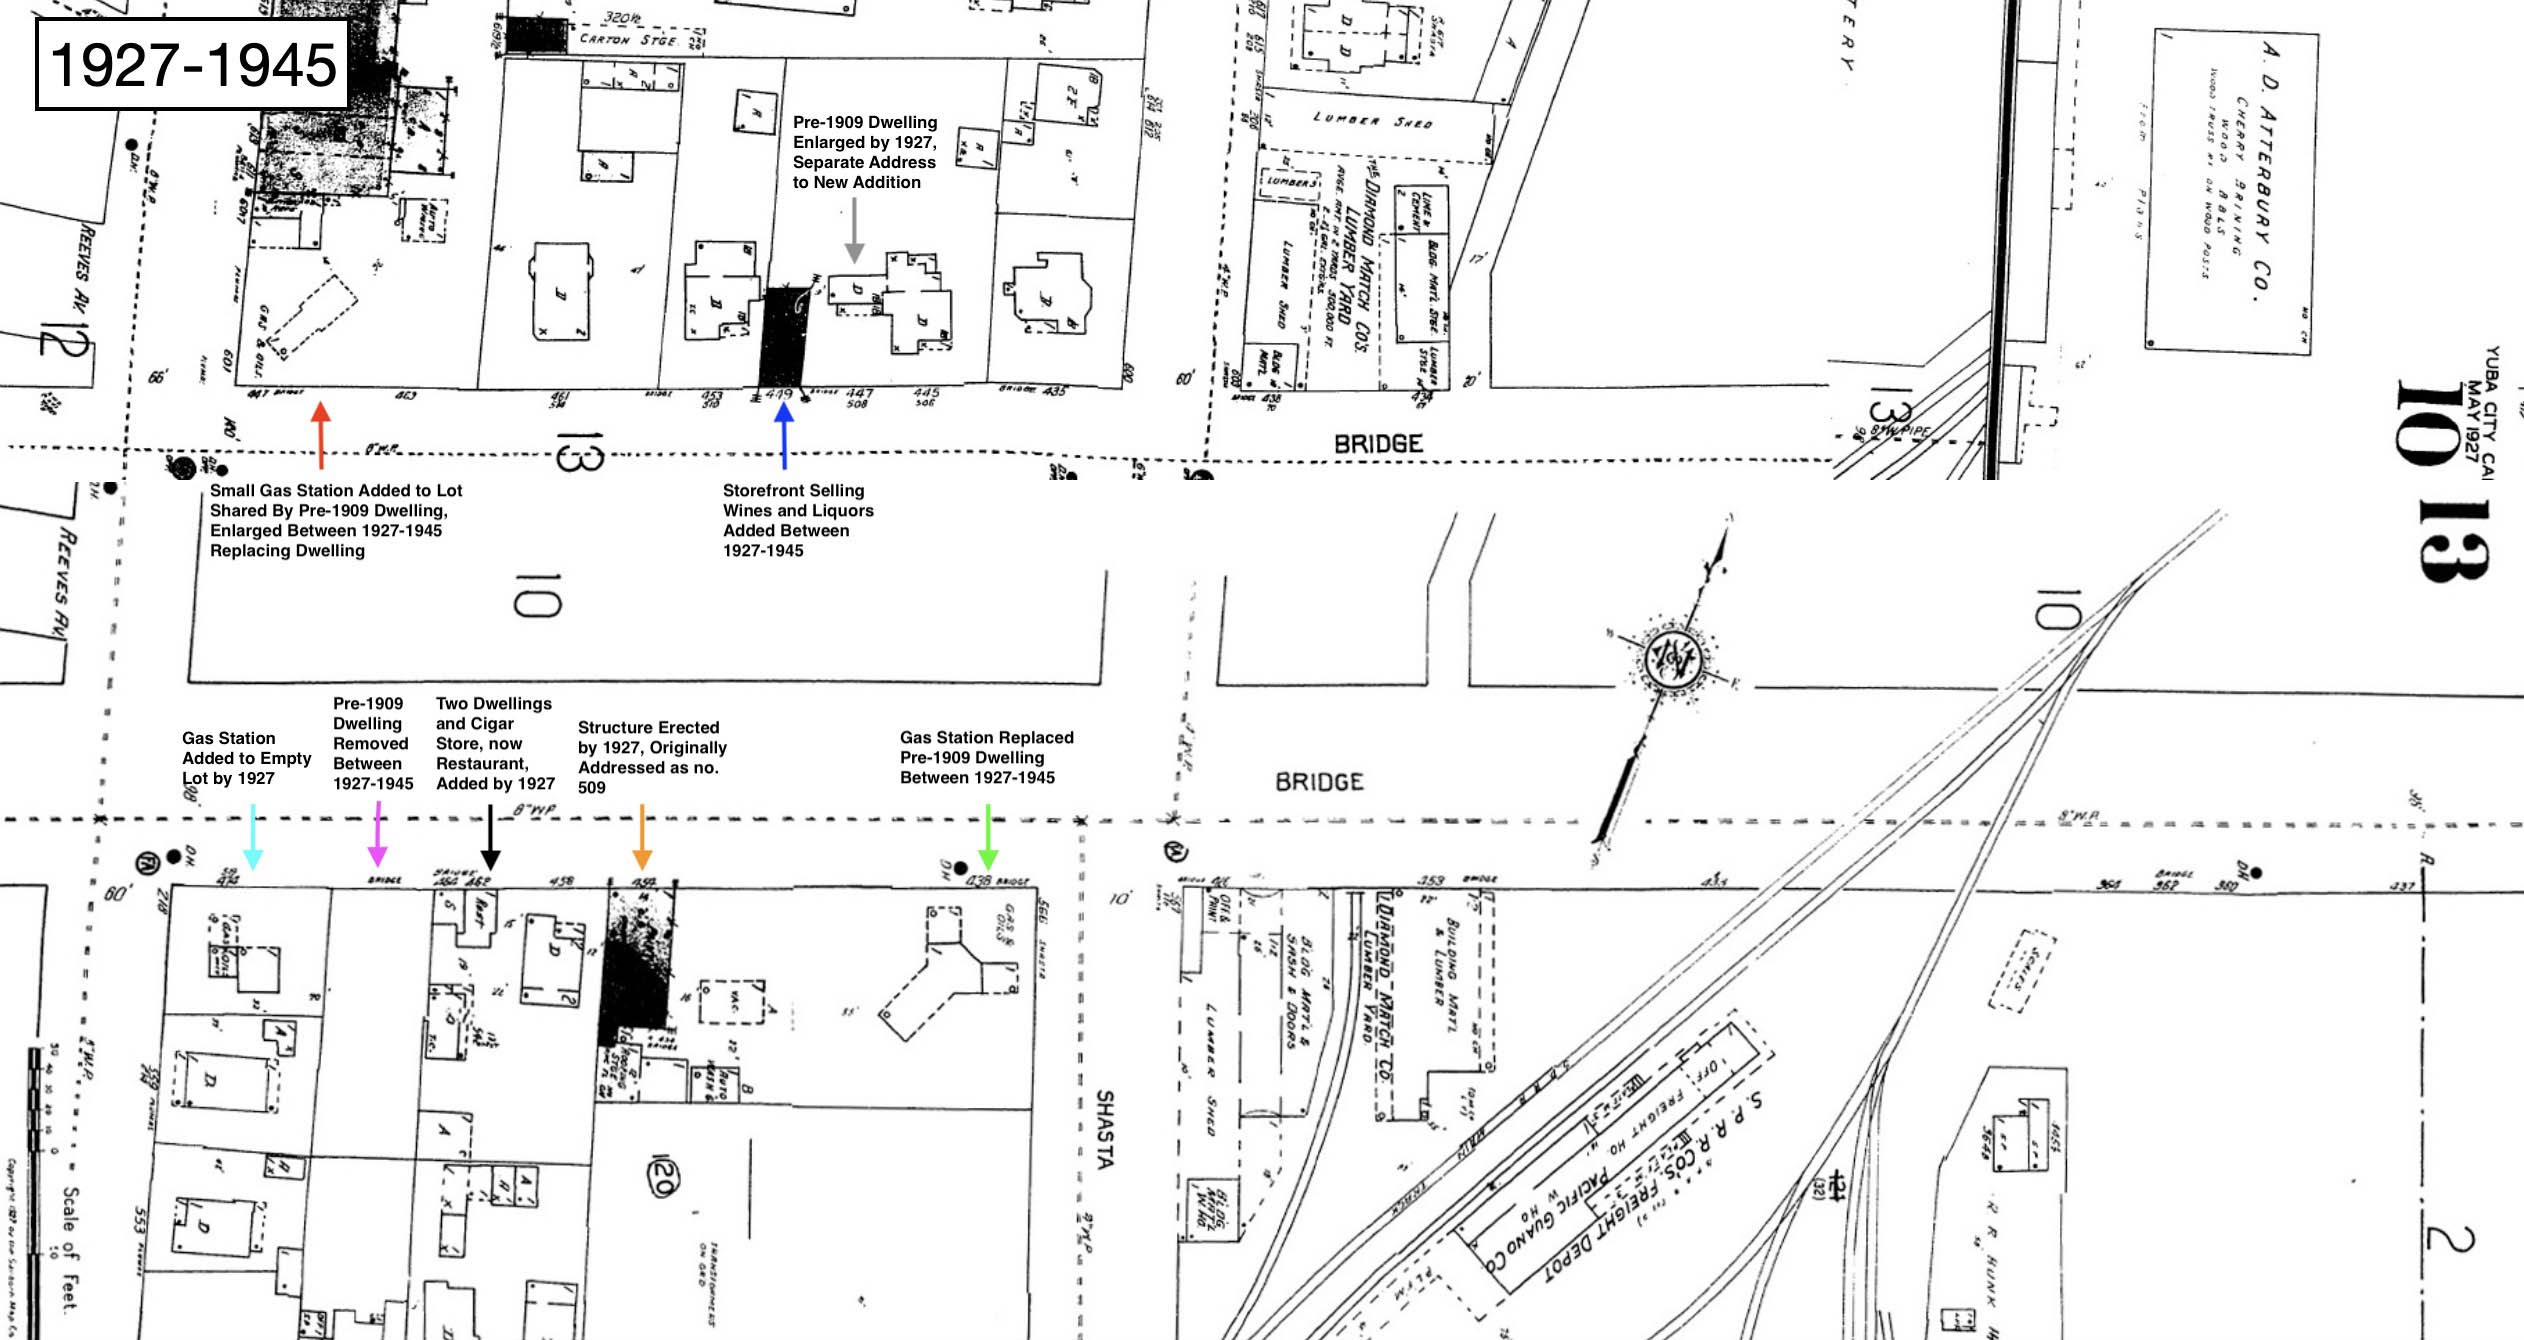
The two panels from the 1927-1945 Sanborn maps are shown here. Combining the information from the previous 1909 maps, as well as those from 1927 that are not shown, comments about the structures present by 1945 are summarized. All structures shown here will be seen in the upcoming panels, except for no. 462 Bridge St. that may be seen in the introductory panel, L303-05, as “Pepp”. Appreciation to Drisel Perez and the Sutter County Museum for the Sanborn maps.
L303-73-Sanborn Map Co., Courtesy Sutter County Museum, (Image 15 of 32)
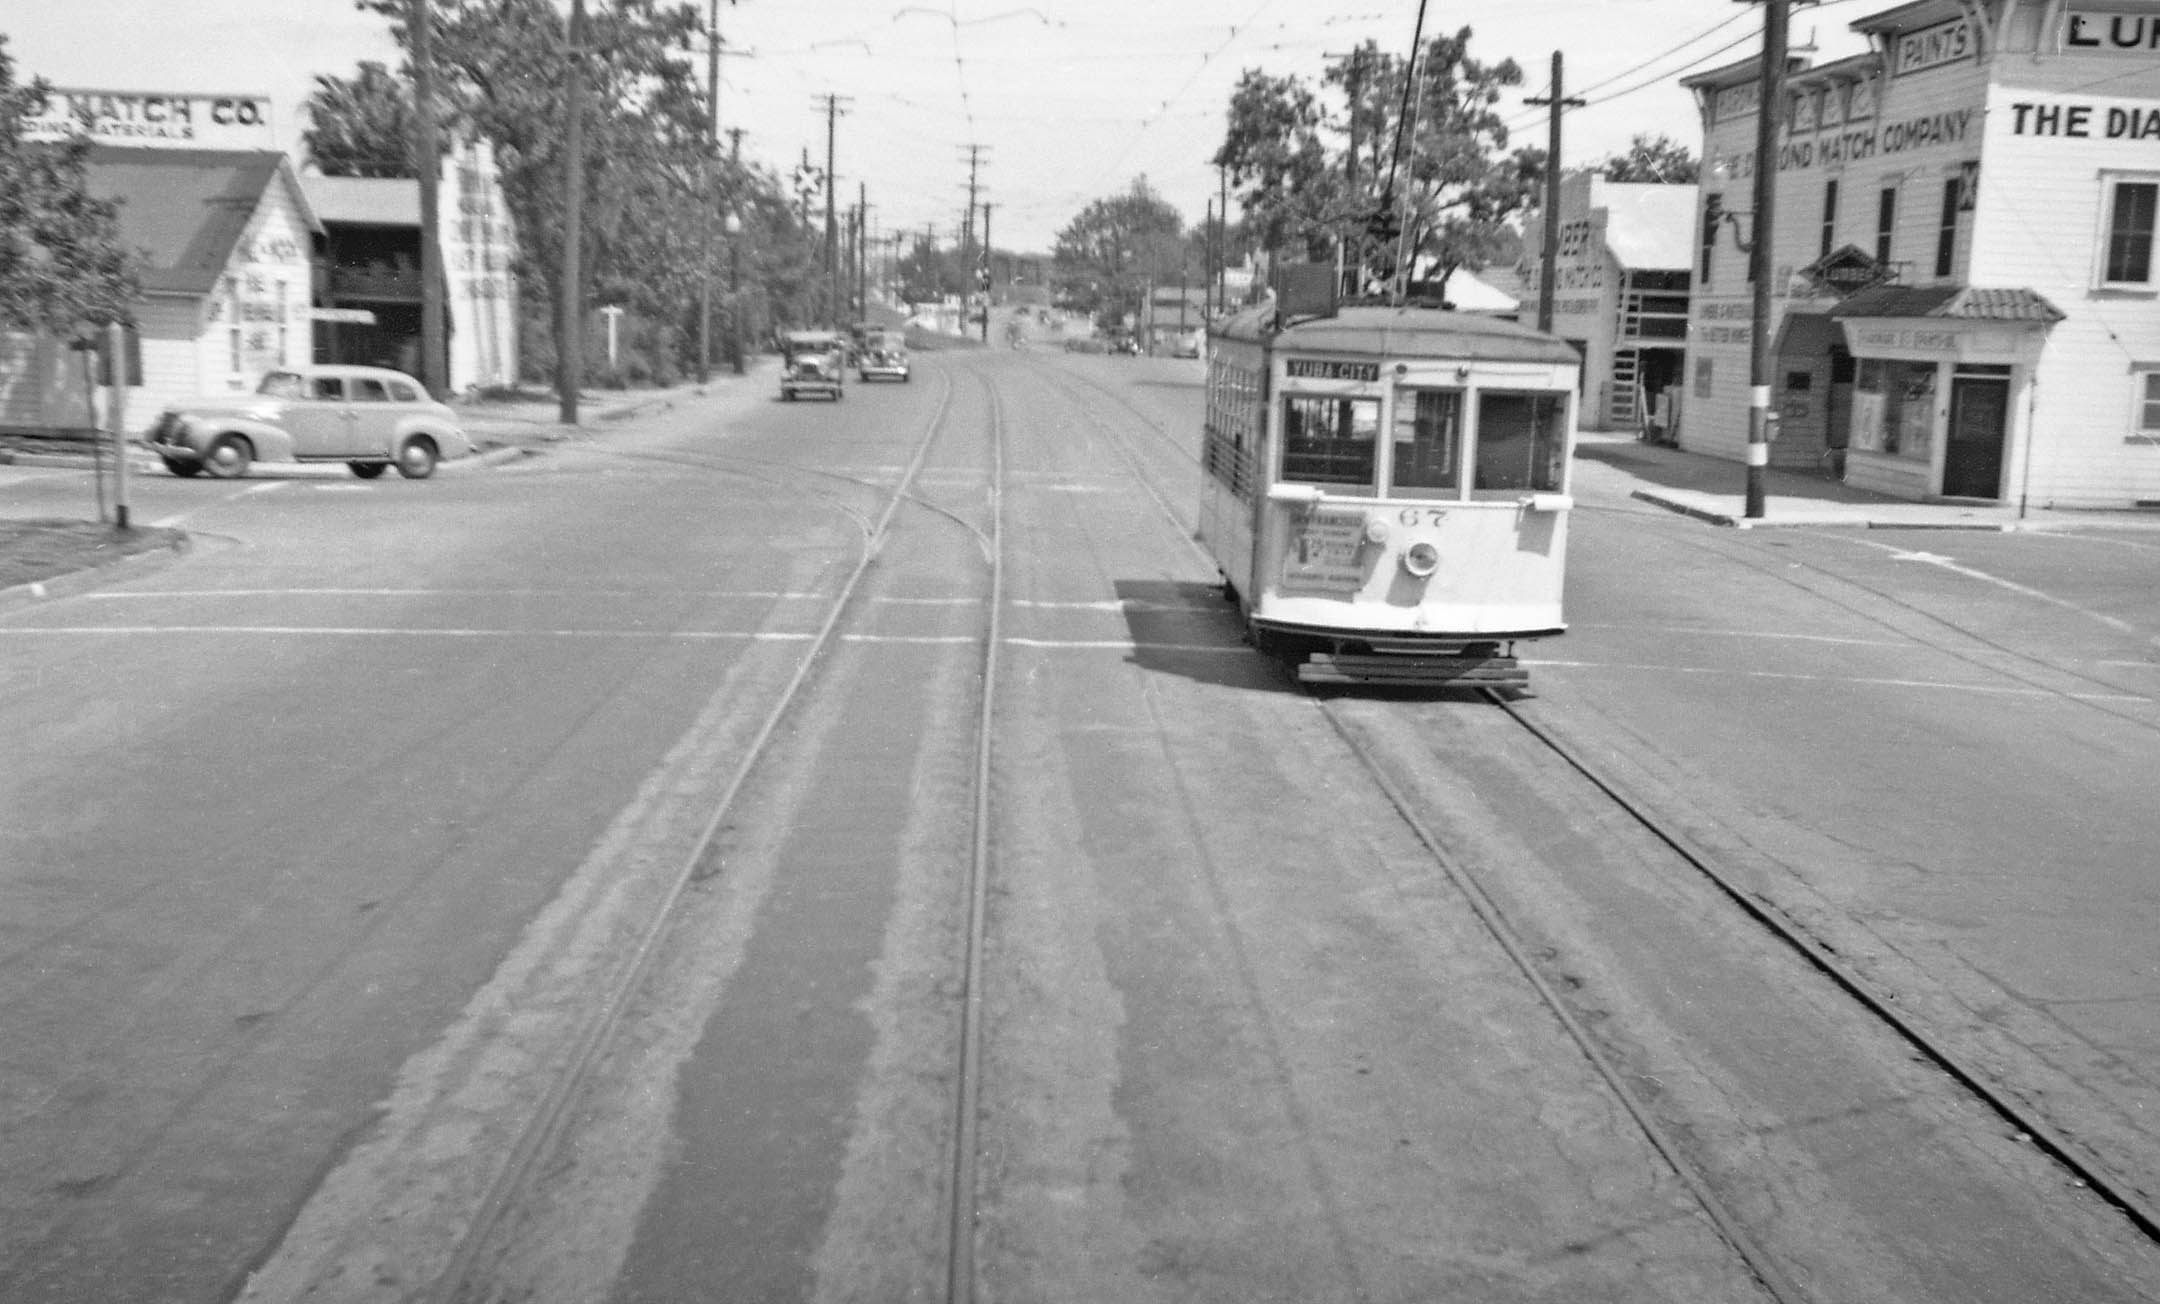
Mapping Bridge St. using dated images begins with this northeast view of Birney 67 just west of the Shasta St. intersection on Apr. 28, 1940. The double-track coming off the berm continued past the cemetery on the left or north, with Diamond Match Co., on both sides of the street. Note the SN spur to the north side yard, more on that in a later presentation. The shell of the building on the west side or left, 429 Bridge St., is still in use by Thrifty Rooter Sewer & Drain in 2023.
L303-75-R. Olson Photo, Courtesy BAERA, Western Railway Museum Archives, 55713sn, (Image 16 of 32)
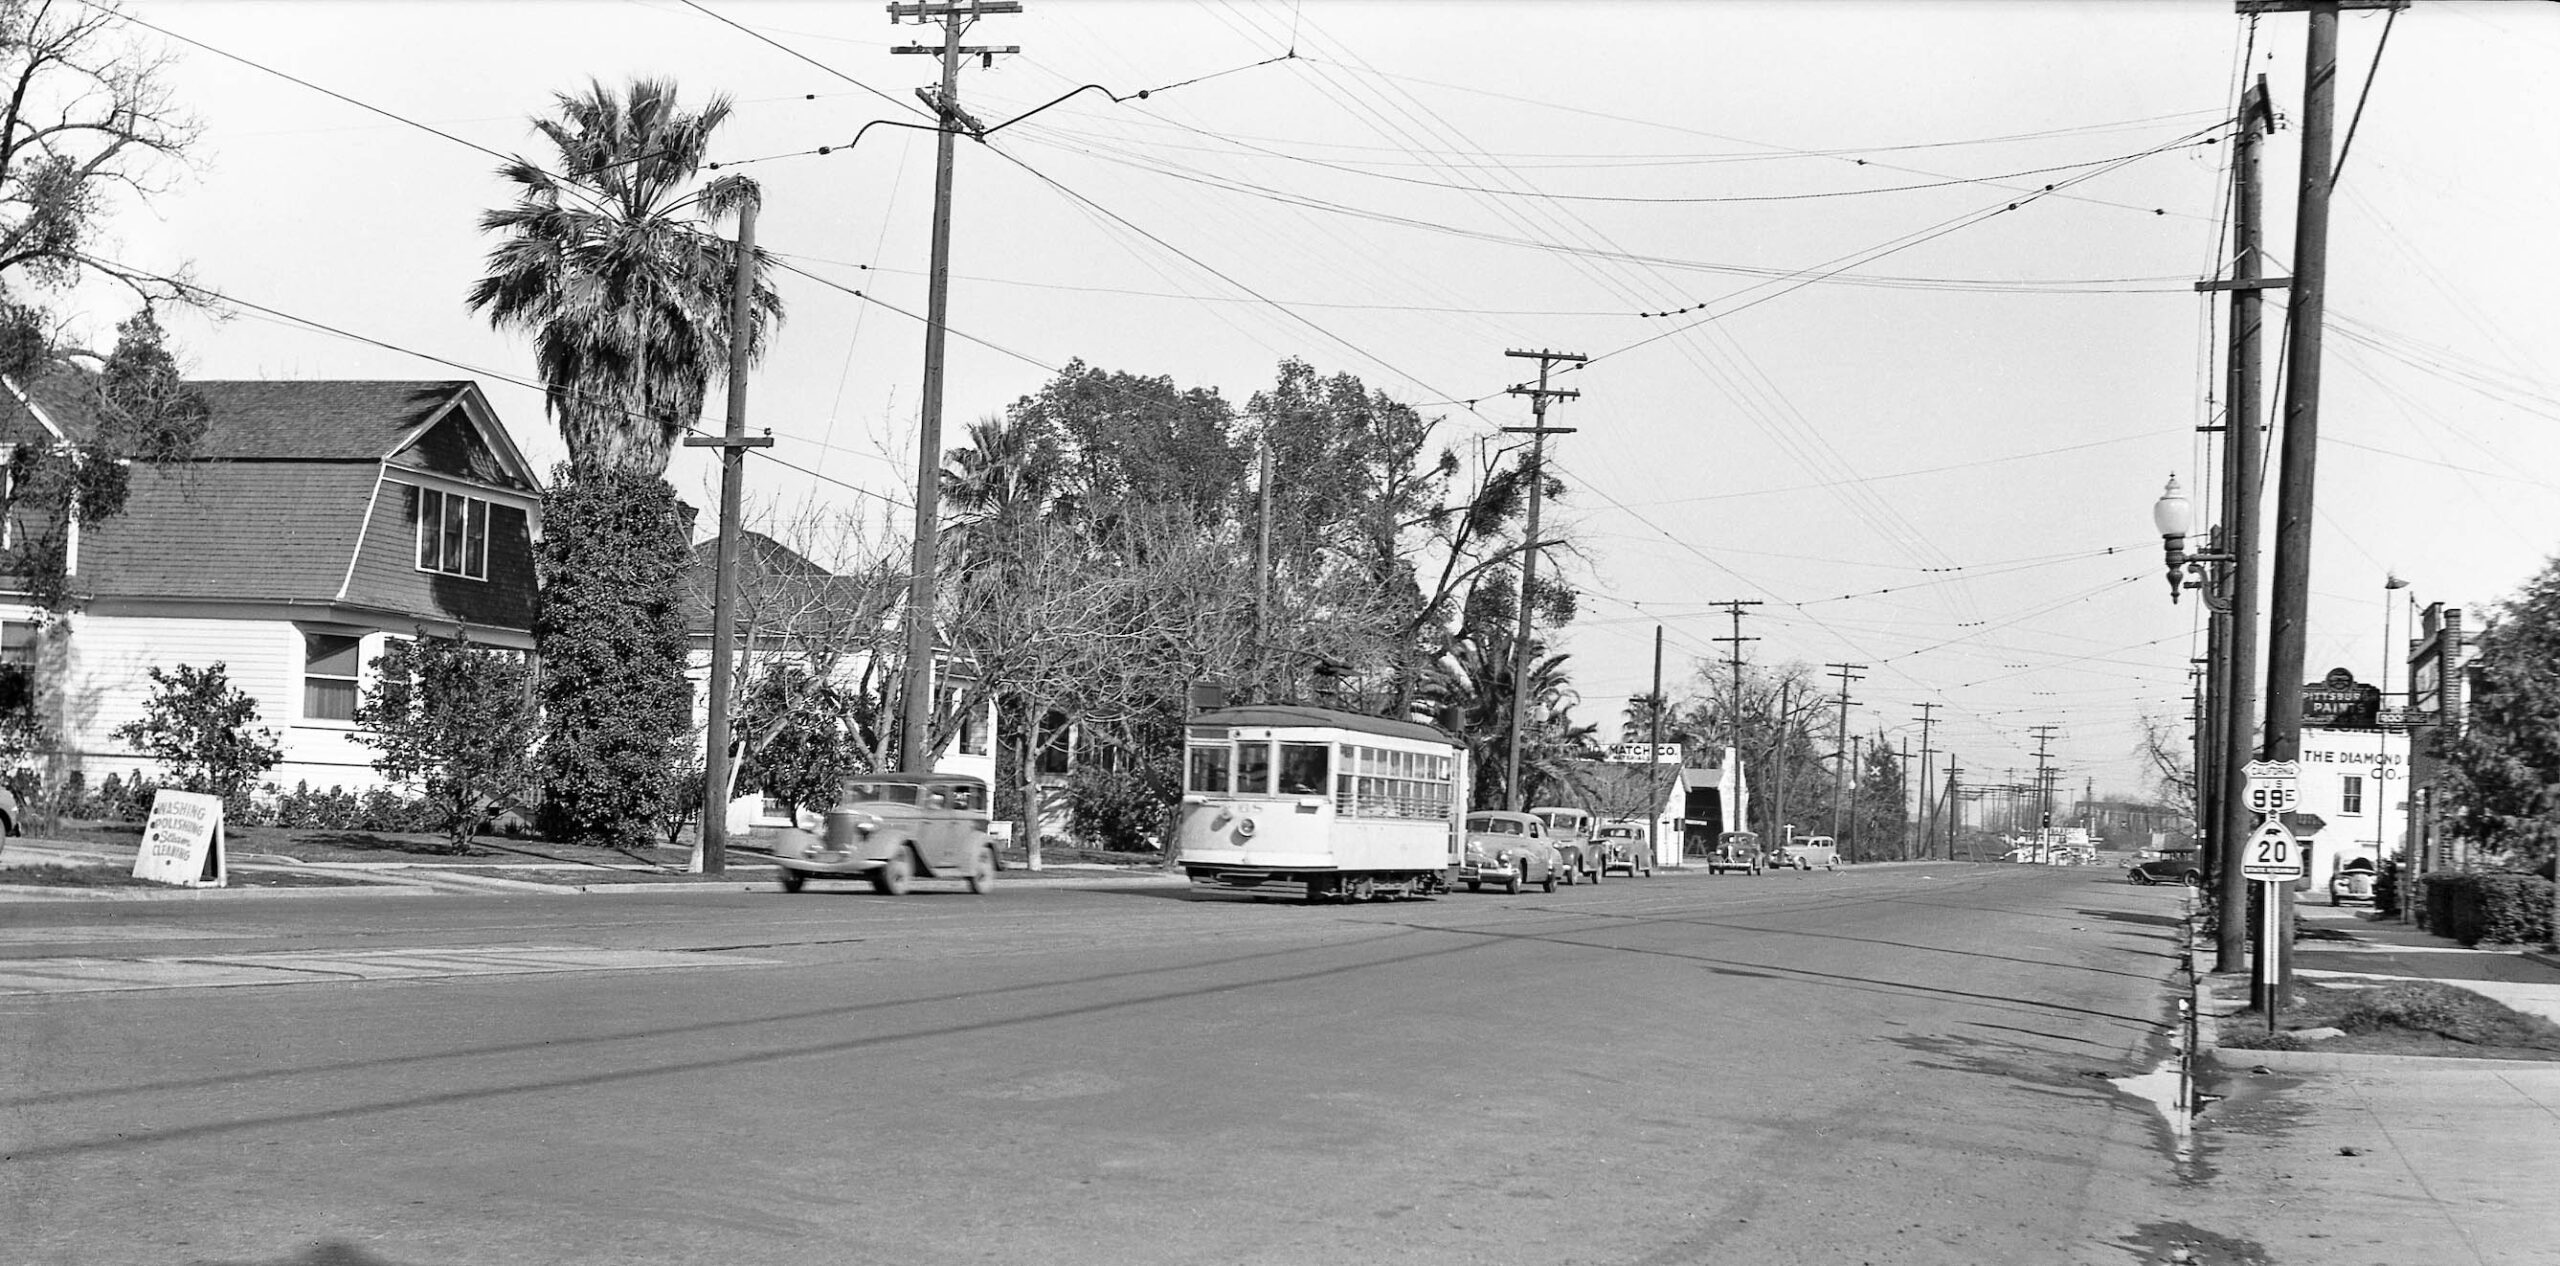
Louis Bradas, Jr’s northeast view of Birney 68 during the last day of streetcar operation, Feb. 15, 1942, confirms the residential north side of Bridge St. between Shasta St. and Plumas St. The one structure seen on the south side sporting a Pittsburgh Paints sign was seen as Tuttle Roofing in the introductory panel L303-05, and should look familiar in 2023 as 454 Bridge St., with occupant UBEO Business Services.
L303-80-Louis Bradas, Jr. Photo, Courtesy BAERA, Western Railway Museum Archives, 69139sn, (Image 17 of 32)
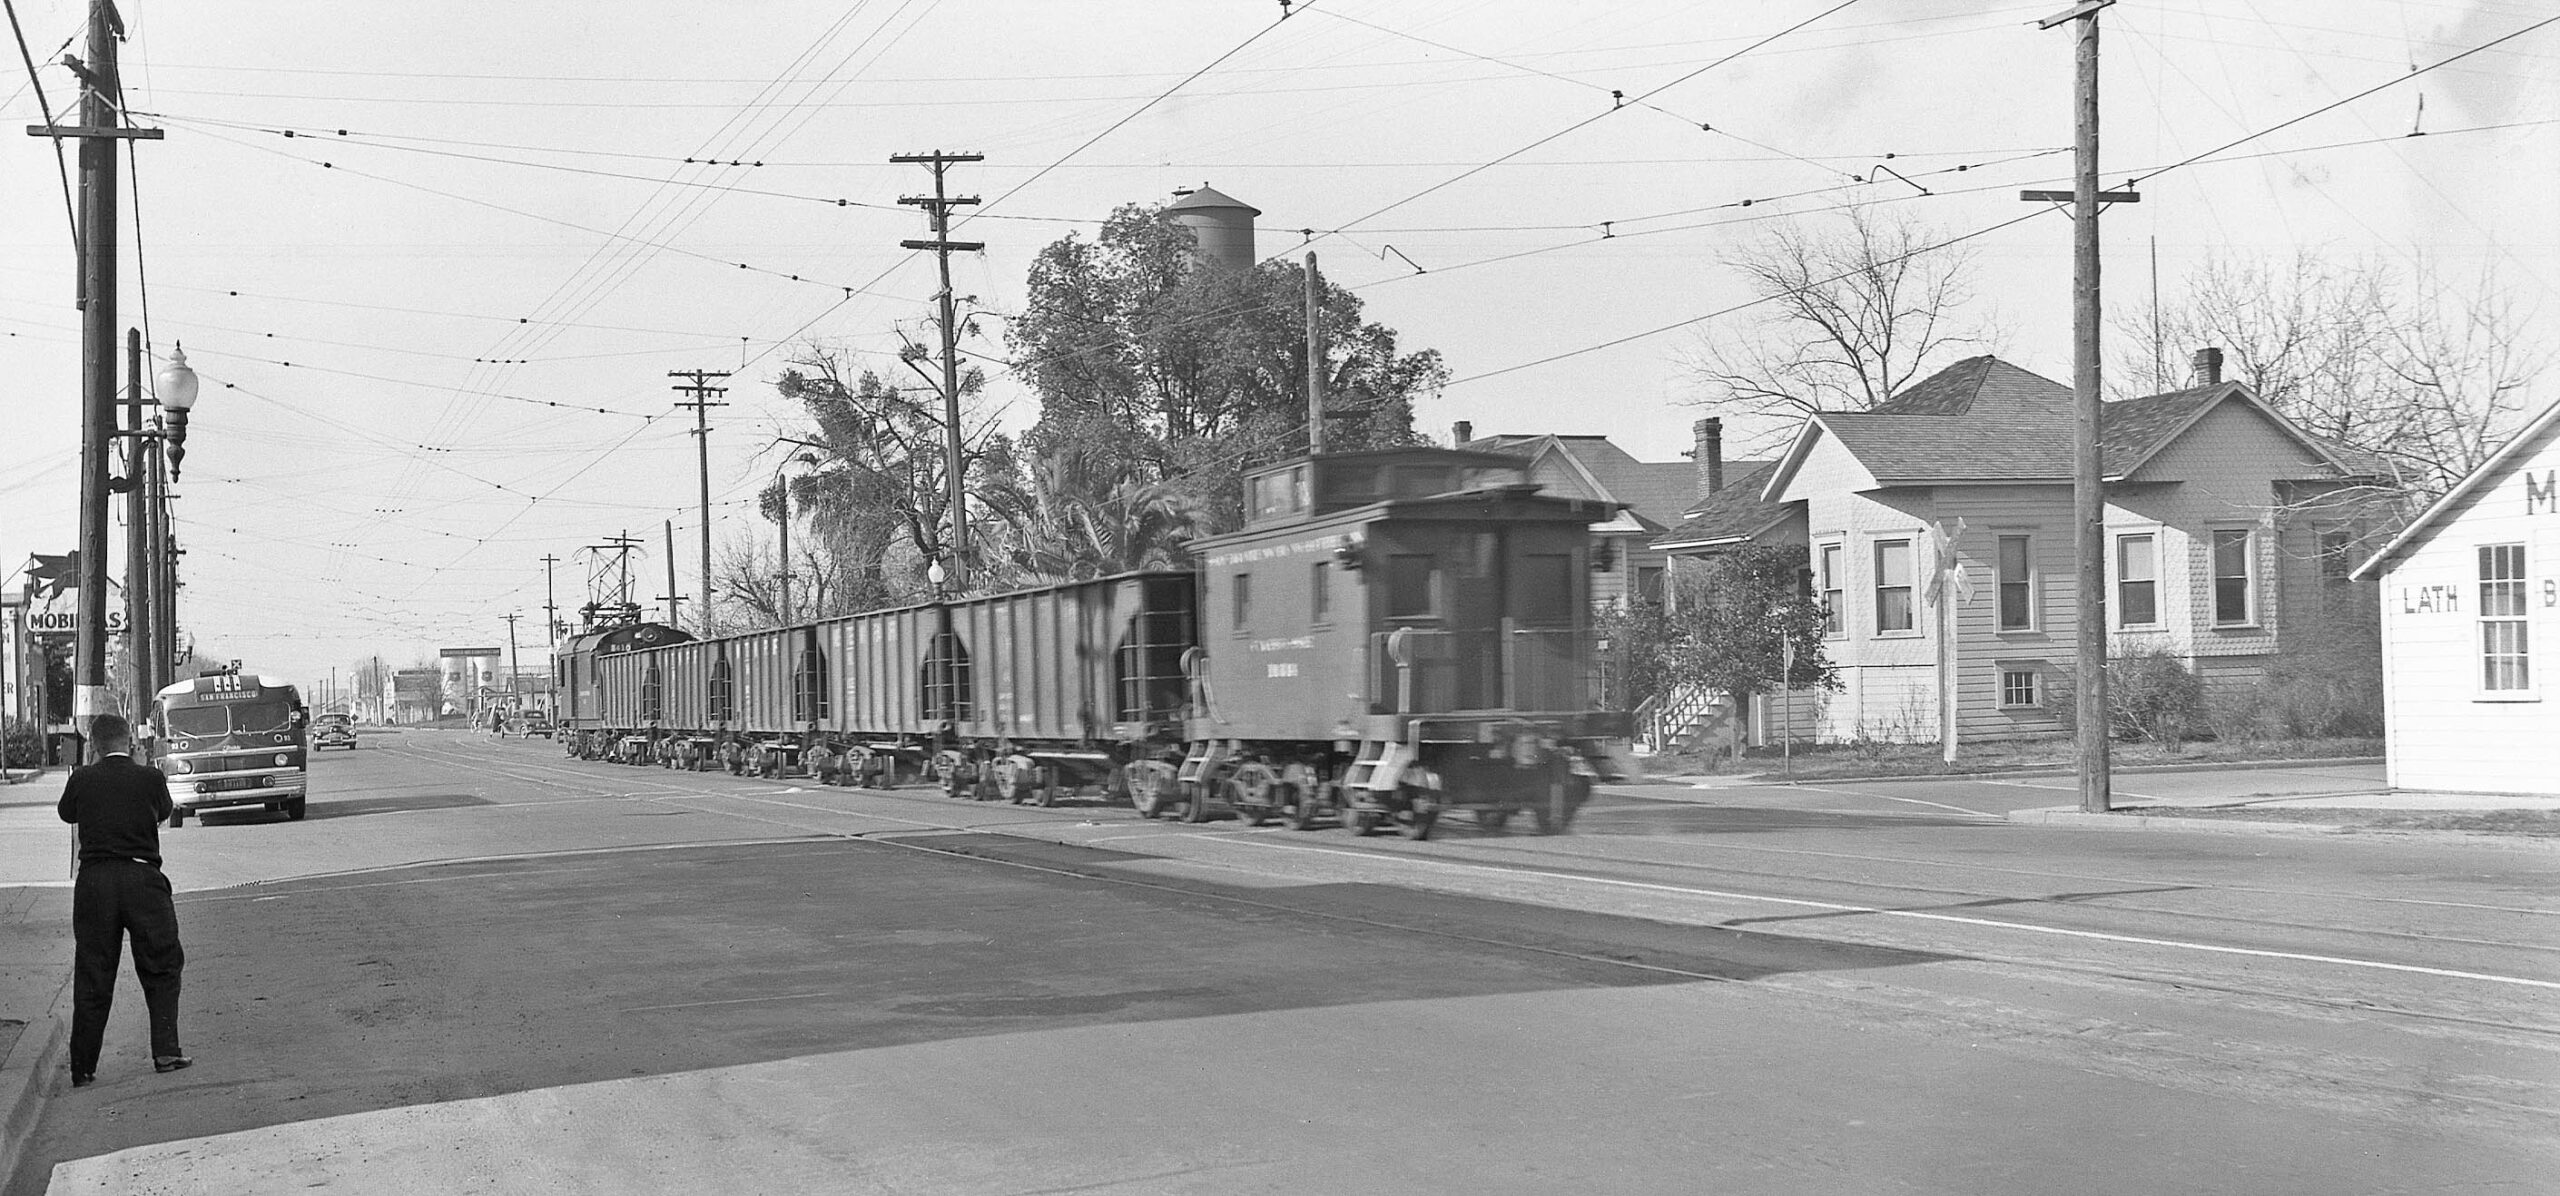
Bradas also caught the tail end of SN 410 with hoppers while documenting his last streetcar rides. This southwest view provides more architectural features to the house on the northwest corner with Shasta St. across from Diamond Match, the Mobil gas station on the south side, and the first look at the water tower on Plumas St. built around 1909, and is currently undergoing renovation in 2023. Thank you to Yuba City’s Doug Libby for providing the date.
L303-85-Louis Bradas, Jr. Photo, Courtesy BAERA, Western Railway Museum Archives, 68859sn, (Image 18 of 32)
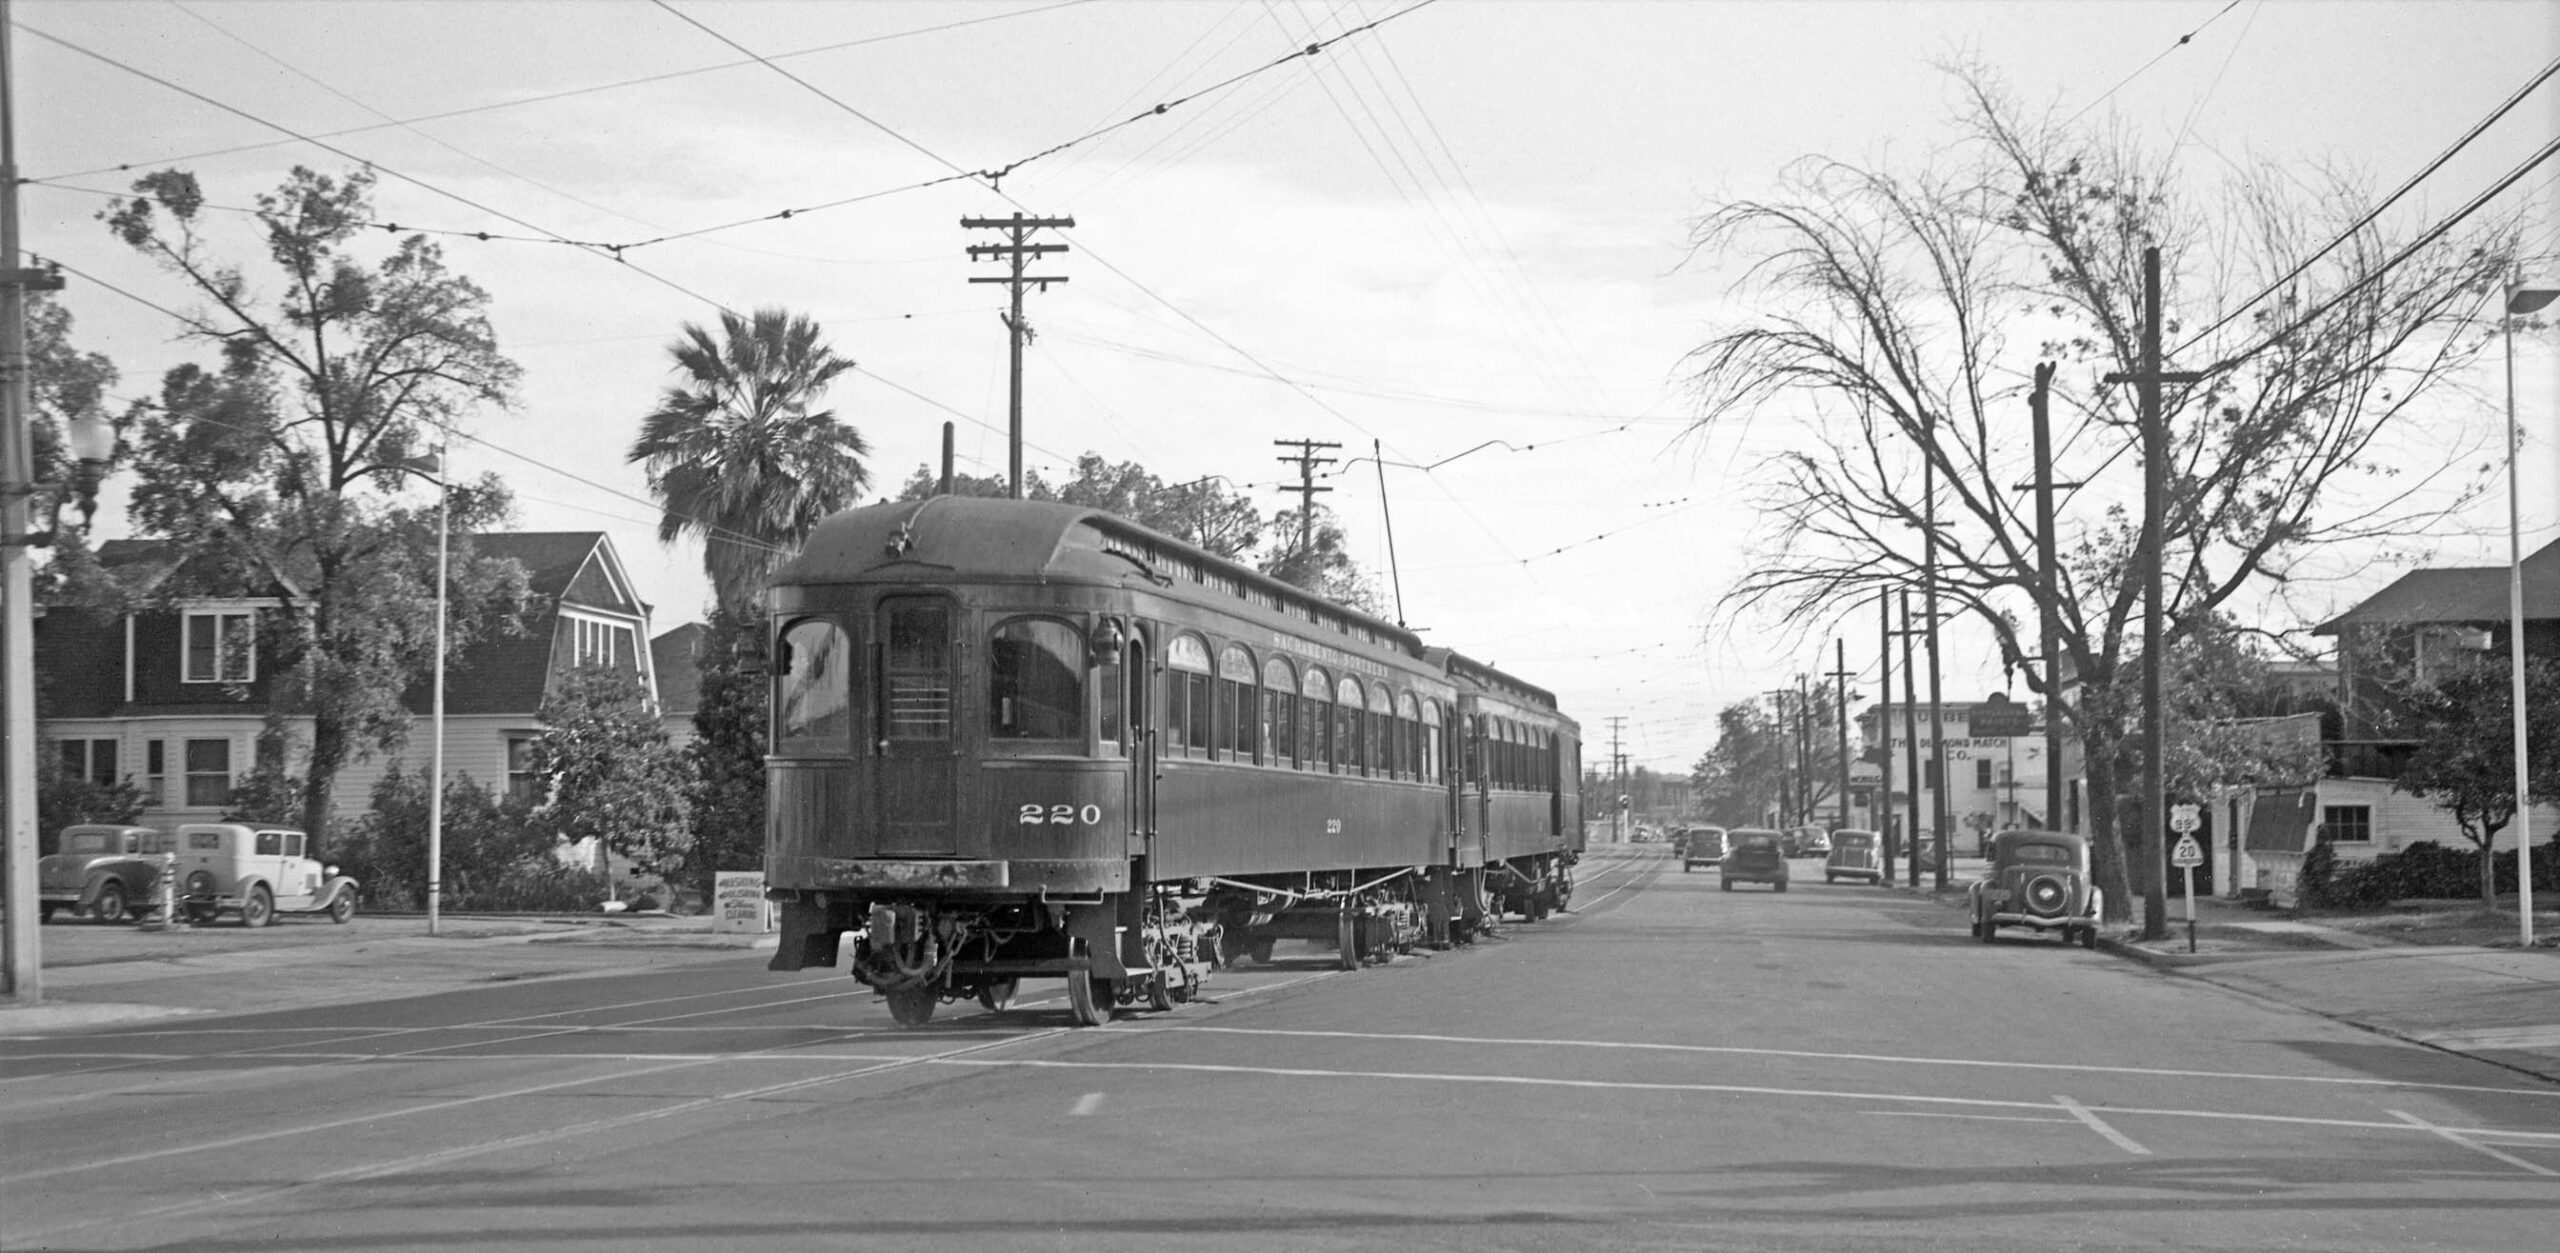
Vernon Sappers northeast view just short of Plumas St. of train no. 2 with SN 220 on the rear heading for Marysville in Sept. 1940 shows that at least one residence remained on the south side of Bridge St., right, and provides more architectural details for the most westerly house on the north side, left.
L303-90-Vernon Sappers Photo, Courtesy BAERA, Western Railway Museum Archives, 125308sn, (Image 19 of 32)
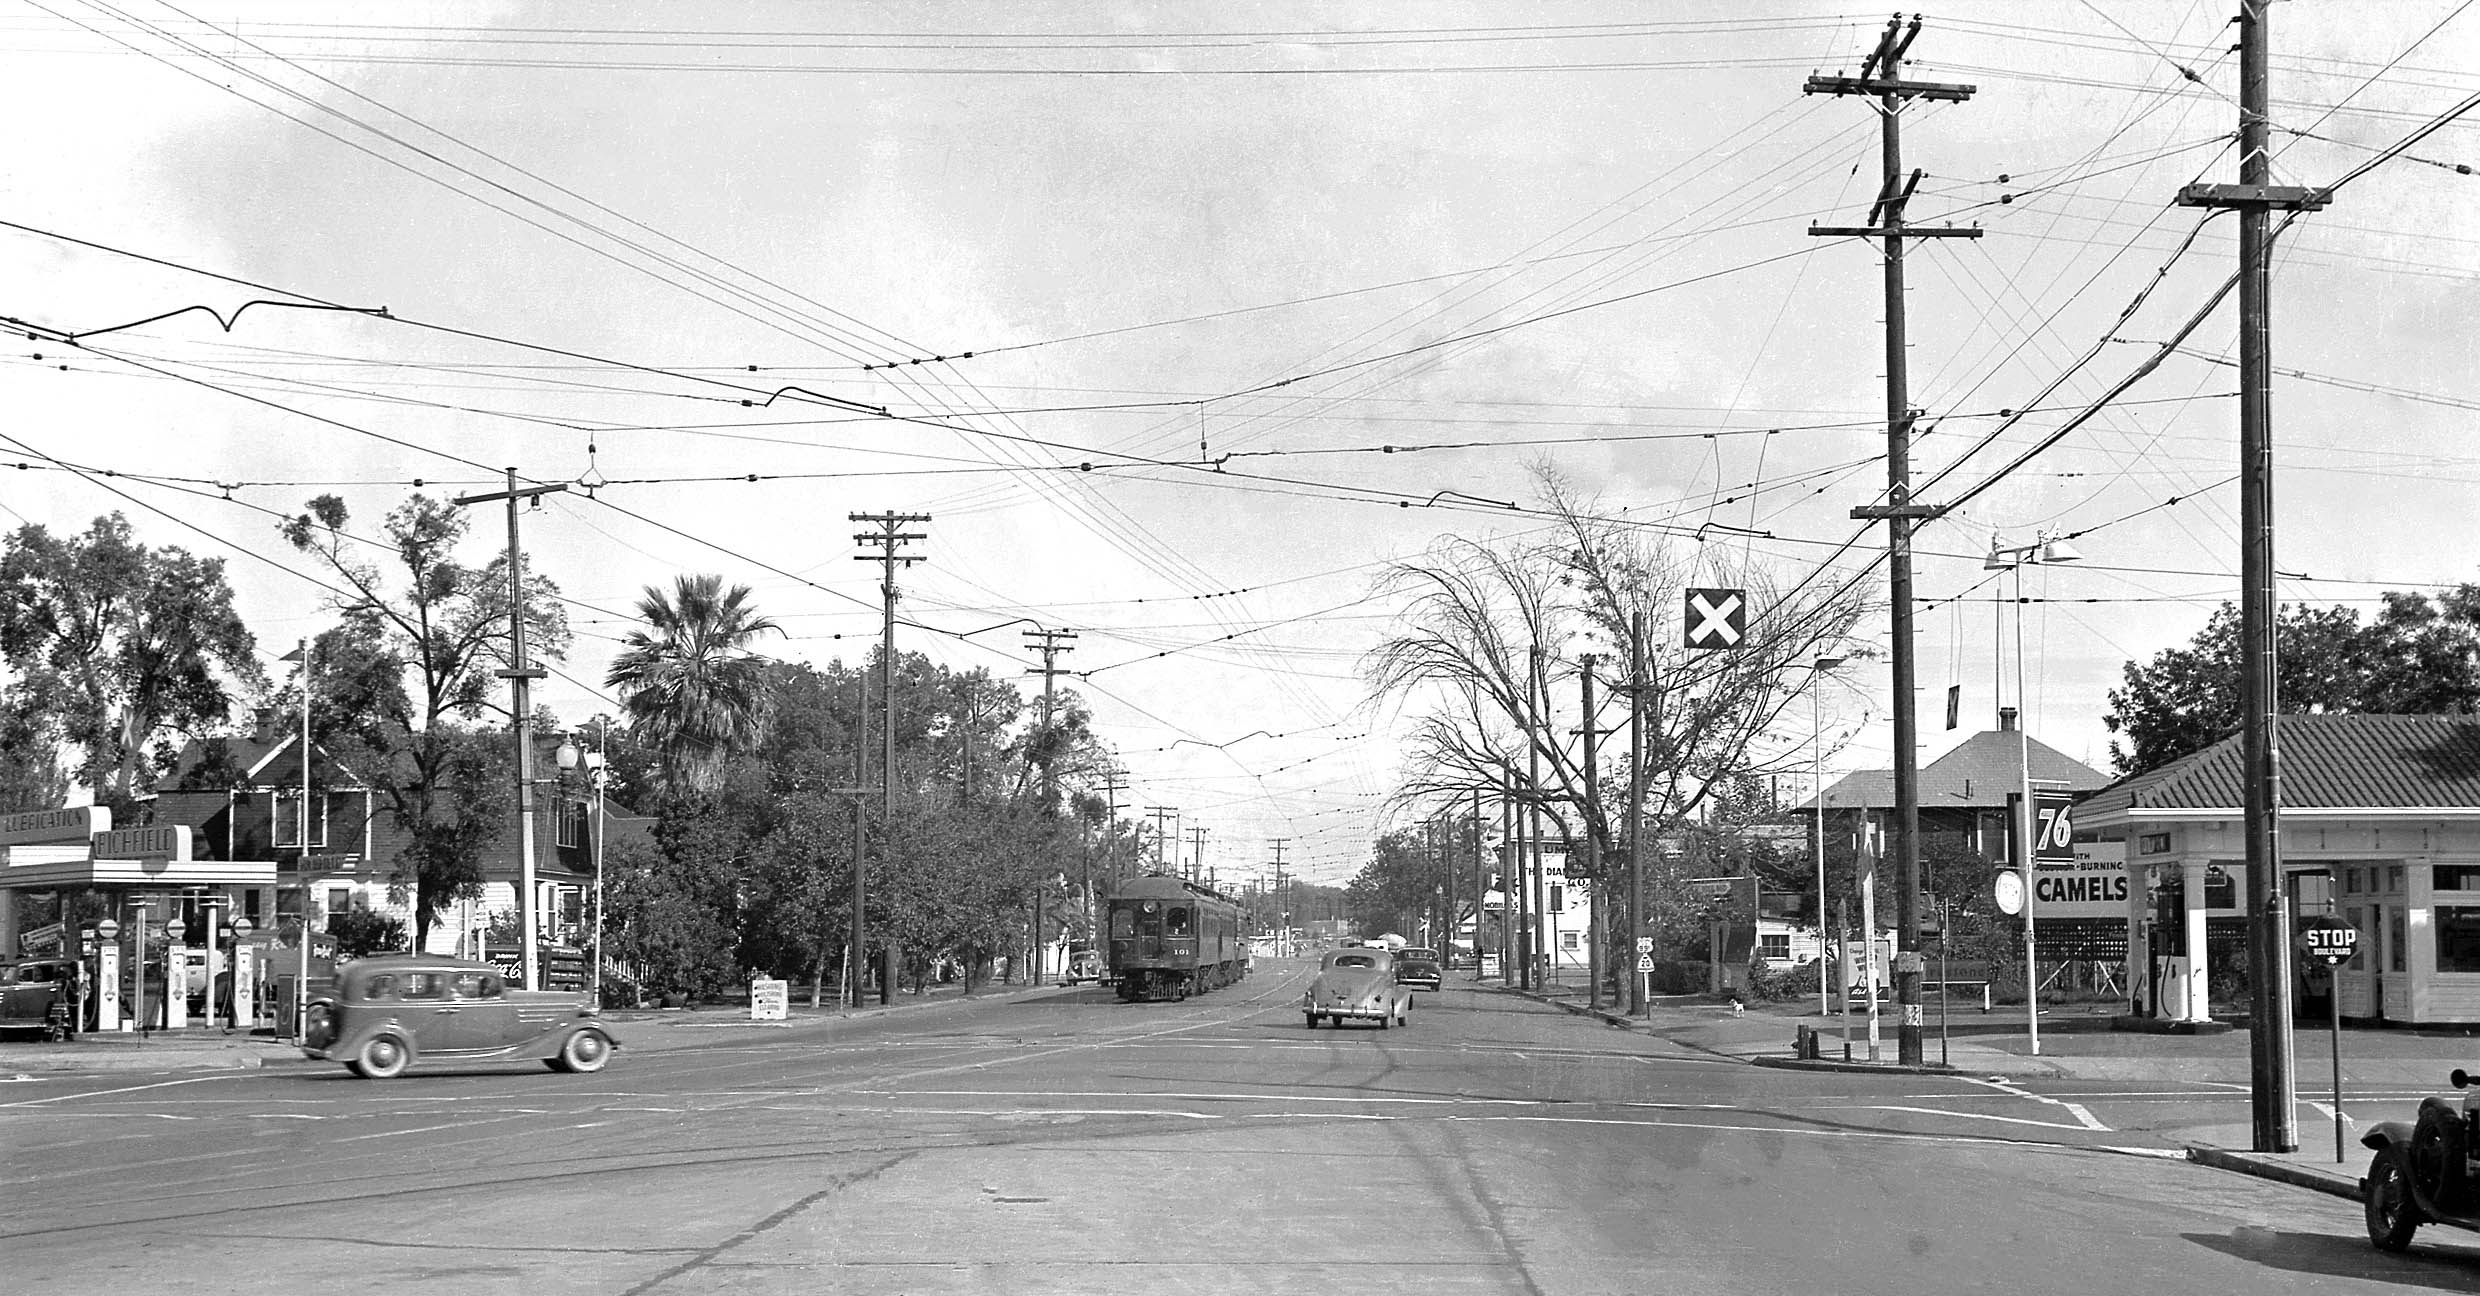
Jerry Graham’s panoramic northeast view west of the Plumas St. intersection with distant SN 101 and two trailers taken in 1940 speaks for itself, and shows the track from Plumas St. coming in from the south and merging with the main line prior to reaching the depot.
L303-95-J. G. Graham Photo, Courtesy BAERA, Western Railway Museum Archives, 4375sn, (Image 20 of 32)
Next to bring the review of Bridge St. to the Dec. 24, 1955 flood with this southeast view. The turquoise arrow shows one additional residence on the south side that was set in more from the street and not captured in the street-level shots. Otherwise, everything else reviewed so far is seen her, except the water tower has been painted silver. This view also includes places to visit in updates to follow, the SN depot and Bridge St. Elementary School across from it, seen to the right of the tower.
L303-100-Copyright California Department of Transportation, 4724-15, (Image 21 of 32)
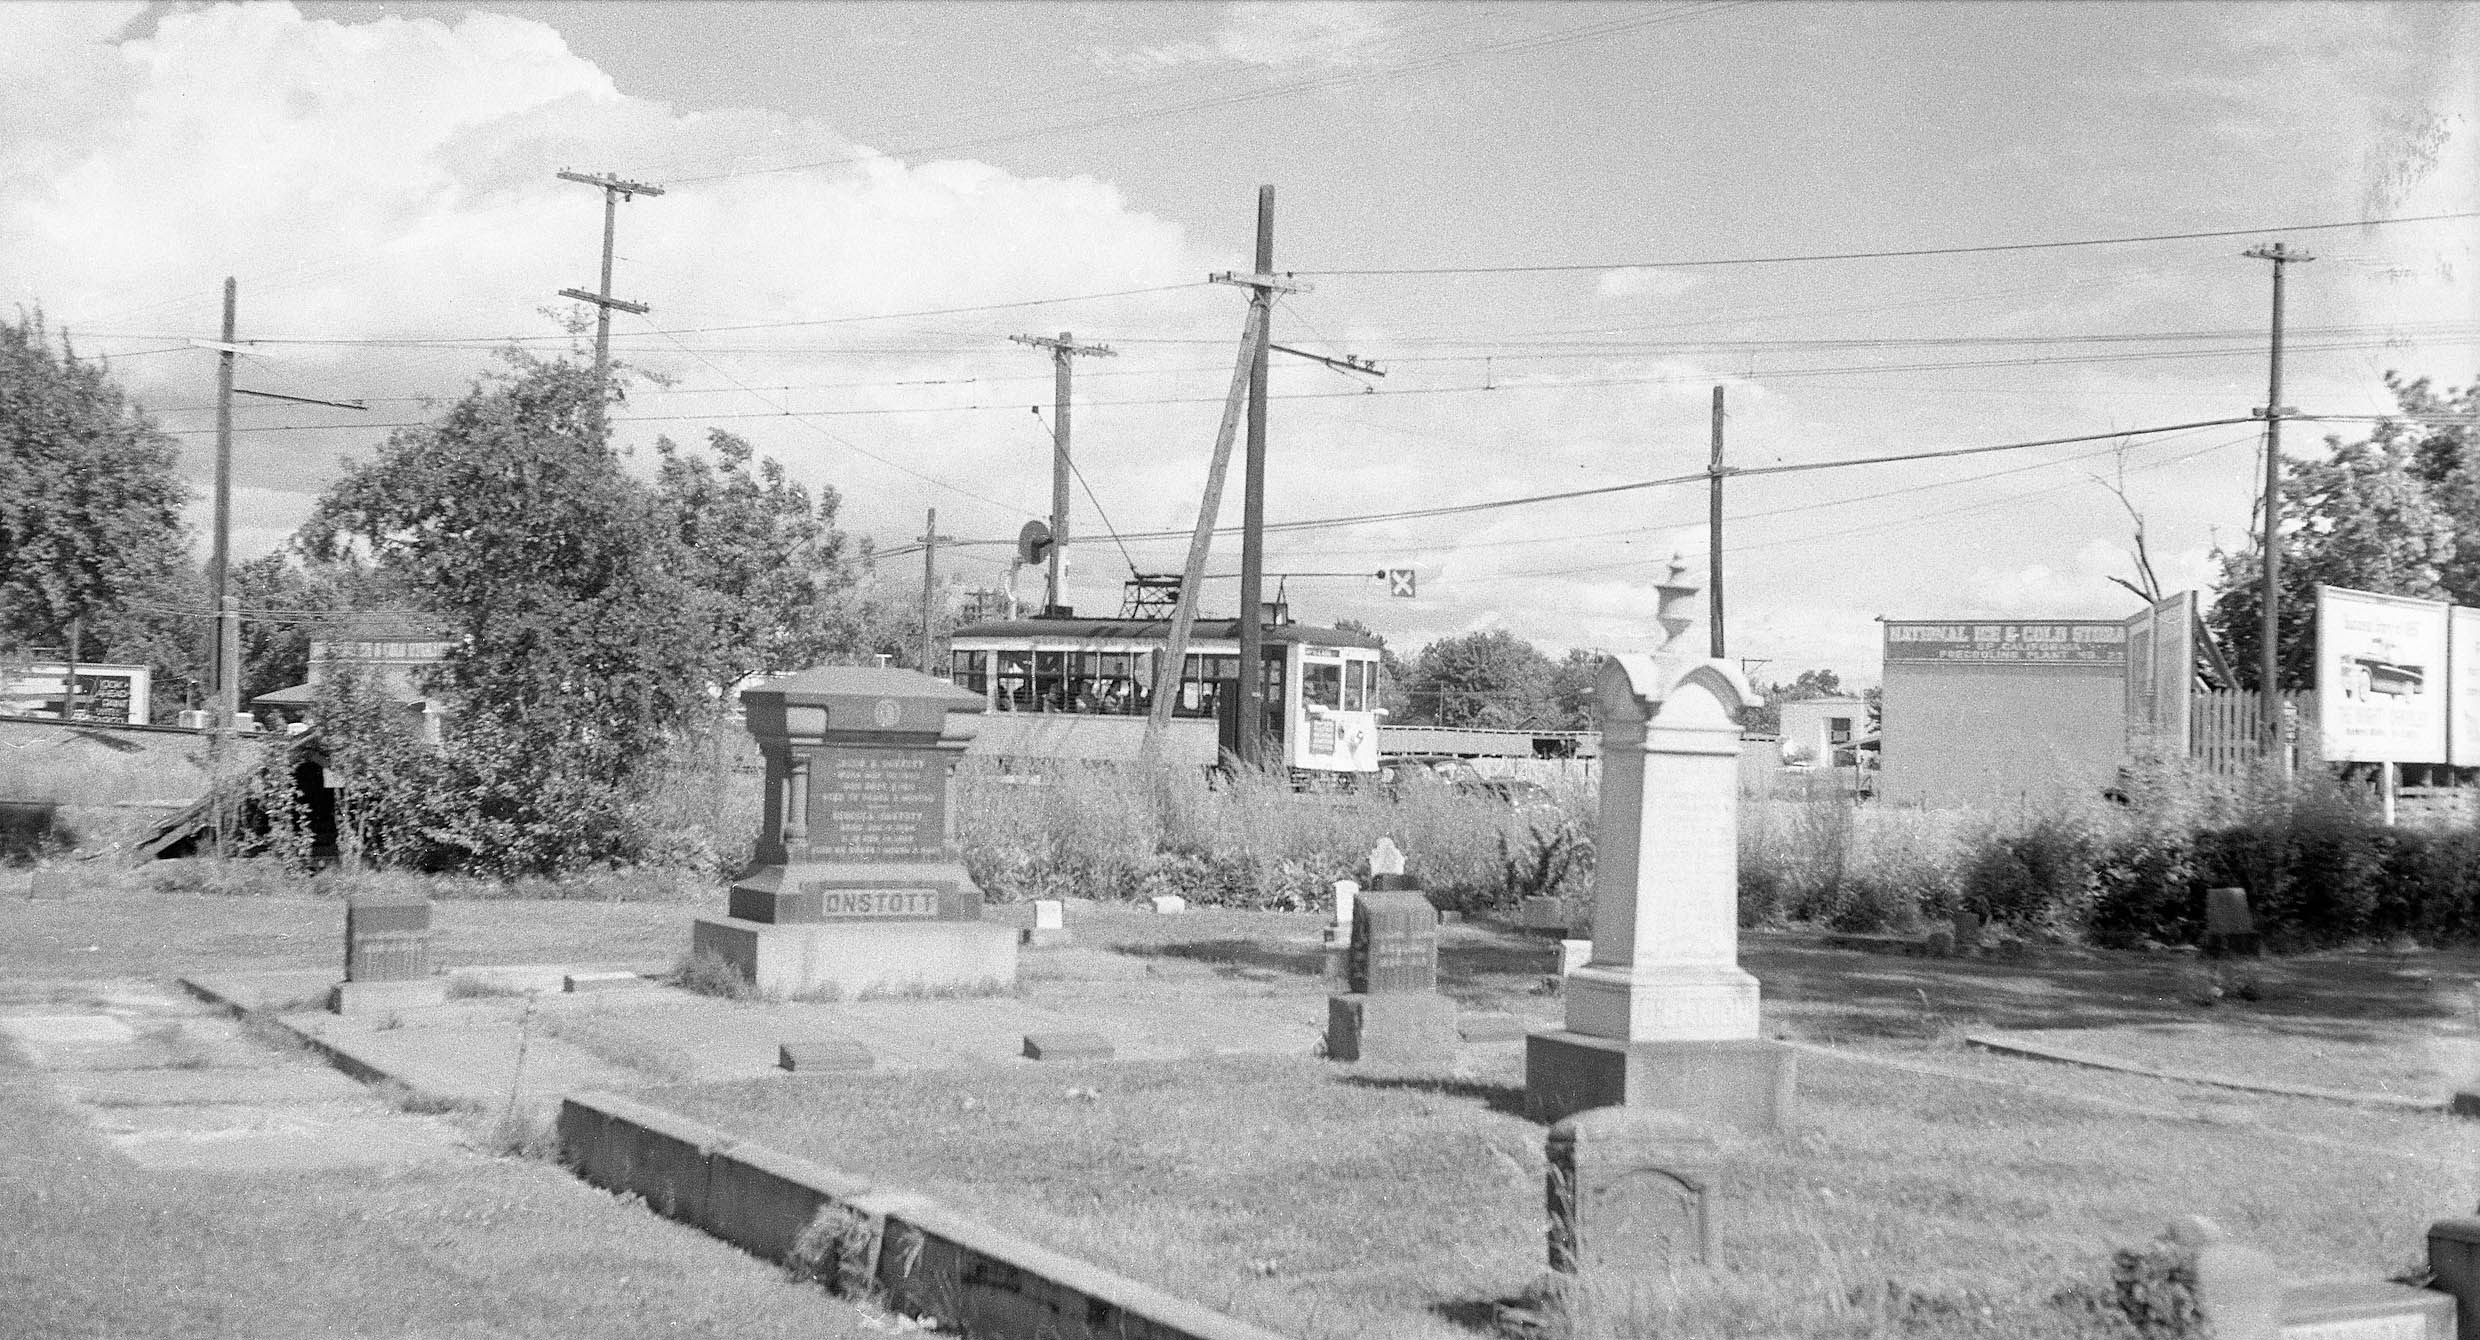
The excursion trip with Birney 62 spanning May 18-19, 1957 provided several informative images to reviewing Bridge St. The Yuba County Cemetery survived the flood, and much before it, having headstones dating back to 1850. This south view with Birney 62 from May 19, 1957 also features National Ice and Cold Storage, another constant in the area.
L303-105-McDonald Collection, Courtesy BAERA, Western Railway Museum Archives, 161023sn, (Image 22 of 32)
By 1957, the SN had cut back the number of tracks coming off the berm to one as shown earlier. Walt Vielbaum’s southwest view from May 18, 1957 shows where the northern-most track was cutback from the other direction, just east of the spur to Diamond Match as indicated by the overhead “x”. This image documents that the southern side buildings of the company were still in operation.
L303-110-Walt Vielbaum Photo, Courtesy BAERA, Western Railway Museum Archives, 133539sn, (Image 23 of 32)
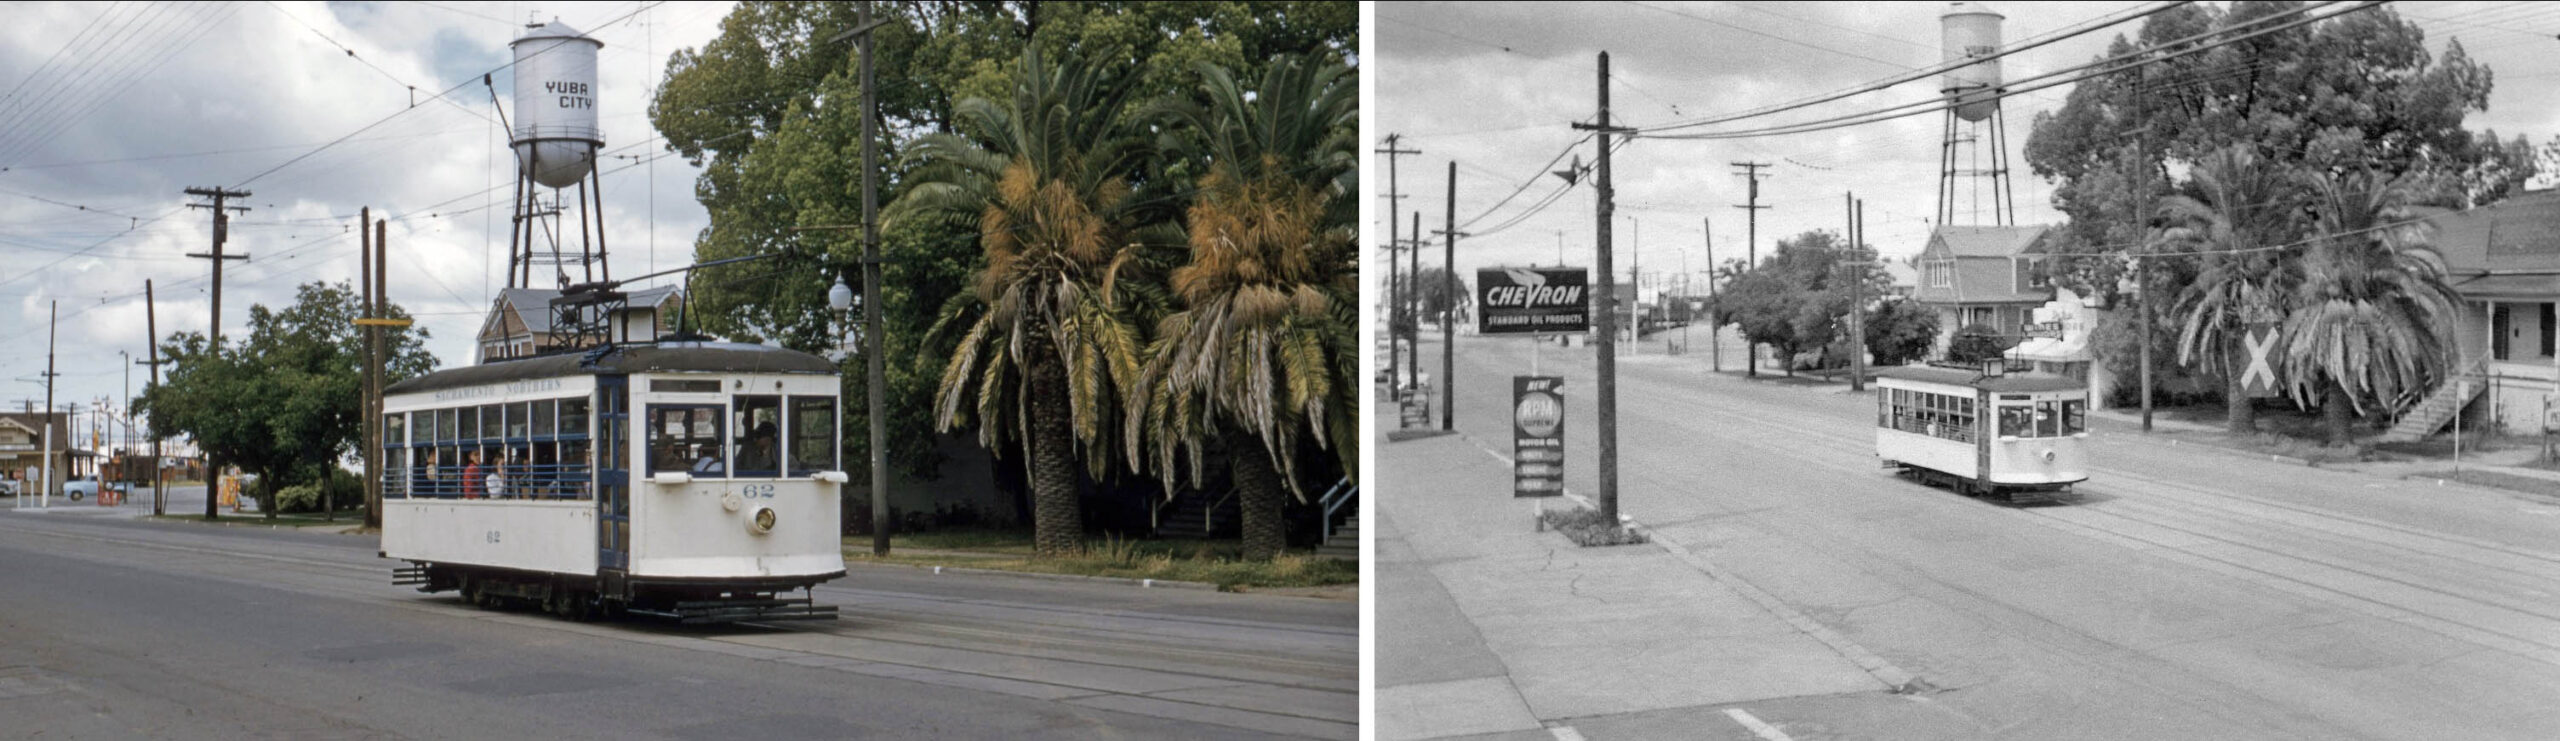
Two more similar northwest views of Birney 62 approaching the Shasta St. intersection and spur to Diamond Match on May 18, 1957. Richard Kampa’s image on the left provides color to this presentation, while the image on the right was taken at a high enough elevation to show that one of the residences on the north side of Bridge St. was now selling wines and liquors, mentioned previously in the Sanborn map in L303-73.
L303-115-Richard Kampa Photo, l, Anonymous, r, Courtesy BAERA, Western Railway Museum Archives, 163101sn, l, 218746sn, r, (Image 24 of 32)
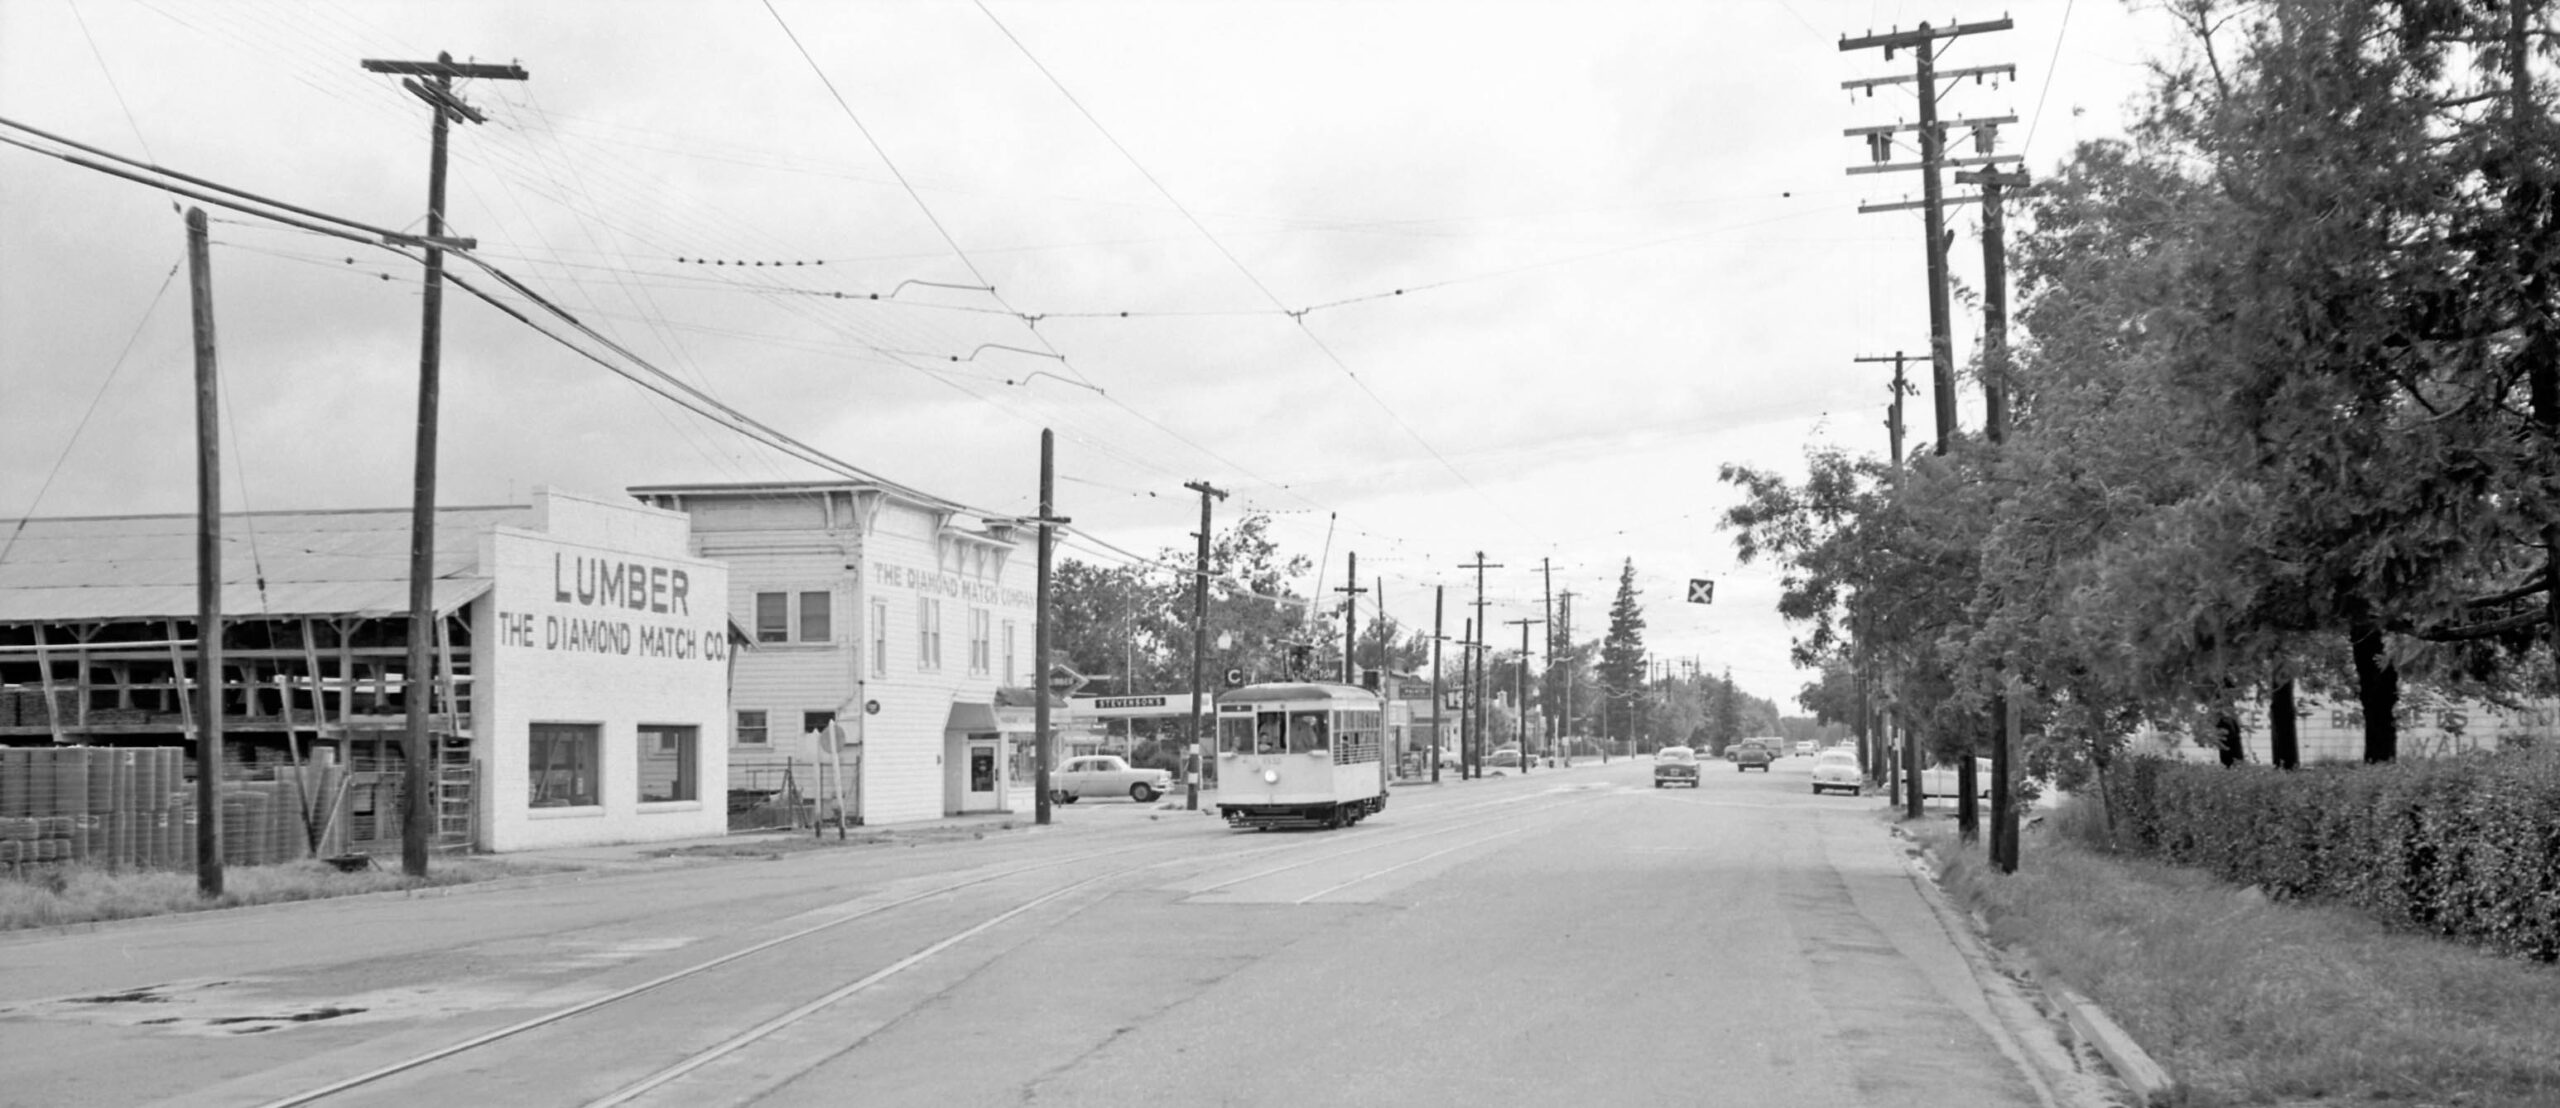
Jack Perry’s east view of SN 654 with an unusual “freight” indicates that Diamond Match Co.’s facilities on the south side of the street are now occupied by Yuba City Mills, a company with a large presence just south of the SP depot. Tuttle Roofing has been replaced by a business selling glass and keys. Also, the small residence detected in the aerial view L303-100 has been replaced by Shan’s Frostop.
L303-120-Jack Perry Photo. Courtesy BAERA, Western Railway Museum Archives, 159934sn, (Image 25 of 32)
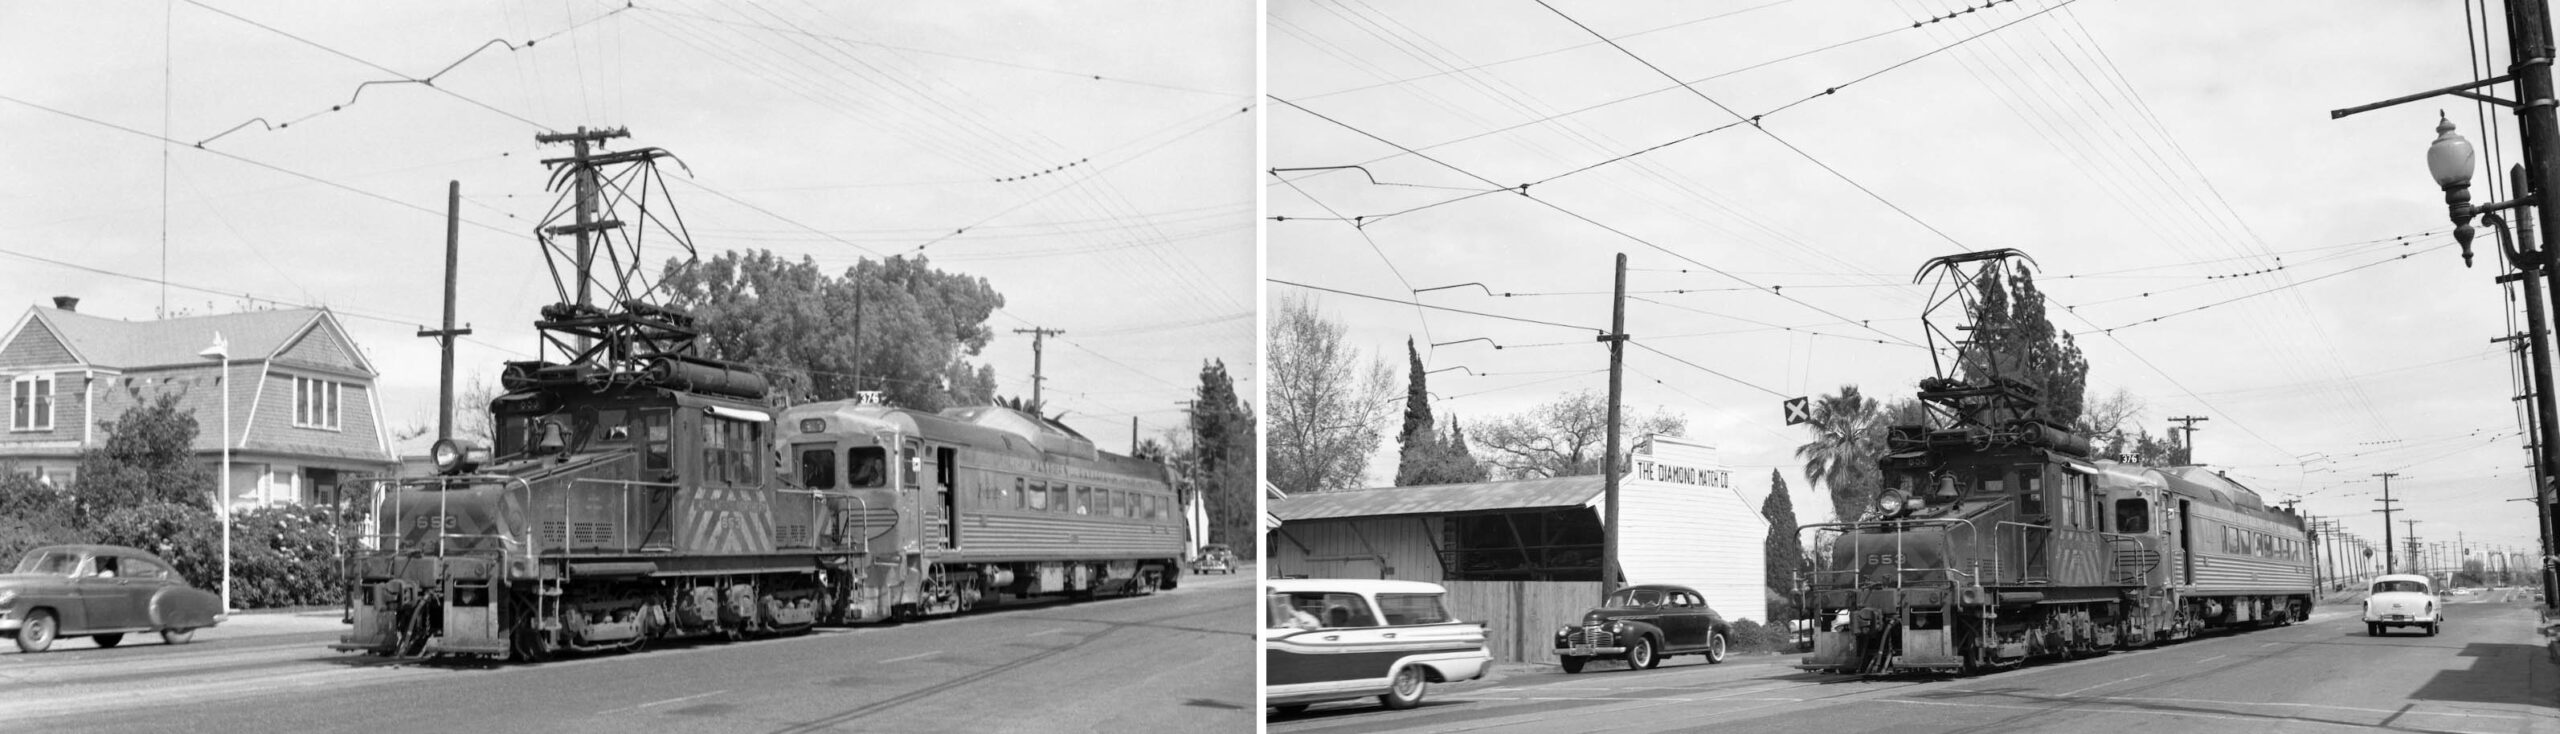
Two unexpected east views of a diesel-powered Budd RDC car in tow, here Western Pacific “Zephyrette” no. 376, behind SN 653 in preparation for the BAERA-sponsored excursion from Oakland to Colusa on Mar. 26, 1960. Private residences remained on Bridge St. between Plumas and Shasta Sts. that year, left., and Diamond Match’s name remained on their north side facility, right. As will be shown in a later presentation, Diamond Match would be referring all business to their Marysville location by BAERA’s excursion on June 15, 1958.
L303-125-Norman Rolfe Photo, l, Addison Laflin Photo, r, Courtesy BAERA, Western Railway Museum Archives, 57221sn, l, and 172972sn, r, (Image 26 of 32)
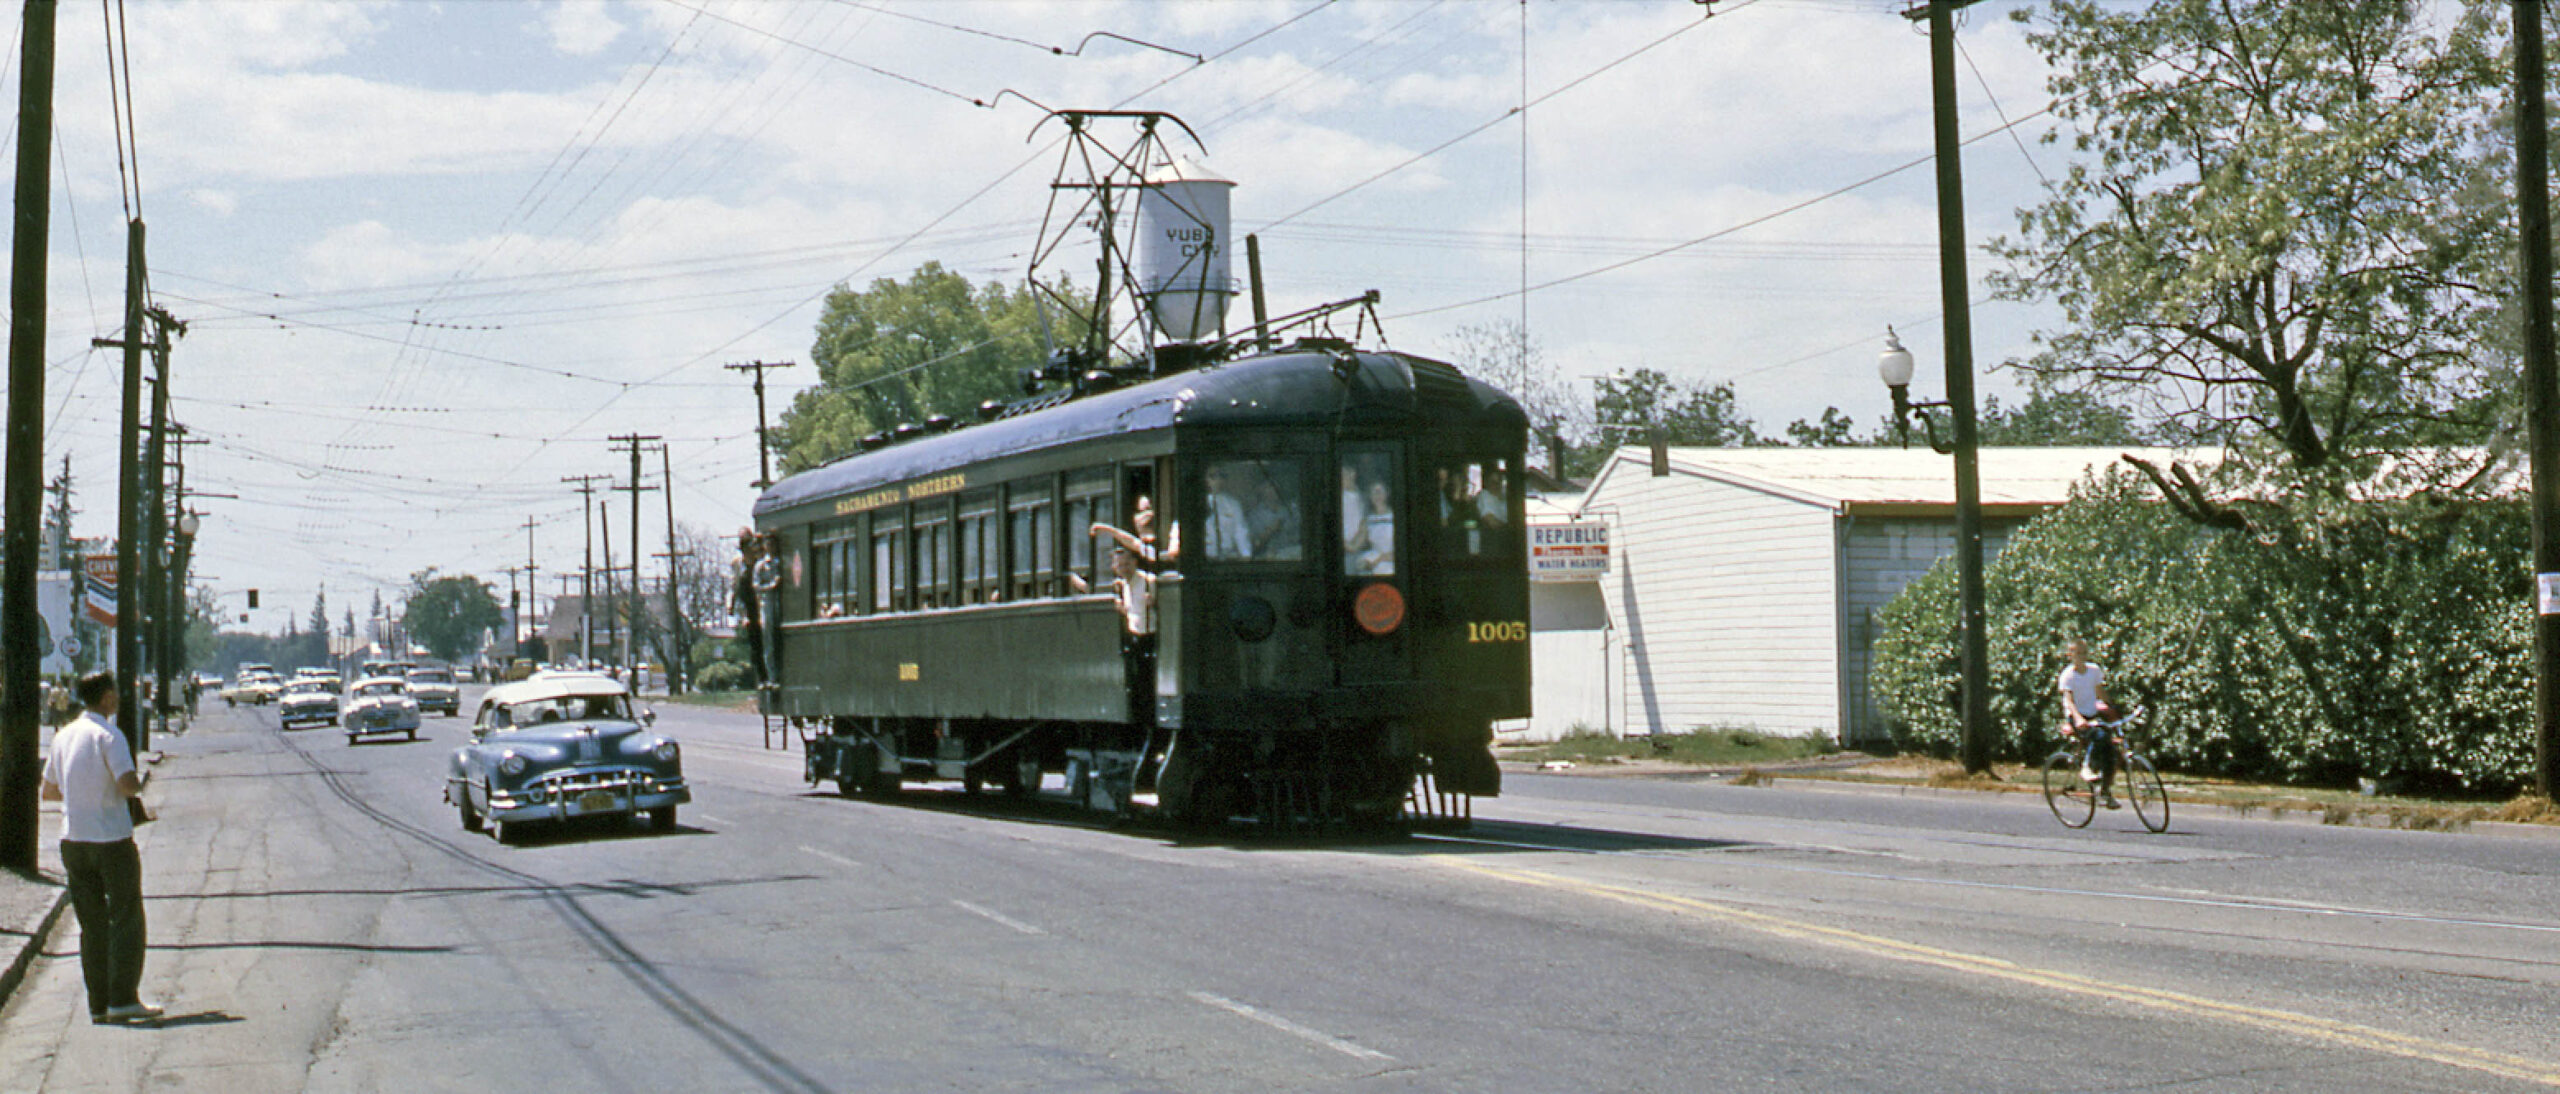
This southwest view from the BAERA-sponsored excursion on Apr. 14, 1962 with SN 1005 shows that the Diamond Match building on the north side of the street was now occupied by Republic Water Heaters.
L303-130-Richard Kampa Photo Courtesy BAERA, Western Railway Museum Archives, 219900sn, (Image 27 of 32)
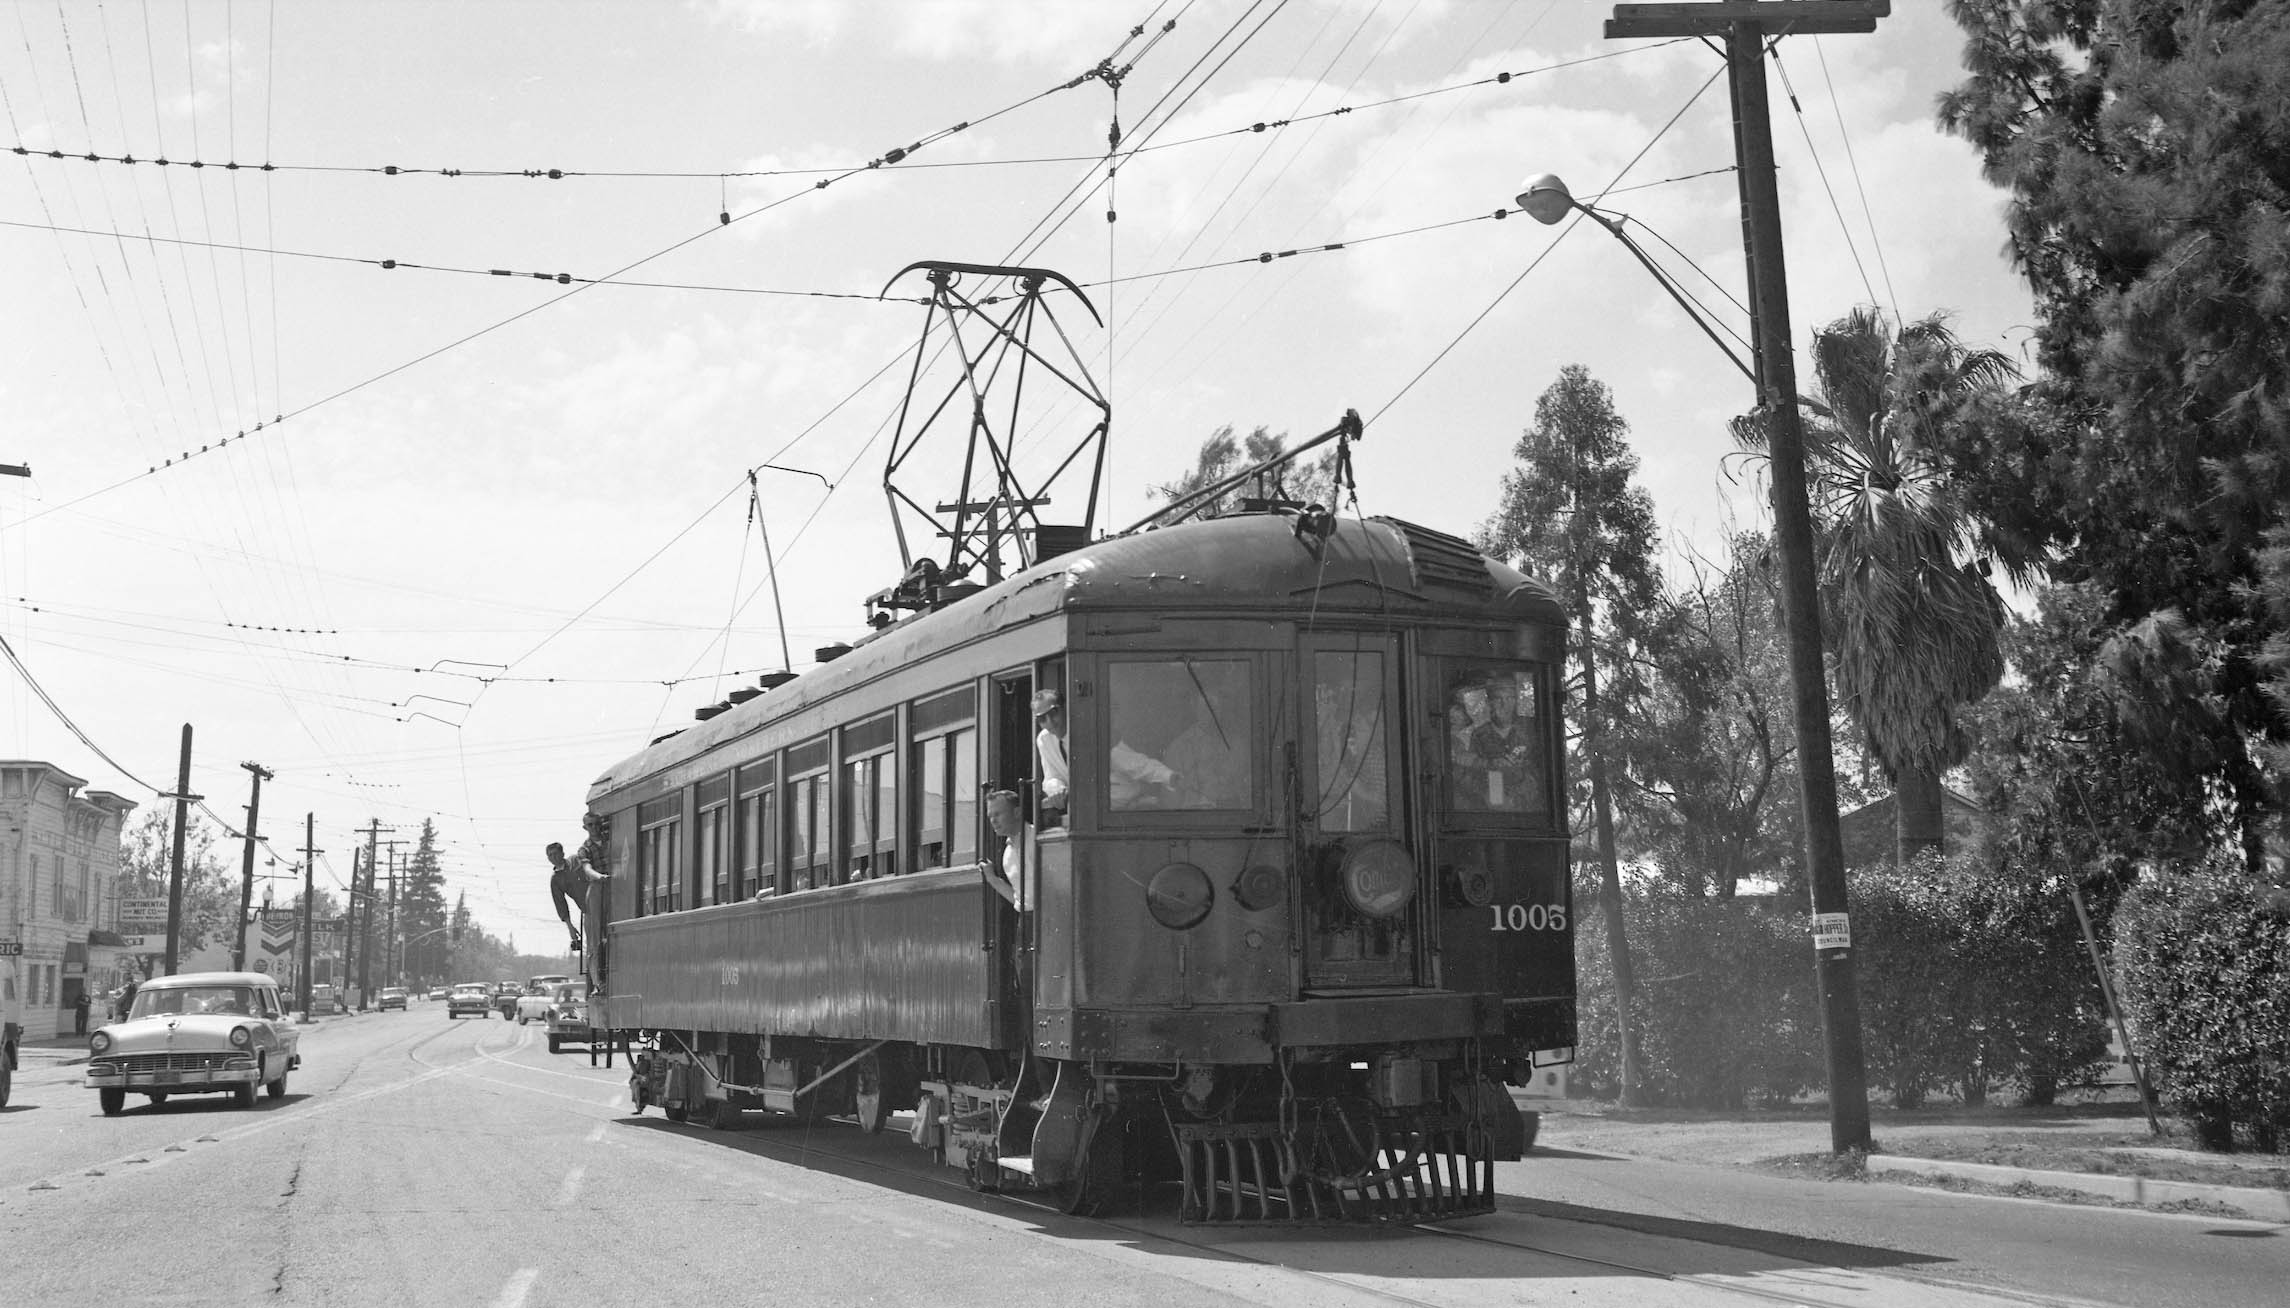
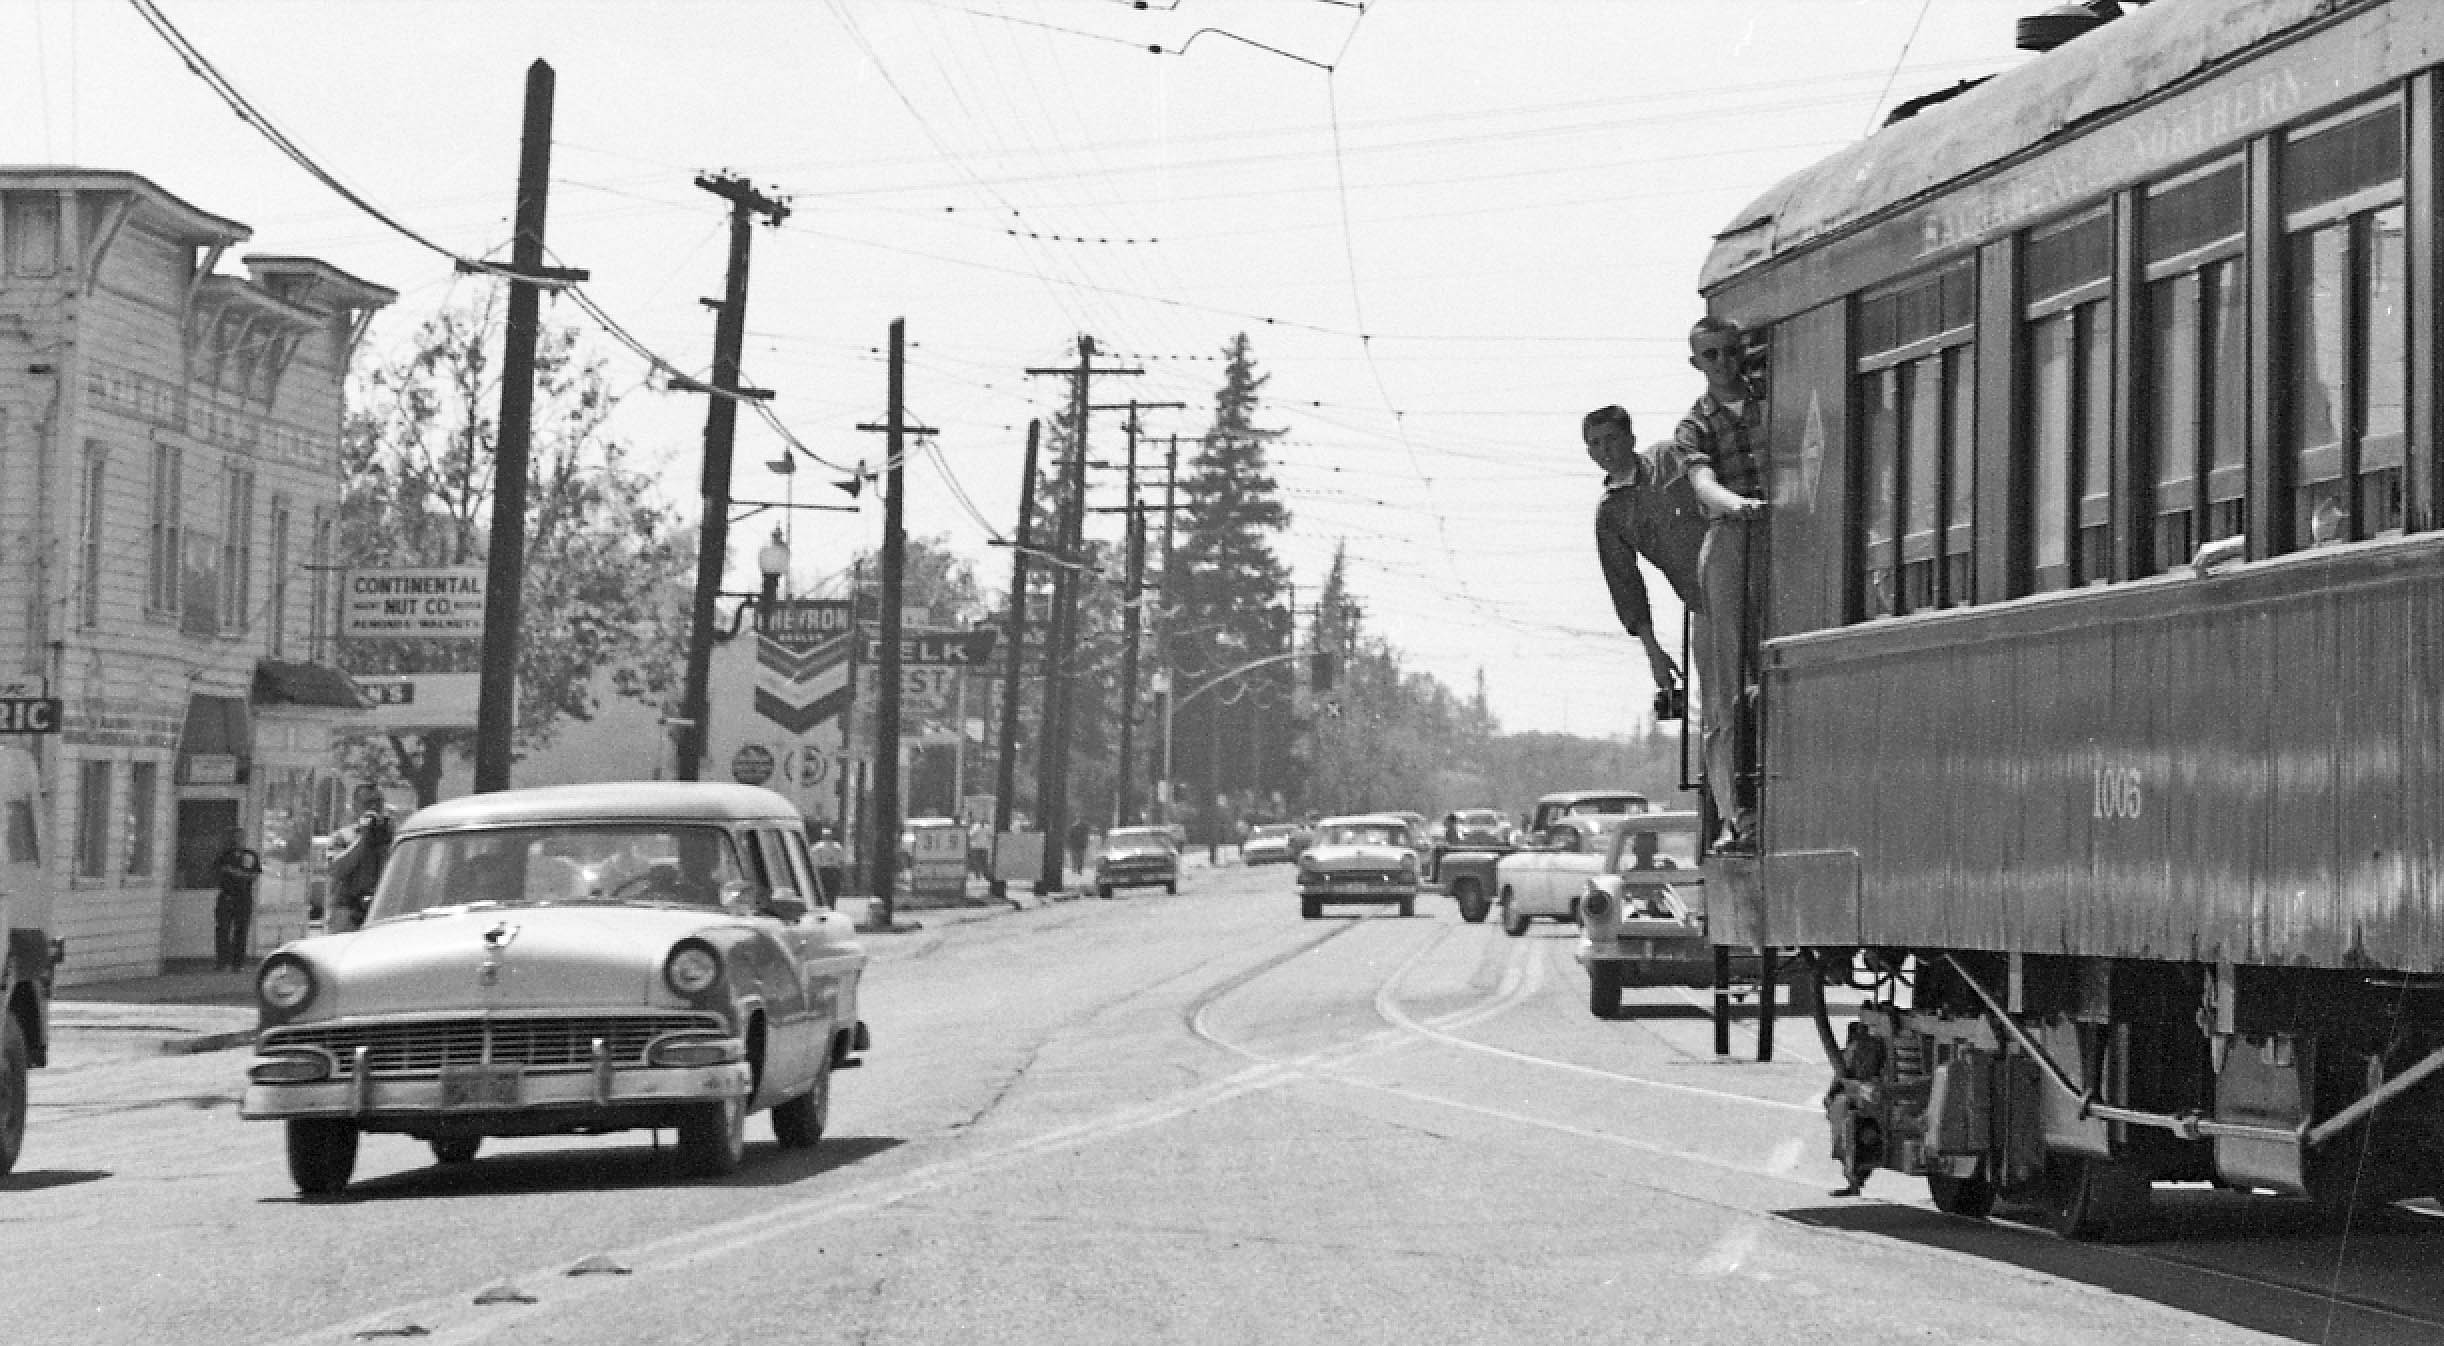
Ahead to June 17, 1962, during the BAERA-sponsored excursion, this southwest view shows SN 1005 on the single continuous track, the truncated one just below the two individuals leaning out the back door.
L303-135-Addison Laflin Photo, Courtesy BAERA, Western Railway Museum Archives, 173953sn, (Image 28 of 32)
An enlargement of the previous southwest view from June 17, 1962 provides one last glimpse of the storefronts along the south side of Bridge St.
L303-140-Addison Laflin Photo, Courtesy BAERA, Western Railway Museum Archives, 173953sn, (Image 29 of 32)
Two northwest-facing aerial views from Feb. 8, 1972 are presented in the this and the next panel. Although much of the agricultural-related processing industry survived south of Bridge St. between the SN-SP crossing and Plumas St., large empty spaces on the north side are present where former residences had been. Note as well that the area once supporting the SN depot is also a cleared patch of land.
L303-145-Copyright California Department of Transportation, 17568-2, (Image 30 of 32)
A second northwest-facing aerial view from Feb. 8, 1972 shows the same scene at a slightly different angle.
L303-150-Copyright California Department of Transportation, 17568-3, (Image 31 of 32)
This presentation closes where the next one will be heading, the SN passenger-freight depot as seen in this northeast view by Dick Brown of SN 1005 from the June 17, 1962 excursion. Thanks to Doug Libby, and Drivel Perez of the Sutter County Museum for their contributions.
L303-155-Dick Brown Photo, Vielbaum Coll., Courtesy BAERA, Western Railway Museum Archives, 133796sn, (Image 32 of 32)