The Chestnut Street Connector and War – To and From the Oakland Army Base
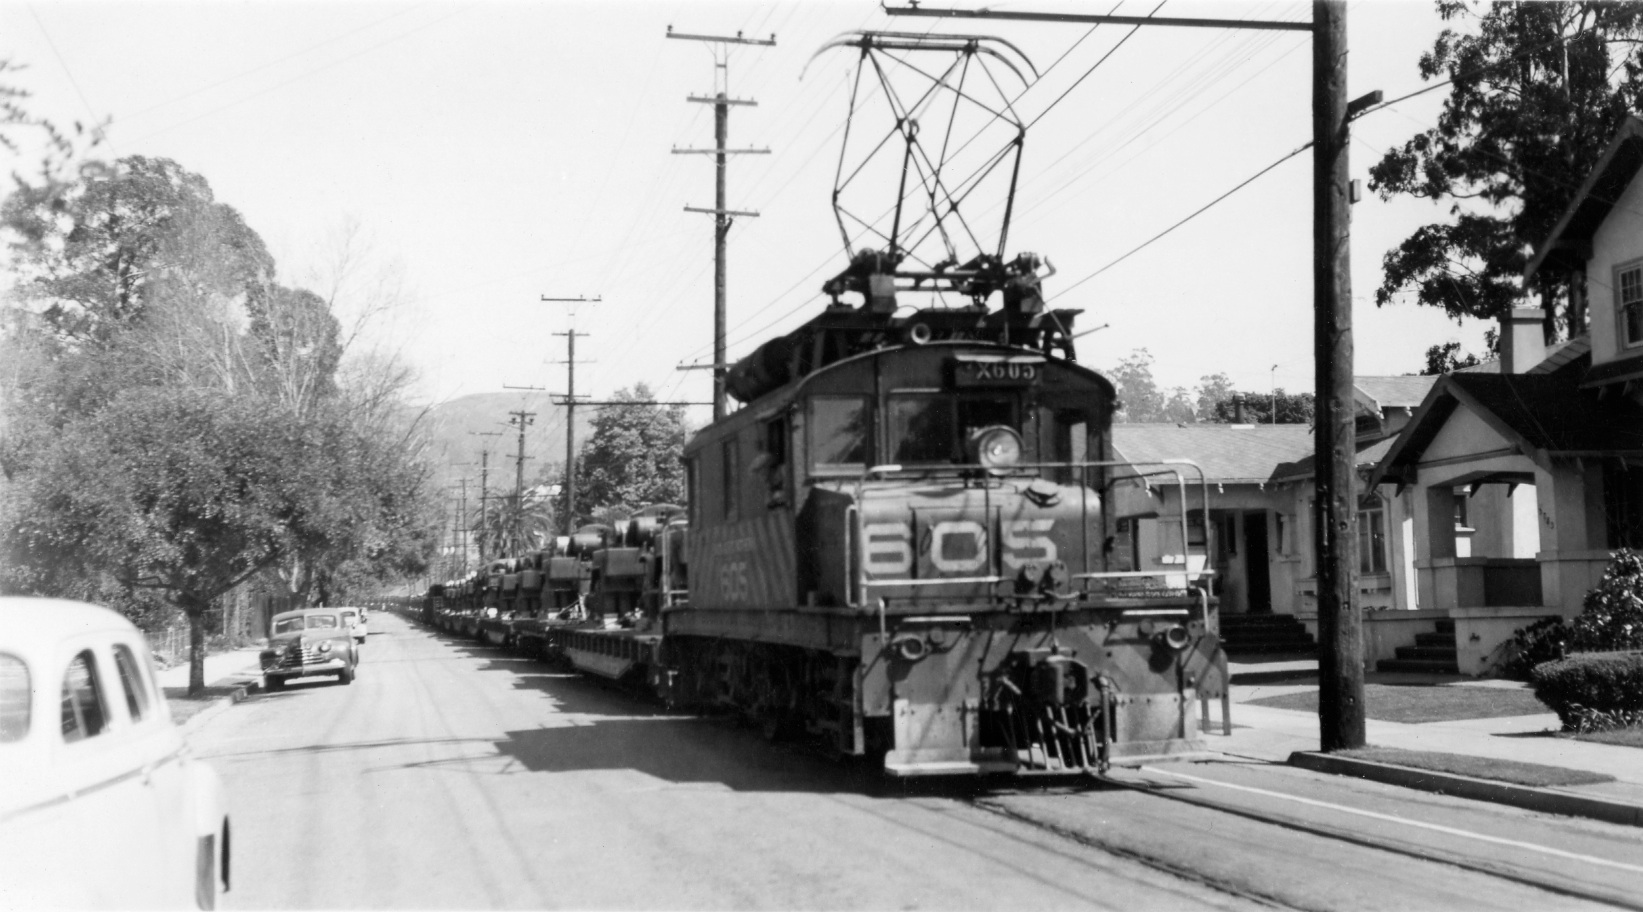
Imagine coming out of your home in post-WWII 1940s at 5783 Shafter Ave. and being greeted by SN 605 guiding an endless number of tanks on flatcars, wondering why the freights continued rolling down the street despite the SN’s decision to not renew their franchise. Incidentally, today this scene would be across from the fire station and 5782 Miles Ave. East view.
L189-05-Fred Fellow Photo and Collection, Courtesy BAERA, Western Railway Museum Archives, 51716sn, (Image 1 of 40)

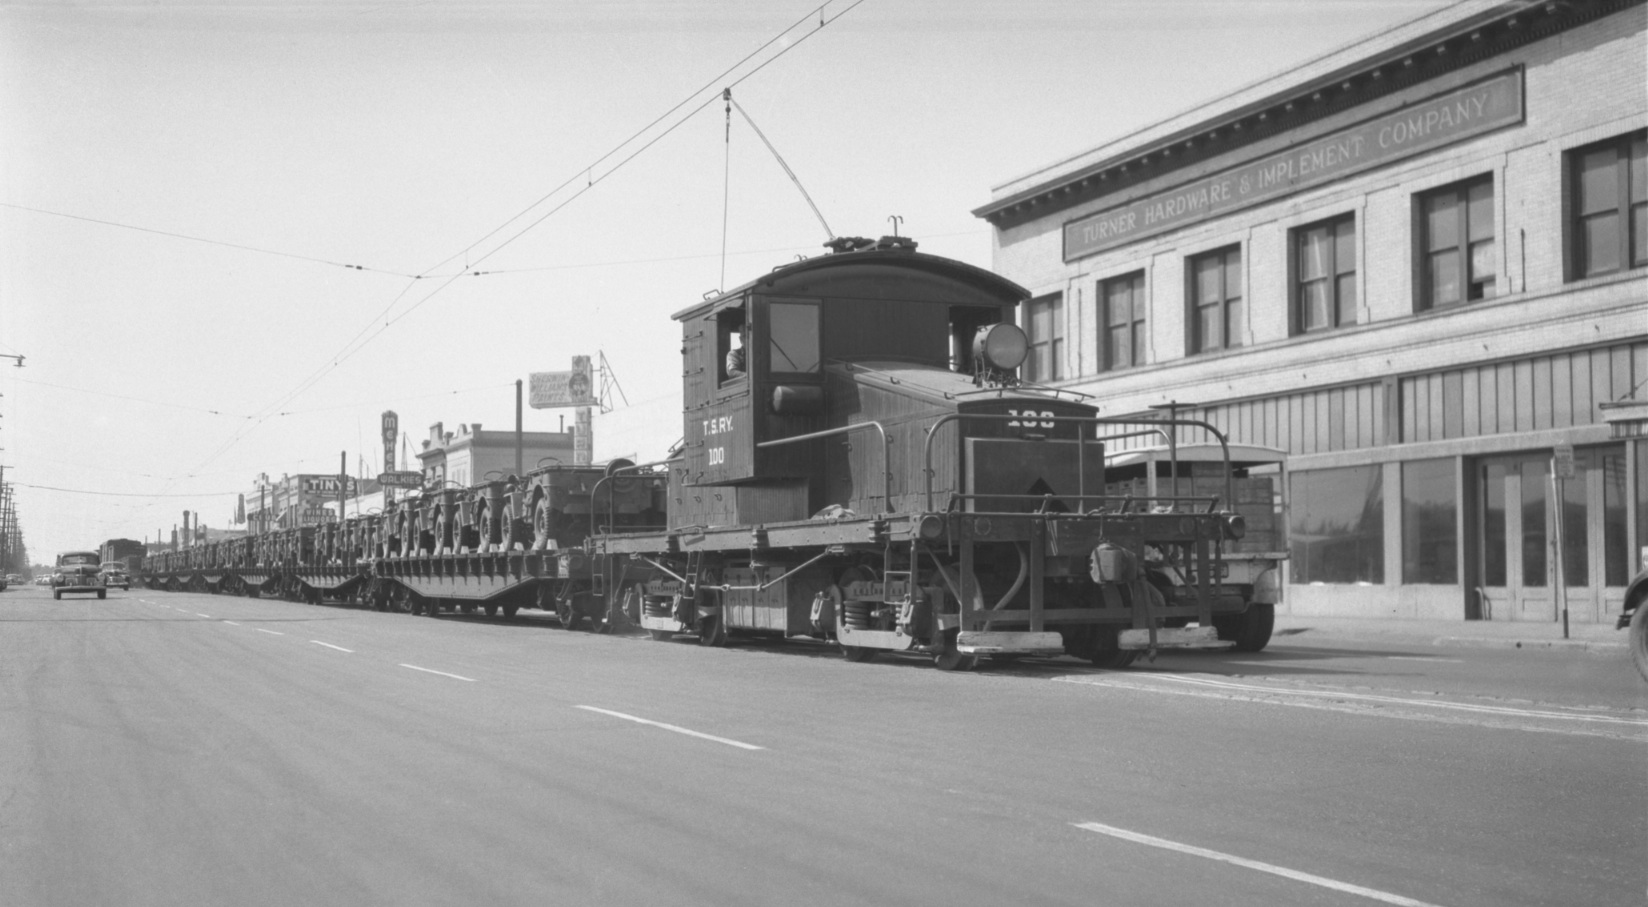
A similar image during the war could not be found, but after V-E Day, May 8, 1945, military gear could be seen on other railways as well. Here, Tidewater Southern 100 with jeeps rolls past Turner Hardware and Implement Co. at 9th and H Sts. in Modesto, June 23, 1945, southwest view.
L189-10-Arthur Lloyd Photo, Courtesy BAERA, Western Railway Museum Archives, 120324ts, (Image 2 of 40)
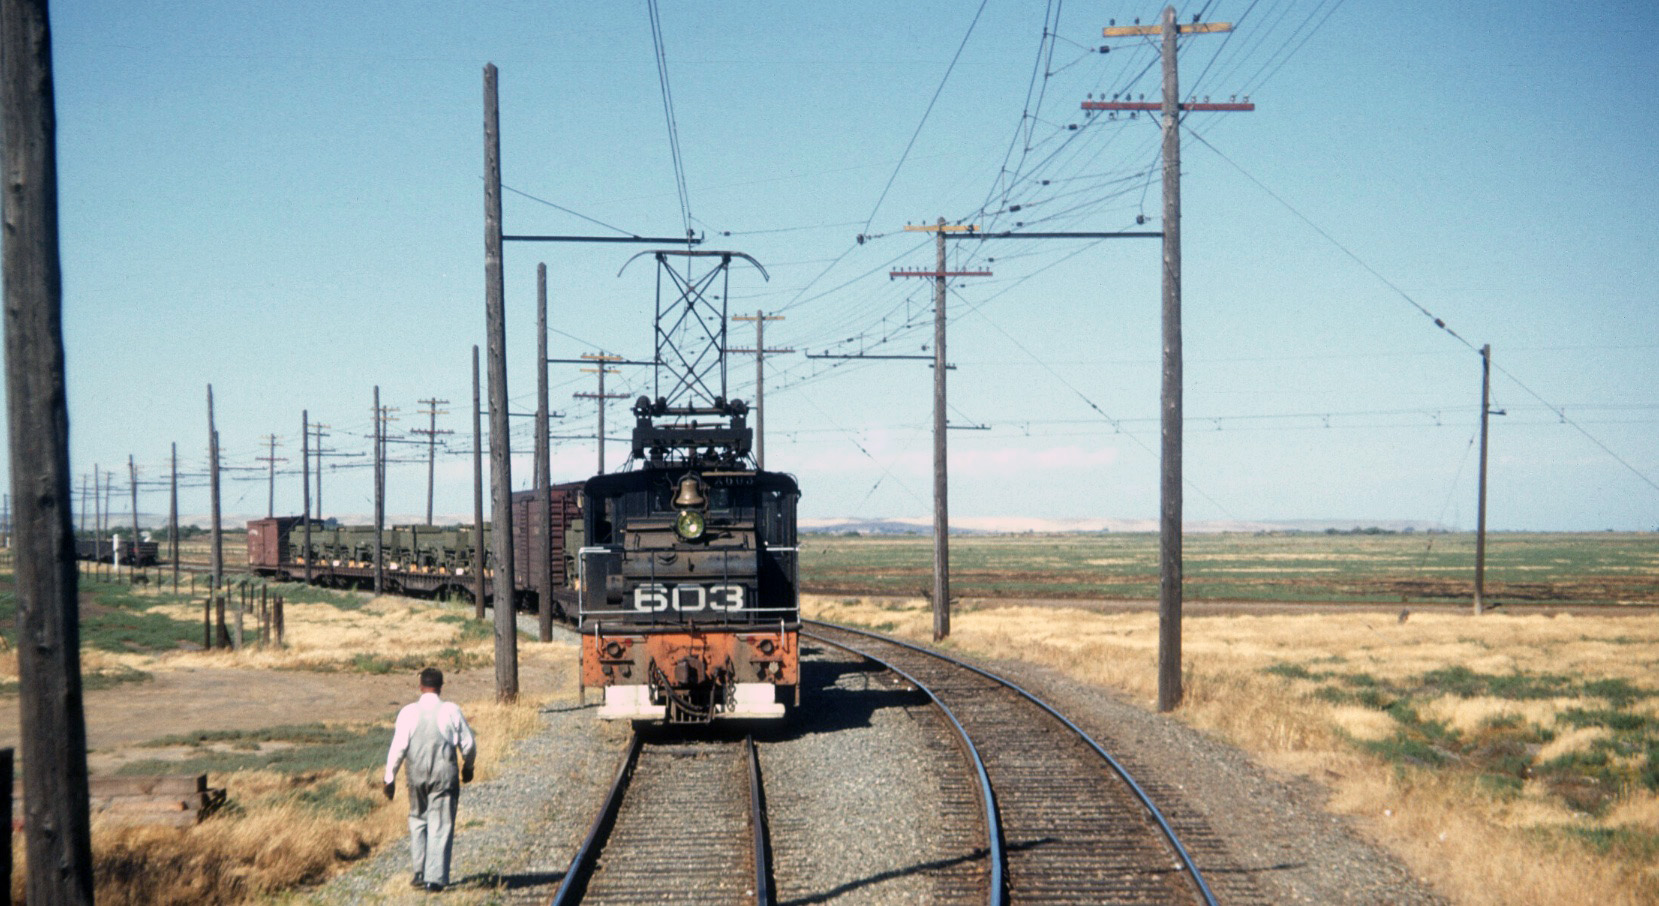
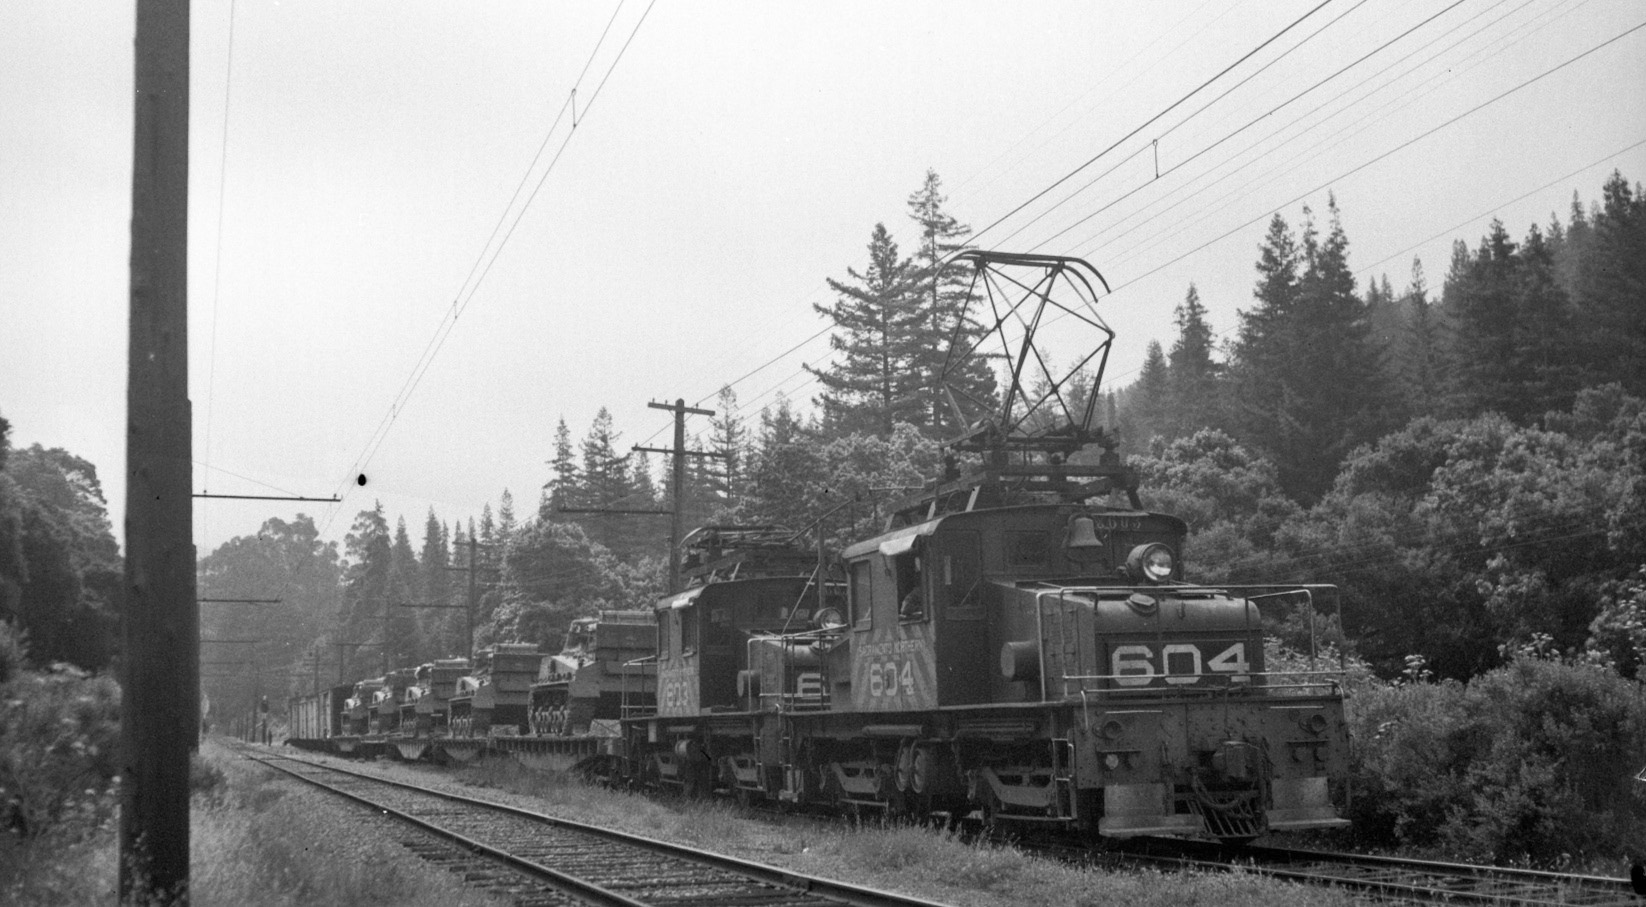
Not surprisingly, no records have yet been uncovered to detail the extent of these military transports, including the points of origin and destination. This review will provide a photographic account of SN-related activities, starting with the earliest image taken at Shafter Ave. and 49th St. with SN 603 and 604 passing Emerson Elementary on May 24, 1946, southeast view.
L189-15-Courtesy BAERA, Western Railway Museum Archives, 93744sn, (Image 3 of 40)
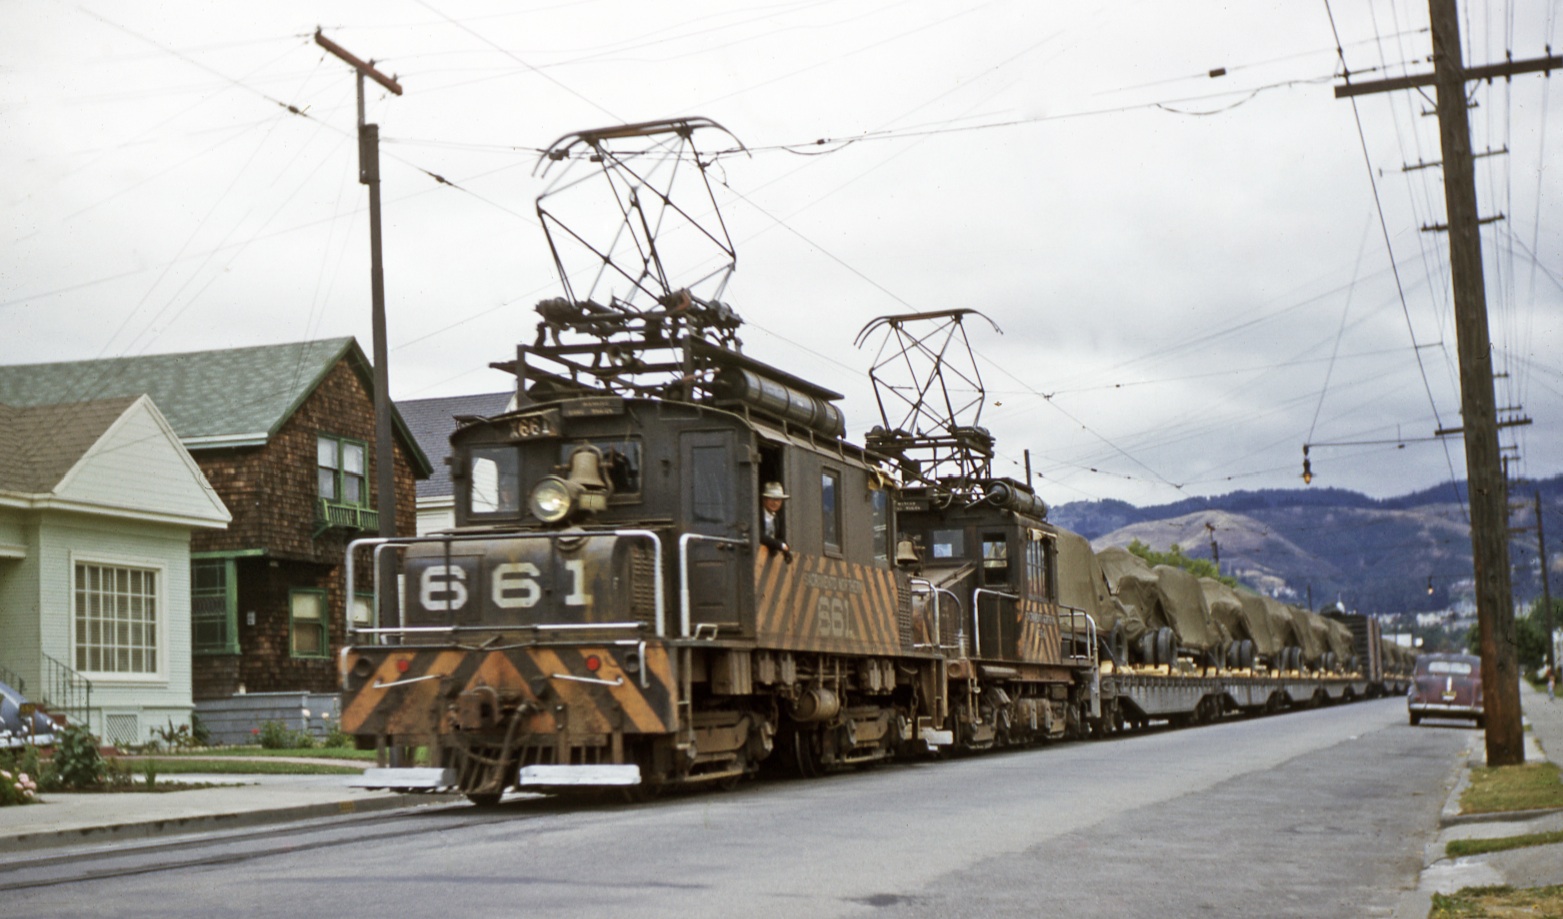
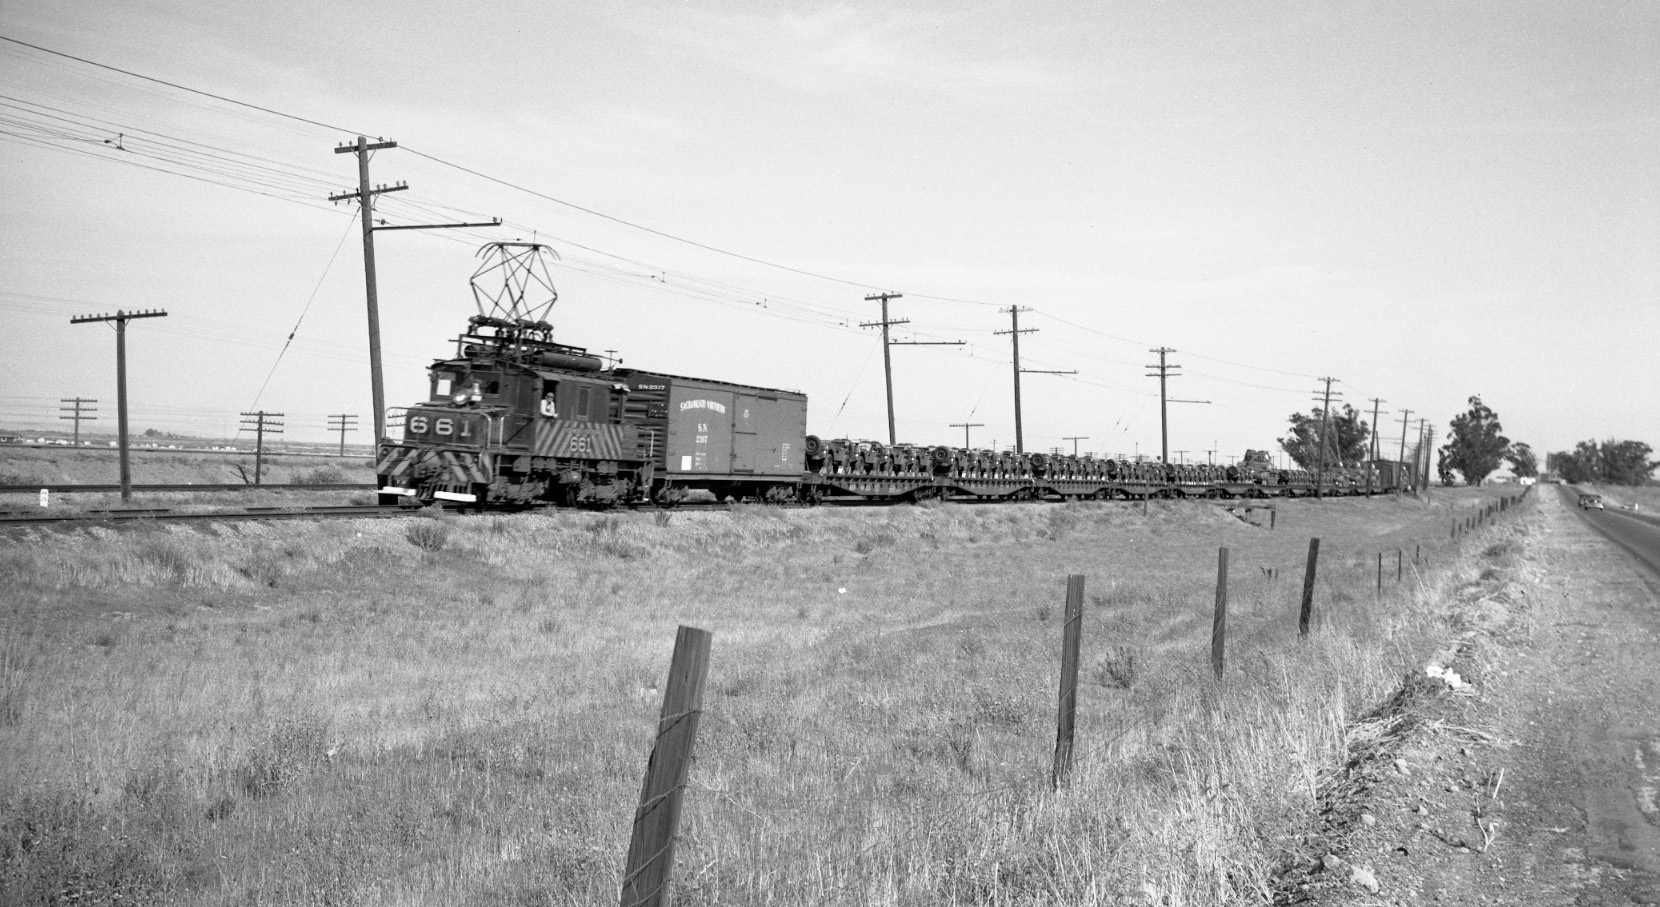
The latest view found of SN-related military transport is shown here, a northeast view at Shafter Ave. just east of Hudson with SN 661 and 654. The slide was labelled as June 26, 1954, and the paint scheme on the motors and the license plates in view support a 1951-1955 date. It is the only image found post-Korean War and post-Lisbon trestle collapse.
L189-20-Courtesy BAERA, Western Railway Museum Archives, 136953sn, (Image 4 of 40)
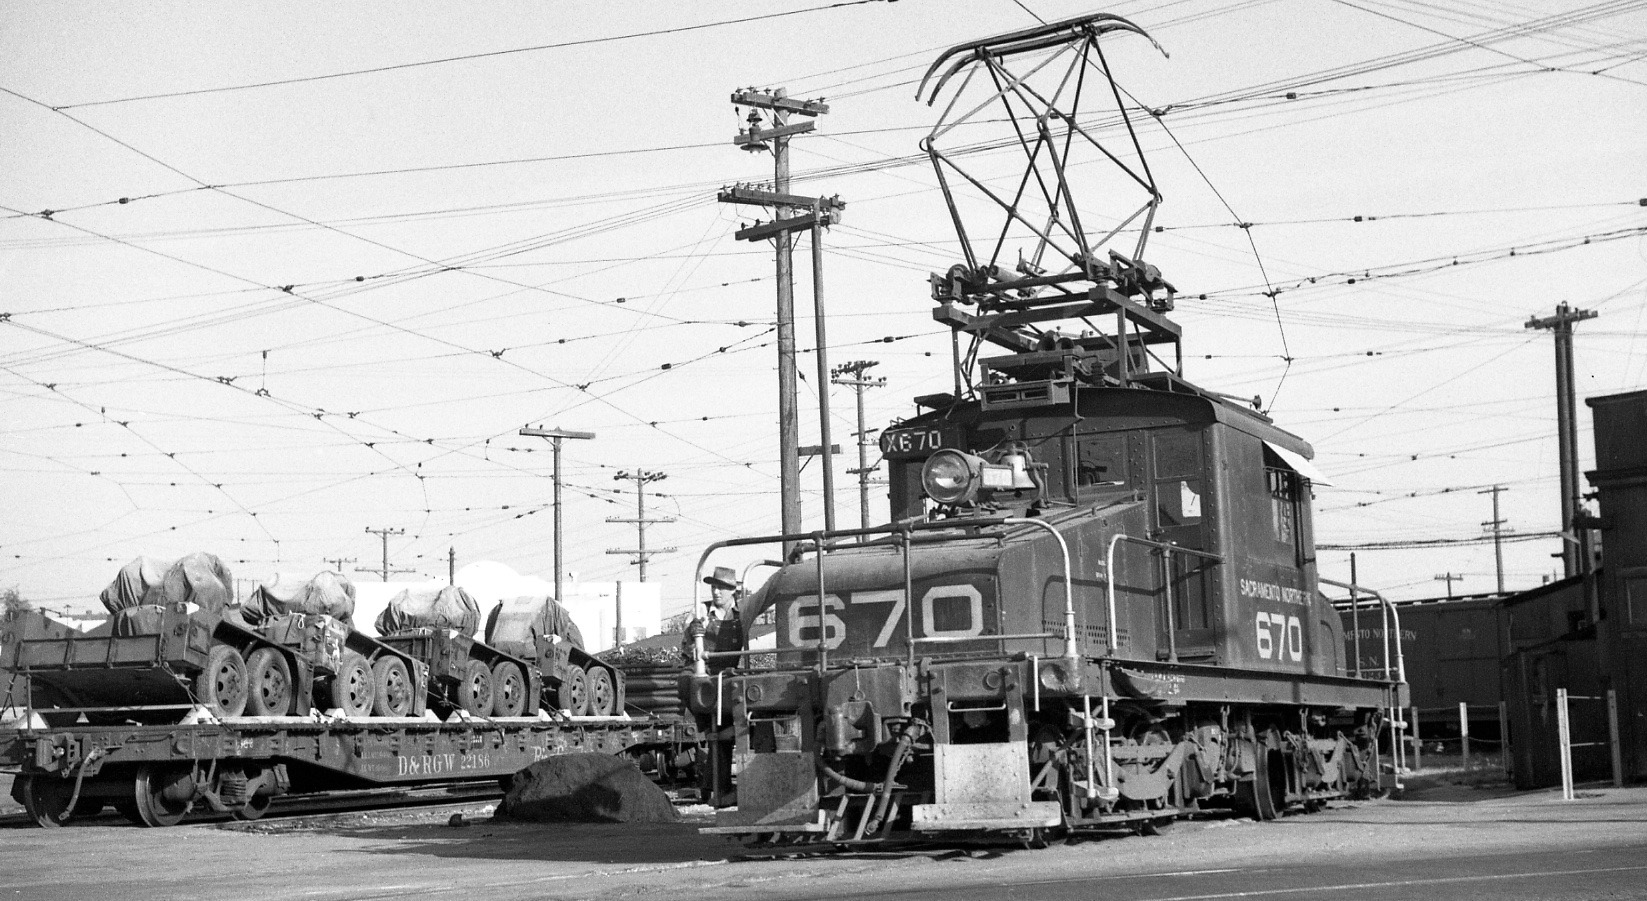
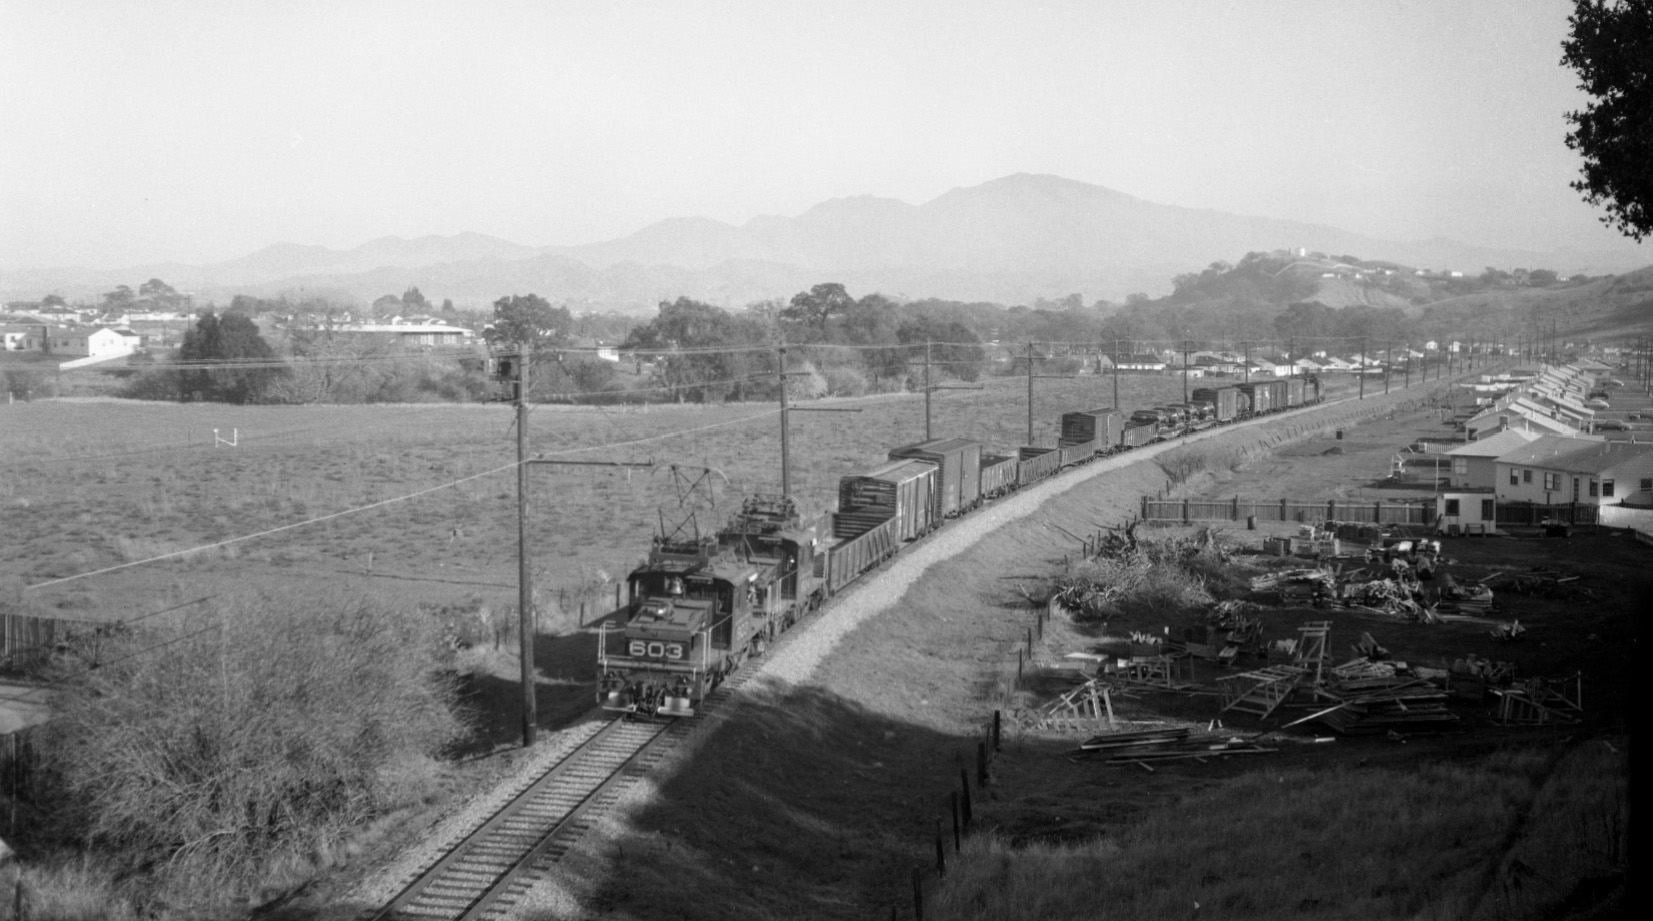
As for origins and destination of this military gear, this southeast view from Shafter Ave. at 40th St. ca. 1950 with SN 670 is the most westerly-located image found of military-related equipment transported by the SN. That is, no images on 40th St. or the Oakland Terminal Railway were found.
L189-25-EK Muller Photo, Courtesy BAERA, Western Railway Museum Archives, 90569sn, (Image 5 of 40)
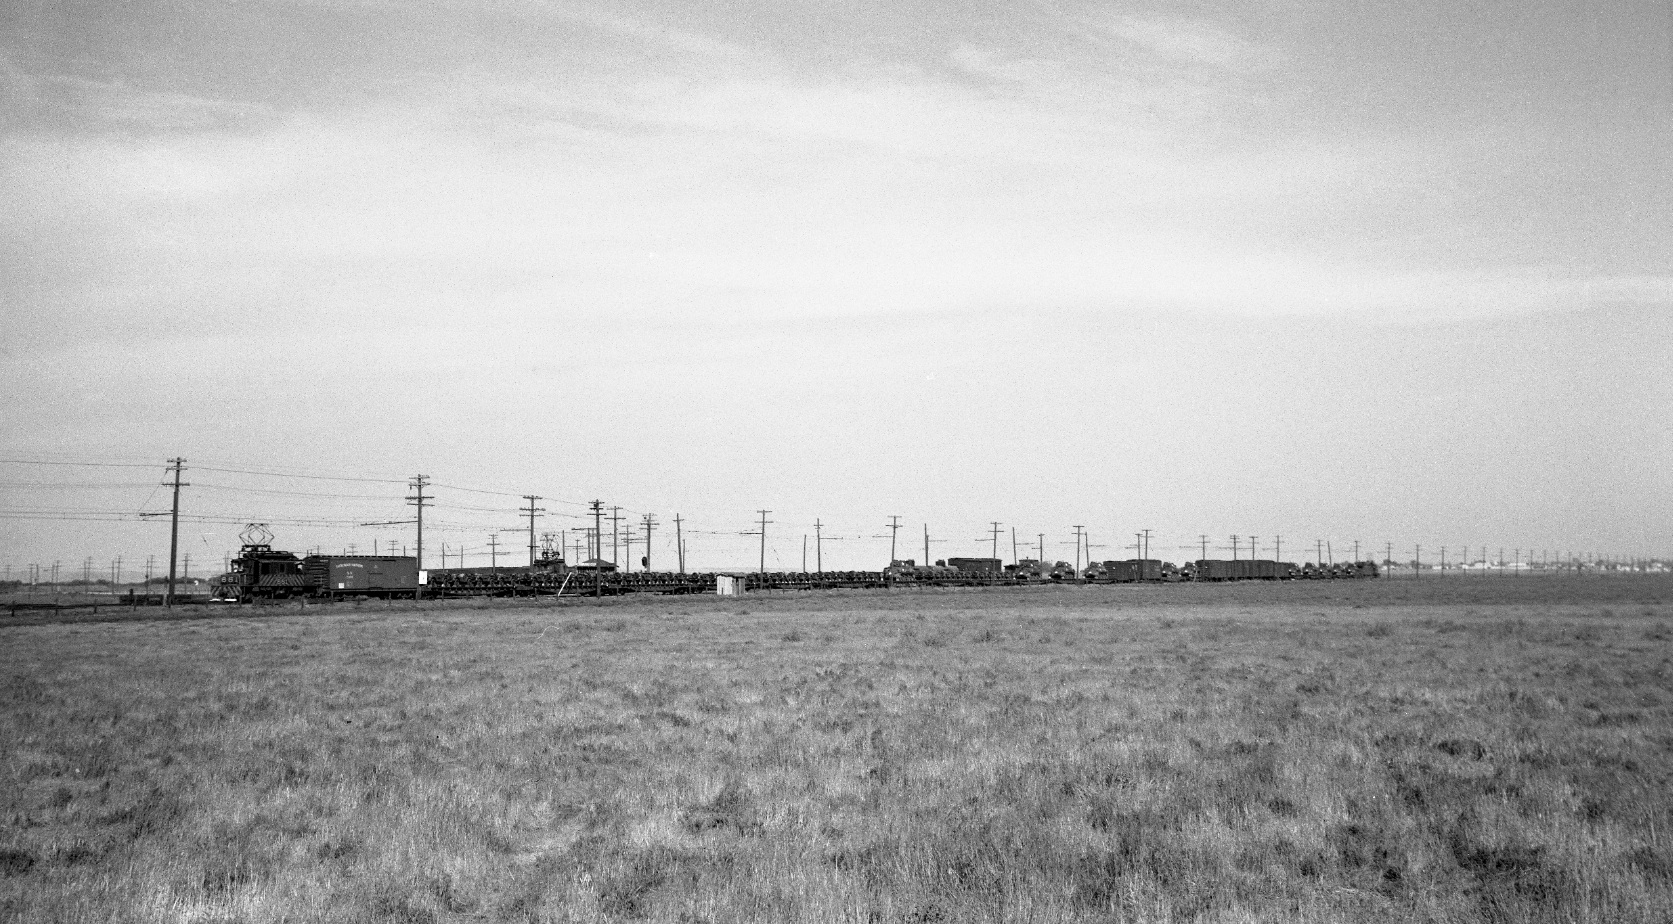
To the east, Tom Buckingham captured SN 661 leading two transports heading west from undated northeast views with the West Pittsburg passenger shelter marking this position. These trains would be assumed to have passed through Pittsburg or were assembled at the railway’s wye. Keep moving on ...
L189-30-Tom Buckingham Photo, Courtesy BAERA, Western Railway Museum Archives, 54299sn , (Image 6 of 40)
The second example of a train appearing to have passed through Pittsburg, and all that it may suggest about a possible Santa Fe connection at that point, is shown in this undated northeast view.
L189-35-Tom Buckingham Photo, Courtesy BAERA, Western Railway Museum Archives, 54300sn , (Image 7 of 40)
The potential of assembling these trains at the West Pittsburg wye is insinuated by this Korean War period image of SN 603 on the western section of the West Pittsburg wye on May 31, 1951. It should be noted that no images of military vehicles on the SN ferry Ramon have been found.
L189-40-HM Stange Photo, Courtesy Art Peterson, (Image 8 of 40)
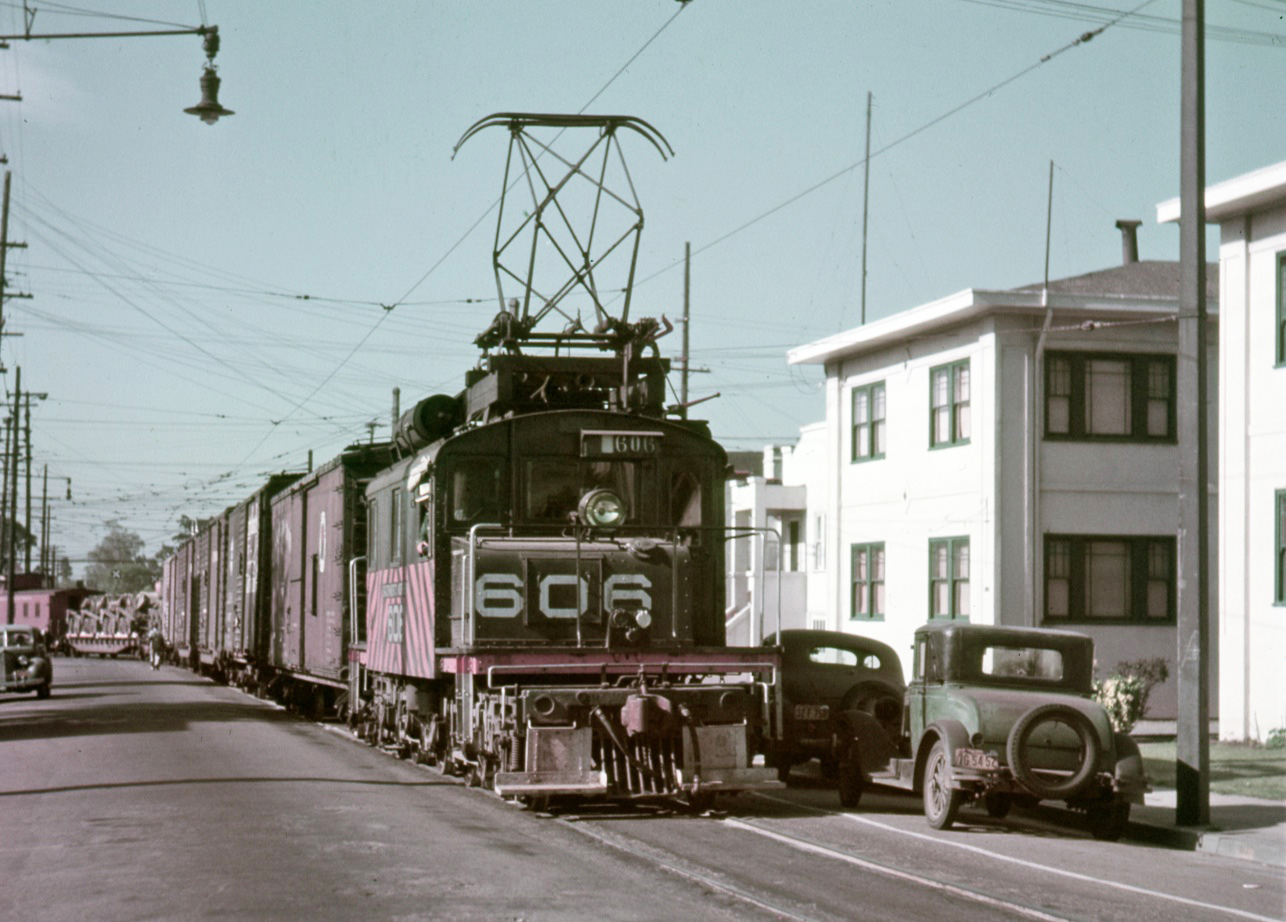
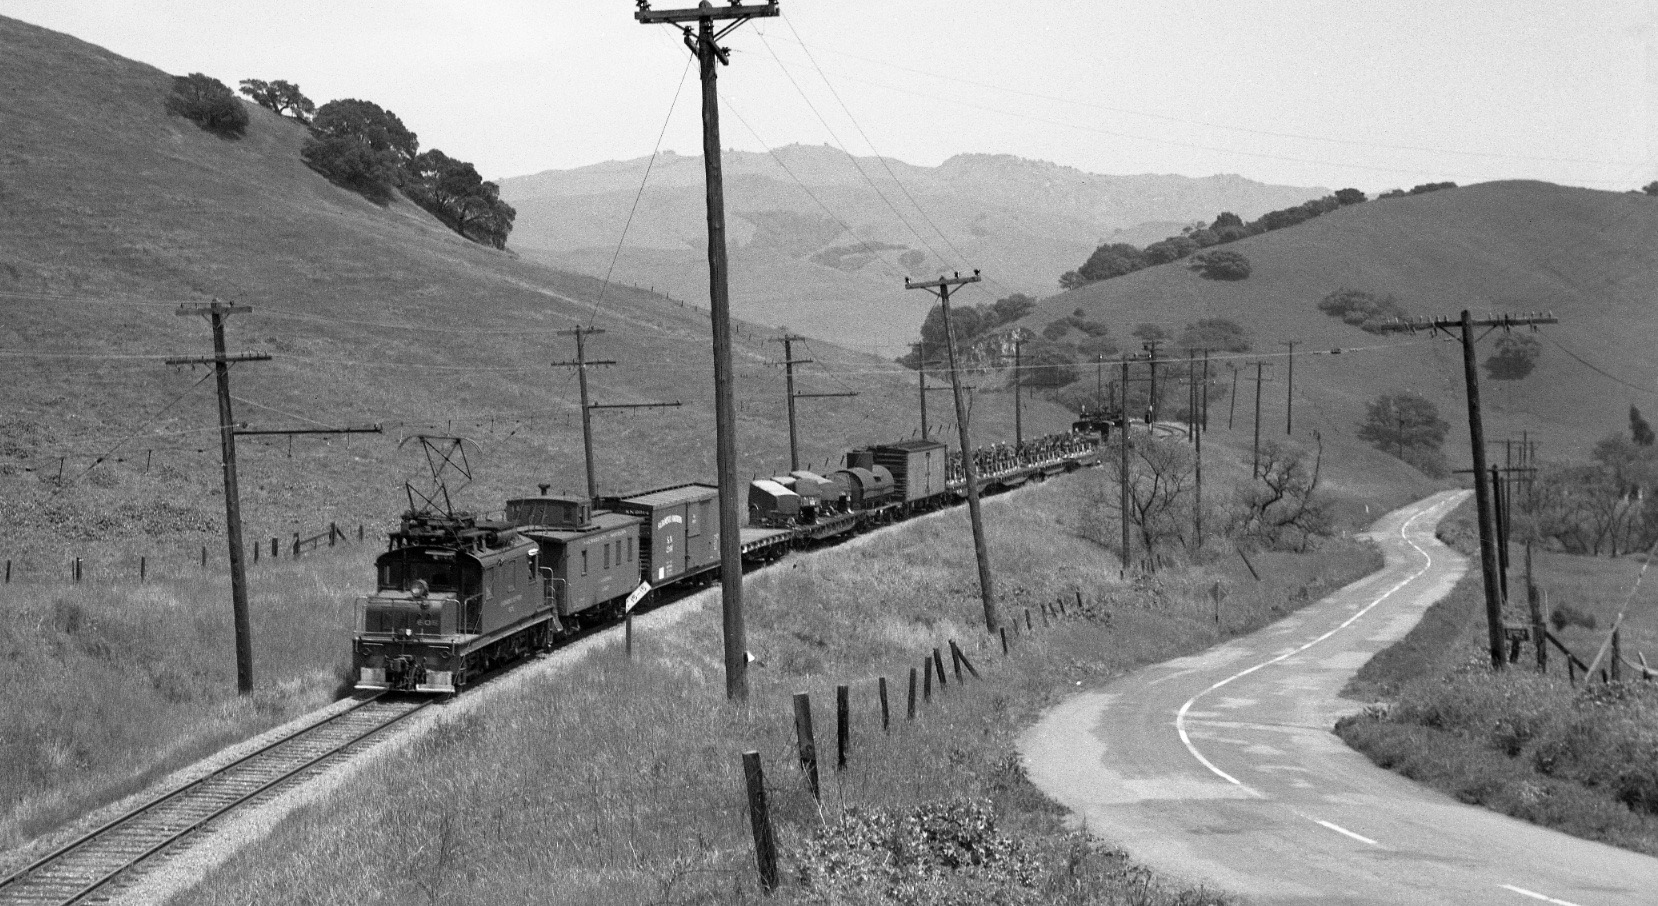
Many unanswered questions on this subject, and more to come. Before that, however, a series of images on the south end, ordering the images west to east through the East Bay hills starting with this southwest view at Shafter Ave. and 41st Street of SN 606 and freight on Apr. 22, 1950.
L189-45-Al Thoman Photo, Courtesy Al Thoman, (Image 9 of 40)
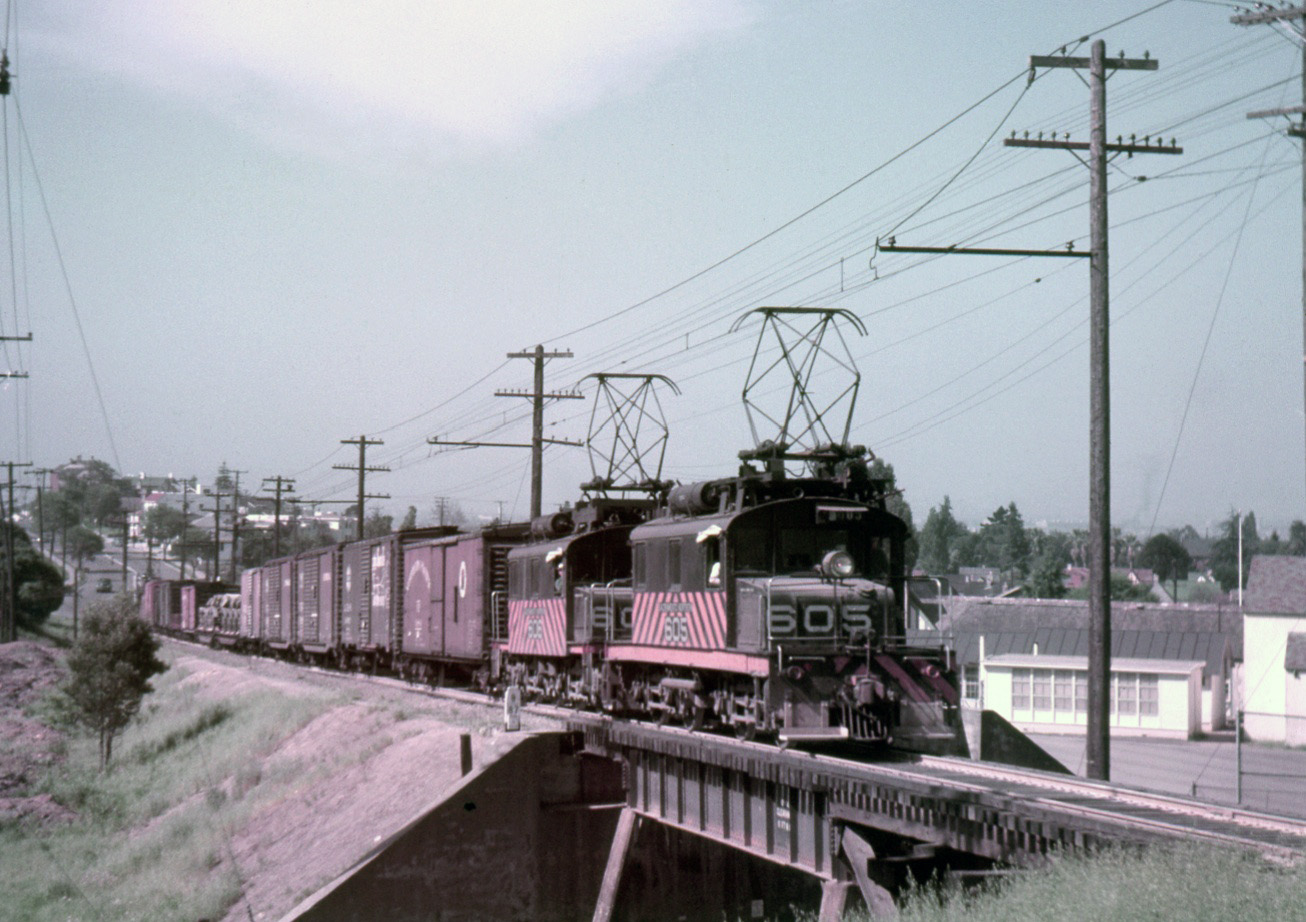
Al Thoman followed the same train to Rockridge capturing this southwest view on Apr.22, 1950 at the Chabot Elementary School berm. Note that SN 606 has been joined by sister motor SN 605 to attack the 4.5 percent grade to Lake Temescal.
L189-50-Al Thoman Photo, Courtesy Al Thoman, (Image 10 of 40)
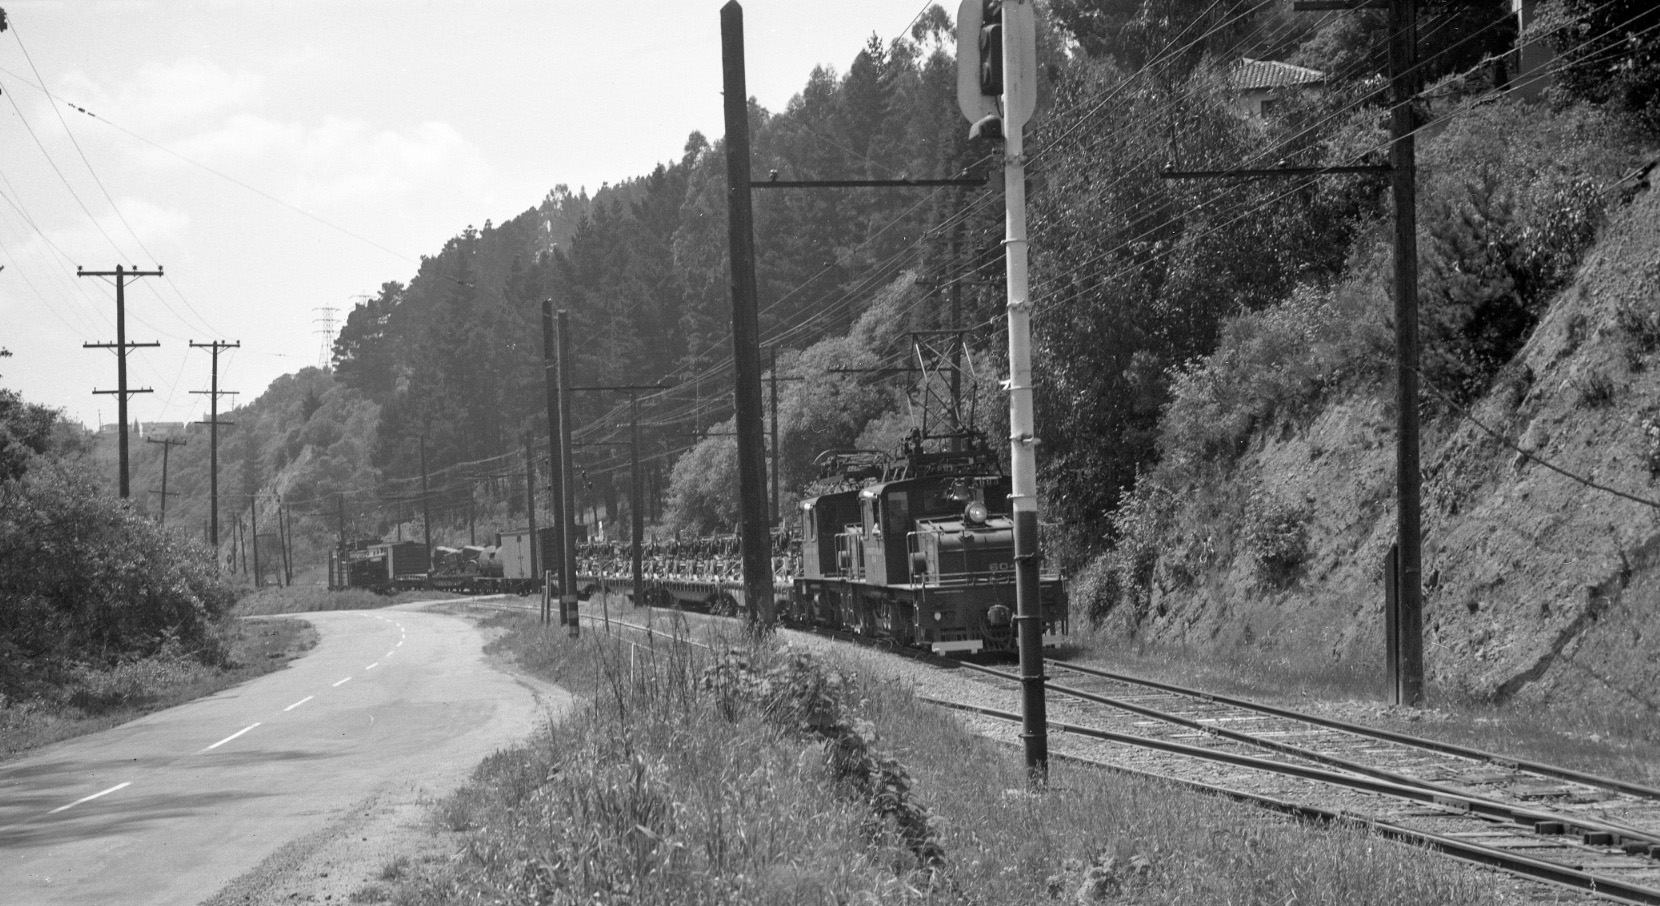
In addition to capturing long freights heading toward Oakland, Tom Buckingham also followed SN 604 and SN 603 here at Havens in Shepherd Canyon in a southwest view from May, 1948. Hop aboard and watch Tom chase this freight and its impressive array of artillery to Saranap.
L189-55-Tom Buckingham Photo, Courtesy BAERA, Western Railway Museum Archives, 54313sn , (Image 11 of 40)
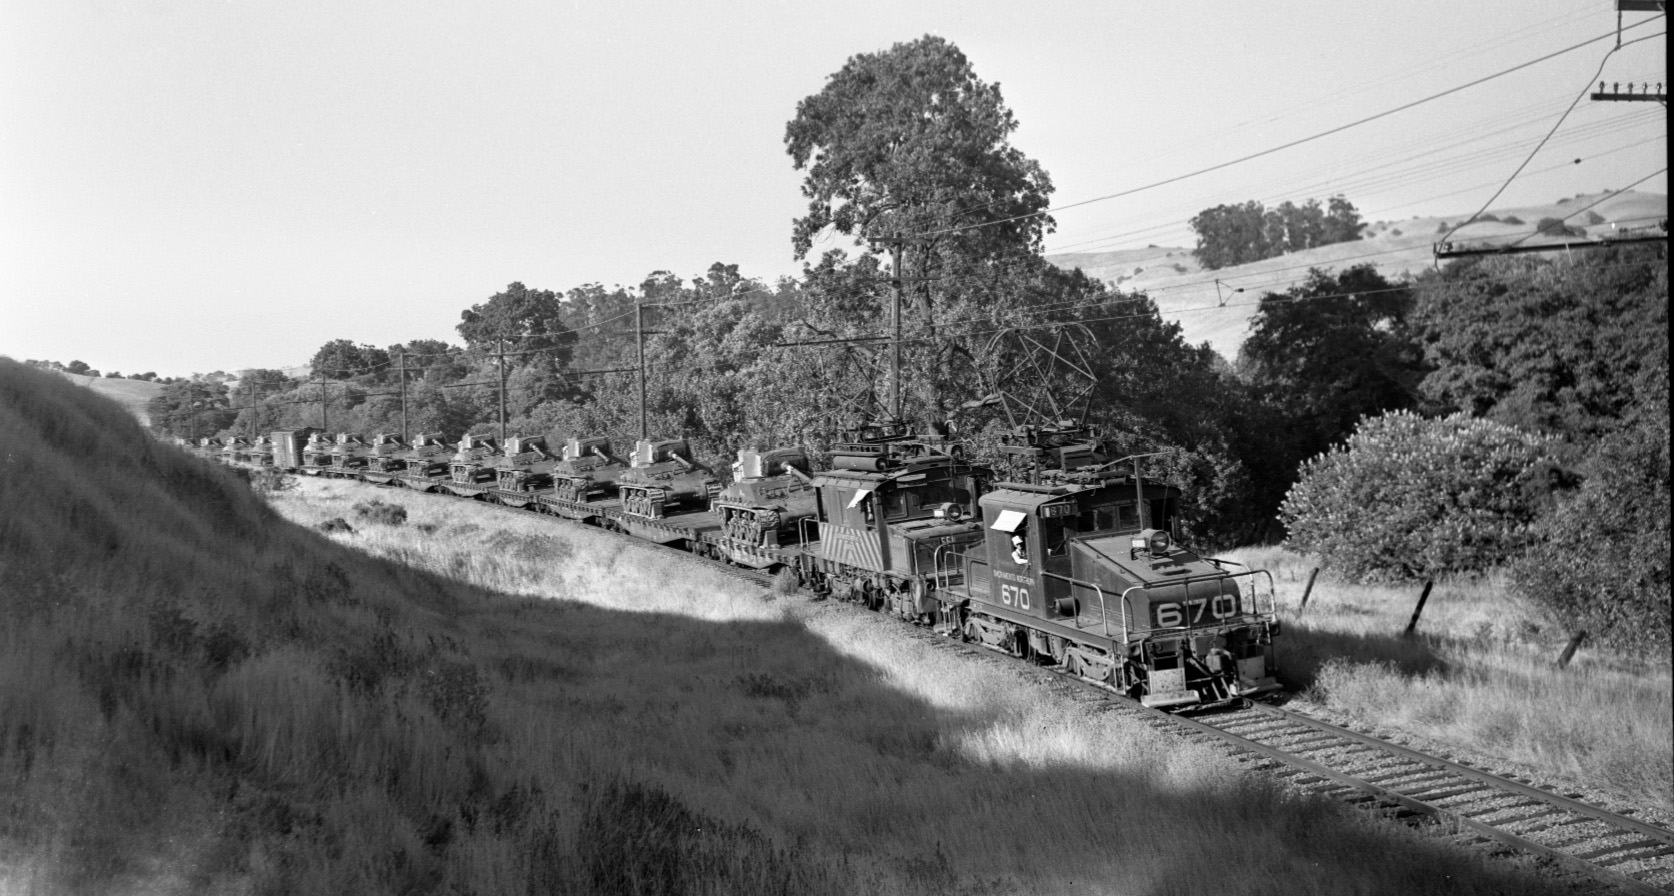
Dave Gumz followed a rail convoy through the Pinehurst and Canyon areas, his best image shown here with SN 670 approaching Wilcox as denoted by the mile 15 sign in this undated east view.
L189-60-Dave Gumz Photo, Courtesy BAERA, Western Railway Museum Archives, 136948sn, (Image 12 of 40)
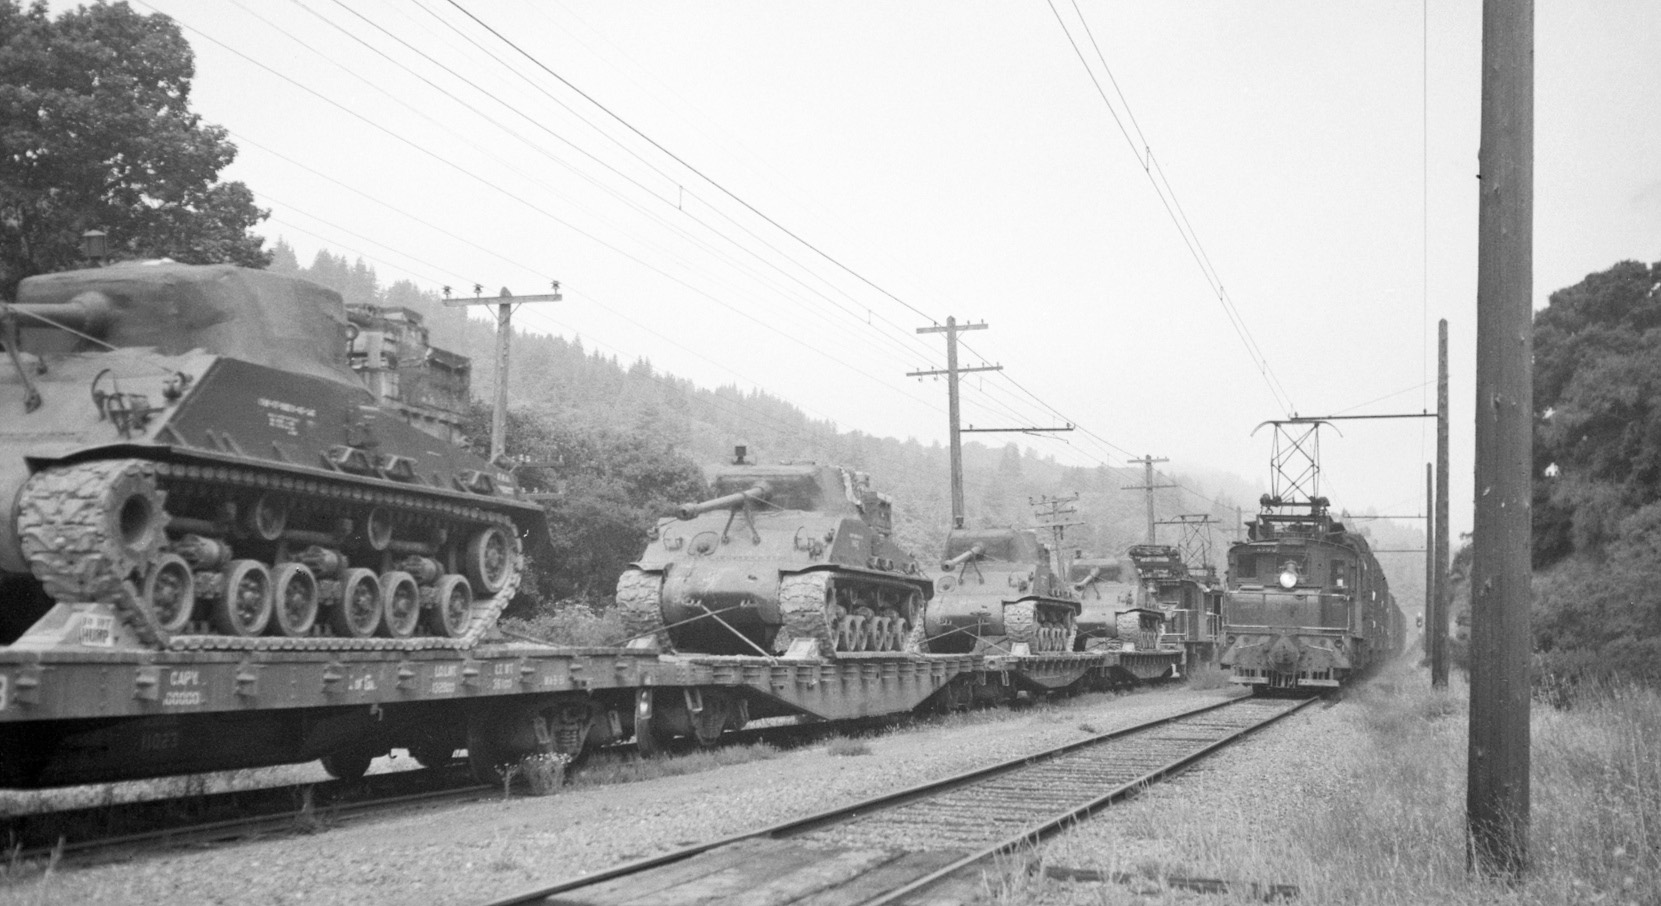
Dudley Thickens took many fine images in Contra Costa County with an emphasis on tank-heavy loads as shown at Pinehurst with SN 604 and SN 603 in 1951, south view.
L189-65-Dudley Thickens Photo, Courtesy BAERA, Western Railway Museum Archives, 136952sn, (Image 13 of 40)
A look at the front of the tanks at Pinehurst, SN 604 and SN 603 now having progressed west with SN 660 passing to the east, 1951, northwest view.
L189-70-Dudley Thickens Photo, Courtesy BAERA, Western Railway Museum Archives, 136950sn, (Image 14 of 40)
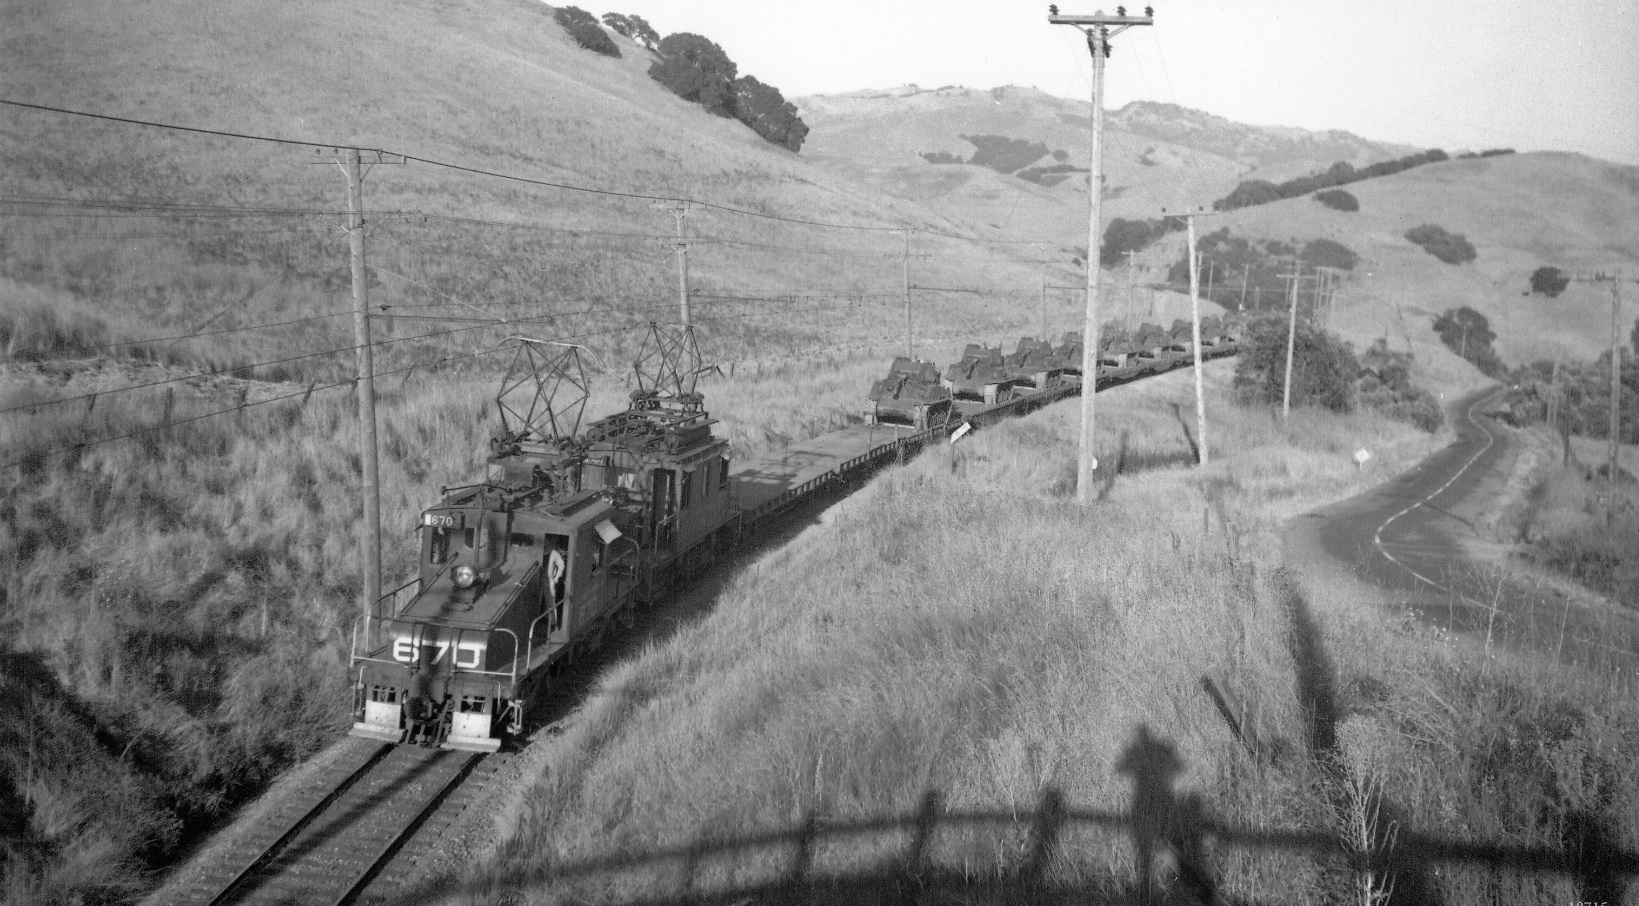
Thickens got his shadow and that of the Canyon Rd.-SN overpass at Valle Vista in this northeast view of SN 670 leading tanks westward, July 1950. Note the two empty flatcars behind the second motor, one of the 660 series, for future reference.
L189-75-Dudley Thickens Photo, Courtesy BAERA, Western Railway Museum Archives, 18715sn, (Image 15 of 40)
Tom Buckingham raced from Shepherd Canyon to Valle Vista and just caught site of the rear of the freight led by SN 604 and 603 at the Canyon Rd.-SN overpass. This northeast view documented that 605 was at the rear in May 1948.
L189-80-Tom Buckingham Photo, Courtesy BAERA, Western Railway Museum Archives, 54288sn , (Image 16 of 40)
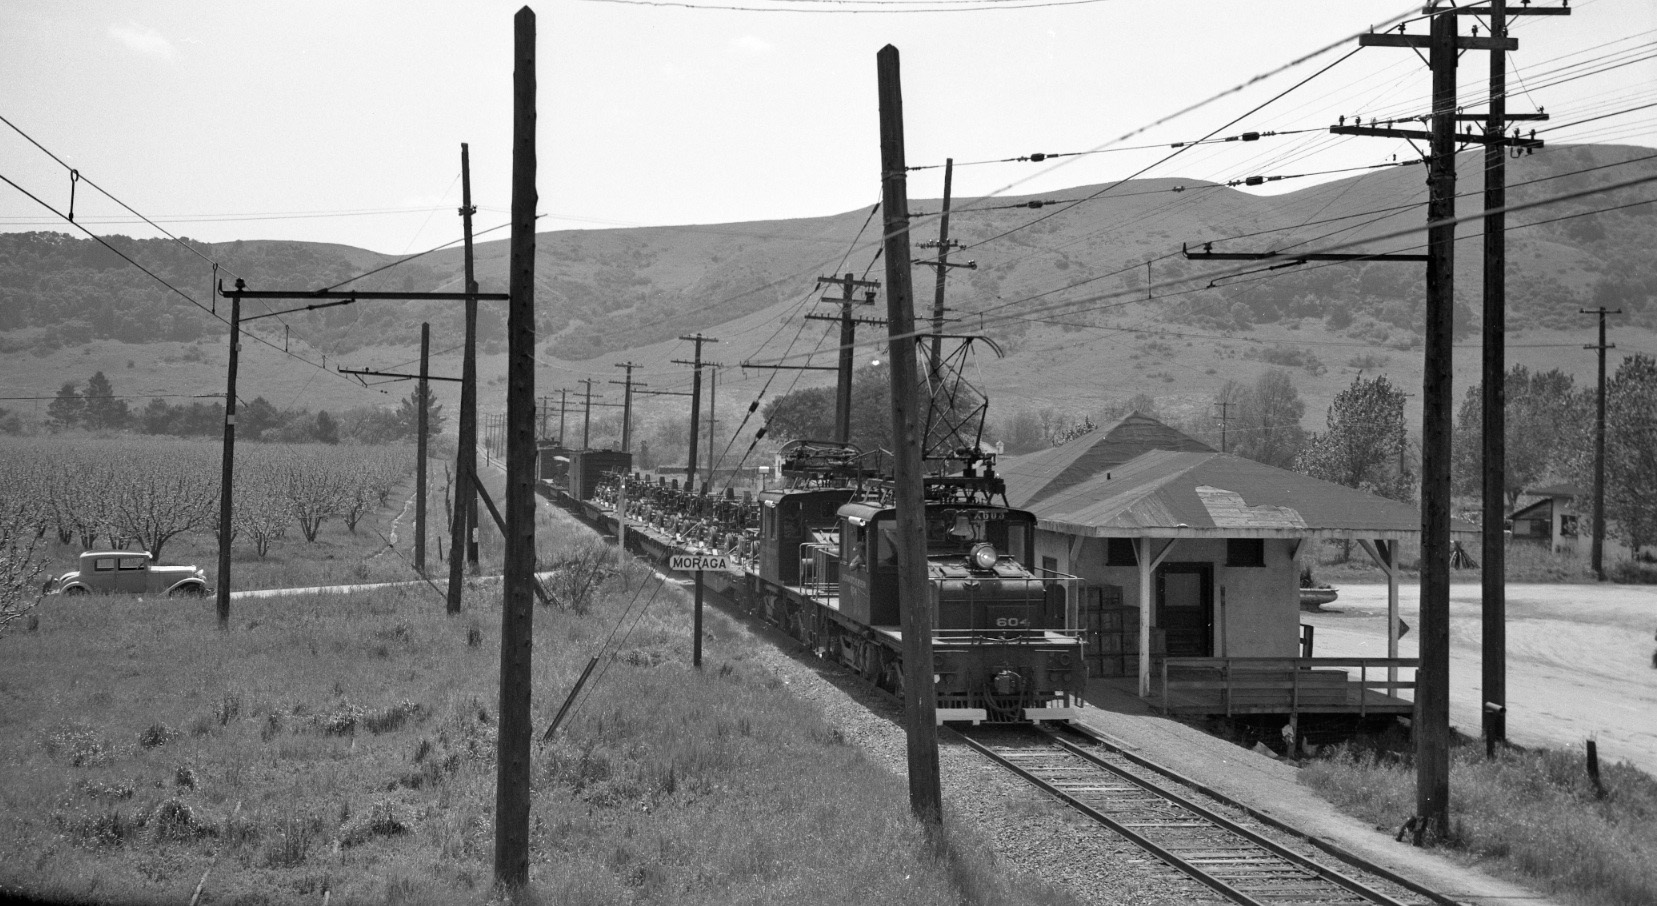
Buckingham was all prepared at the old station at Moraga in May 1948, southwest view, to catch the front of SN 604. It appears the only witnesses to this impressive array of equipment was the photographer and his car.
L189-85-Tom Buckingham Photo, Courtesy BAERA, Western Railway Museum Archives, 54315sn , (Image 17 of 40)
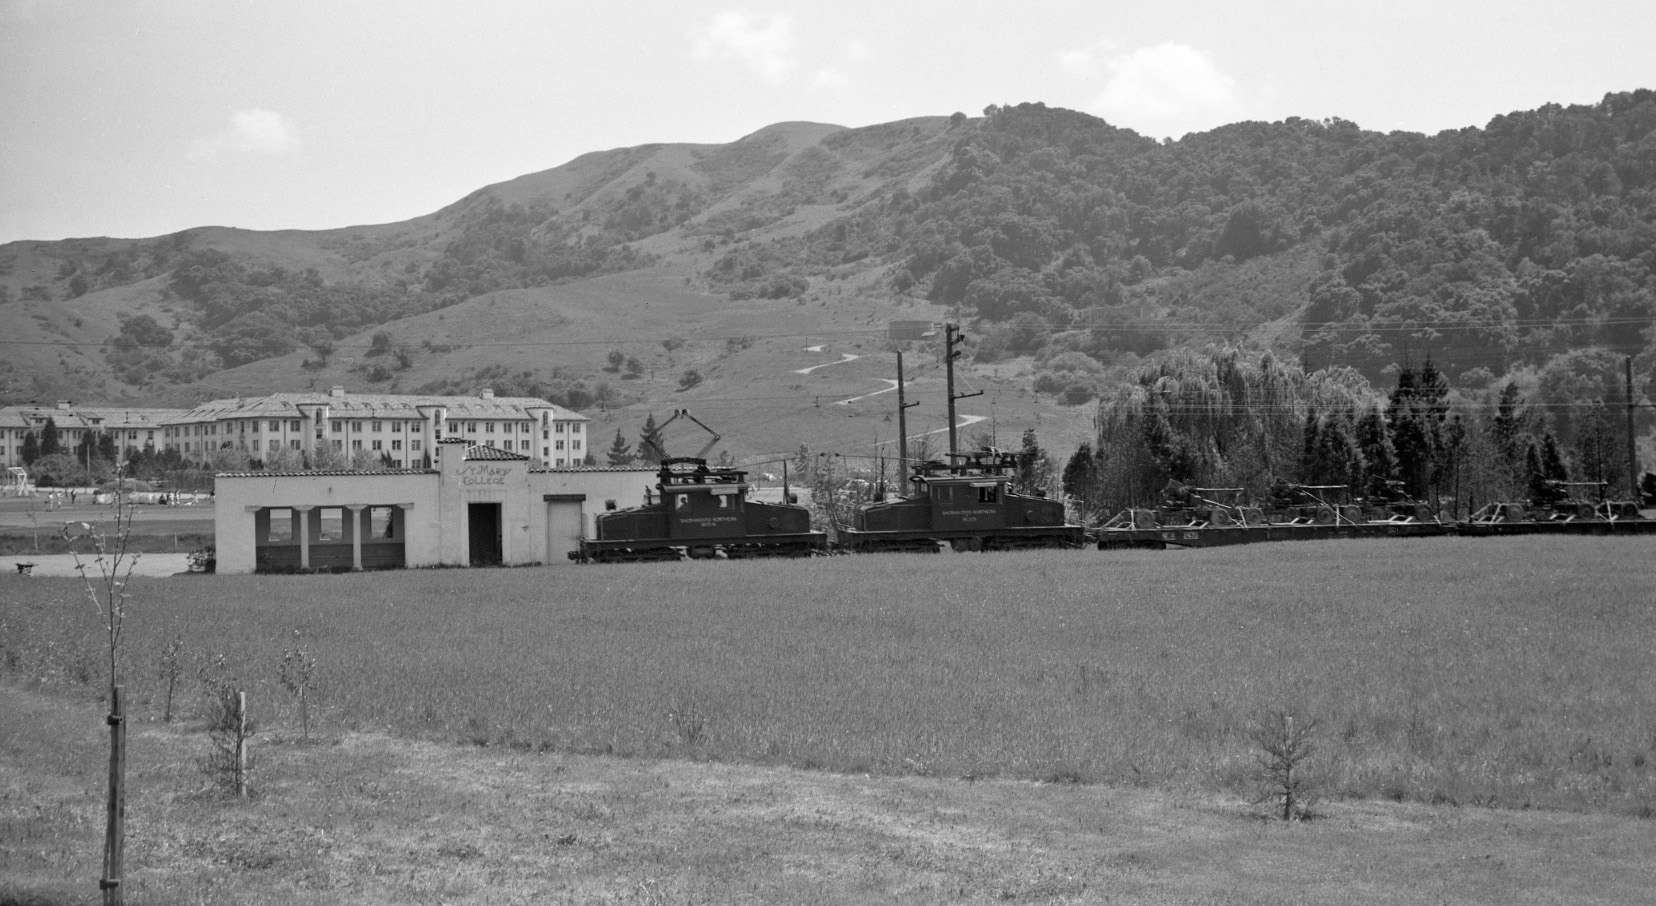
Athletic activities on the field continued without interruption as the military contingent passed St. Mary's College Station, where Buckingham recorded this east view in May 1948.
L189-90-Tom Buckingham Photo, Courtesy BAERA, Western Railway Museum Archives, 54316sn, (Image 18 of 40)
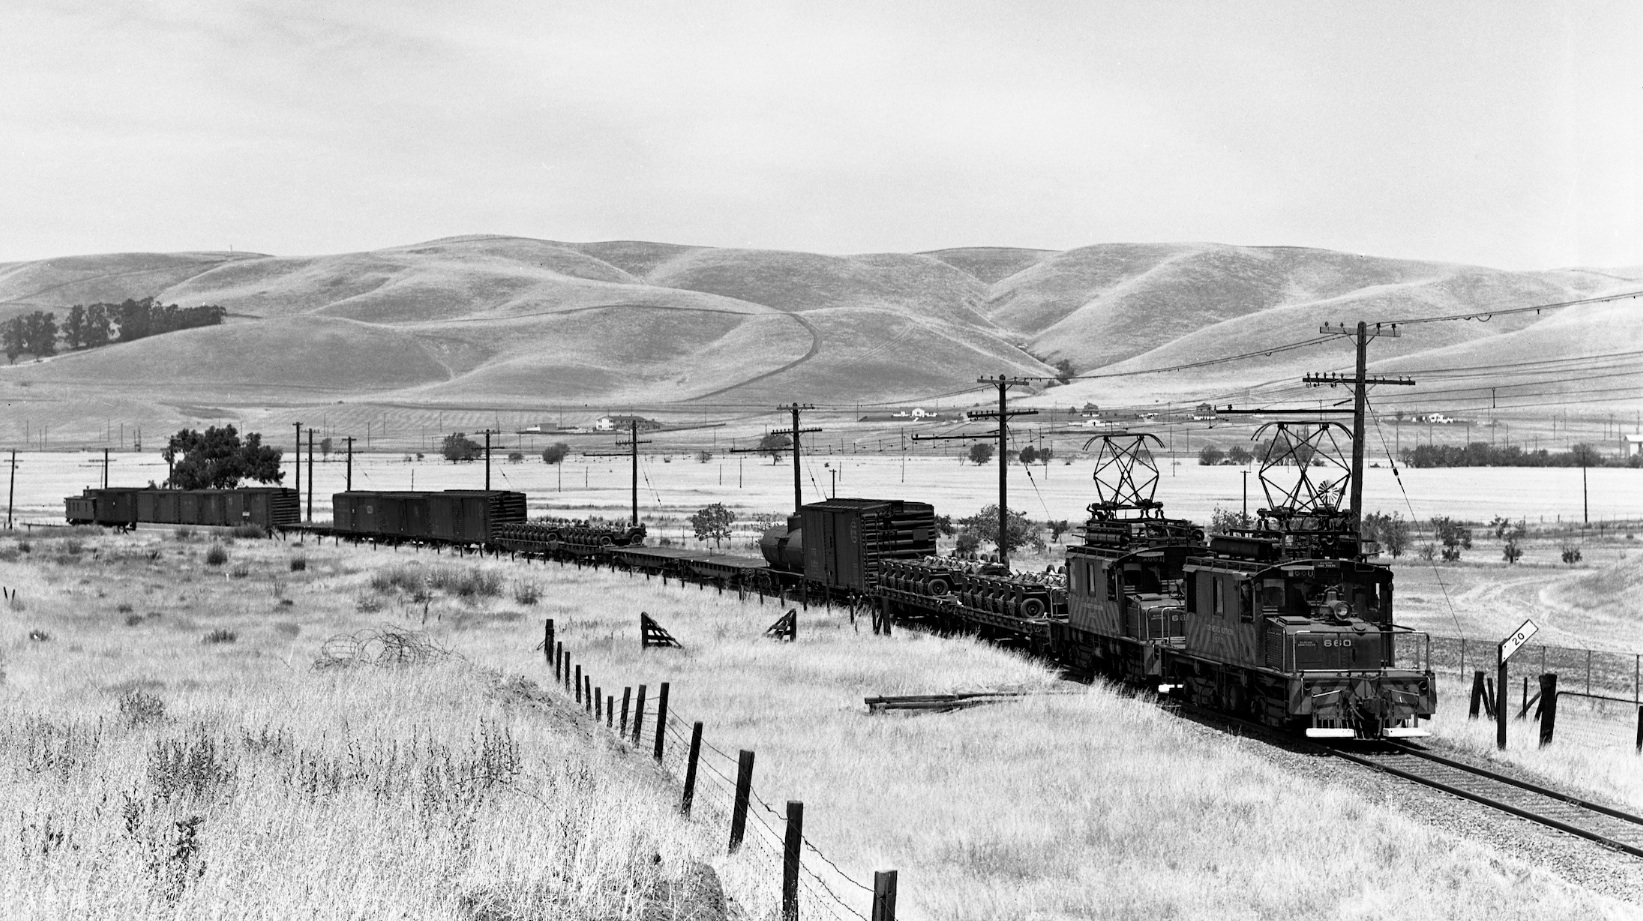
Meanwhile, Thickens took this image of SN 670 and SN 660 with tanks along Las Trampas Creek in Lafayette in a northeast view. Although heading west as is the freight in L-189-75, this image was narrowed down to the day, July 29, 1950. Although also led by SN 670, this image has no empty flatcars behind the second motor.
L189-95-Dudley Thickens Photo, Courtesy BAERA, Western Railway Museum Archives, 4591sn, (Image 19 of 40)
Tom Buckingham wasted no time leaving St. Mary’s College on his quest to capture SN 604 and SN 603 and artillery along every station structure possible, and here he succeeded. The scene is at Burton, southeast view, May 1948, and in addition to the abandoned passenger shelter, a good view of the agricultural-related covered freight platform is featured.
L189-100-Tom Buckingham Photo, Courtesy BAERA, Western Railway Museum Archives, 54317sn , (Image 20 of 40)
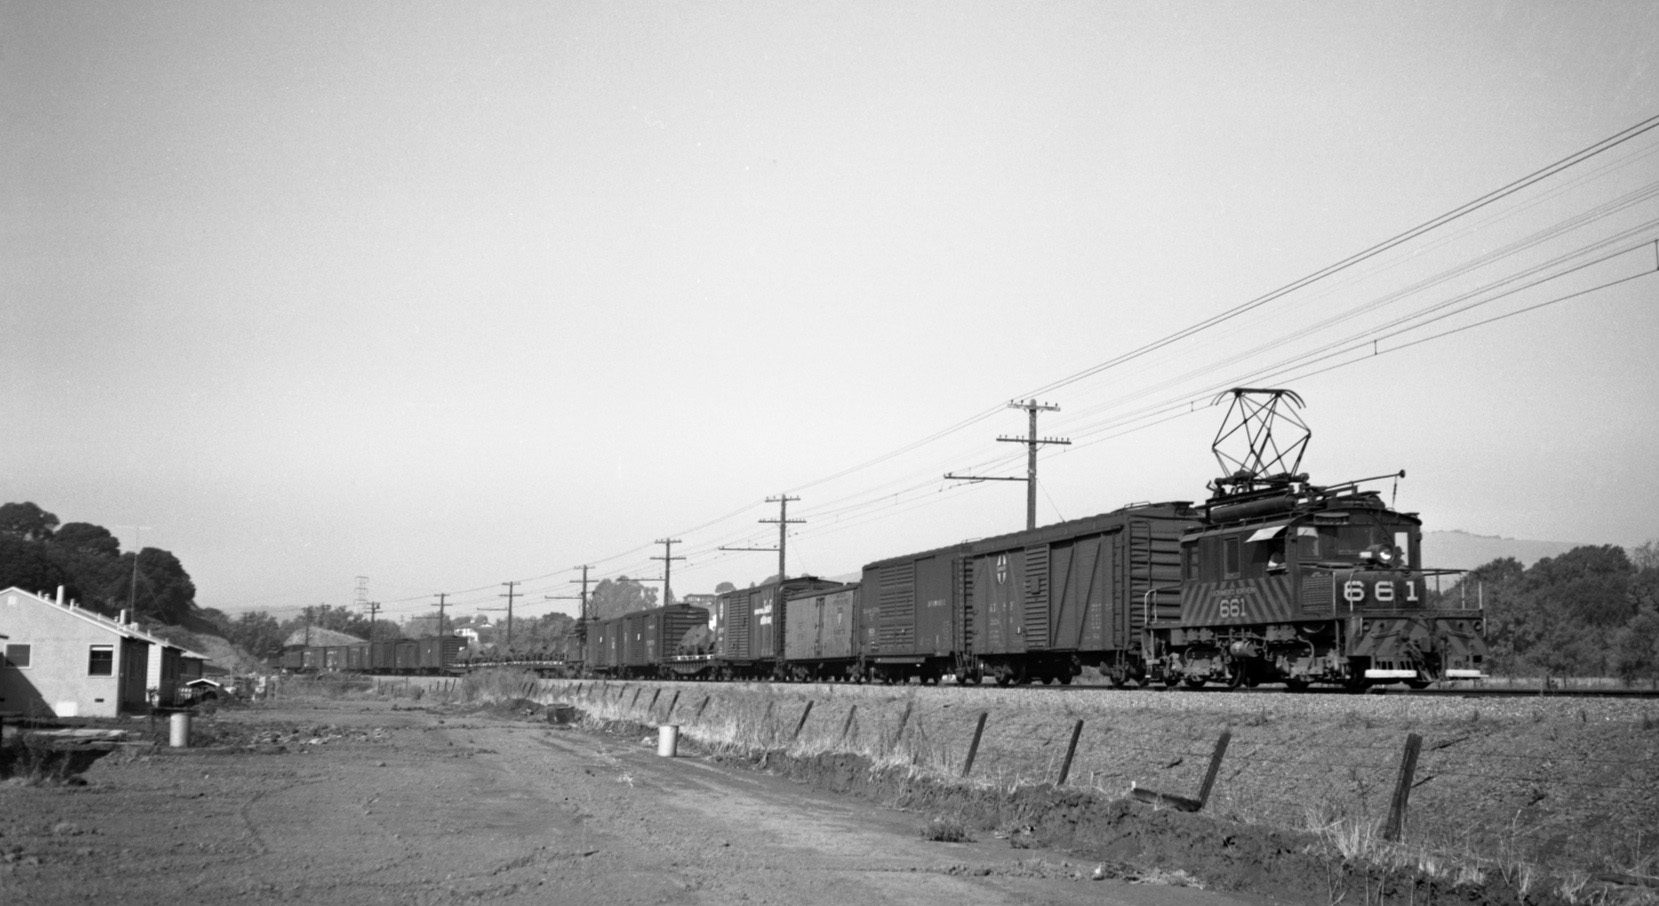
Getting closer to Thickens first home in the Easy Bay, Saranap, SN 661 heads east emerging from the rock-lined constriction that today is part of Olympic Blvd. just east of Pleasant Hill Rd. Northwest view, October, 1949. Note the new housing that backed onto the railway from West Newell Ave.
L189-105-Dudley Thickens Photo, Courtesy BAERA, Western Railway Museum Archives,94720sn, (Image 21 of 40)
Flipping the scene almost 180 degrees to the east, Mount Diablo looms large in this undated image taken from the hill along the cut showing SN 603 and SN 604 carrying a typical freight west at the Lafayette-Saranap border with the exception of two flatcars with military vehicles.
L189-110-Dudley Thickens Photo, Courtesy BAERA, Western Railway Museum Archives, 4604sn , (Image 22 of 40)
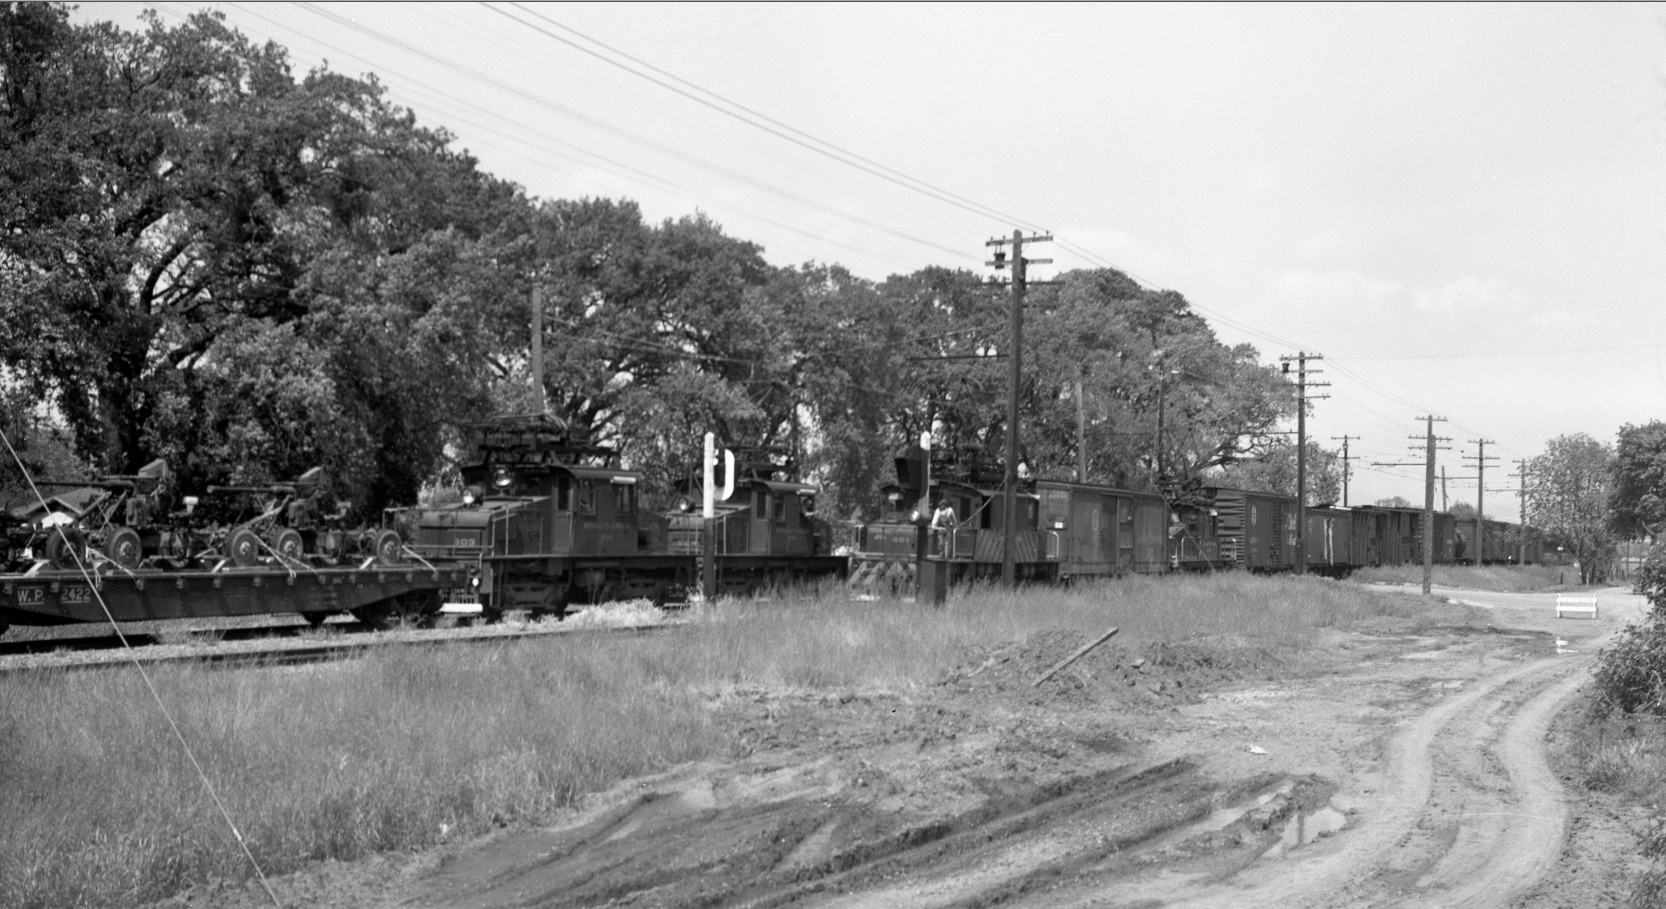
Noting a log jam at the double-track curve at Saranap, Buckingham takes his final image of SN 604 and 603 with military artillery with an added extra of a SN 661-led passing freight. Undated, northeast view.
L189-115-Tom Buckingham Photo, Courtesy BAERA, Western Railway Museum Archives, 54318sn, (Image 23 of 40)
No related images were found between Walnut Creek and Concord until Ohmer Hill at mile 36. Caboose 1610 watches over two flatcars of jeeps on a freight heading west in June 1948. This southeast view captures the trees in the distance that can be appreciated at the current BART North Concord-Martinez stop.
L189-120-Tom Buckingham Photo, Courtesy BAERA, Western Railway Museum Archives, 54291sn , (Image 24 of 40)
Between the overpass of the Arnold Industrial Highway, the Highway 4 precursor, and Ohmer Hill, SN 660 and 661 carry four flatcars of jeeps westward in this northeast view from July 5, 1948.
L189-125-Moreau Collection, Courtesy BAERA, Western Railway Museum Archives, 82391sn, (Image 25 of 40)
As SN 654 crosses the overpass of the Arnold Industrial Highway, the main load is wood, but the gem is the one tank hidden between boxcars. Northeast view circa 1950.
L189-130-Tom Gray Photo, Courtesy Tom Gray, (Image 26 of 40)
EK Muller was on Main St. in Port Chicago circa 1950 when a northeast view of a freight captured military vehicles at the rear.
L189-135-EK Muller Photo, Courtesy BAERA, Western Railway Museum Archives, 78465sn, (Image 27 of 40)
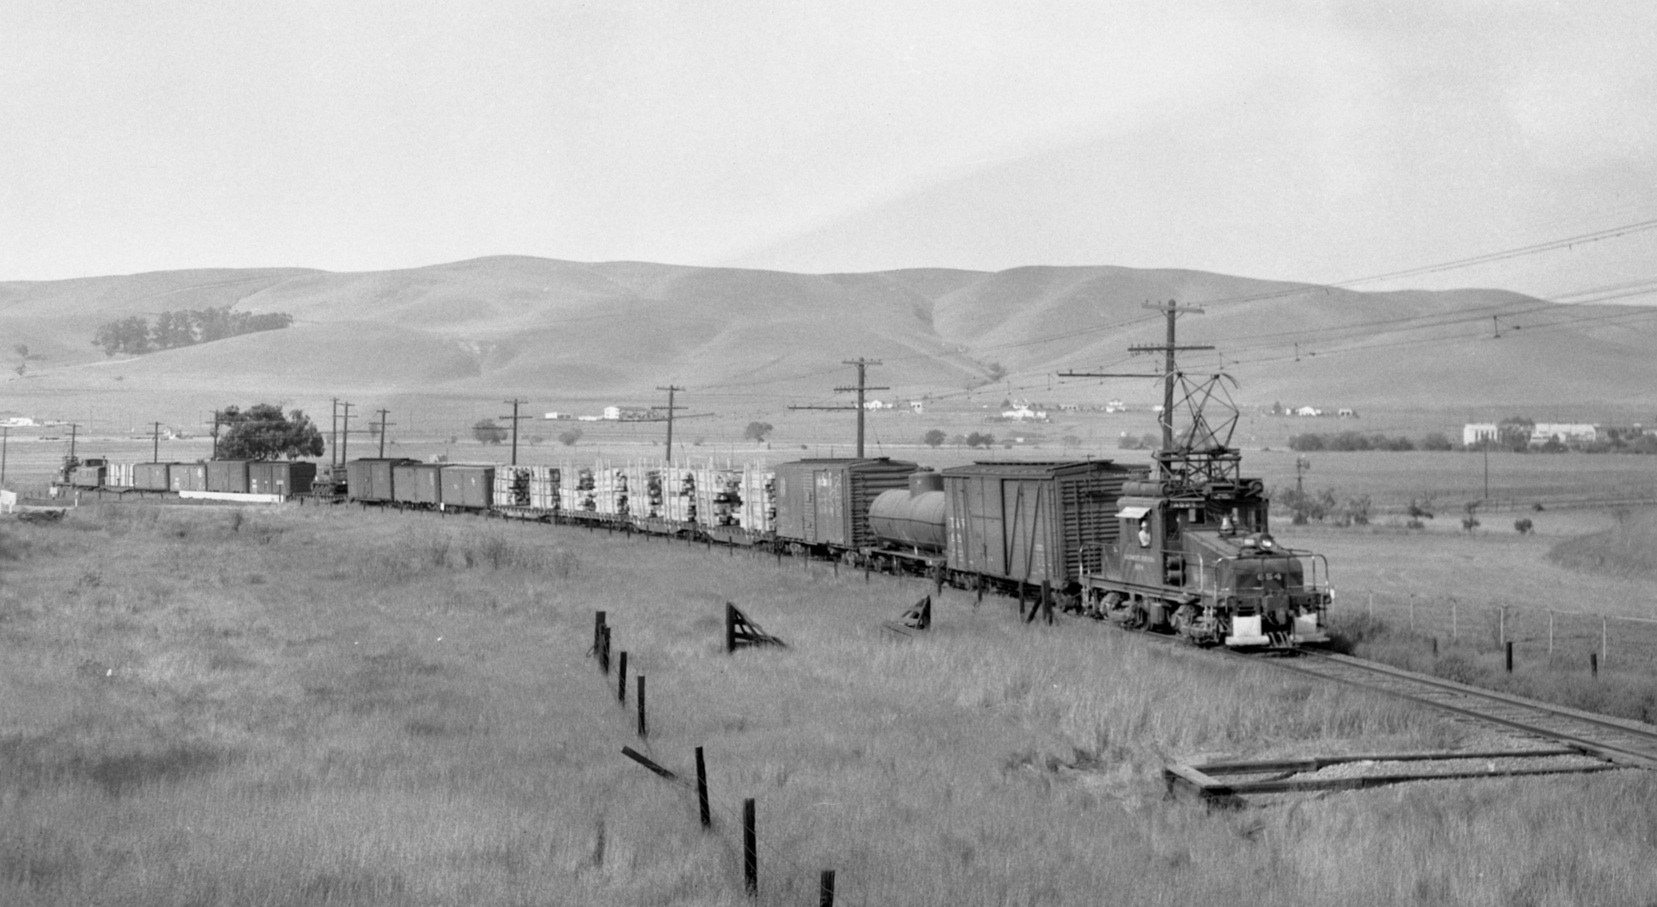
With the trees at the McAvoy grade crossing in view to the east, or right edge, another view of SN 661 with assorted military gear heading west along the Port Chicago Highway was documented in an undated northeast view. For a film documenting transport of military trucks through Shepherd Canyon, see Charles Smiley’s “Electric Rails Around the Bay”, D-124.
L189-140-Tom Buckingham Photo, SN, Courtesy BAERA, Western Railway Museum Archives, 54303sn , (Image 28 of 40)
Documentation for the eastern starting or ending points of the images just reviewed has not been found, but the western point for SN-directed military supplies was the Oakland Army Base. Starting with this east view above the Bay Bridge toll plaza and the Key System mainline and yard from Aug. 30, 1954, the first objective was to locate the vehicles and artillery seen in this presentation on the base.
L189-145-Copyright California Department of Transportation, 3936-38 , (Image 29 of 40)
At least a few of the vehicles in this detail match those delivered by train, appreciating that a similar image from 1946-1951 was not found to match the ground views just shown. Assuming the Oakland Terminal Railway delivered these items from 40th St. to the base without crossing the Southern Pacific, SP, mainline, two short options for the route of those trains in 1954 seem most plausible.
L189-150-Copyright California Department of Transportation, 3936-38, Detail, (Image 30 of 40)
This east view Aug. 30th, 1954 detail shows no connections between the southern-most Key System track, purple arrow, and the adjacent track that had been used by the Interurban Electric Trains, IER, orange arrow, all the way to the bridge. The only access to the army base based on this image is at the checkpoint, green arrow, from which a roadway extends to the fleet of military vehicles.
L189-155-Copyright California Department of Transportation, 3936-38, Detail, (Image 31 of 40)
Another east view from Aug. 30th, 1954 of the army base checkpoint.
L189-160-Copyright California Department of Transportation, 3936-40, Detail, (Image 32 of 40)
A second possible route involves the use of the trestle, blue arrow, that the IER had used prior to its dissolution as an overpass of the SP mainline. East view from Aug. 30th, 1954.
L189-165-Copyright California Department of Transportation, 3936-40, Detail, (Image 33 of 40)
To consider the possibility of the OTR utilizing the trestle, start with this west view from Nov. 16, 1954.
L189-170-Copyright California Department of Transportation, 4073-4 , (Image 34 of 40)
A detail of L189-170 west view from Nov. 16, 1954 shows the track that would need to be used, orange arrow, for the OTR to gain access to the trestle, the blue arrow marking the take-off point of that structure.
L189-175-Copyright California Department of Transportation, 4073-4, (Image 35 of 40)
A north view from Nov. 16, 1954 of what was displayed in L189-175 is shown here. The track that would need to be used, orange arrows, for the OTR to gain access to the trestle, the blue arrow, marking the take-off point of that structure.
L189-180-Copyright California Department of Transportation, 4073-6, (Image 36 of 40)
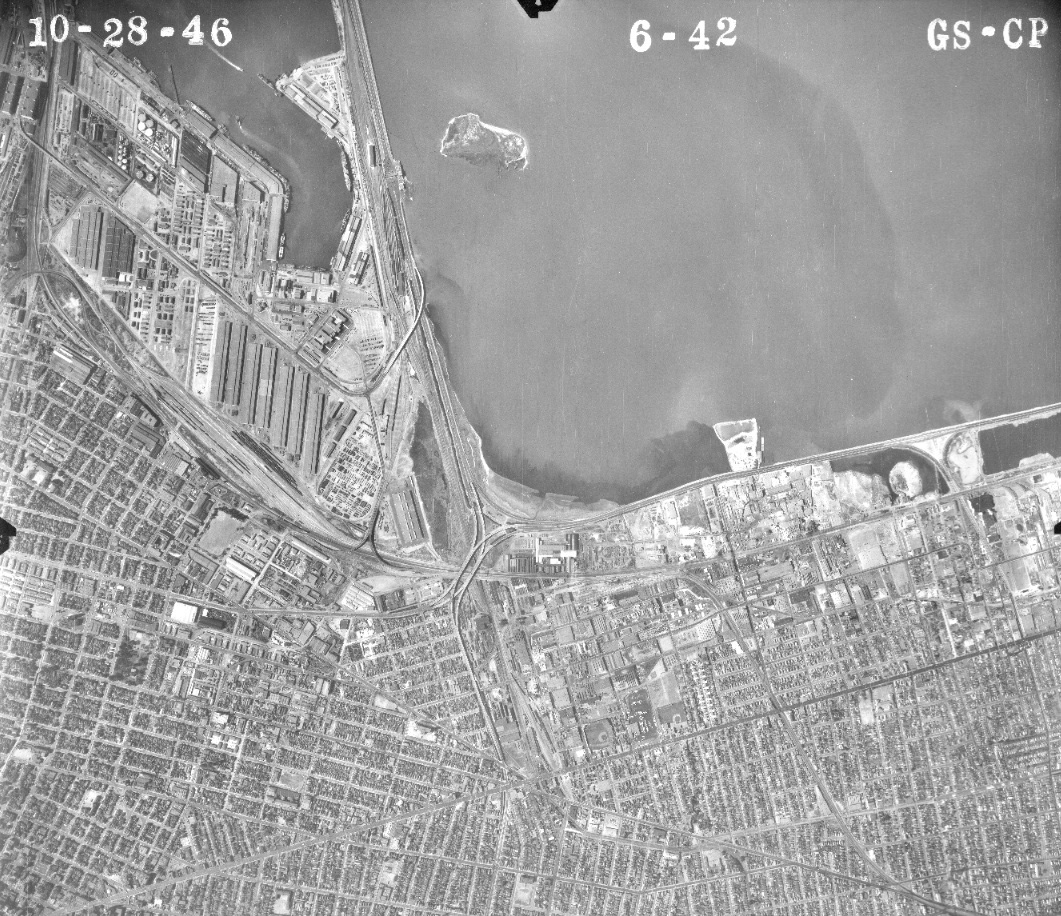
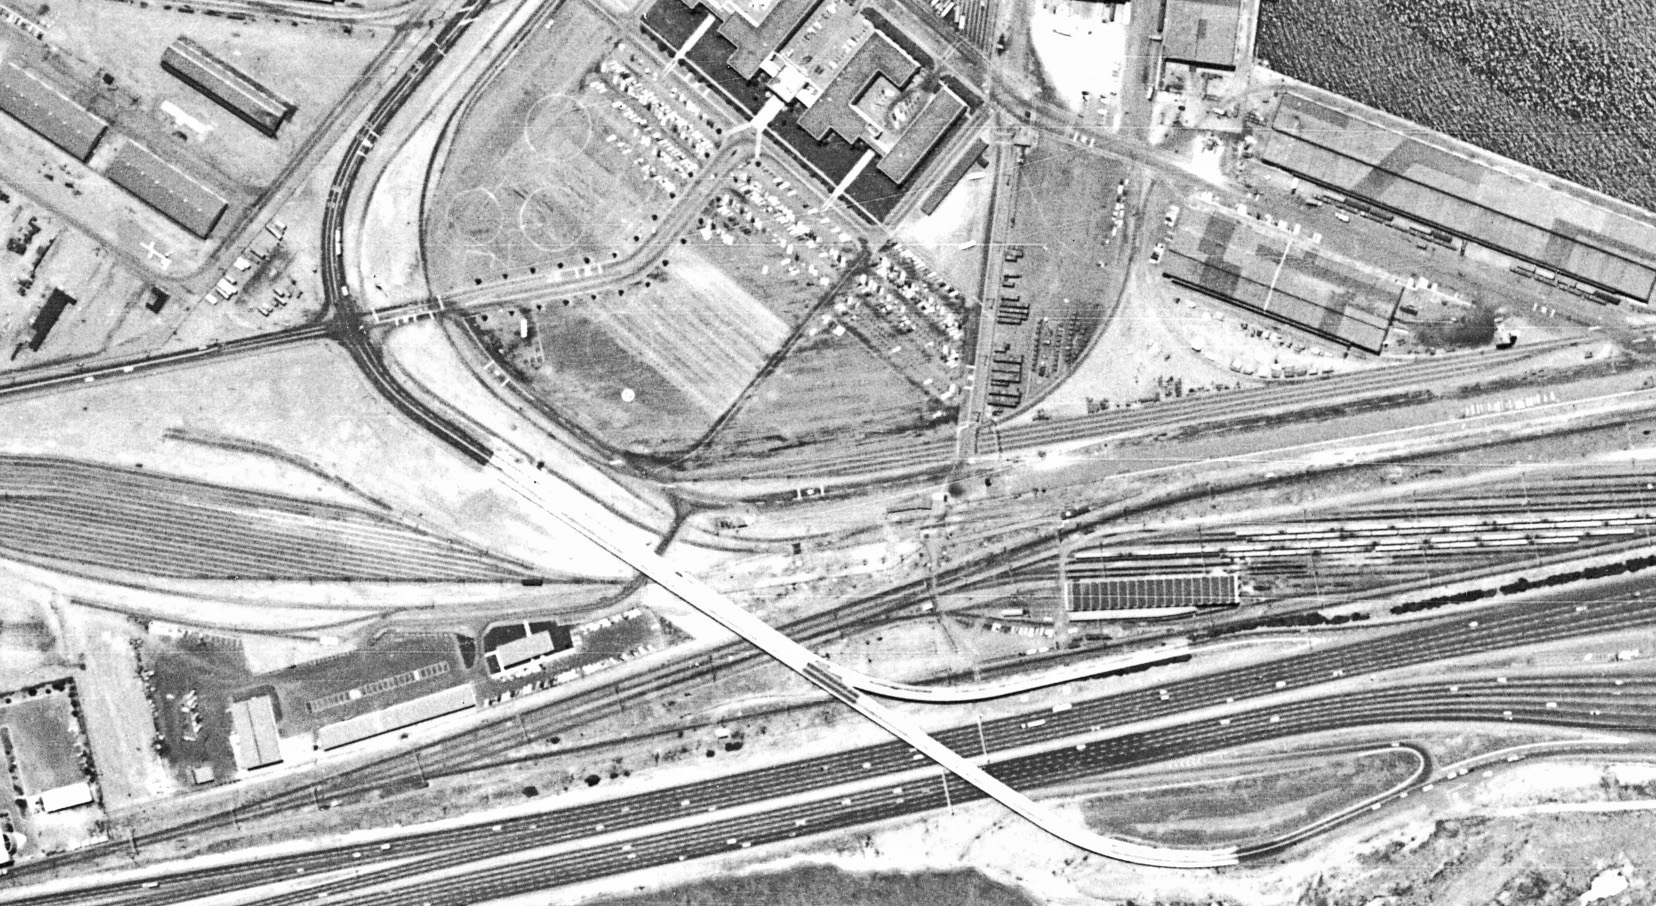
The track layout before this date may have allowed other options, examined by this vertical west-oriented aerial from 1946.
L189-185-Courtesy East Bay Regional Park District Archives, (Image 37 of 40)
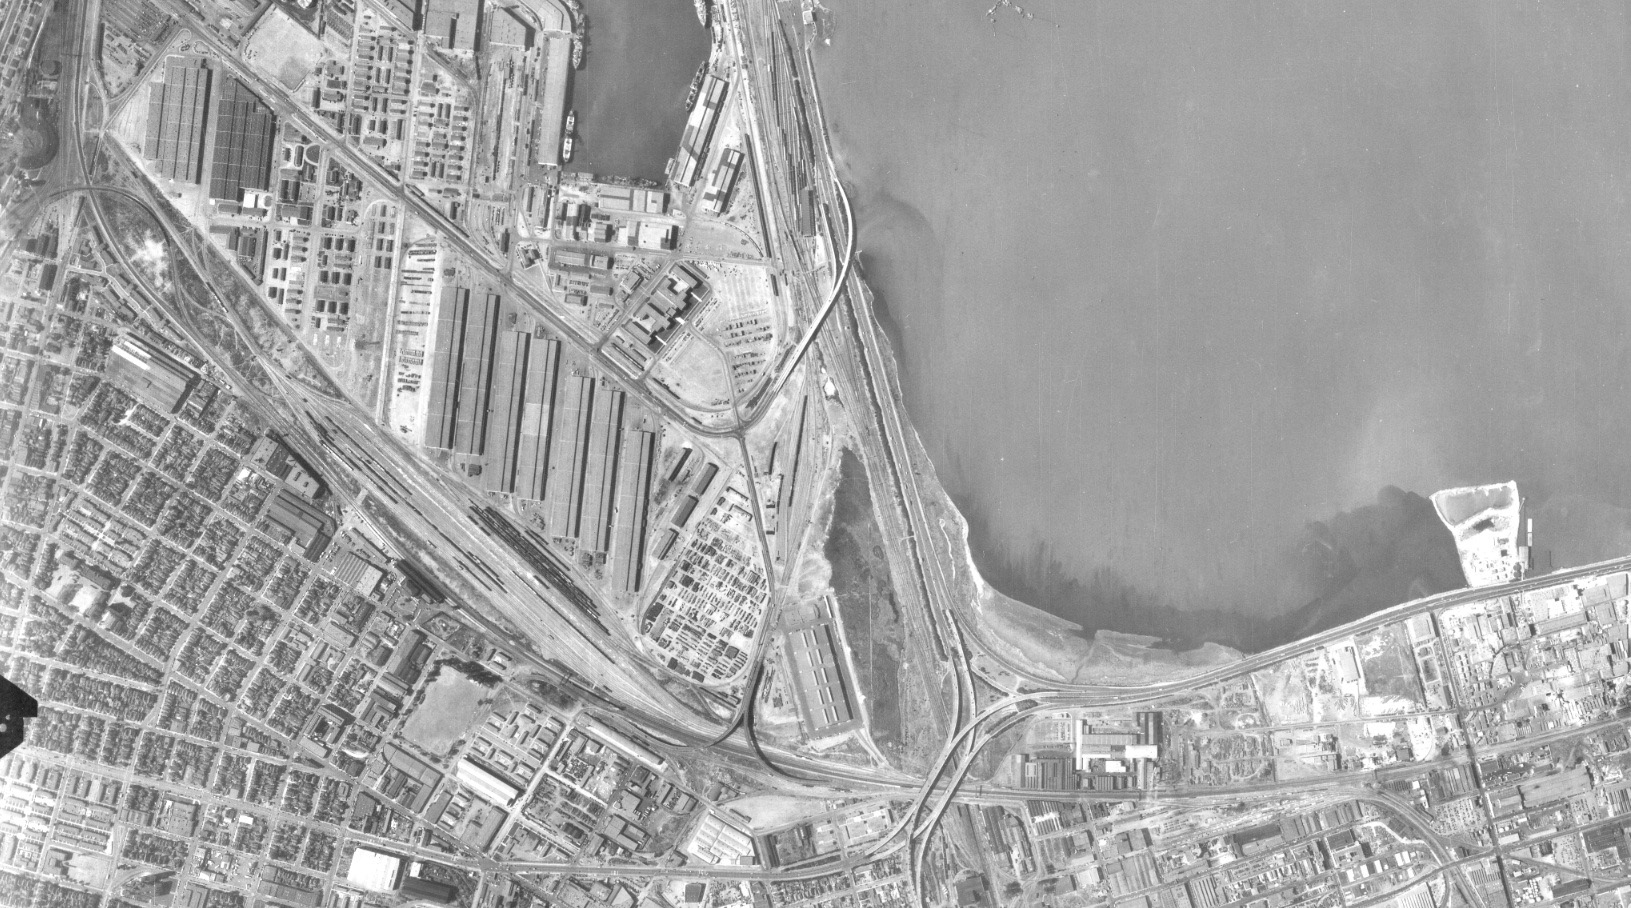
A more detailed view of the area in question from the west-oriented aerial from 1946.
L189-190-Courtesy East Bay Regional Park District Archives, (Image 38 of 40)
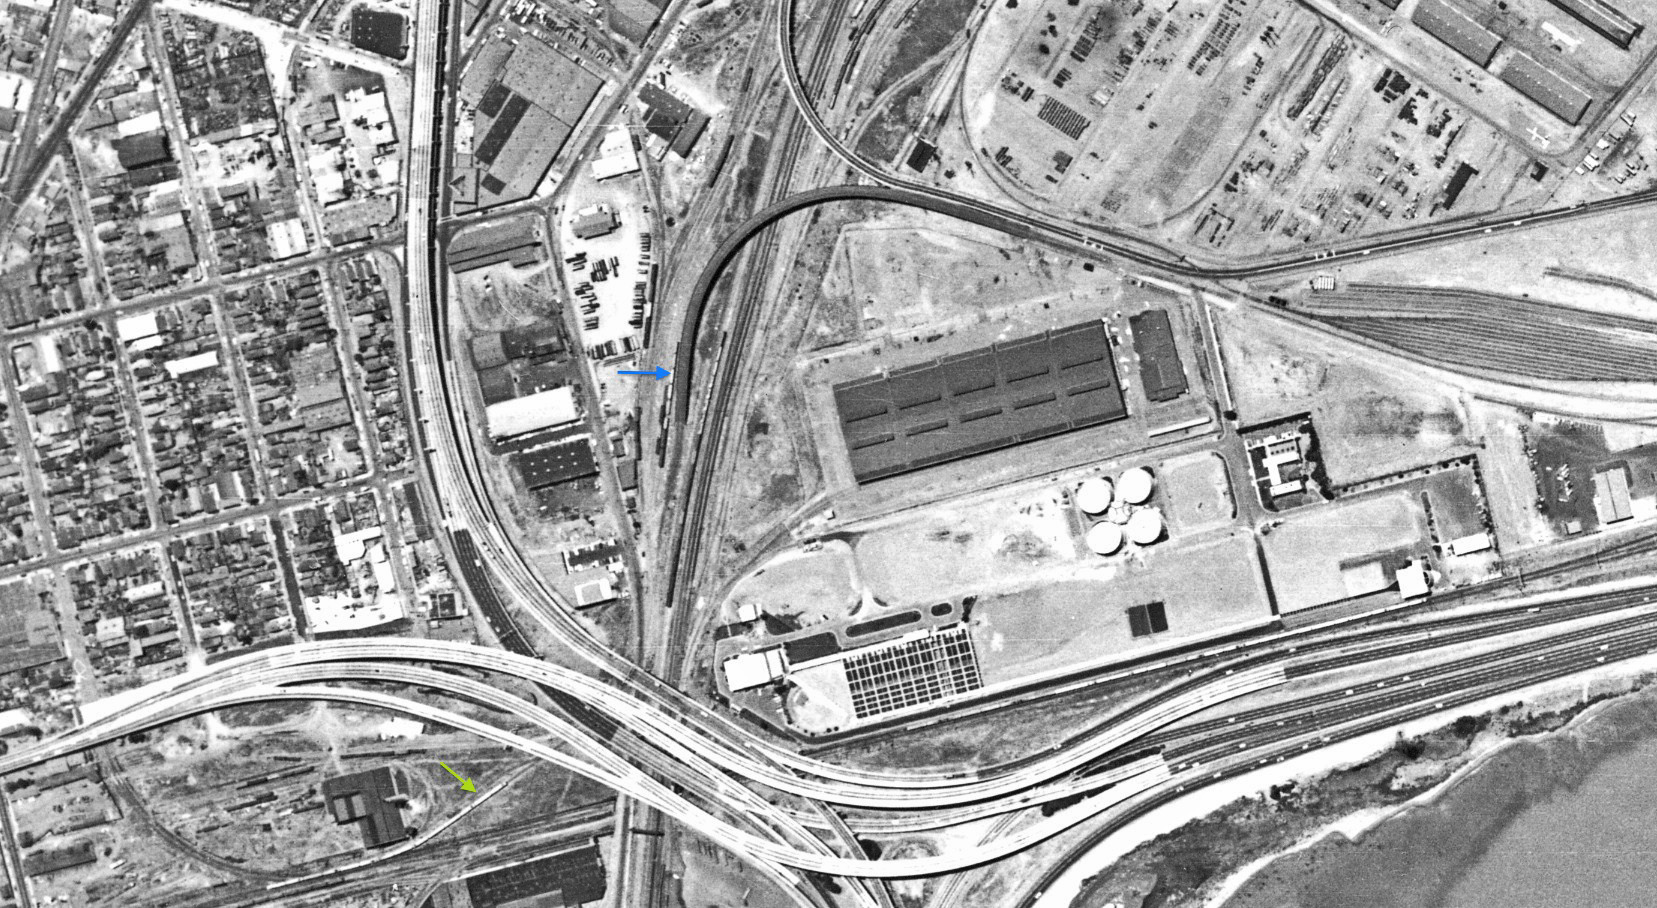
The 1946 aerial has now been rotated such that west is to the right. The green arrow shows a train whose path could lead to the IER trestle, blue arrow.
L189-195-Courtesy East Bay Regional Park District Archives, (Image 39 of 40)
From the same rotated 1946 aerial, the area around the army base checkpoint is presented for completeness sake, although no additional insights are gained. Much more work required to provide a detailed, accurate assessment of the movement of military vehicles and artillery by the SN during the post-war 1940s, early 1950s time period.
L189-200-Courtesy East Bay Regional Park District Archives, (Image 40 of 40)