Leaving No Trace on 2nd St.
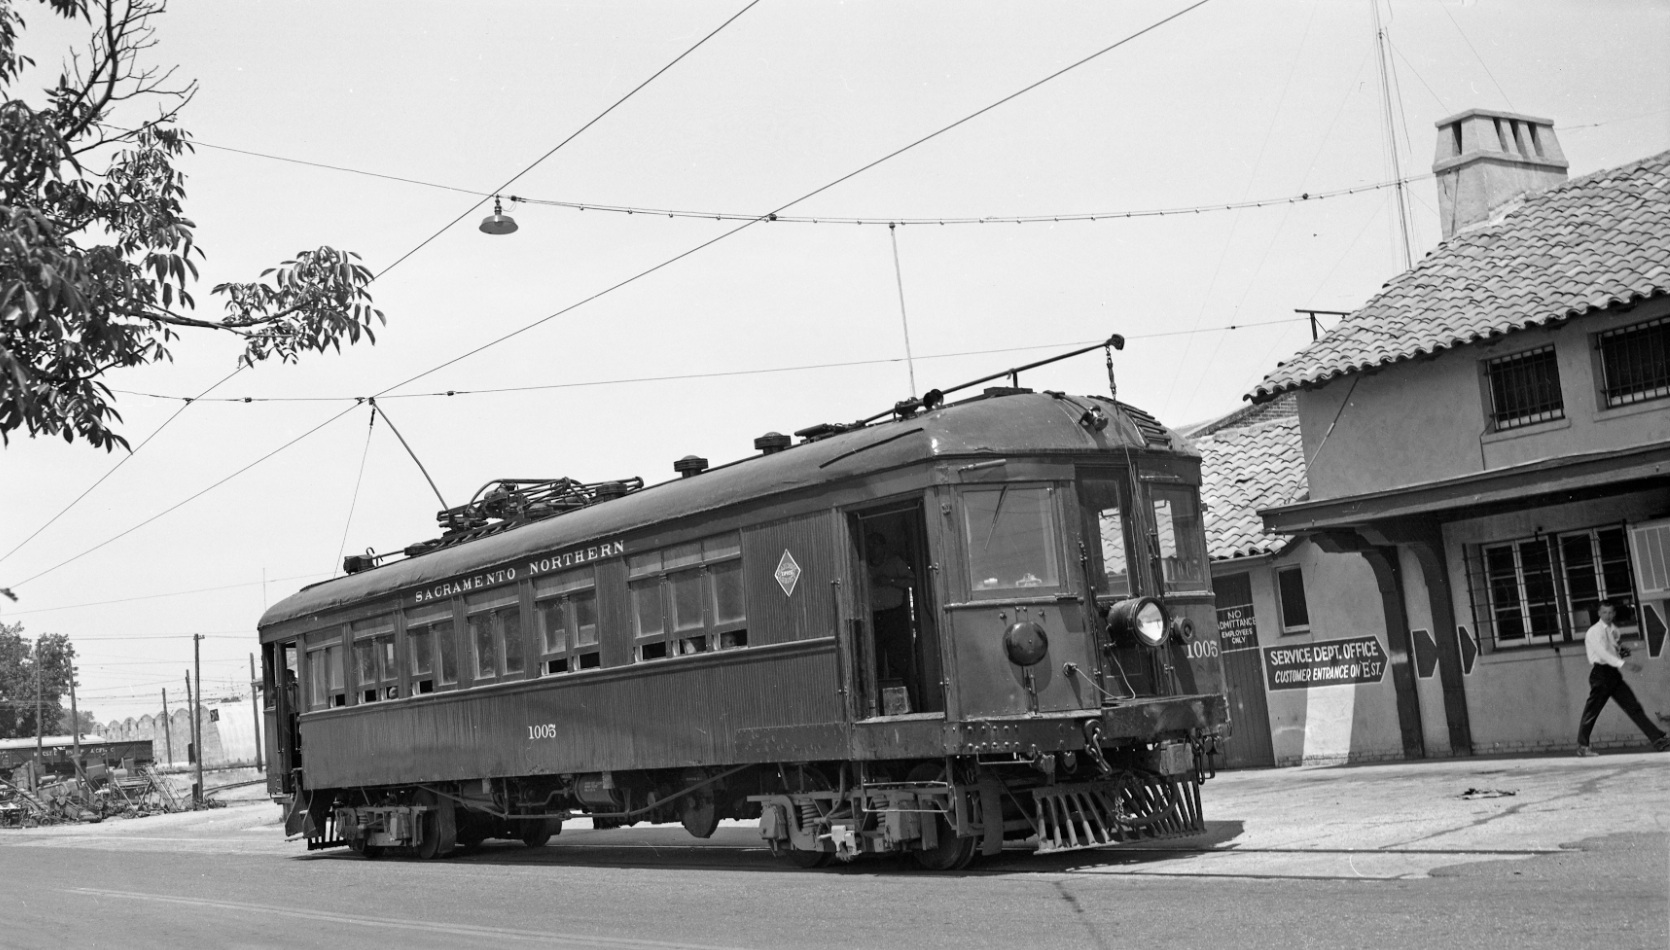
It was insulting enough for the SN passenger train tracks to be truncated in front of the station at 2nd St. off E St. as seen in this northwest view of the last visit of a passenger train, SN 1005, to the station on Apr. 14, 1962.
L218-02-Addison Laflin Photo, Courtesy BAERA, Western Railway Museum Archives, 125328sn, (Image 1 of 25)

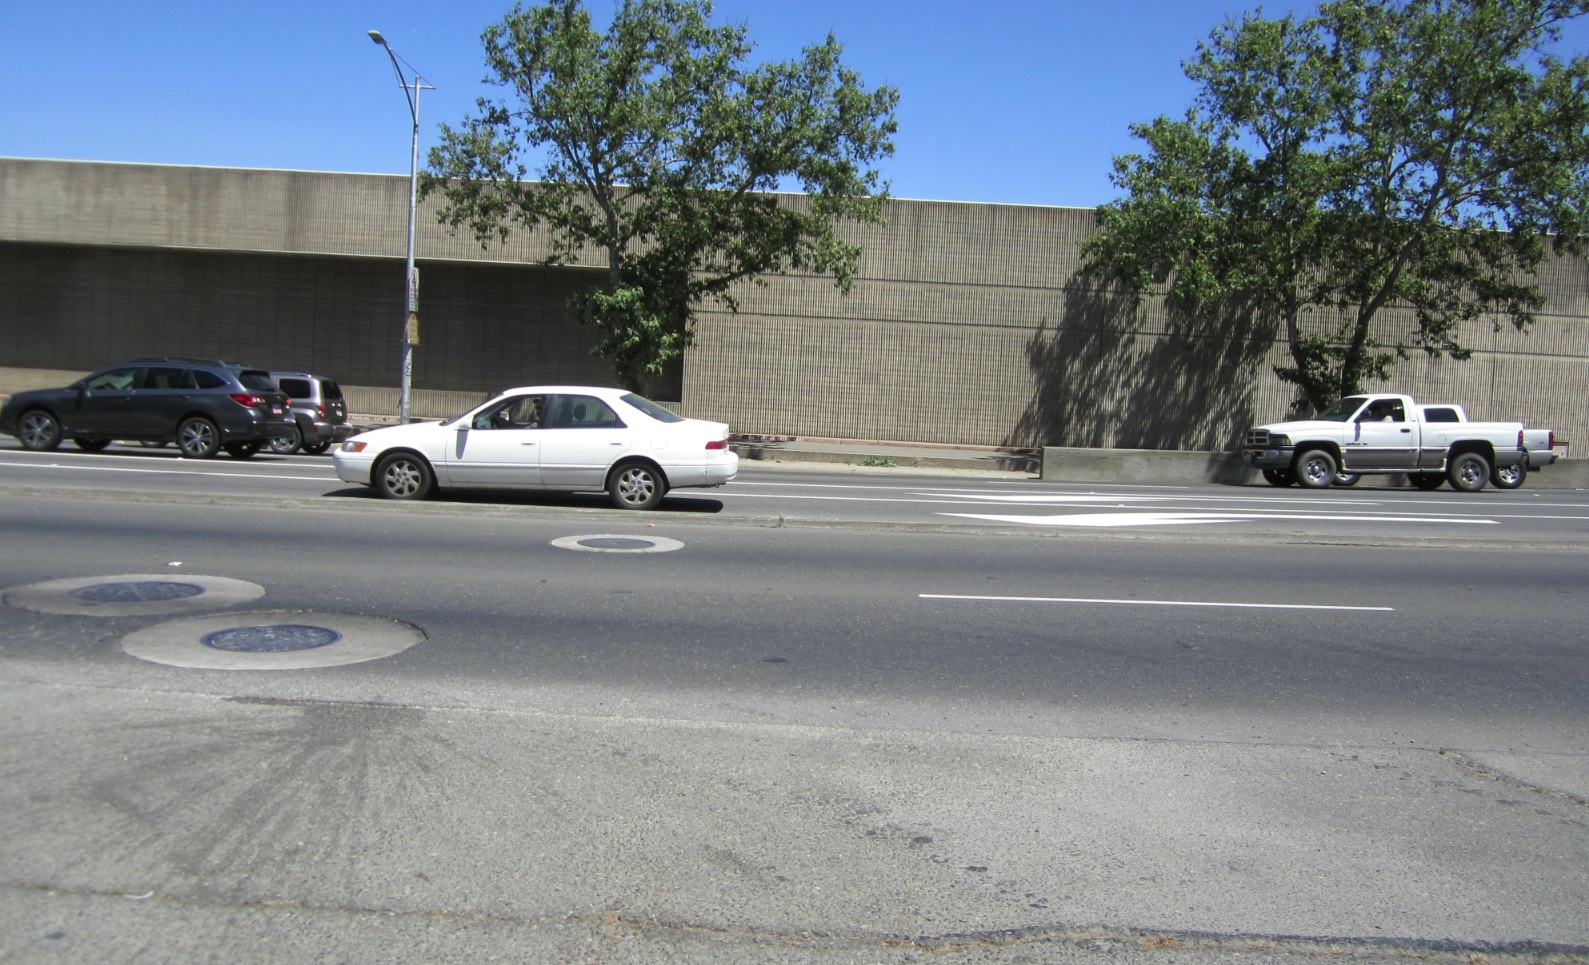
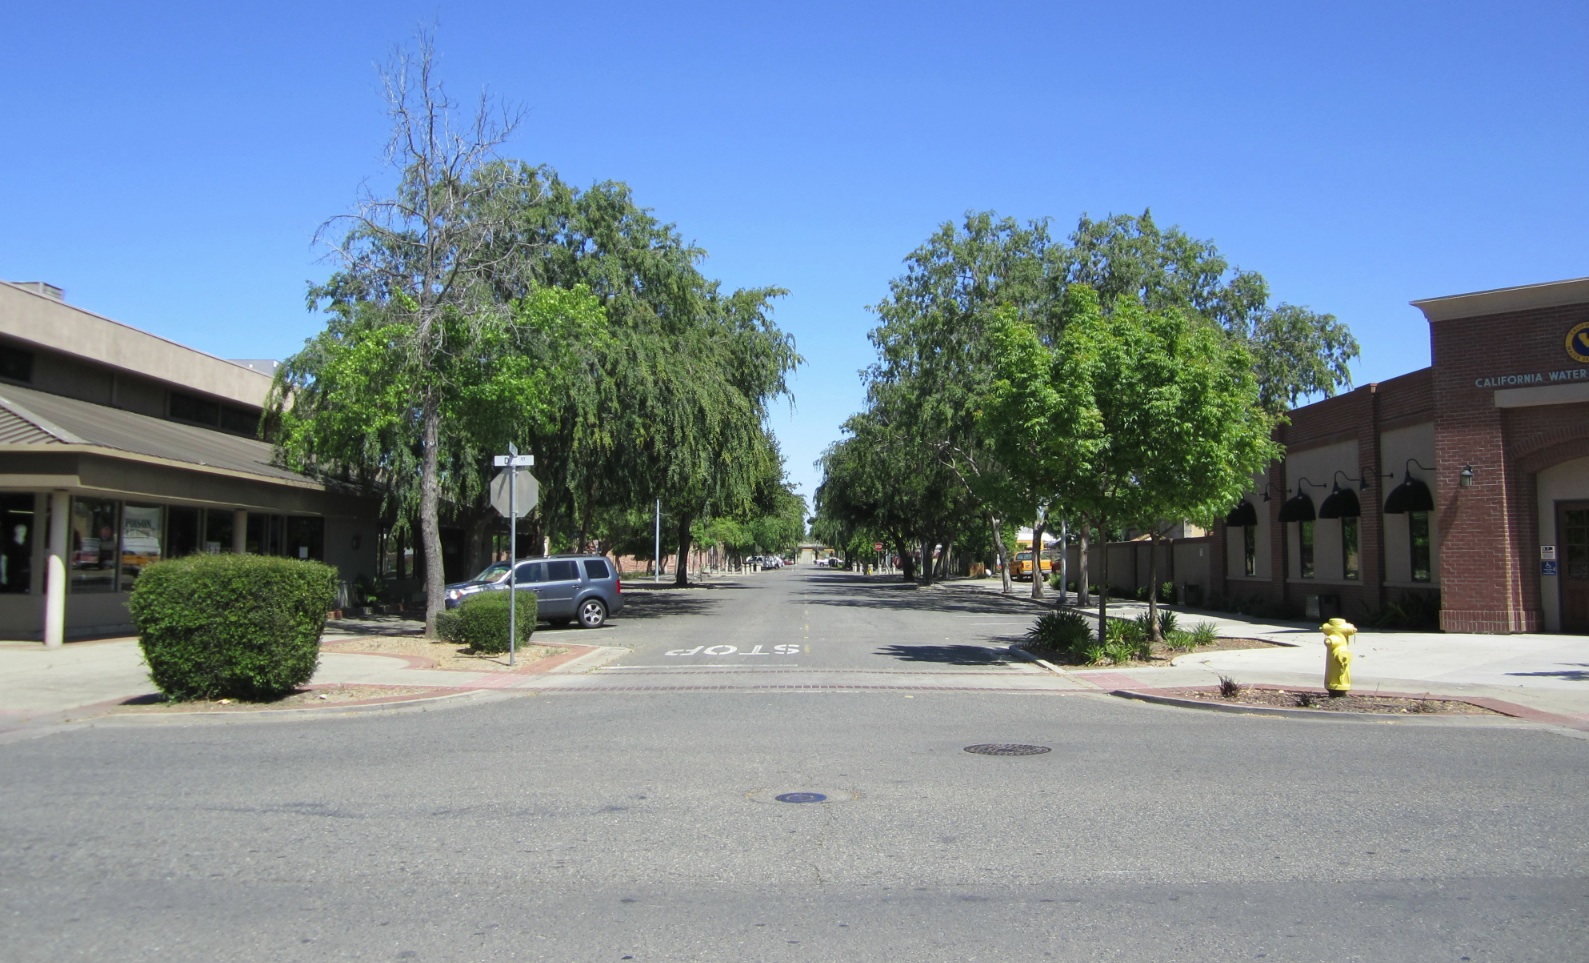
But not nearly as bad as the wall seen from the west intersection of 2nd St. and E St. in 2018, a wall at the east intersection that terminates 2nd St. beyond this point.
L218-05-Stuart Swiedler Photo , (Image 2 of 25)
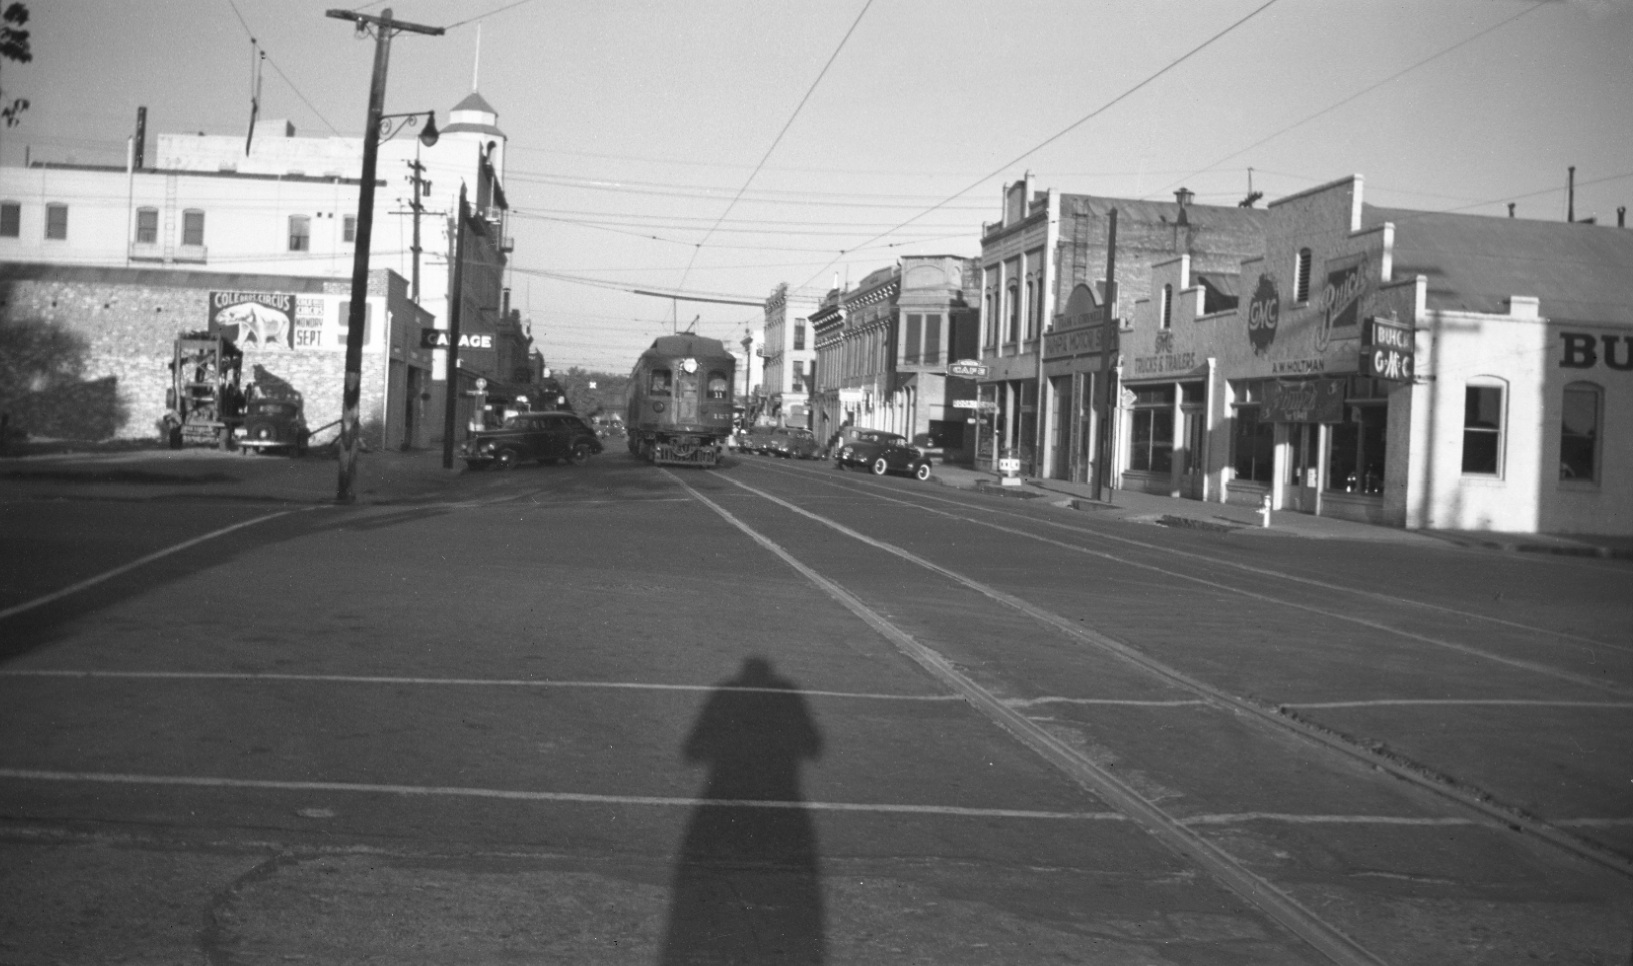
A “before” shot of the previous image, SN 127 as train no. 11 approaches the east intersection of 2nd St. and E St. in Sept. 1940, one month prior to the cessation of SN interurban passenger service north of Sacramento.
L218-10-Sappers Collection, Courtesy BAERA, Western Railway Museum Archives, 124706sn, (Image 3 of 25)
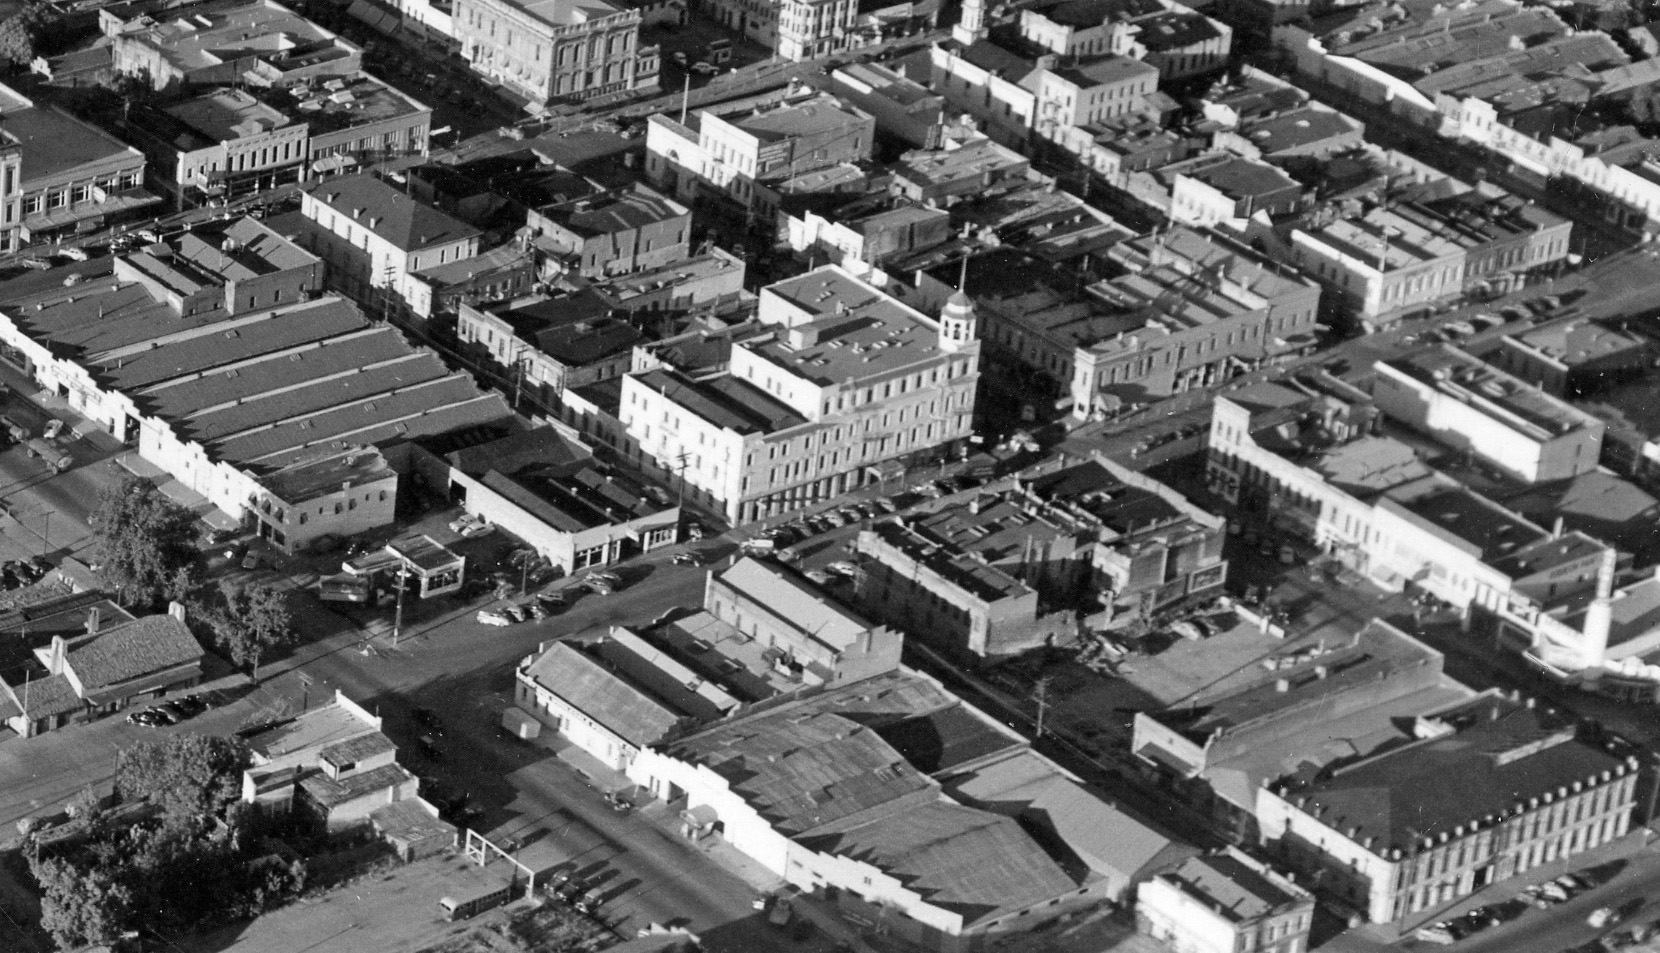
The area to be covered in this update are the two blocks of 2nd St. from E St. to C St. Northeast view, circa 1946. See the annotated version that follows.
L218-15-Eastman Studio Photo B-470, Moreau Coll., Courtesy BAERA, Western Railway Museum Archives, 1, (Image 4 of 25)
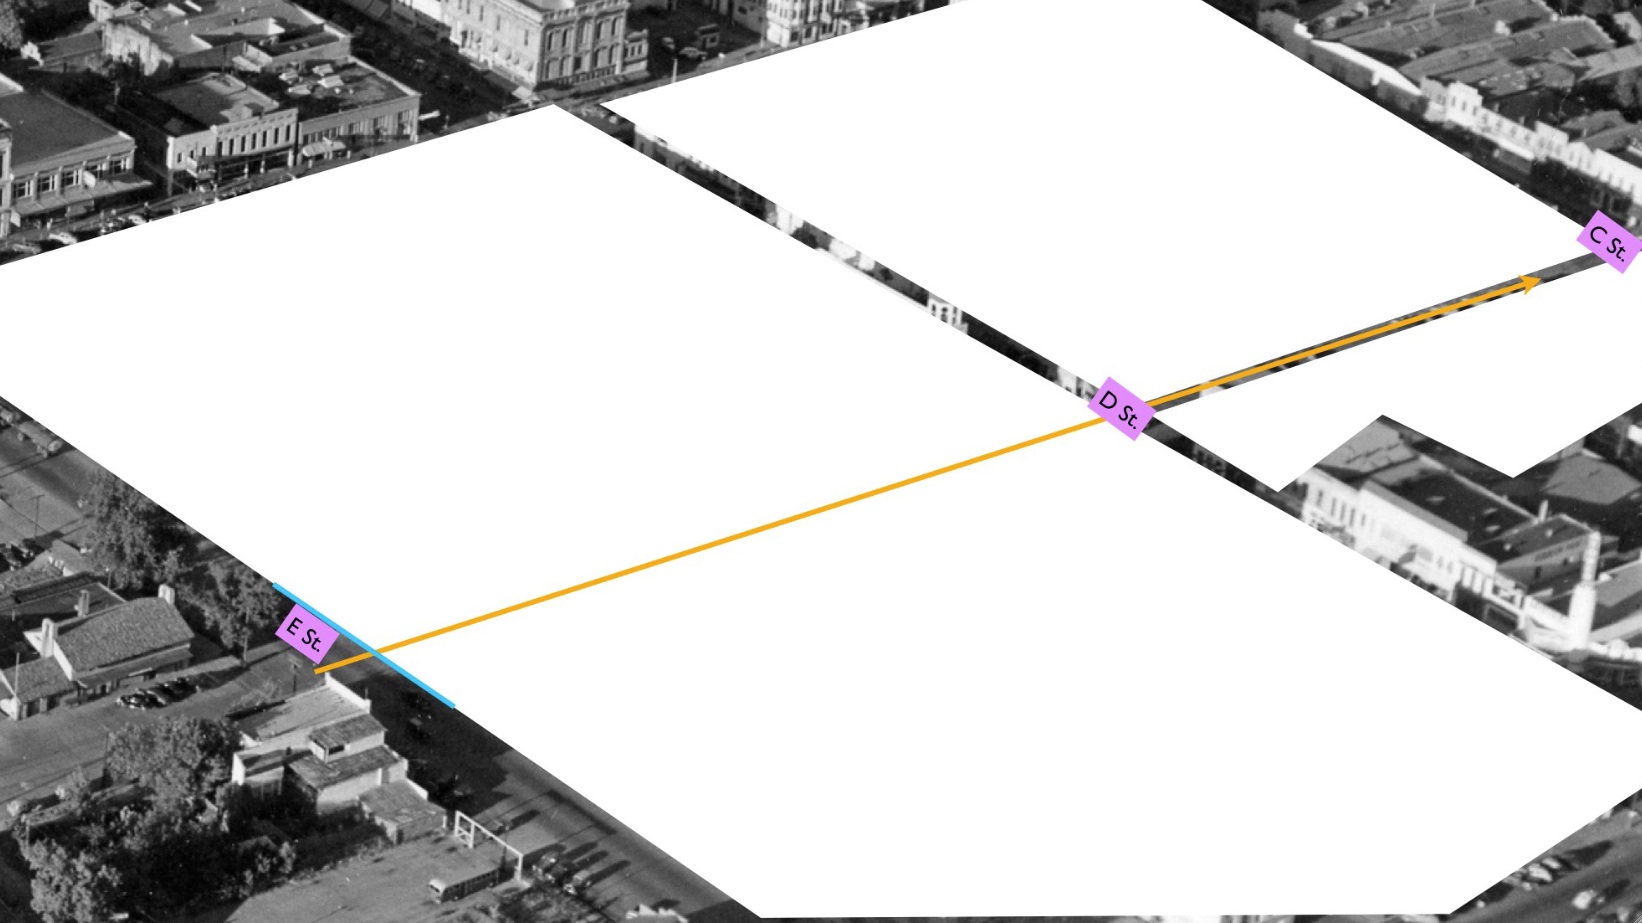
The whited-out area was razed ca. 1977 as part of a redevelopment effort. Henceforth in this update, everything shown before that time no longer exists. The gold line is the extent of SN track on 2nd St. once the SN was formed in 1929, and the turquoise bar represents the location of the wall seen in the initial image.
L218-16-Eastman Studio Photo B-470, Moreau Collection, Courtesy BAERA, Western Railway Museum Archiv, (Image 5 of 25)
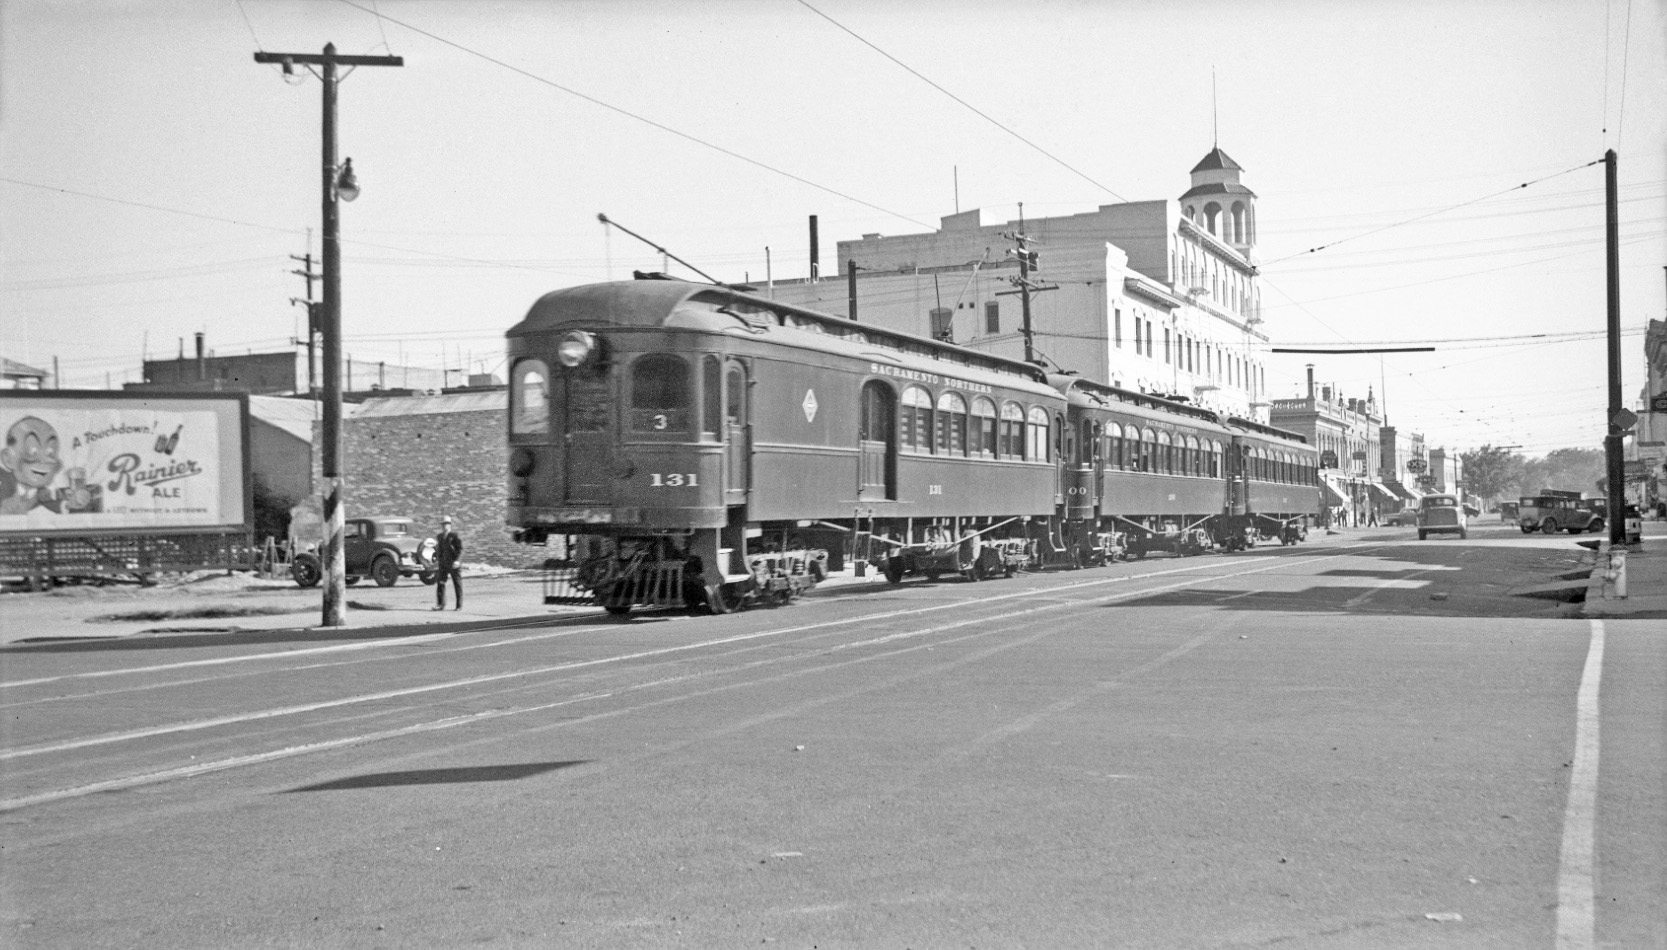
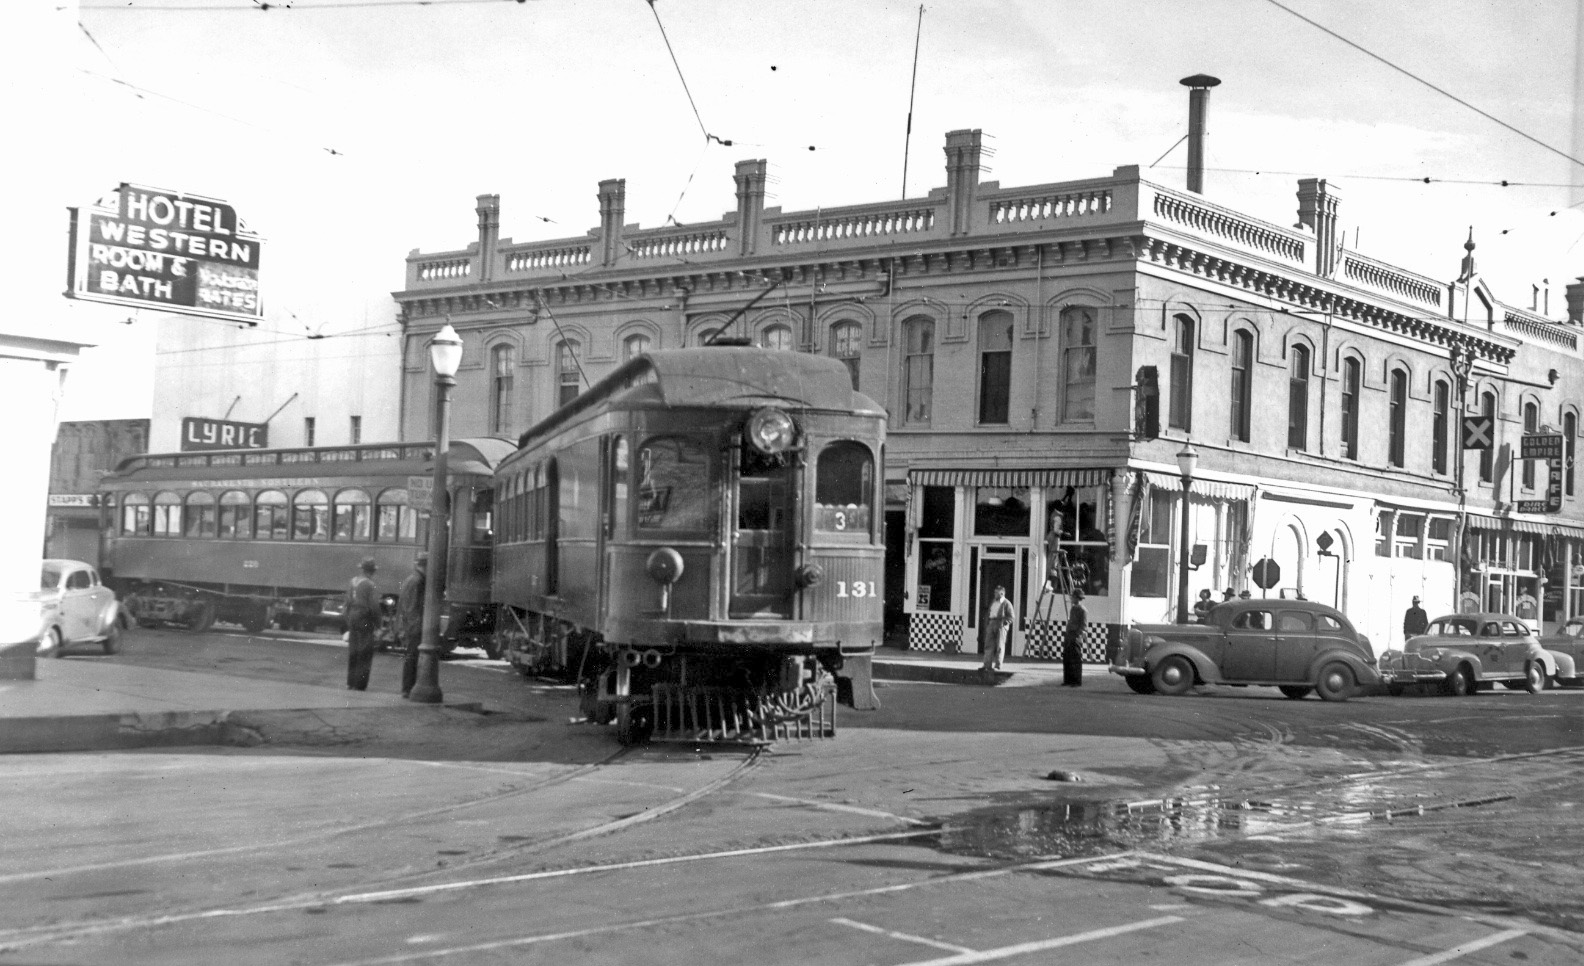
This northeast view up 2nd St. east of E St. with three-car SN 131-200-225 approaching the station on Oct. 6, 1940 also shows how the north side of the street was dominated by the Western Hotel, and for this moment in time, a catchy sign toward the intersection with E St.
L218-20-Dudley Thickens Photo, Courtesy BAERA, Western Railway Museum Archives, 60241sn, (Image 6 of 25)
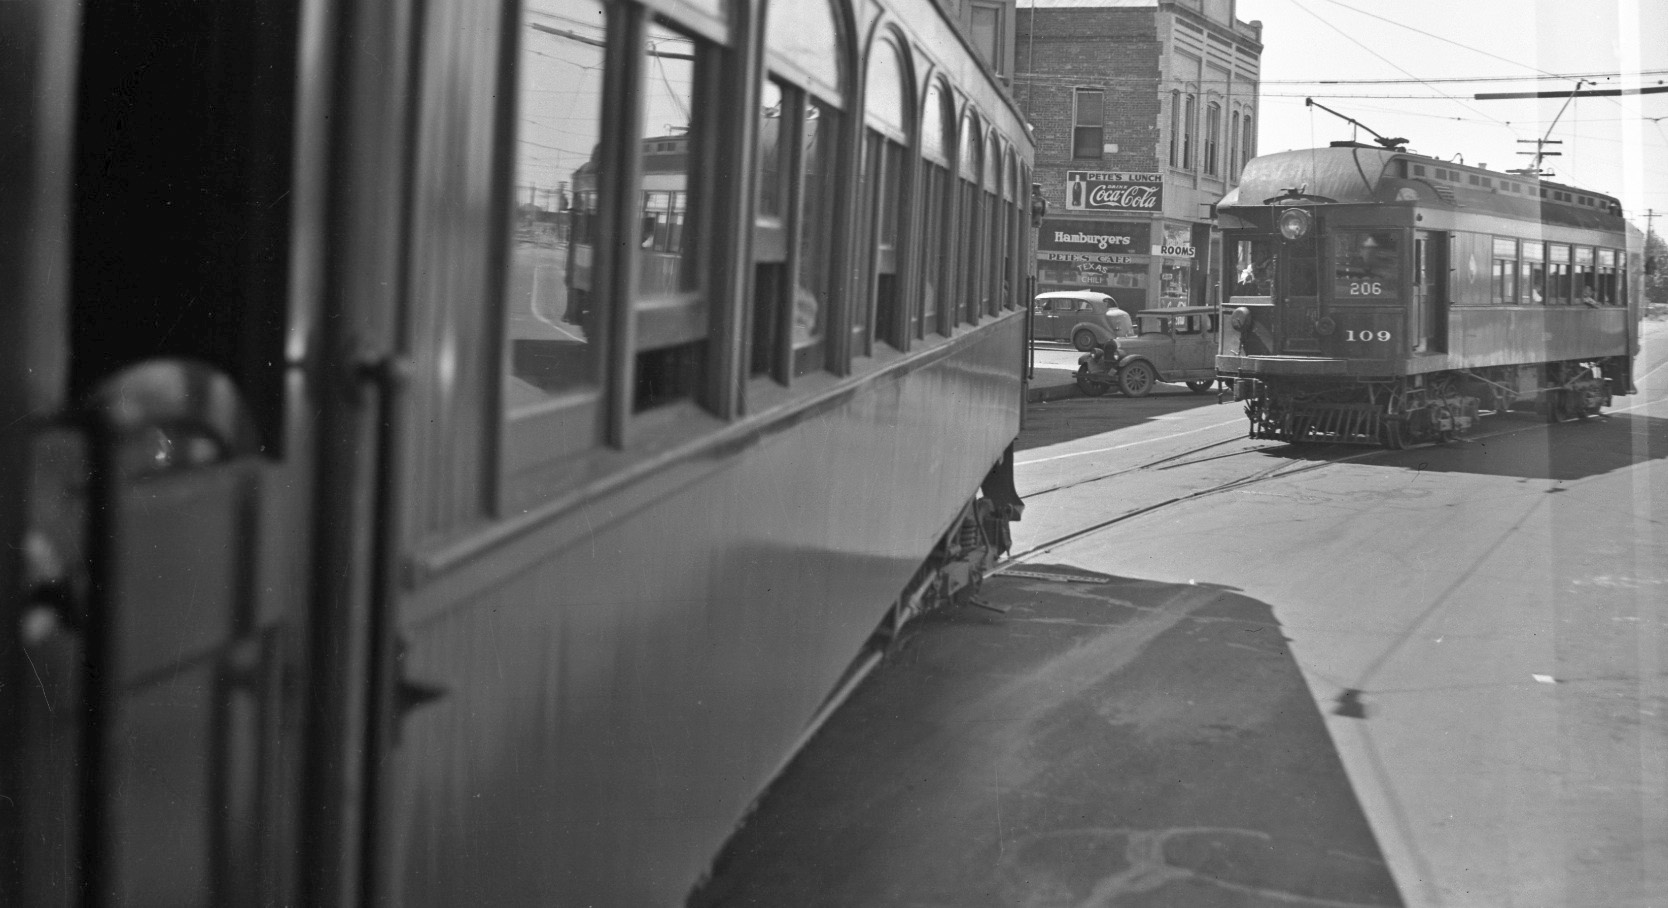
While the local to Colusa, SN 109, takes the the long way back to the west, a sign for a garage is also seen on the west side of High St., the small block that separated the hotel from its western neighbors. Northeast view, ca. 1940.
L218-25-Charles Savage Photo, Courtesy BAERA, Western Railway Museum Archives, 9743.1sn , (Image 7 of 25)
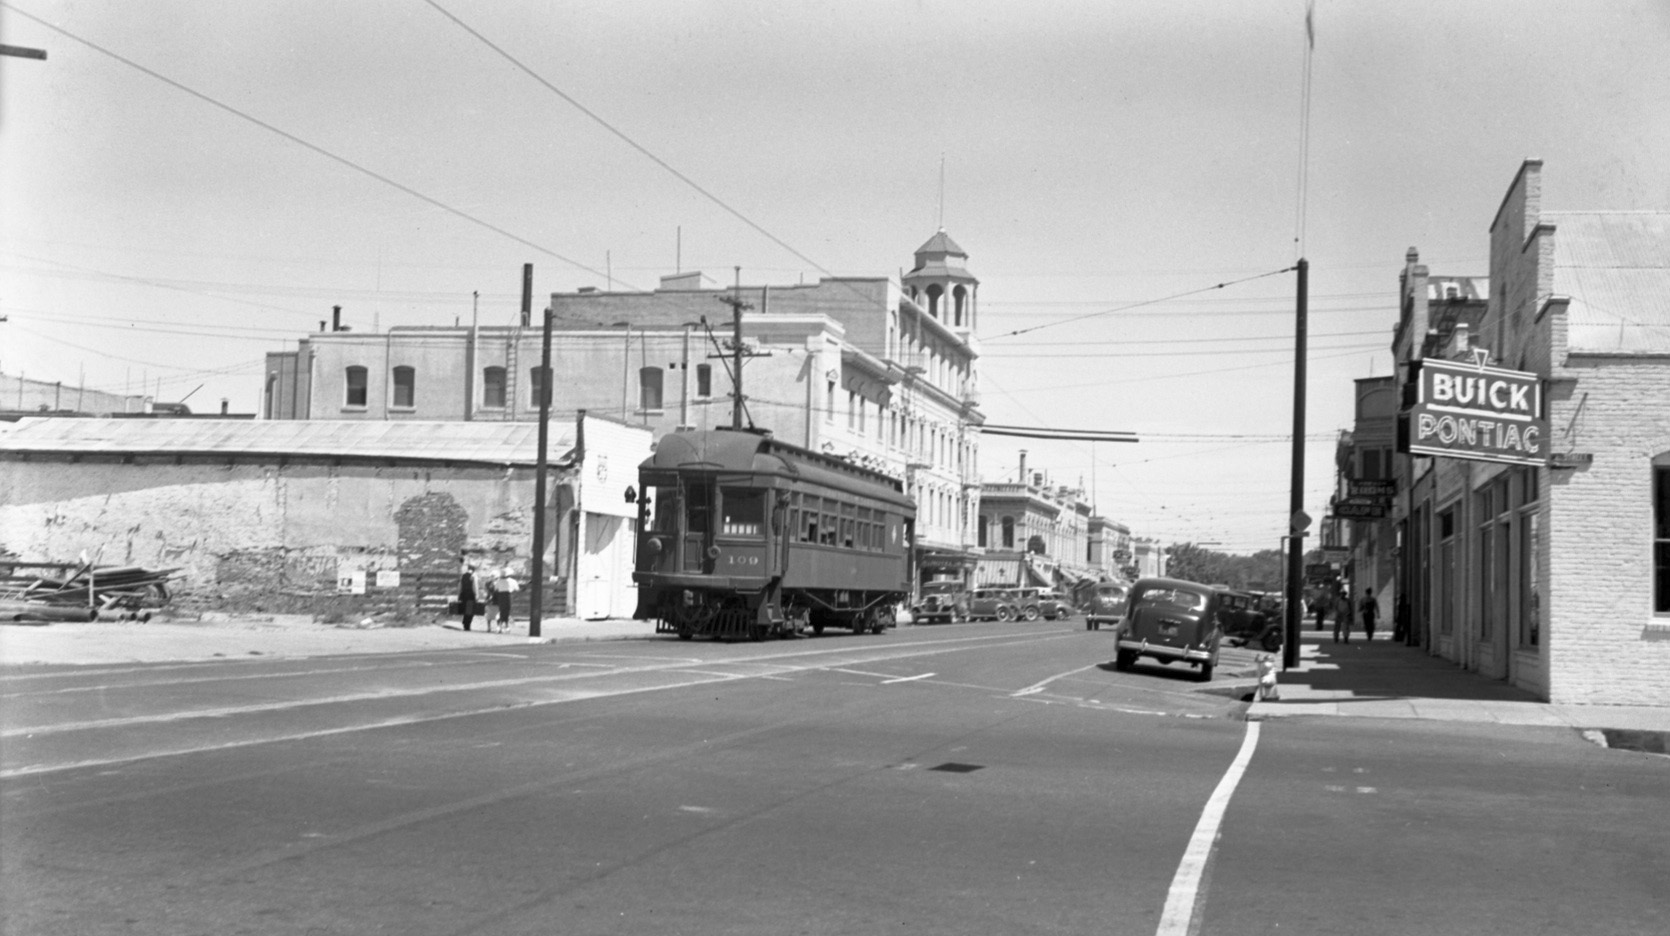
As Colusa-bound SN 109 continued east ca. 1940, Charley Savage turned his camera more eastward to document the Albert W. Holtman Buick-Pontiac dealership at 420 2nd St. on the southwest corner with E. St.
L218-30-Charles Savage Photo, Courtesy BAERA, Western Railway Museum Archives, 9743.2sn , (Image 8 of 25)
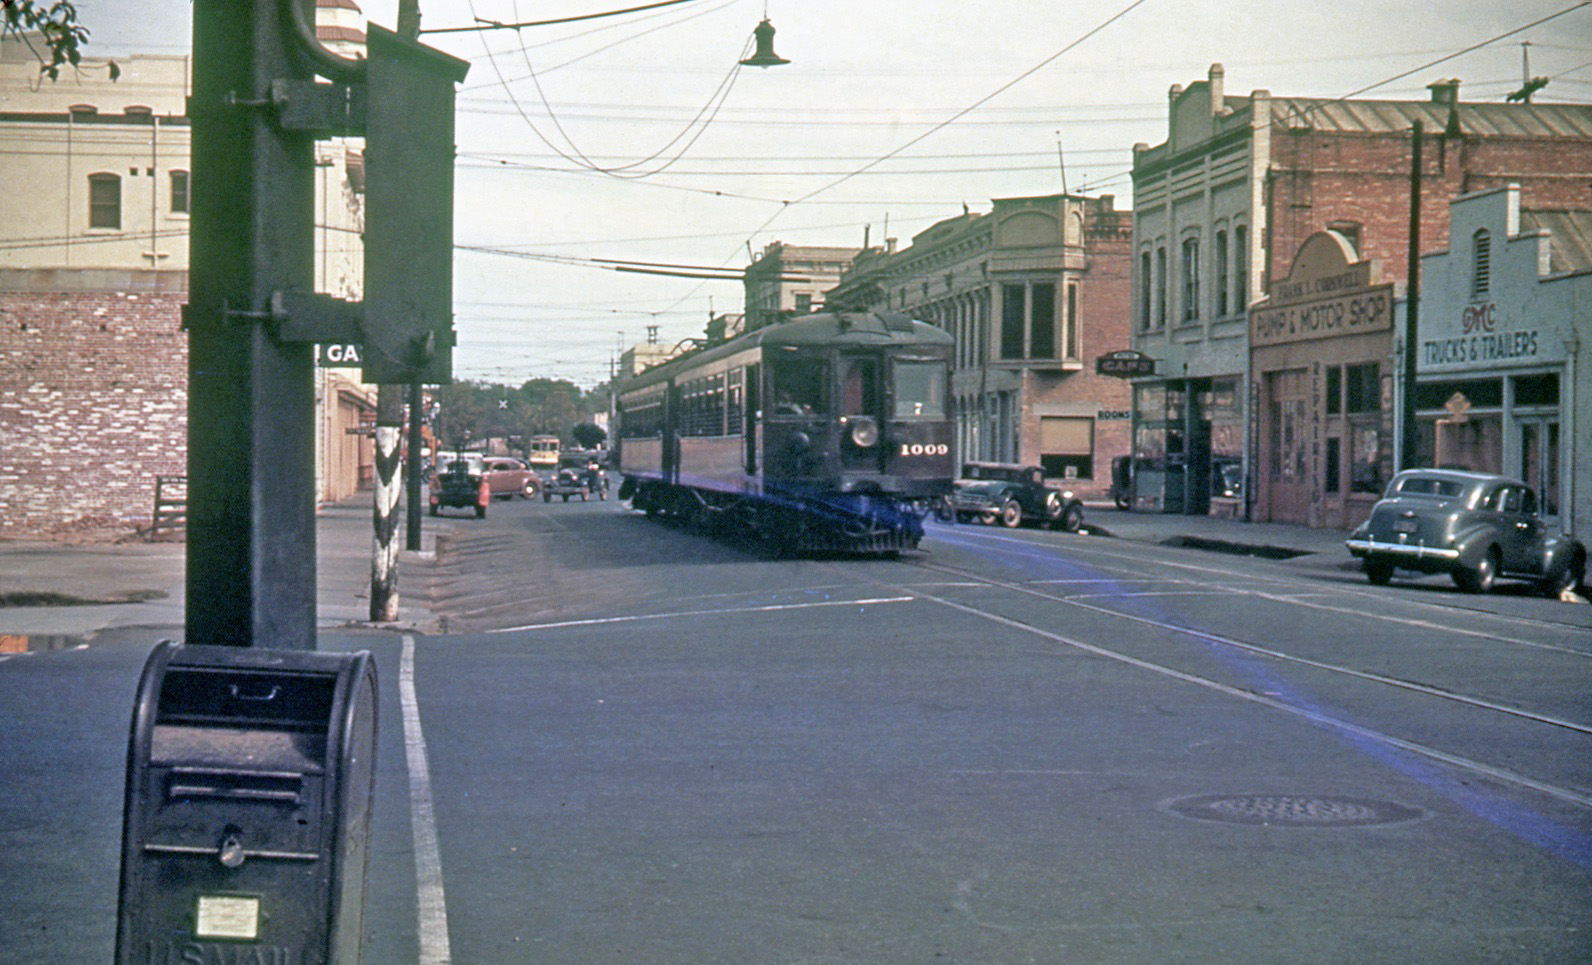
For architectural detail on the south side of 2nd St., it is hard to beat Howard Eichstaedt’s 1940 color image of SN 1009 leading a two-car passenger train to F St. street, reproduced in a slide by Tom Guildersleeve around 1990. In the background, a Birney car sits east of D St., and the Southern Pacific, SP, overpass of the street can be appreciated as well.
L218-35-Howard Eichstaedt Photo, Courtesy BAERA, Western Railway Museum Archives, 126951sn , (Image 9 of 25)
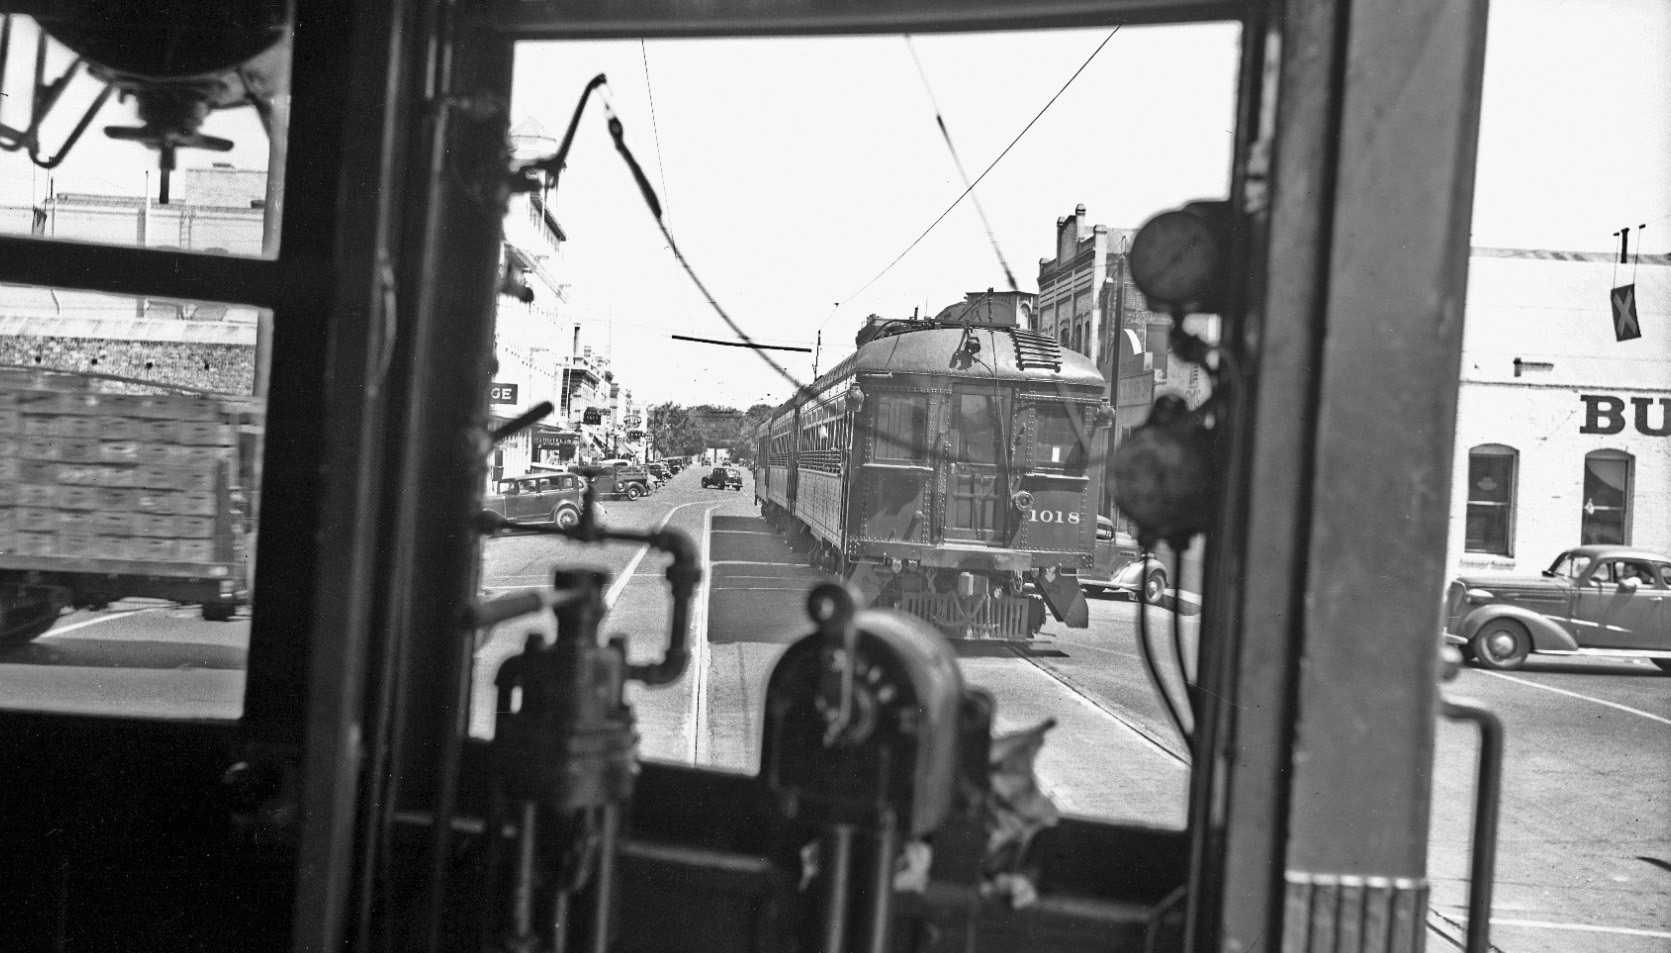
A view from the Colusa local, SN 109, reveals SN 1018 on the rear of a three-car train headed for Yuba City in this east view from the 2nd St. and E St. intersection from Aug. 18, 1940. Further east on 2nd St. the joining of the northernly-placed track to the southernly one can be seen forcing SN 109 to wait. The function of this track arrangement will be appreciated momentarily.
L218-40-Sappers Courtesy BAERA, Western Railway Museum Archives, 124668sn, (Image 10 of 25)
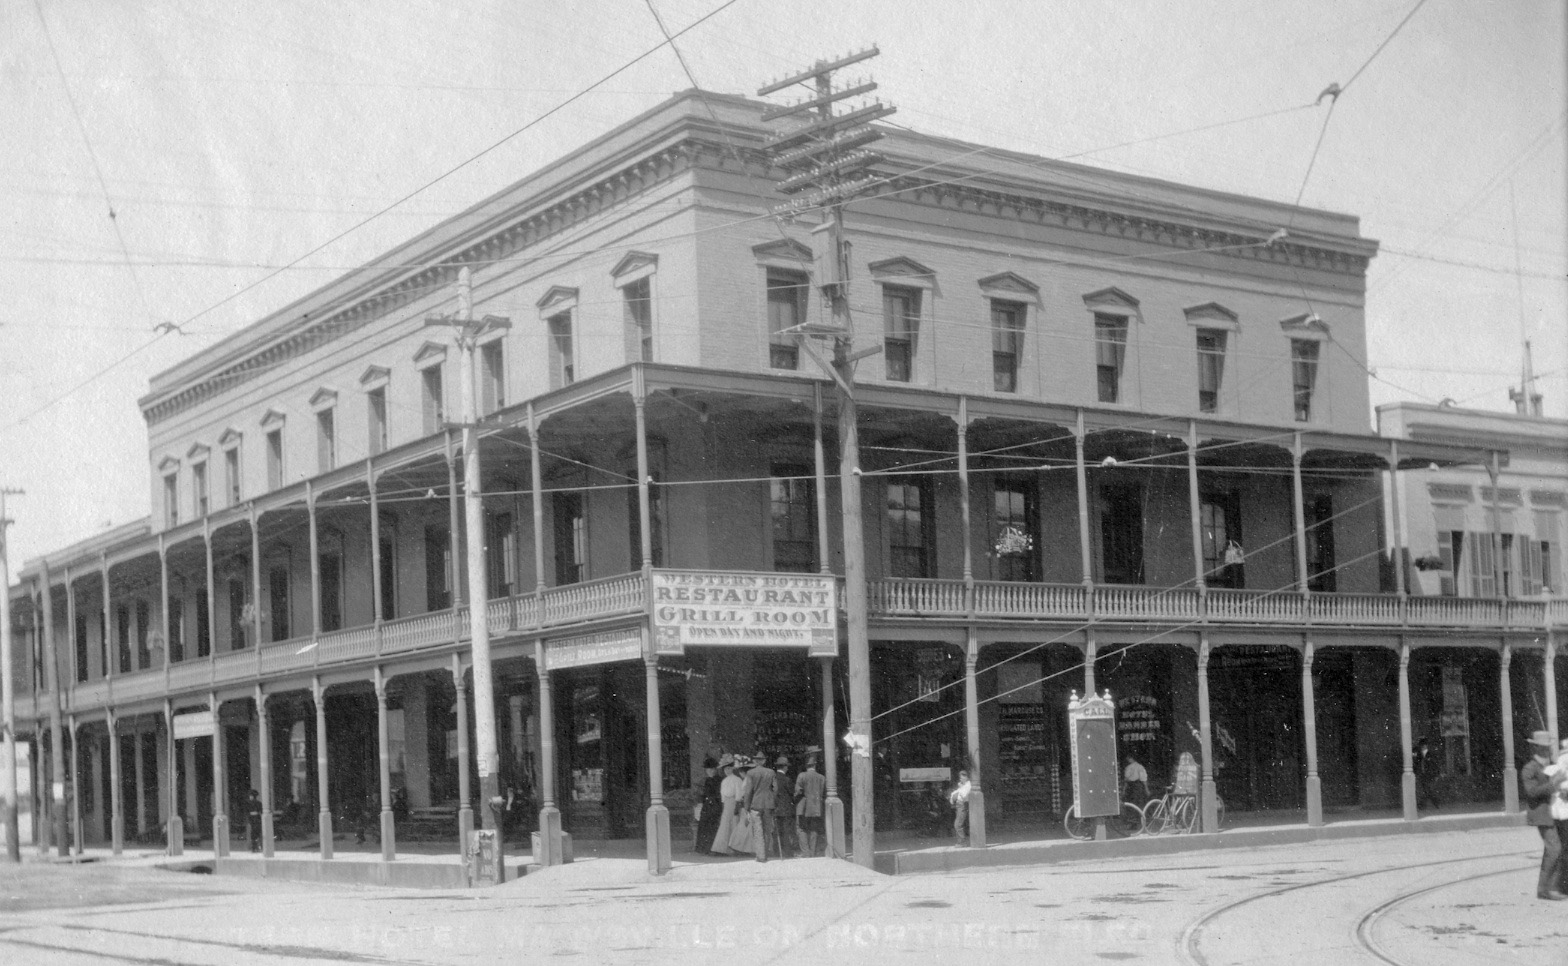
The Western Hotel resided at 405 2nd St. at the northwest corner with D St. It opened in 1853 as the five-star Western House. Besieged by fires in 1854, 1933 and 1956, it was demolished in 1957. Northwest view toward the northwest corner of 2nd St. and D St., circa 1910.
L218-45-Courtesy BAERA, Western Railway Museum Archives, 121385sn, (Image 11 of 25)
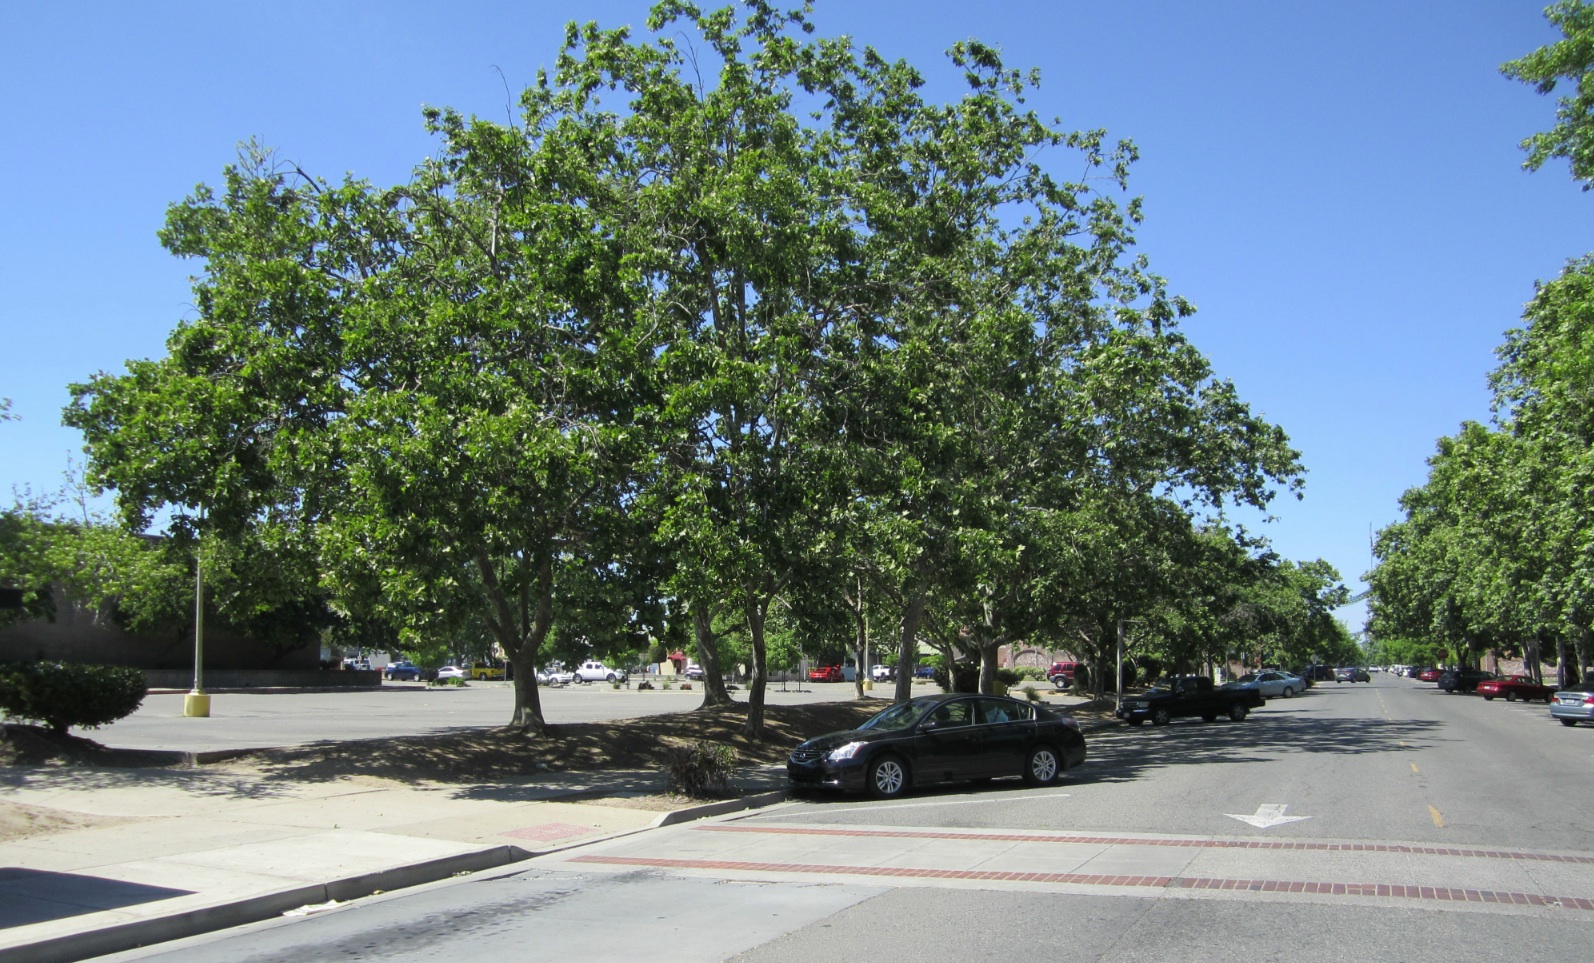
A northwest view of the former location of the Western Hotel in 2018 taken from D St.
L218-50-Stuart Swiedler Photo, (Image 12 of 25)
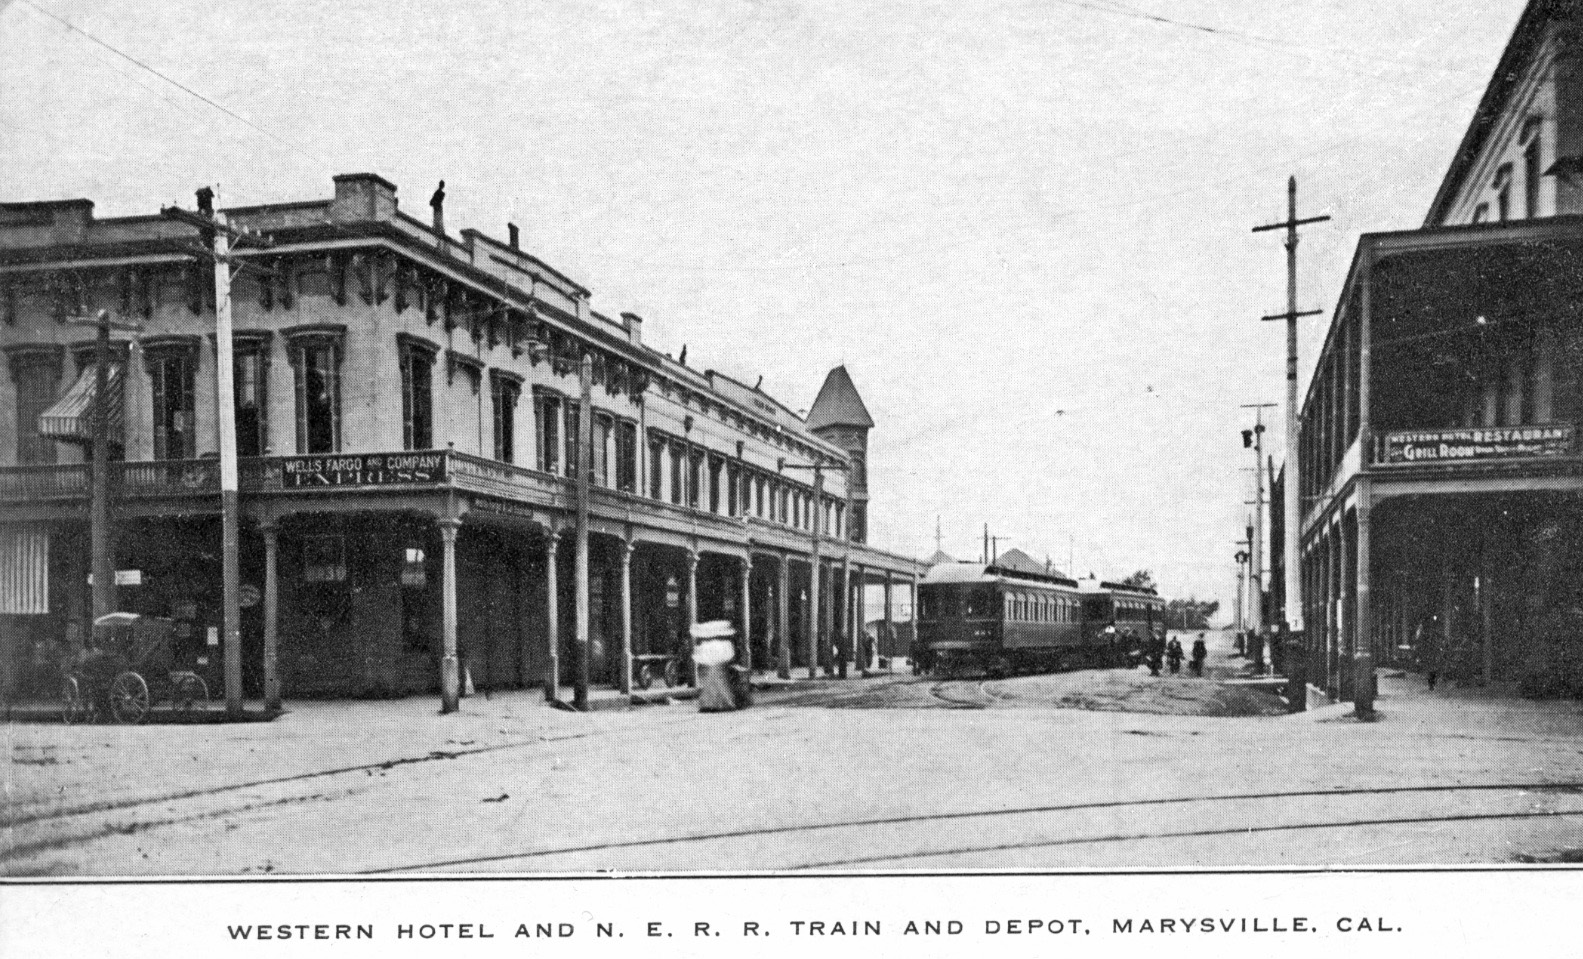
The reduction of two tracks to one served two functions at 2nd St. and D St. It allowed trains or streetcars to access either street, but also to navigate the narrow turn from 2nd St. onto D St. Shown is a west view of Wells Fargo and Western Hotel ca. 1910 from a postcard. The next images shows the same scene in 2018.
L218-55-Courtesy BAERA, Western Railway Museum Archives, 161837sn , (Image 13 of 25)
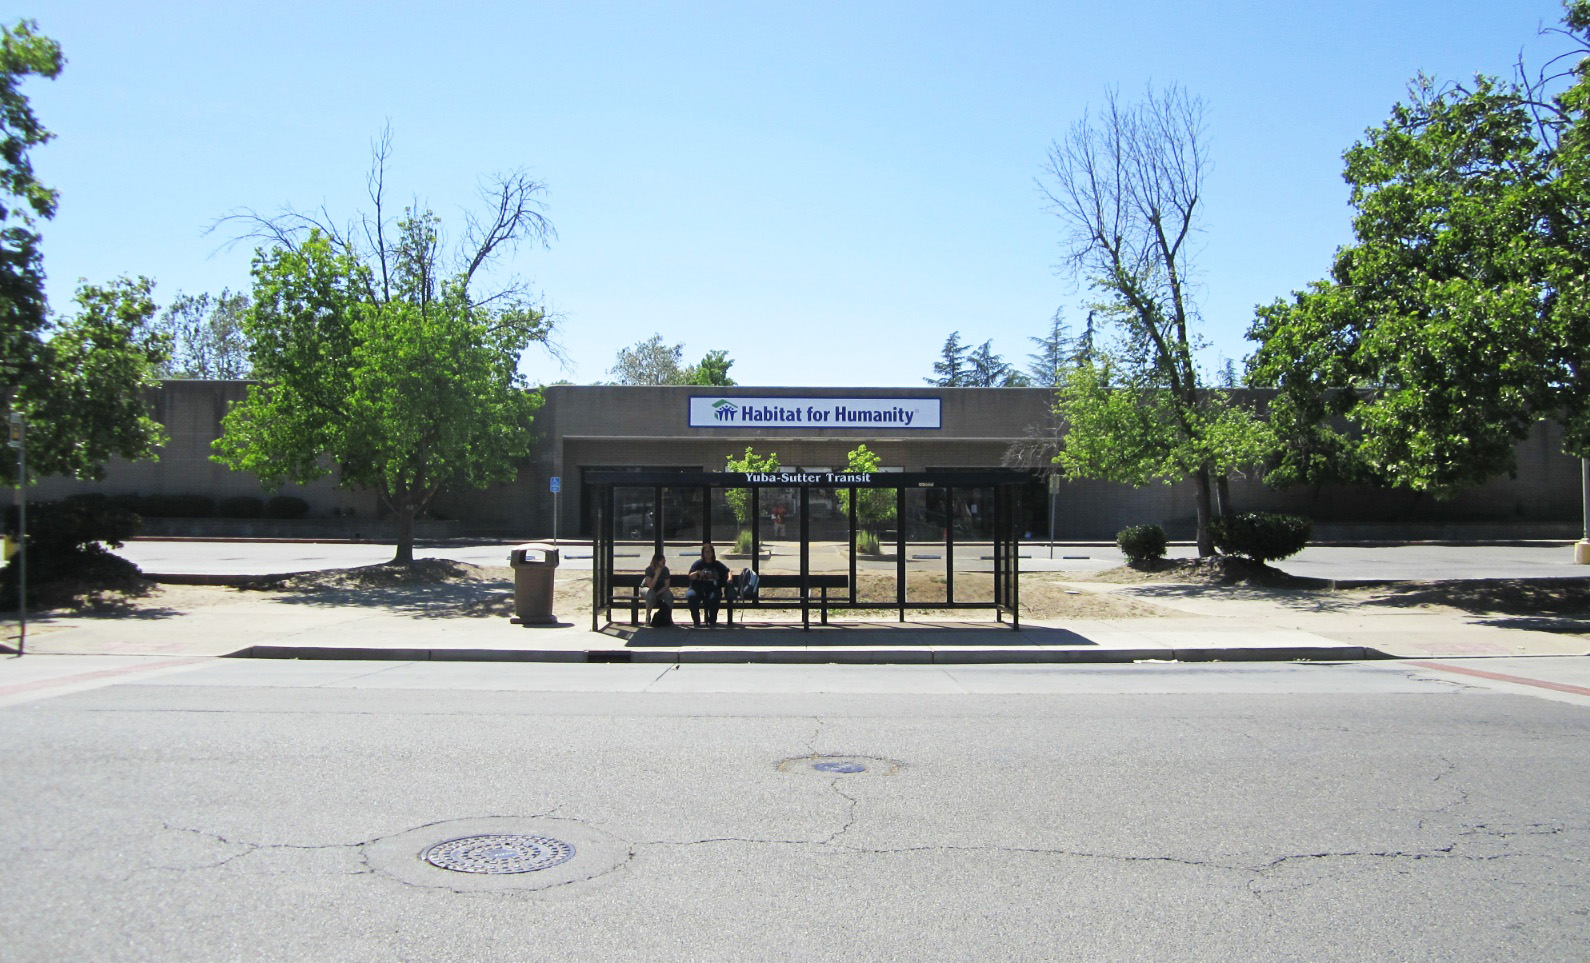
Second St. returns east of D St., and this west view from 2nd St. at D St. shows the huge parking lot fronting Habitat for Humanity. This store-lot complex was originally occupied by Mervyns until it closed in 2008.
L218-60-Stuart Swiedler Photo, (Image 14 of 25)
Next, turning around one-hundred-eighty degrees to the east at 2nd St. and D St., nothing remains on this block from the SN era. The SP overpass for 2nd St. is seen in the distance.
L218-65-Stuart Swiedler Photo, (Image 15 of 25)
A northeast view of the northeast corner of 2nd St. and D St. from Oct. 27, 1940 shows SN 131 and SN 220 making the turn onto 2nd St. directly toward the viewer. The Lyric Theater, to be discussed in the next update, can be seen in the background.
L218-70-Courtesy BAERA, Western Railway Museum Archives, 126023sn, (Image 16 of 25)
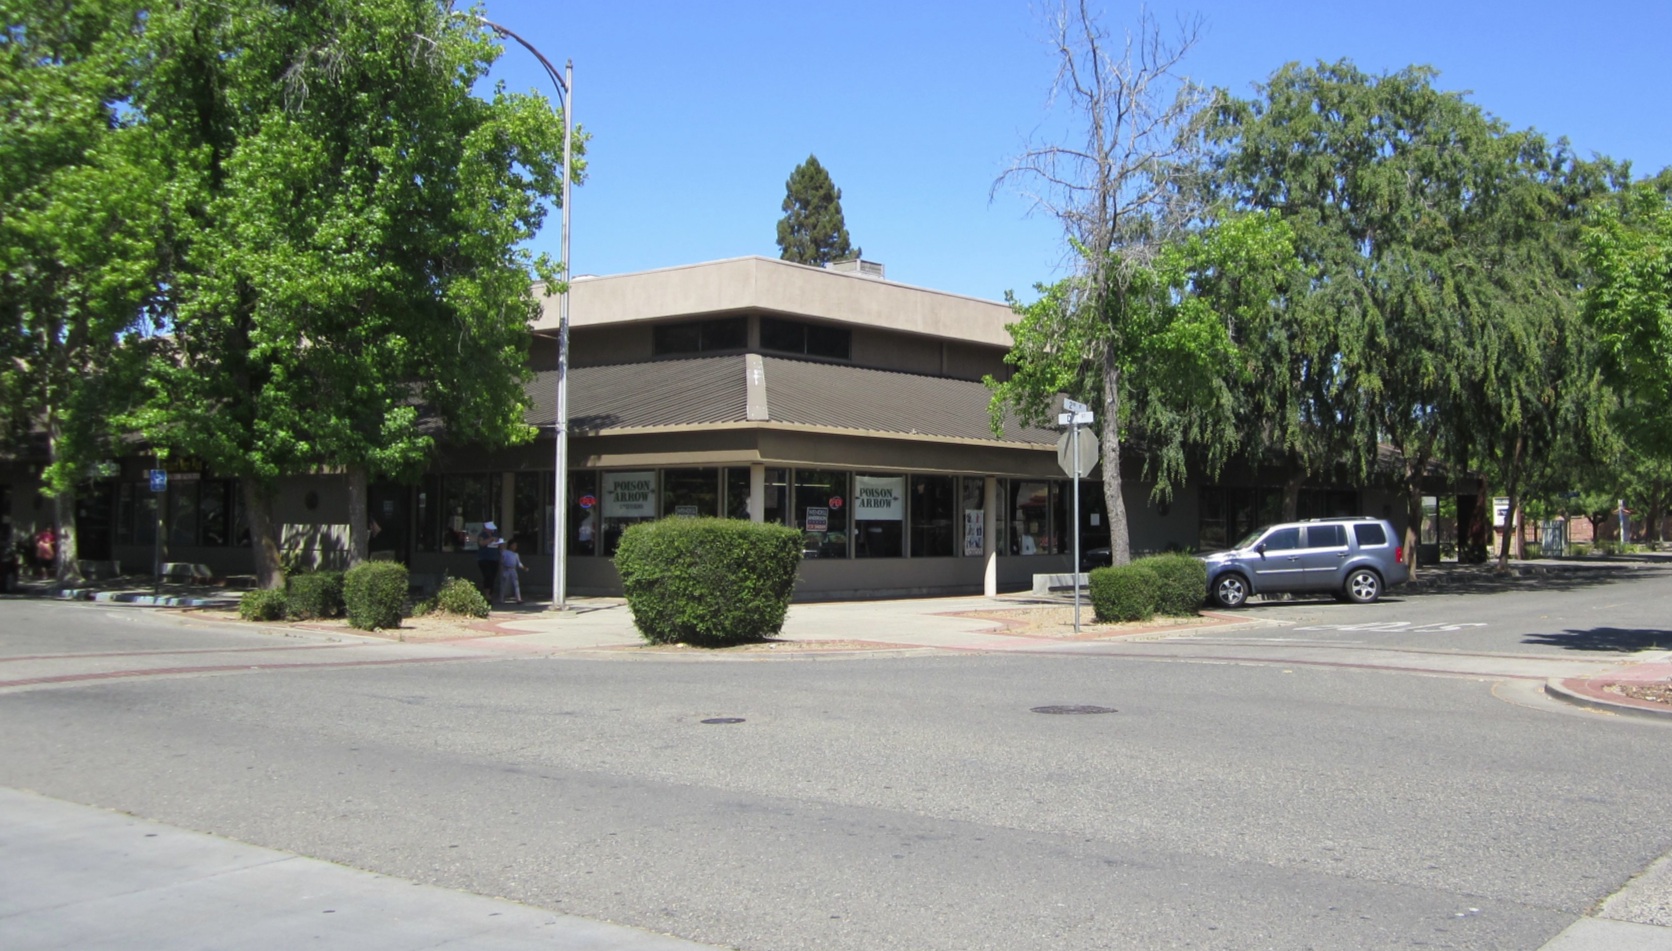
The same northeast view of the northeast corner of 2nd St. and D St. in 2018.
L218-75-Stuart Swiedler Photo, (Image 17 of 25)
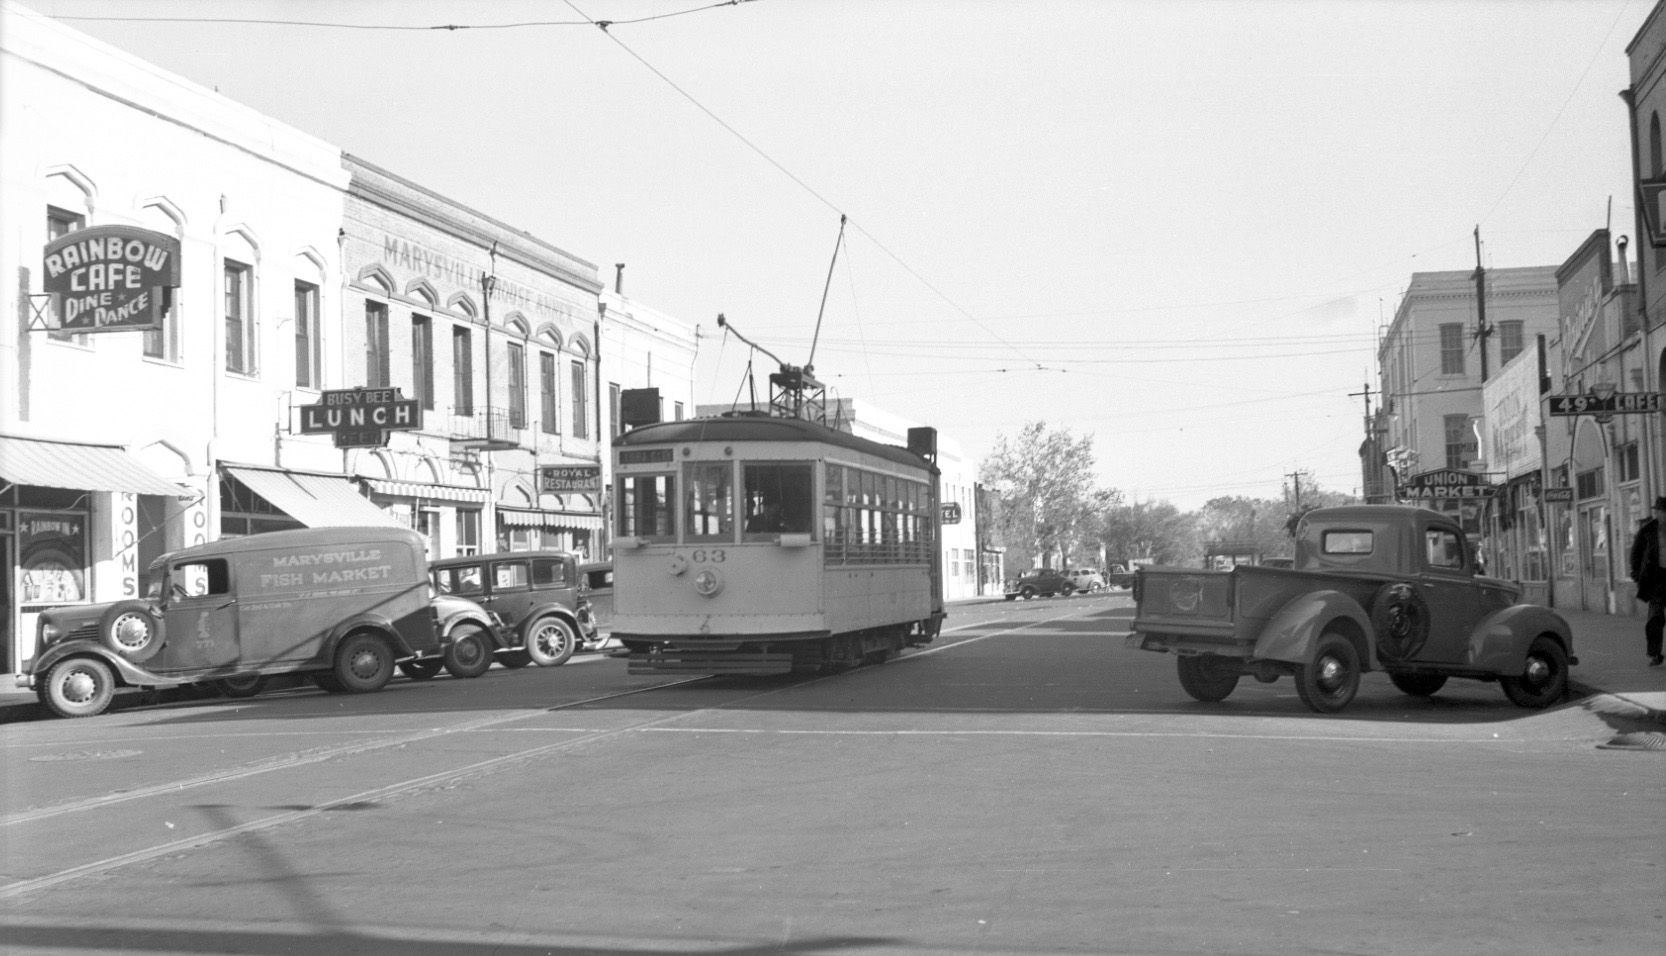
Ted Wurm’s east view on 2nd St. toward C St. on Jan. 23, 1941 has several notable features. The end of wire can be seen behind Birney 63, the tracks just reaching Oak St., recalling that they once continued north on C St. on the way to the SP station. The 300 block contained places to eat or buy food, as well as two buildings for the Marysville House Annex.
L218-80-Ted Wurm Photo, Courtesy BAERA, Western Railway Museum Archives, 32693sn, (Image 18 of 25)
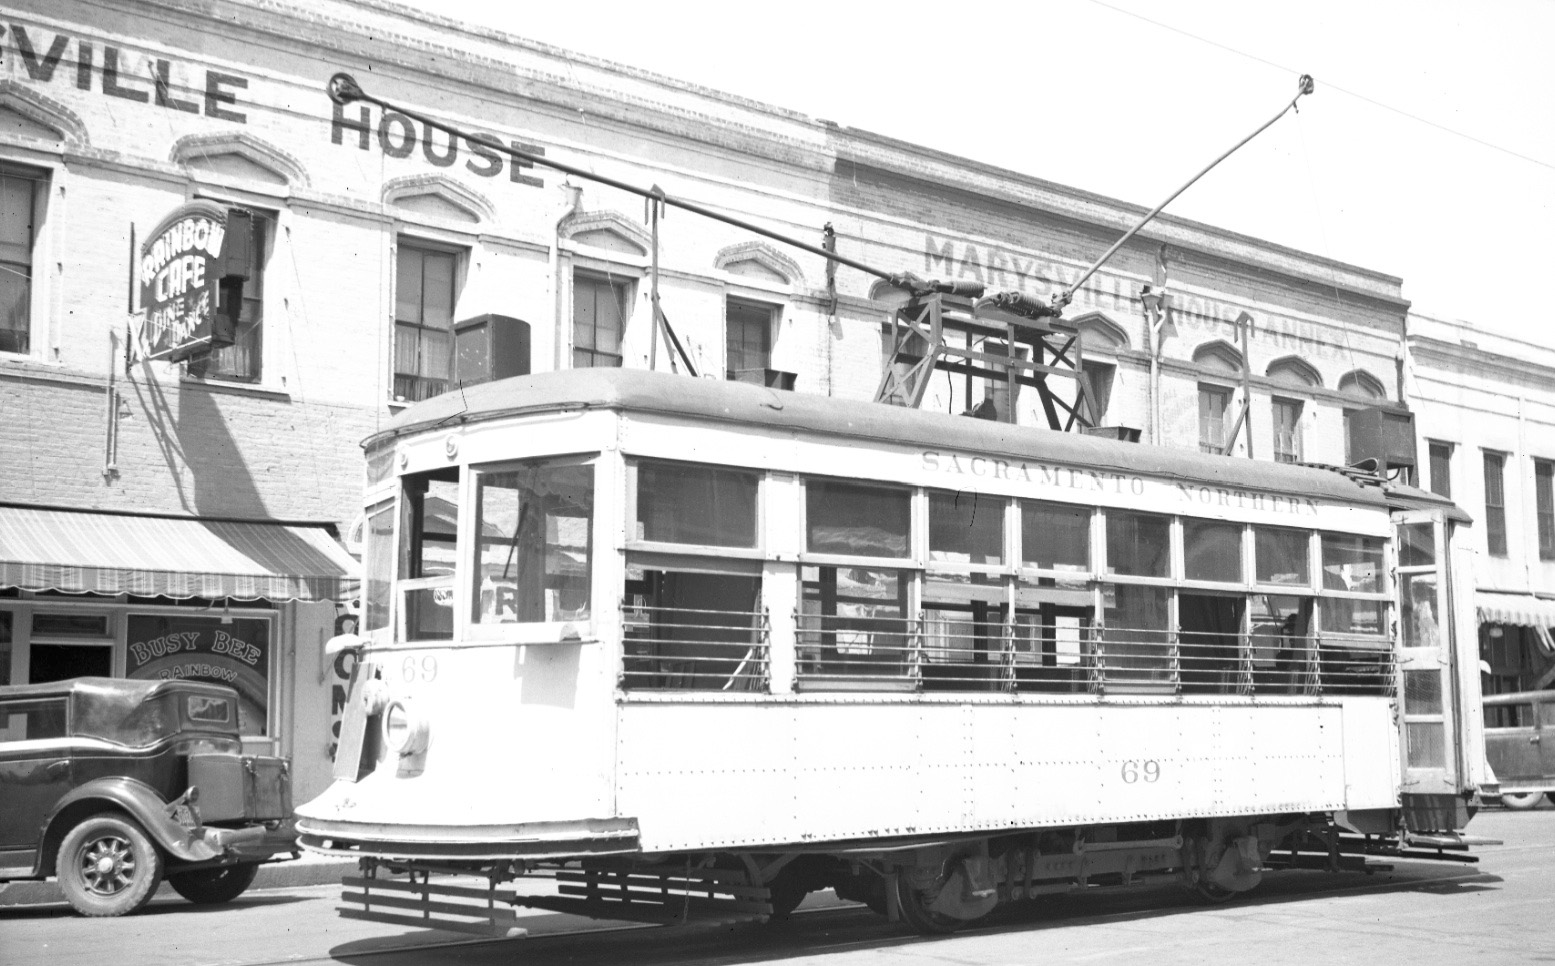
A northeast view at the end-of-the-line, this time of Birney 69, also provides more detail of the architecture of 2nd St. ca. 1940.
L218-85-Vernon Sappers Photo, Wurm Coll., Courtesy BAERA, Western Railway Museum Archives, 124642sn, (Image 19 of 25)
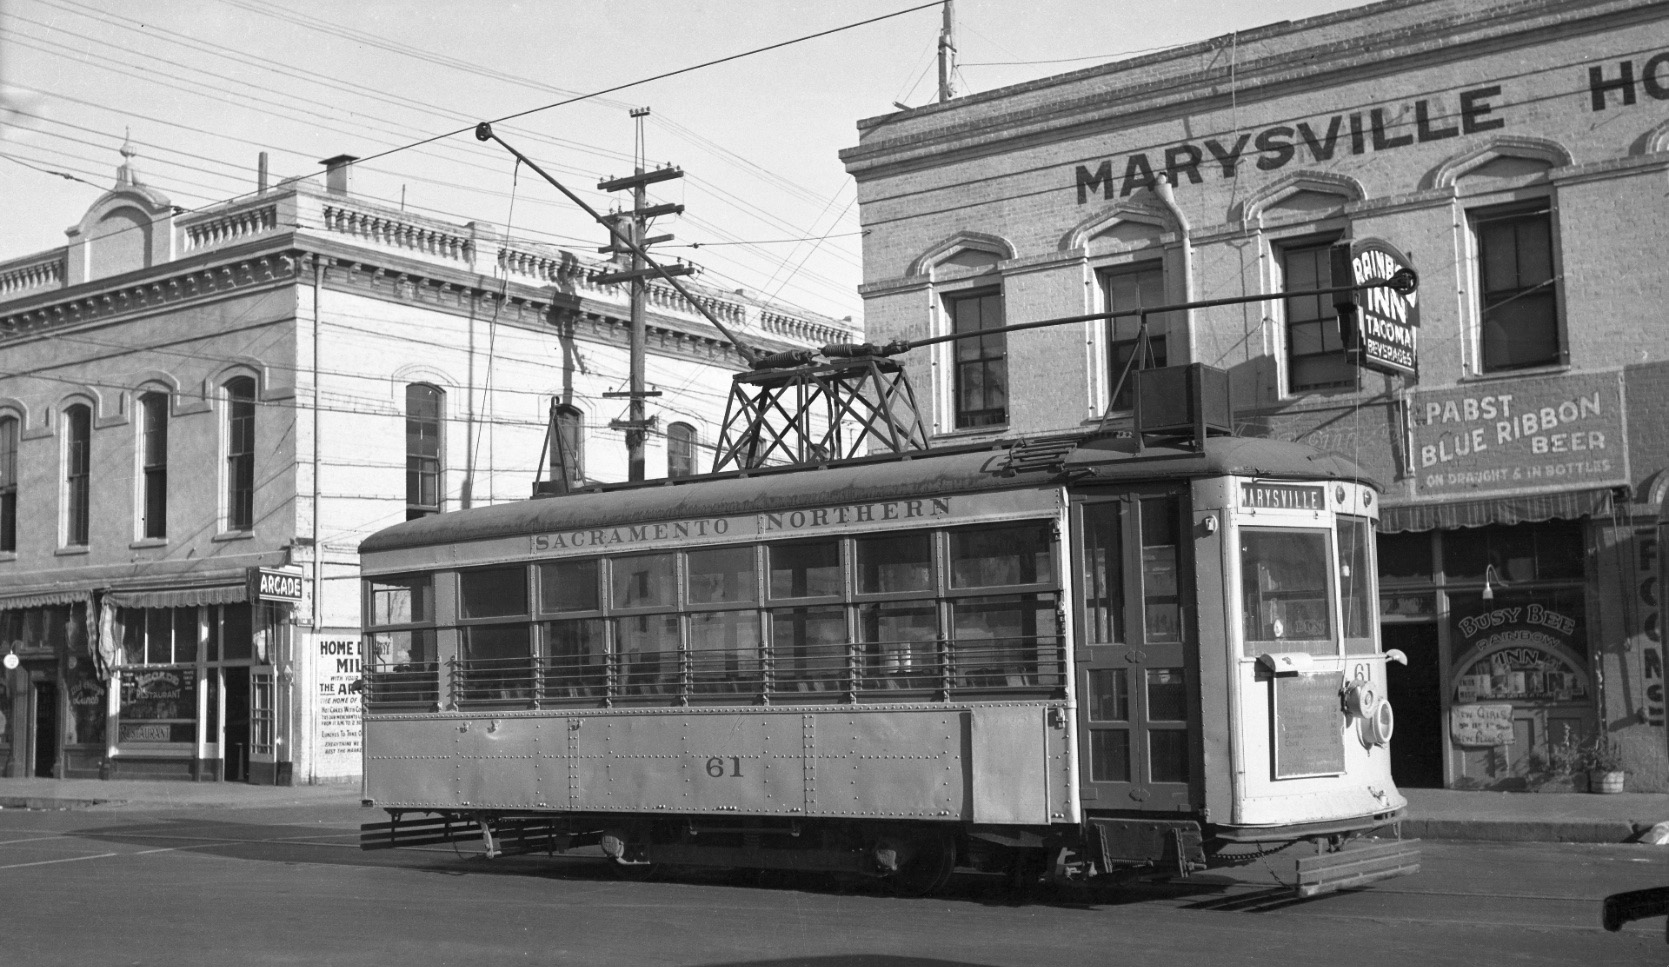
Art Alter’s southeast view of the south side of 2nd St. in Sept 1937 toward Oak St. is strikingly similar to the arrangement and composition of the north side, featuring the second building for the Marysville House Annex and Busy Bee.
L218-90-Art Alter Photo, Moreau Coll., Courtesy BAERA, Western Railway Museum Archives, 81731sn, (Image 20 of 25)
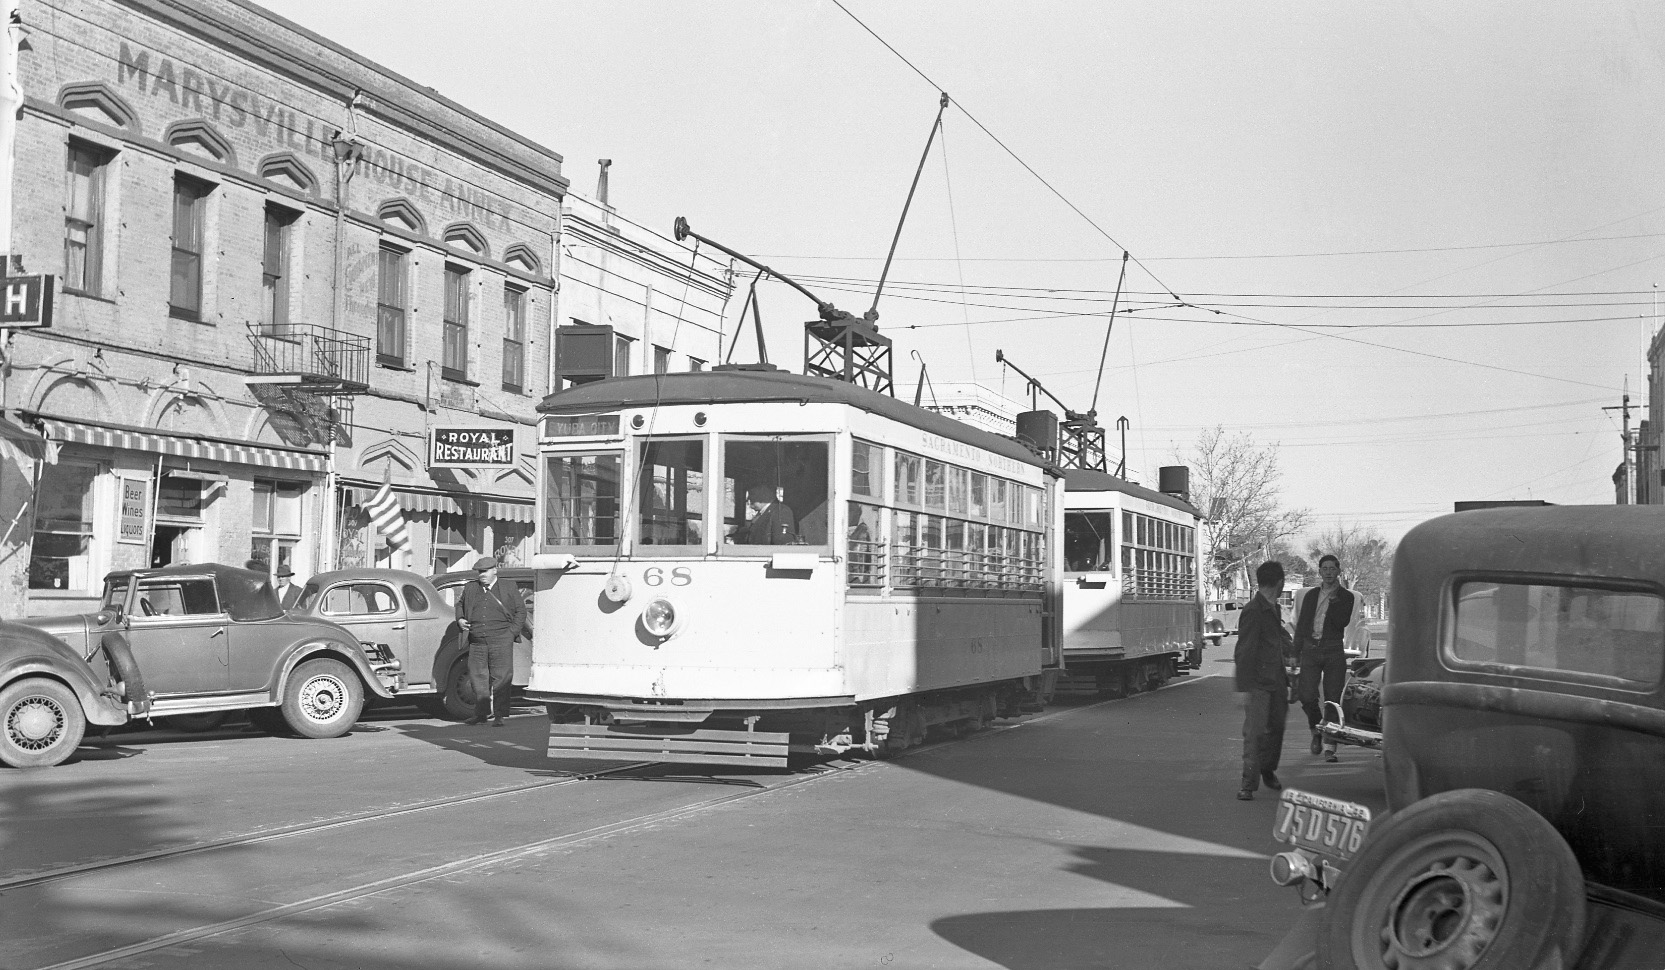
Louis Bradas, Jr. was at this spot on the last day of streetcar service, Feb. 15, 1942 to capture this northeast view on 2nd St. of Birney cars 68 and 70 lined up for the excursionists.
L218-95-Louis Bradas, Jr. Photo, Courtesy BAERA, Western Railway Museum Archives, 69120sn , (Image 21 of 25)
Back at the intersection of 2nd St. and D St., an interurban and the Colusa local, SN 109, line up to navigate the turn onto D St. Note Pete's Lunch Cafe at the corner of High St. and 2nd St. in this southwest view, circa 1940.
L218-100-Courtesy BAERA, Western Railway Museum Archives, 57067sn, (Image 22 of 25)
After the streetcar tracks were abandoned, the tracks on 2nd St. were cut back to the SN station as seen in this south-facing aerial from March 7, 1958. This image shows the original D St. Bridge nearing its final time, but in the place of the Western Hotel is an empty lot.
L218-105-Copyright California Department of Transportation, 5886-2, Detail, (Image 23 of 25)
This north-facing aerial from Aug. 1, 1960 shows the area covered in this update, from E St., left or west, to C St., right or east. The transfer of the Yuba River crossing from D St. to E St. has already taken place.
L218-110-Copyright California Department of Transportation, 7609-3, Detail , (Image 24 of 25)
The architecture surrounding the SN on D St. will be the topic covered in the update. North view, Aug. 1, 1960.
L218-115-Copyright California Department of Transportation, 7609-3, Detail , (Image 25 of 25)