The Palm Trees of Rockridge Curve
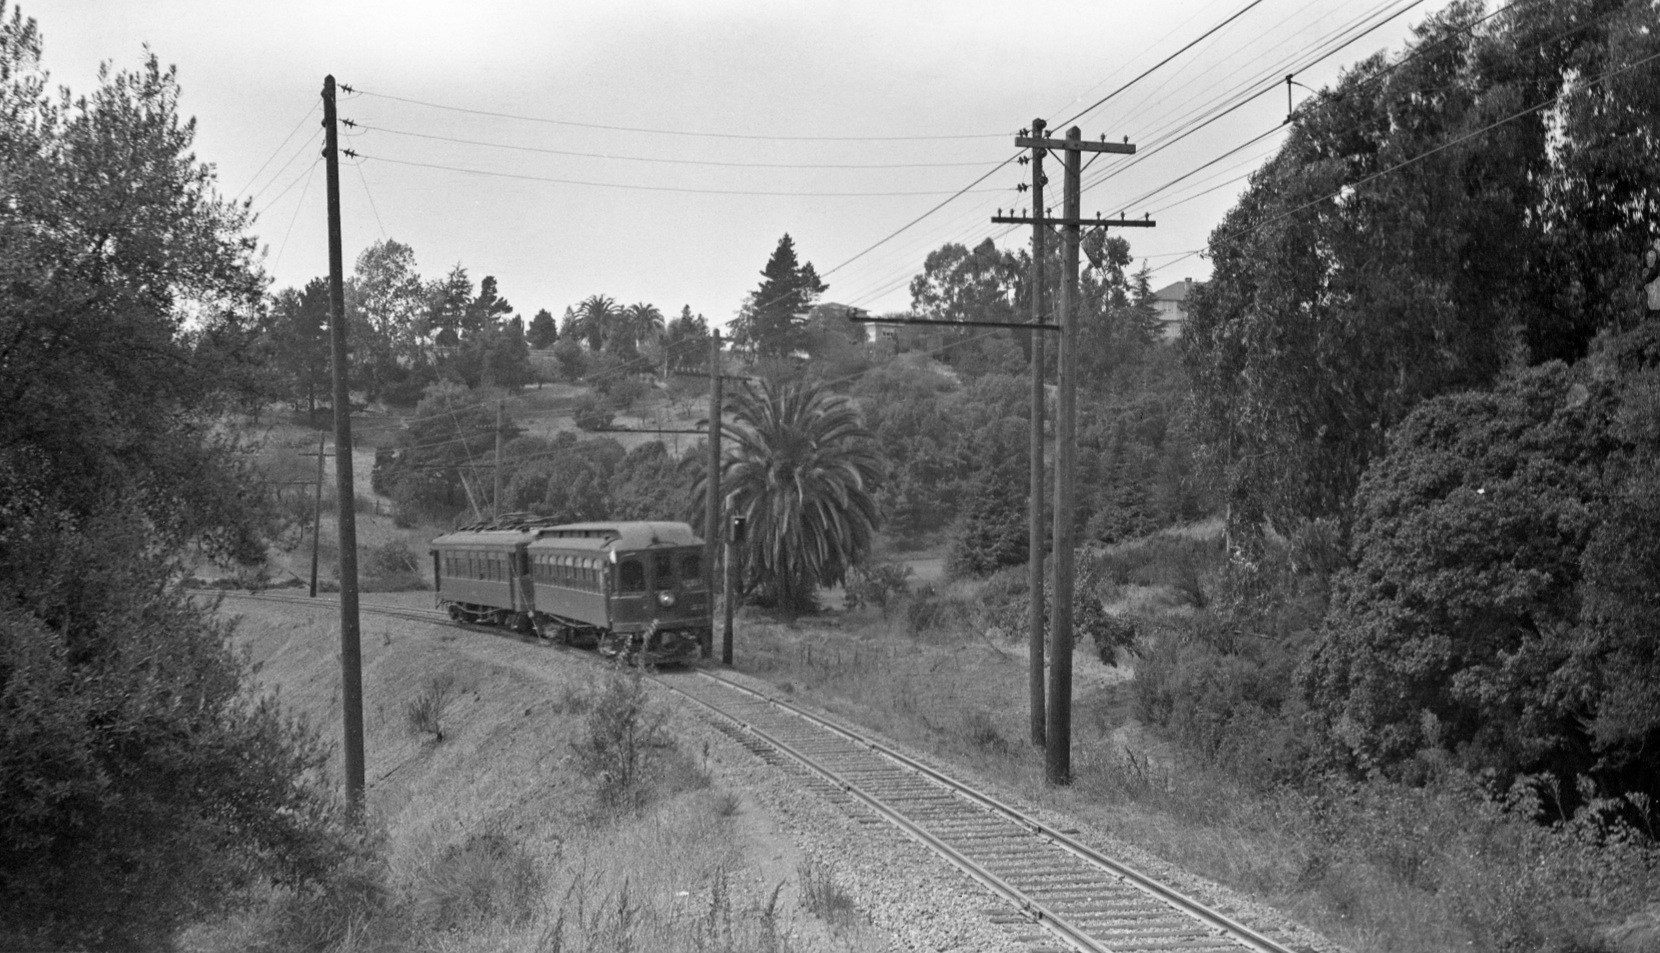
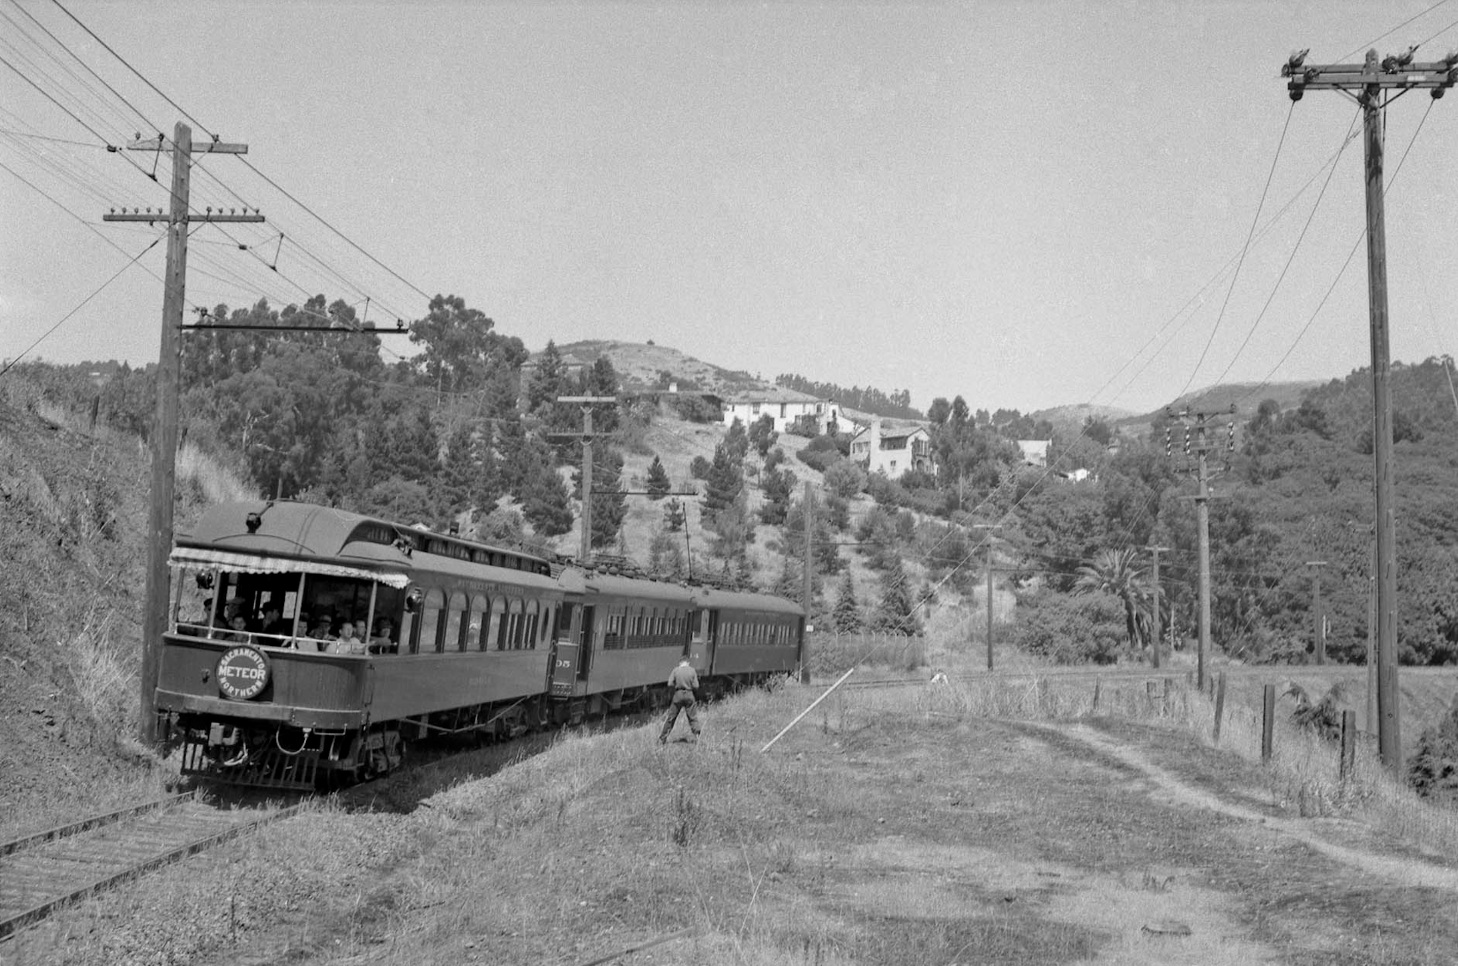
This scene with the palm tree on “Rockridge Curve” was a favorite among railfans and photographers as the surroundings indicated that the SN was out in the country. Niles car SN 222 and trailer Cincinnati car SN 1017, west view, Aug. 25, 1940.
L56-05-Vernon Sappers Collection, Courtesy BAERA, Western Railway Museum Archives, 64905sn, (Image 1 of 25)

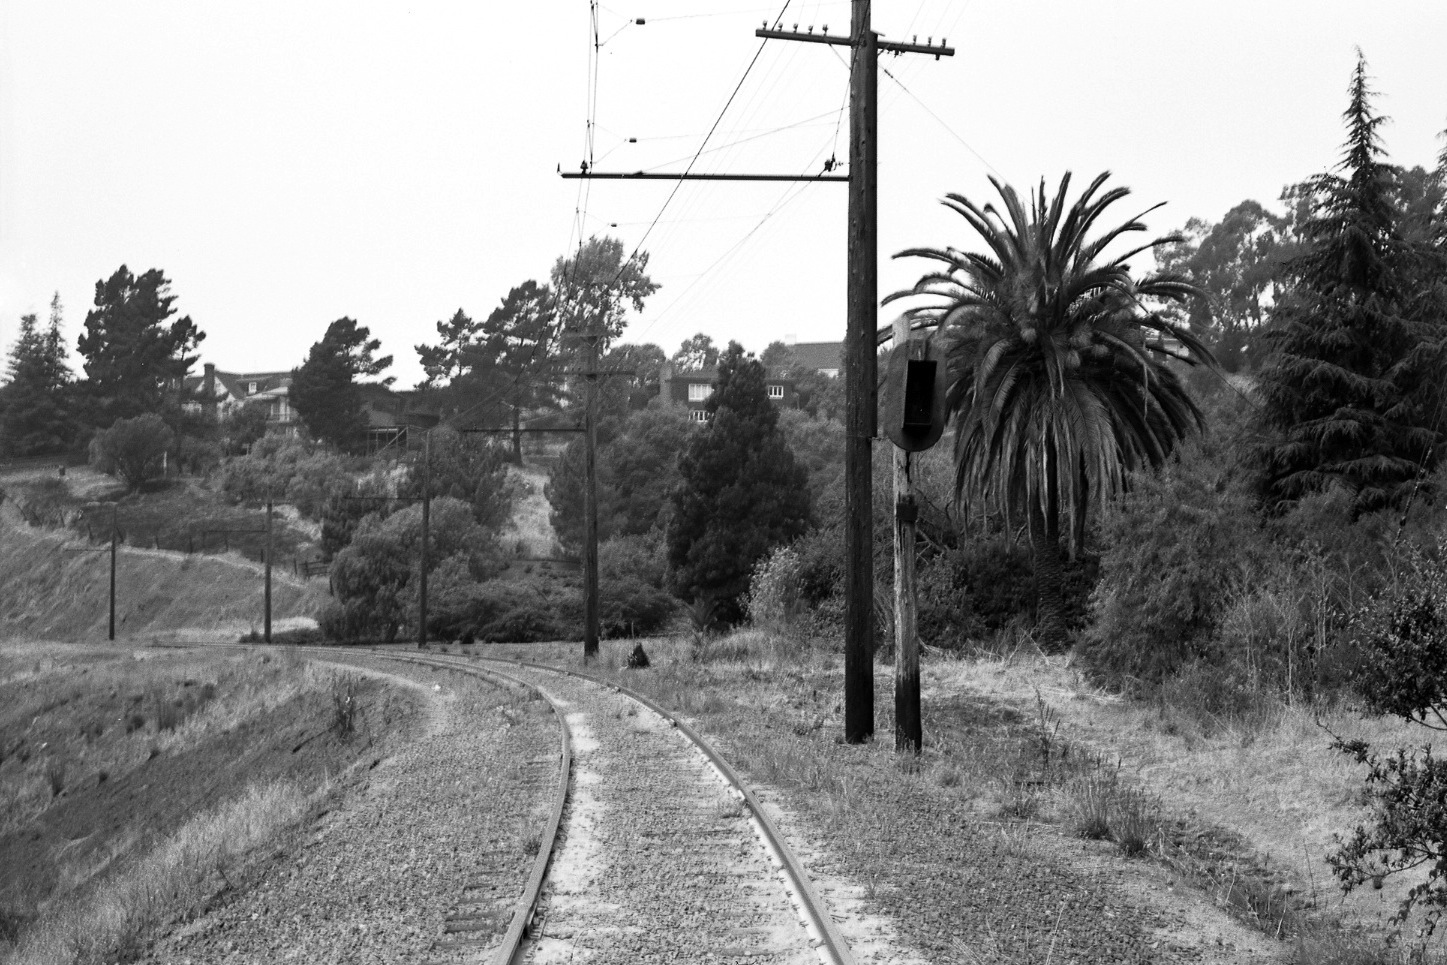
Rockridge Curve is not an officially designated place, and its origins are obscure, except that it aptly described a curved section in Chabot Canyon that contributed to the elevation gain to reach Lake Temescal. West view, Apr. 8, 1953.
L56-10-Copyright California Deptartment of Transportation, 3300-19, Detail , (Image 2 of 25)
Although construction records have not been found, this section of the original Oakland and Antioch Railway shows signs of significant excavation. Basically, two sheared off hills on either side of the EBMUD facility, the latter significantly altered when the Rockridge Siphon was put in place in the 1920s to supply water from the Claremont Tunnel. North view, Apr. 8, 1953.
L56-15-Copyright California Deptartment of Transportation, 3300-41, Detail , (Image 3 of 25)
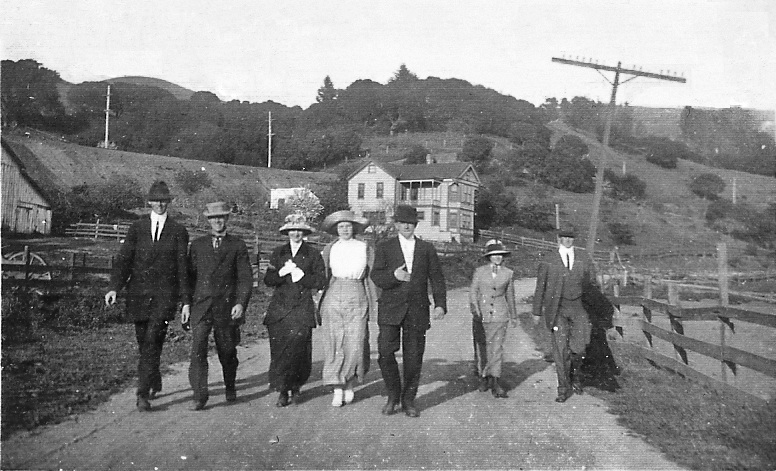
Identification of early images of Rockridge Curve as in this east view from the early 20th century is aided by the presence of the railway berm adorned by the catenary wire poles, but no panoramic views or images with trains prior to 1920 have been found.
L56-20-Courtesy Richard Perry , (Image 4 of 25)
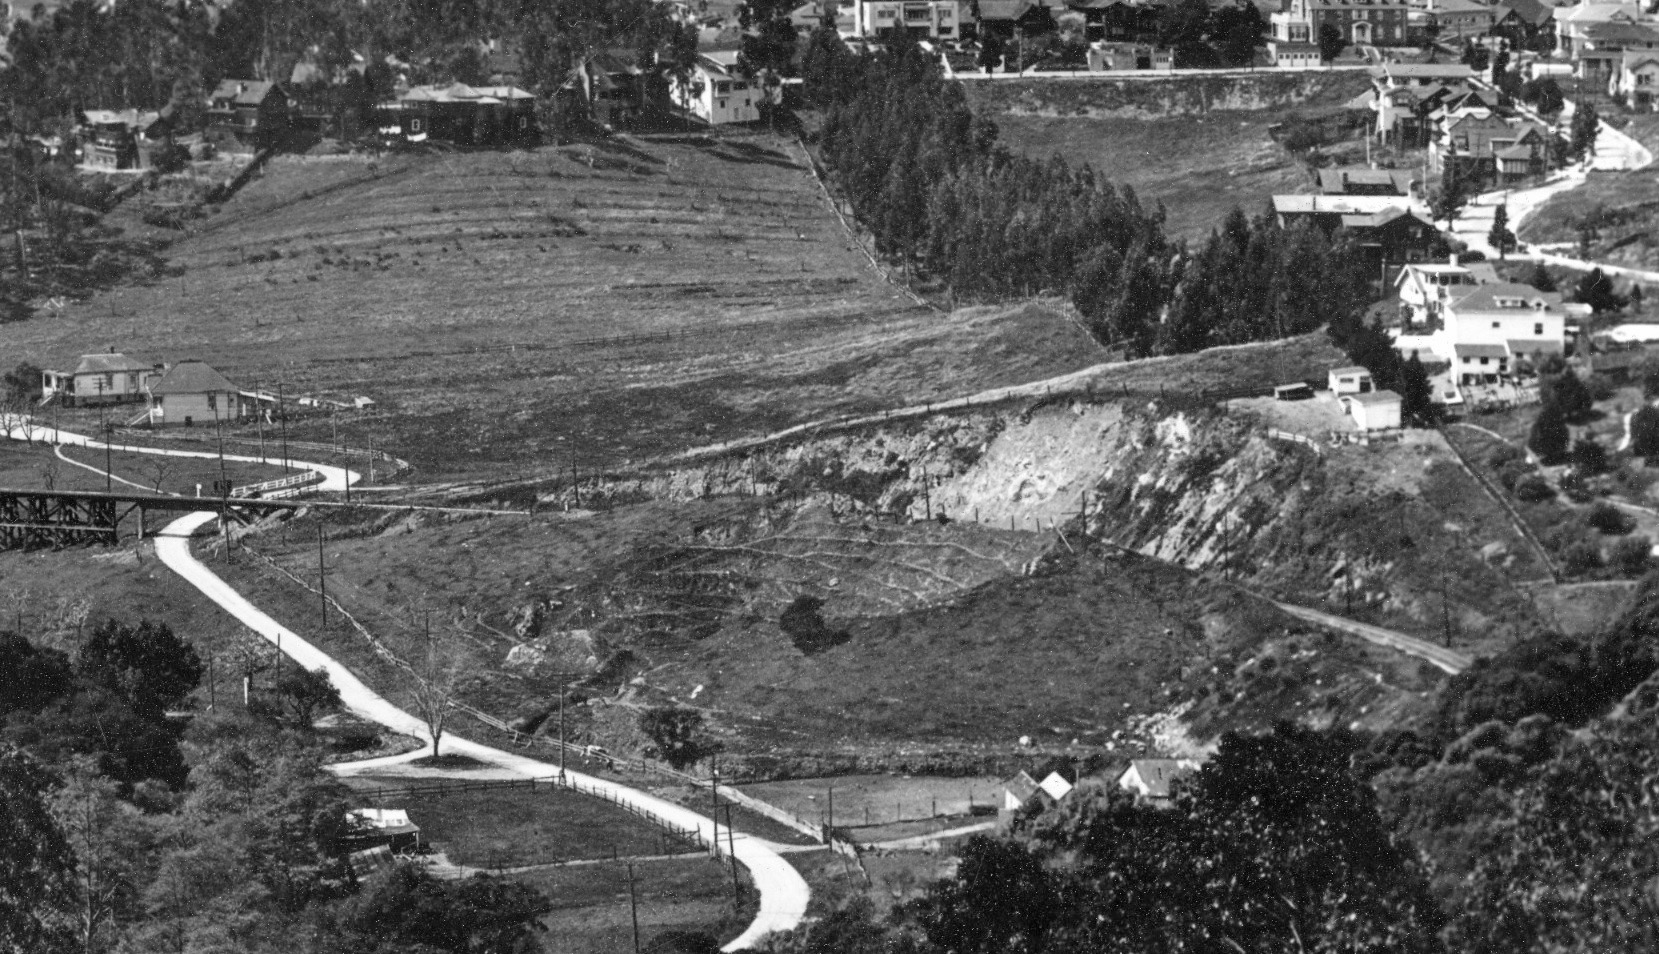
Eston Cheney took two photographs circa 1920s based on the trestle across the future site of the elementary school, and the absence of EBMUD and no. 280 Hillcrest Rd. This northwest view shows the carved out right-of-way sitting below the Berkeley border, at this point with walls of earth on either side of the track.
L56-25-Eston Cheney Photo D-1380-C, Courtesy John Bosko, John Bosko Coll., Detail, (Image 5 of 25)
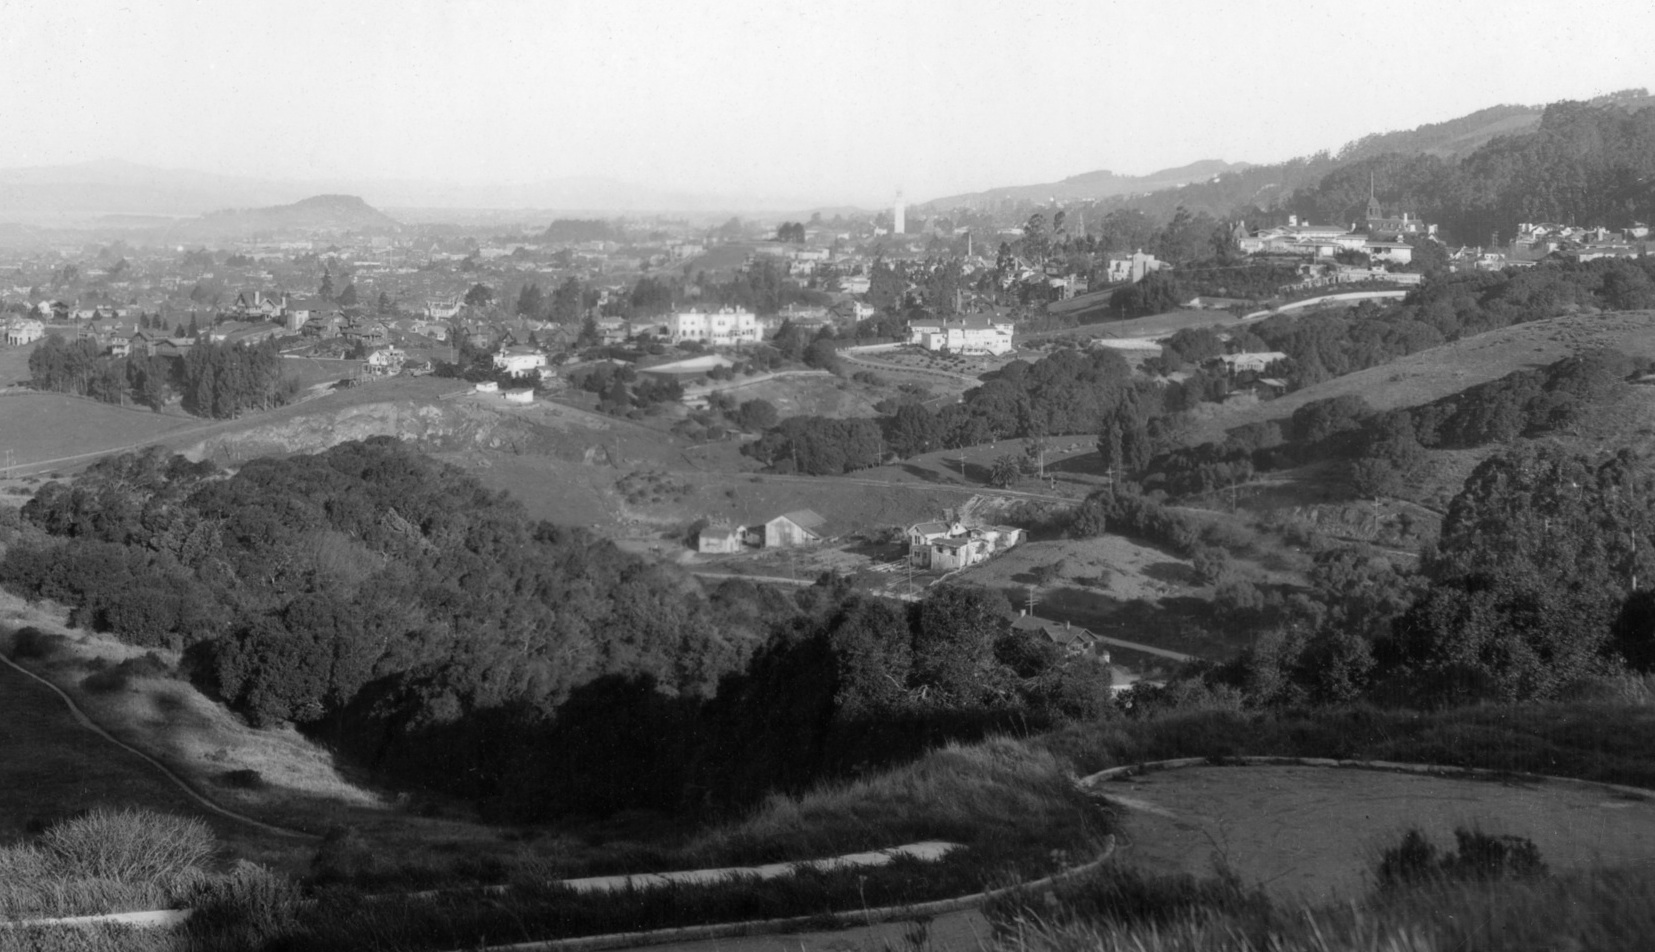
This circa mid-1920s north view shows the full curve just east of the Chabot Rd. overpass.
L56-30-Eston Cheney Photo D-3632, Cortesy John Bosko, John Bosko Coll., Detail , (Image 6 of 25)
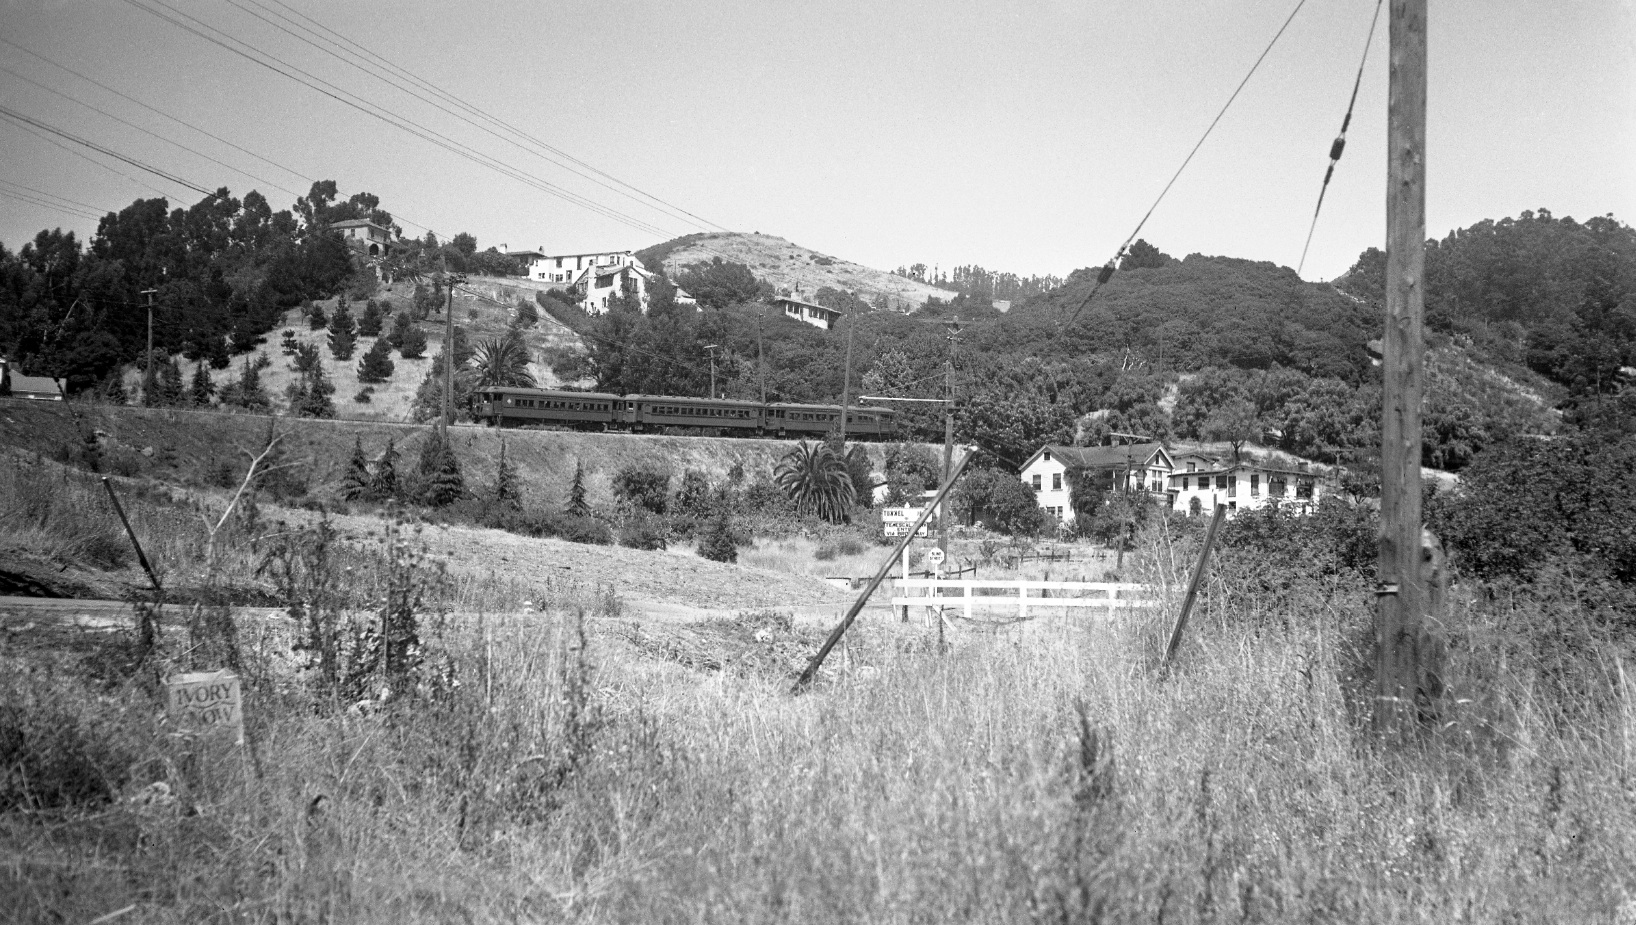
This north view from Jul. 6, 1938 reveals two palm trees, one above and one below the three-car train. The homes on Roble Ct. above the right-of-way persist, but those below it, nos. 6965 and 6973 Chabot Rd., perished with BART construction. Golden Gate Ave. at Chabot Rd., center, prevails, but photographer Charley Savage and the Ivory Snow box would be buried under the weight of Highway 24.
L56-35-Charles Savage Photo, Courtesy BAERA, Western Railway Museum Archives, 10040sn, (Image 7 of 25)
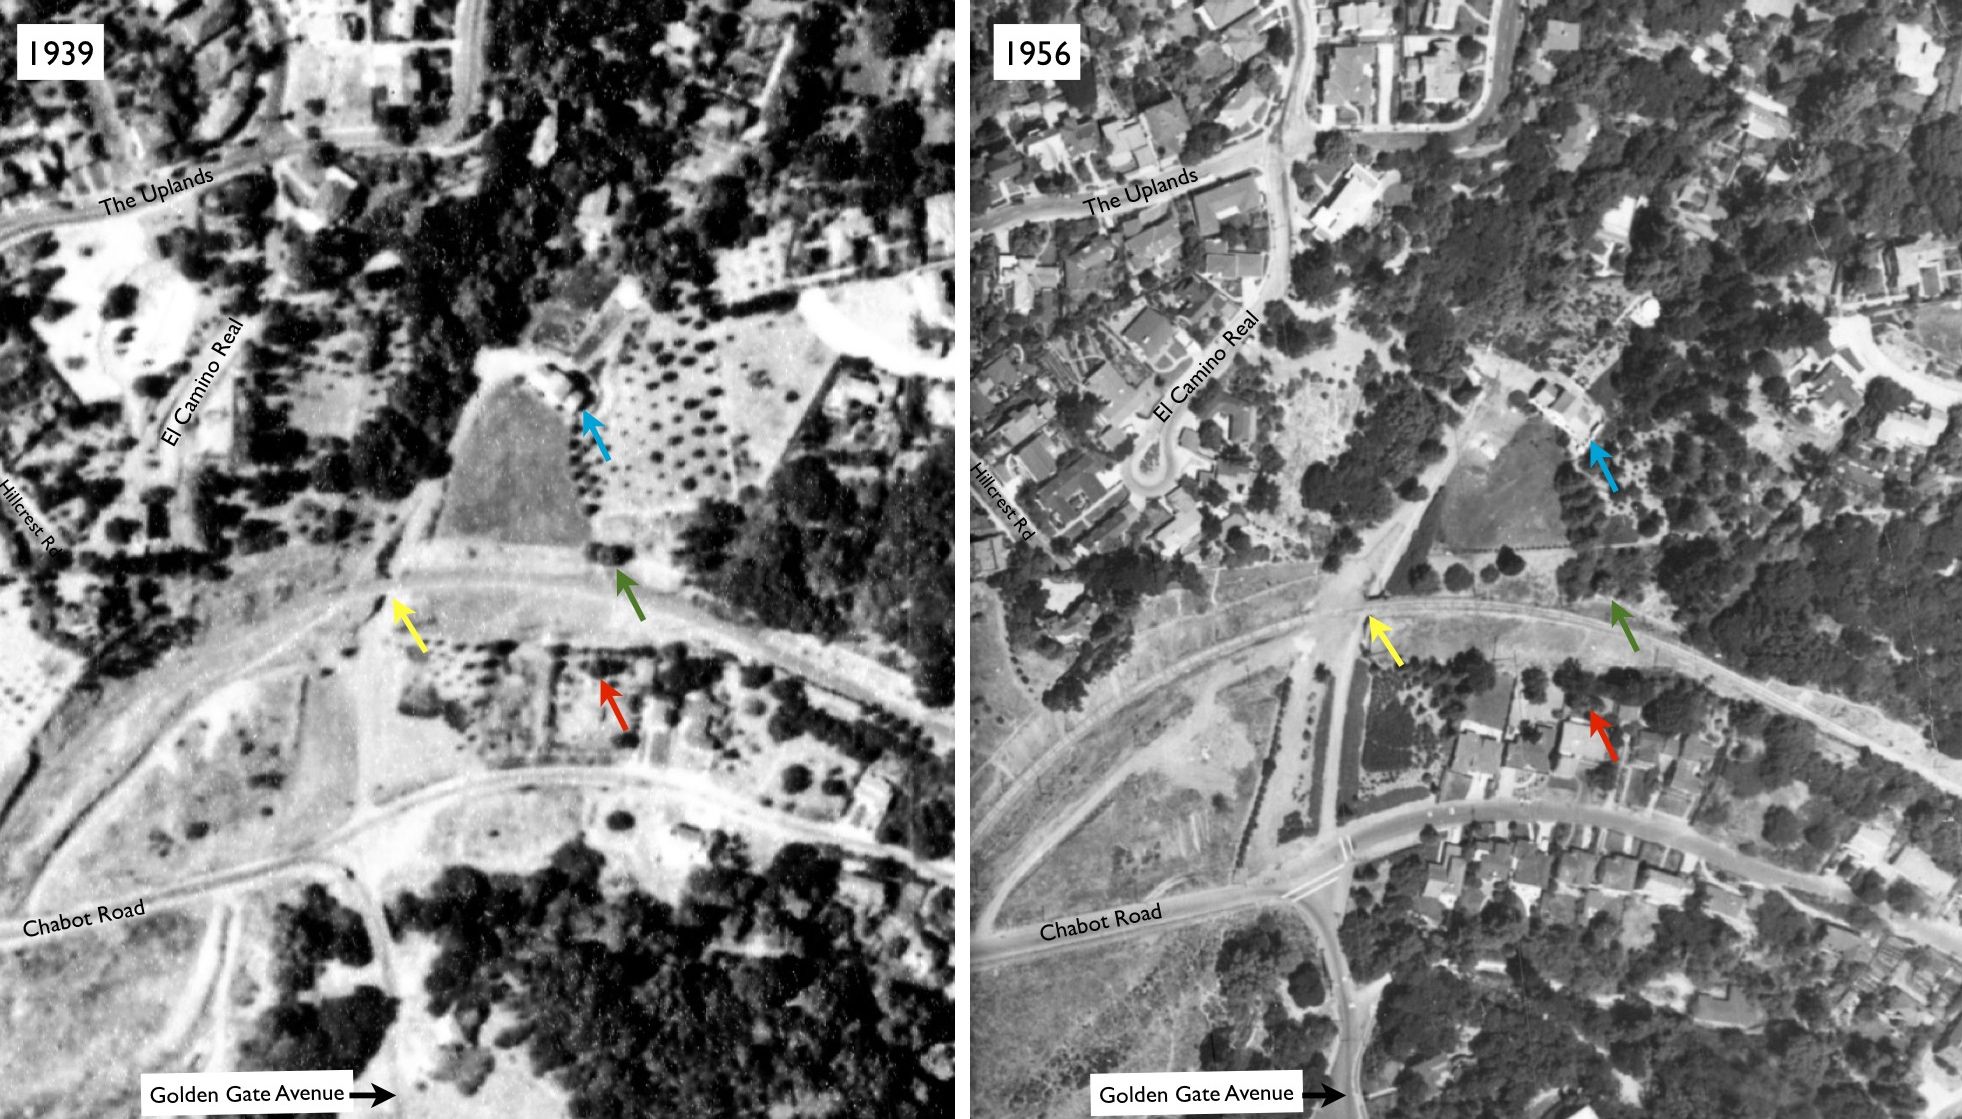
The SN is marked by the yellow arrow as it crossed over the continuation of Golden Gate Ave. in this 1939 to 1956 comparison. EBMUD Claremont Laboratory, turquoise arrow, the big palm tree north of SN, green arrow, and palm tree south of SN, red arrow. Refs: left, Ref. BUT-BUU-289-66, Courtesy EBMUD; right, G4364_B5_A4_1956_R6_no.116-2
L56-40-USDA AAA Western Division, RM Towill, and Earth Science and Map Library, UC Berkeley, (Image 8 of 25)
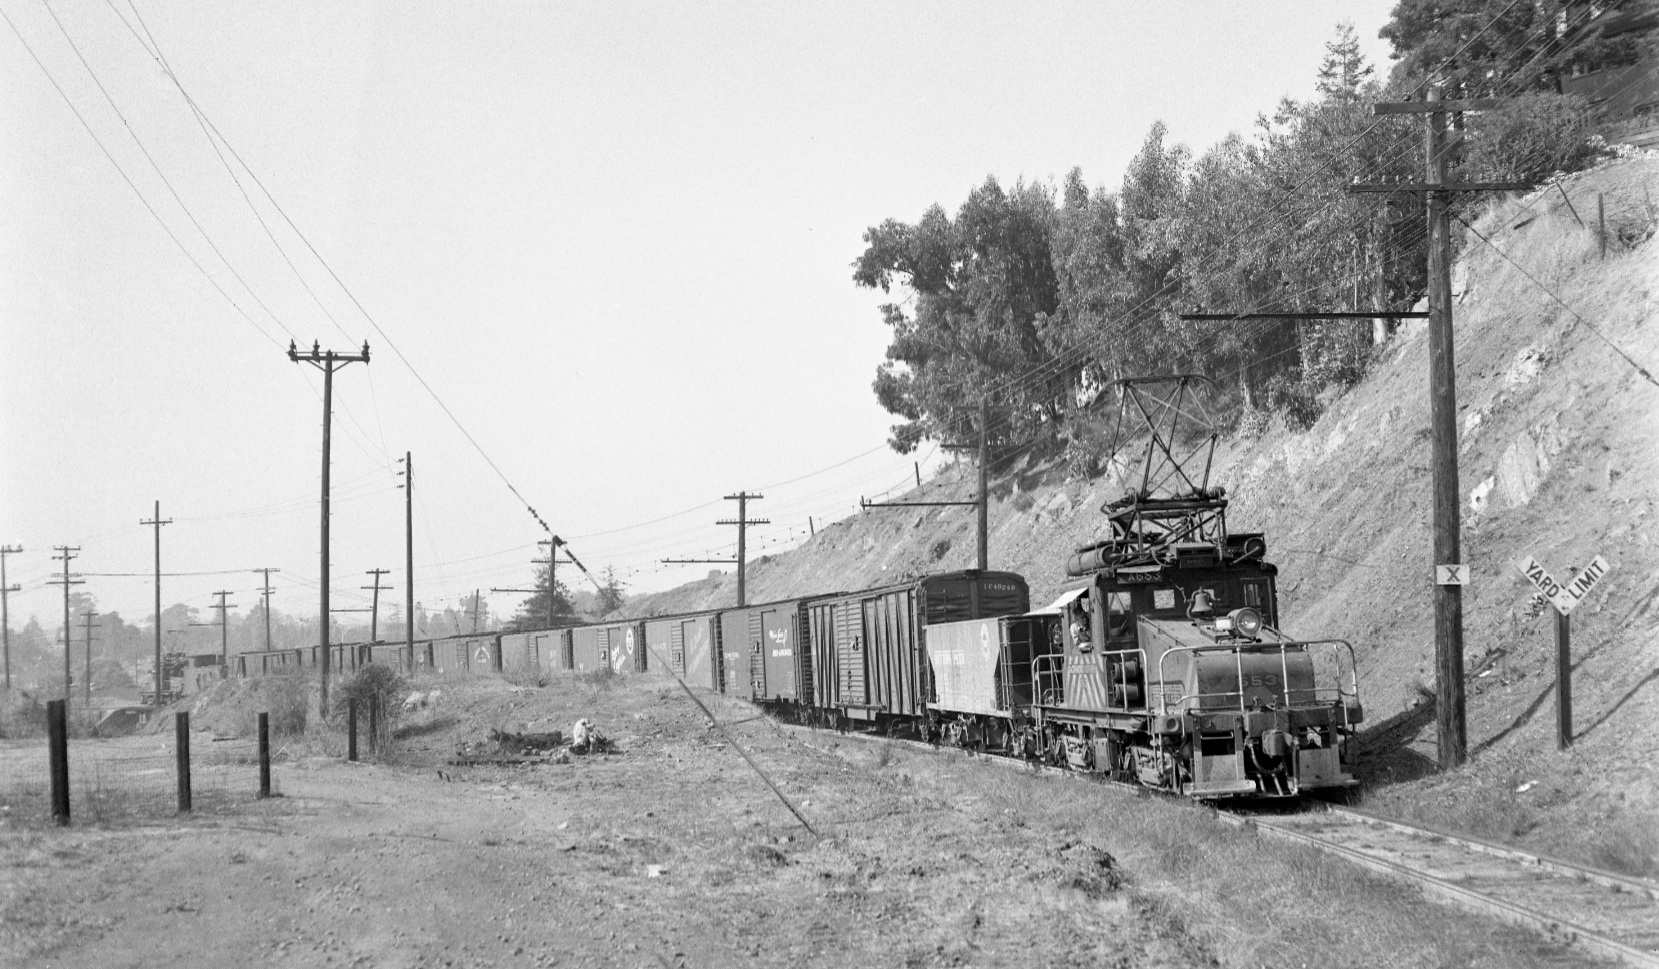
The western end of the curve is shown here with SN 653 leading a freight in this west view from Oct. 13, 1956. Helper motor SN 652 on the rear sits centered on the overpass of Chabot Rd.
L56-45-Fred Matthews Photo, Courtesy Anonymous Donor , (Image 9 of 25)
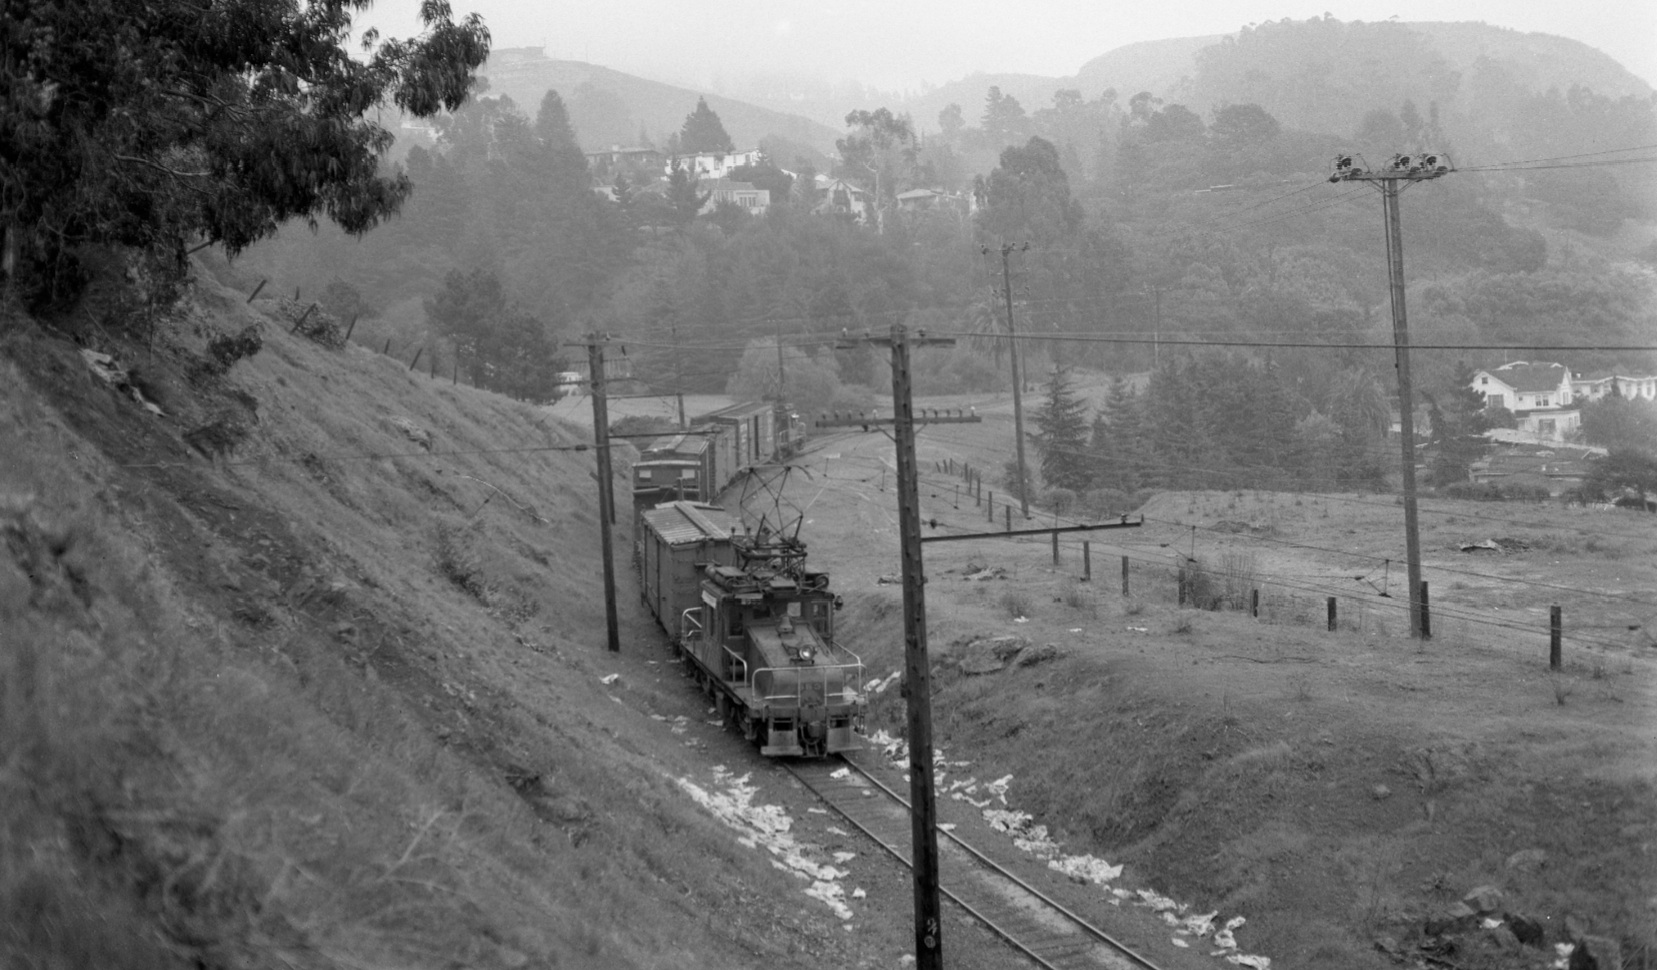
SN 652 approaches the EBMUD overpass with SN 653 seen here on the rear with an added boxcar between it and the caboose in this east view from Feb. 26, 1957. In two days, the SN will abandon the line west of Lafayette. The layers of garbage accentuate the walls of the cut.
L56-50-Fred Matthews Photo, Courtesy Anonymous Donor , (Image 10 of 25)
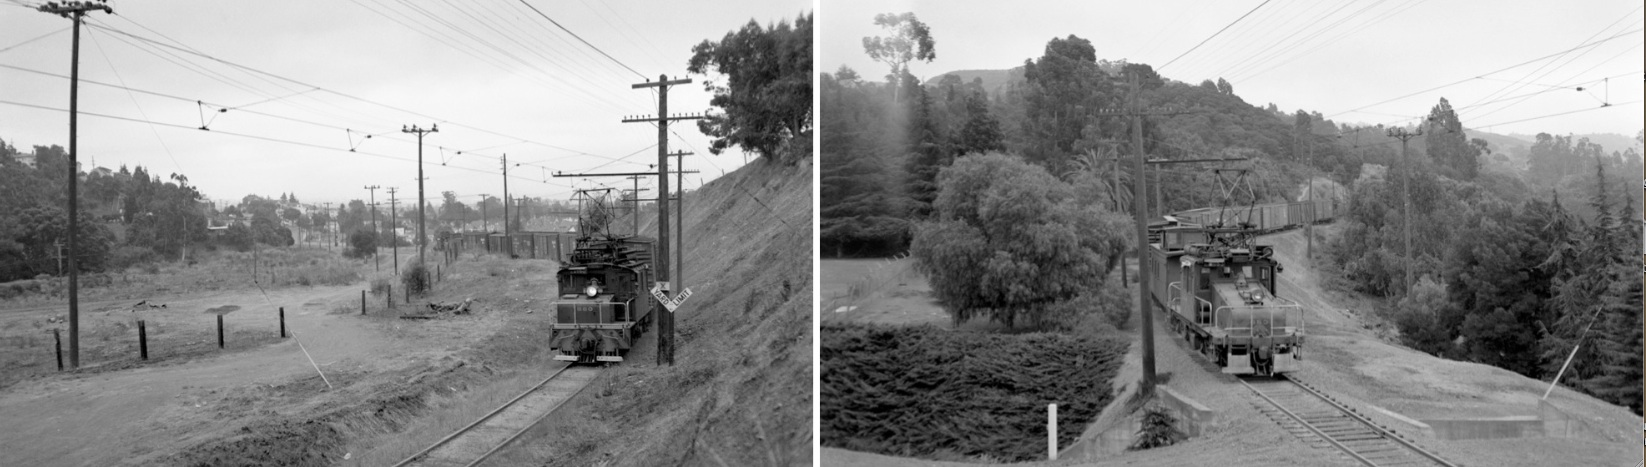
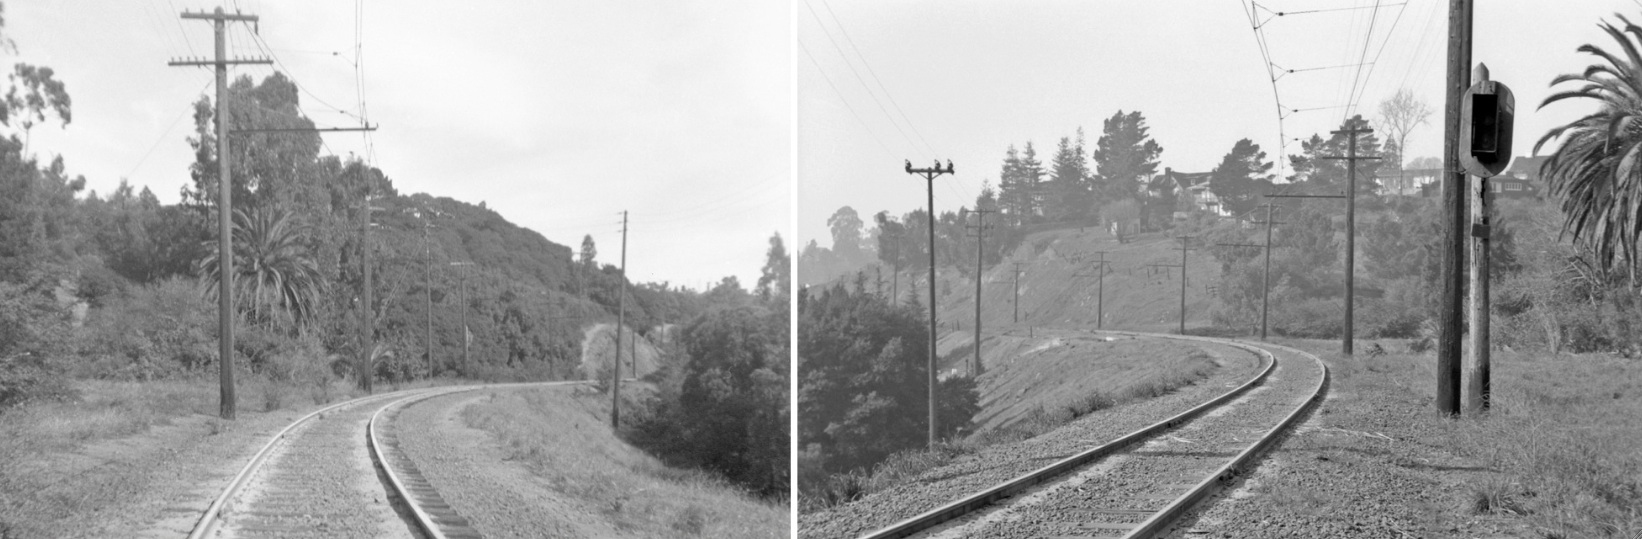
From a photographic standpoint, there were different strategies employed to document the curve. Fred Matthews caught SN 660 and freight negotiating the curve, left panel, southwest view, and waited until SN 653 brought up the rear, right panel, east view, Aug. 11, 1956.
L56-55-Fred Matthews Photo, Courtesy Anonymous Donor , (Image 11 of 25)
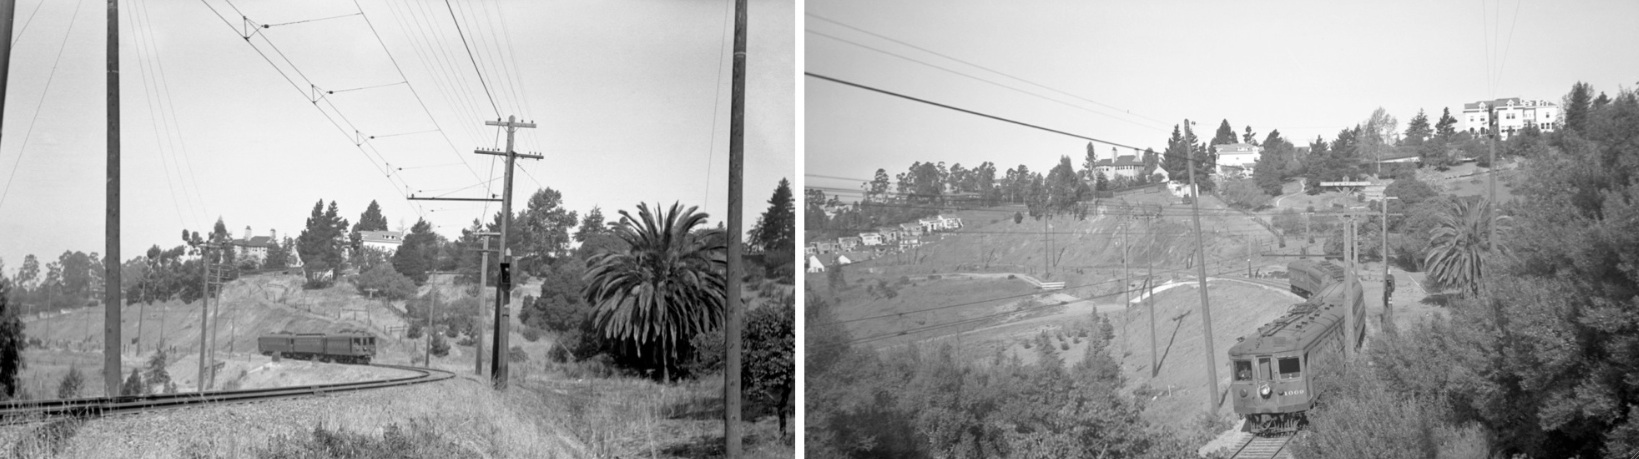
Waiting at the end of the curve worked too, as Dudley Thickens captured the whole of Rockridge Curve with an oncoming passenger train, the big palm tree and the block signal in this west view from July 4, 1940, left panel. When placed side-by-side with Wil Whittaker’s image of SN 1009 from 1937, right panel, it almost looks like a time-lapse sequence, except that the train in the right image has an extra trailer. Ref: right, Vielbaum Collection.
L56-60-Courtesy BAERA, Western Railway Museum Archives, 64578sn, r, 100040sn, l, (Image 12 of 25)
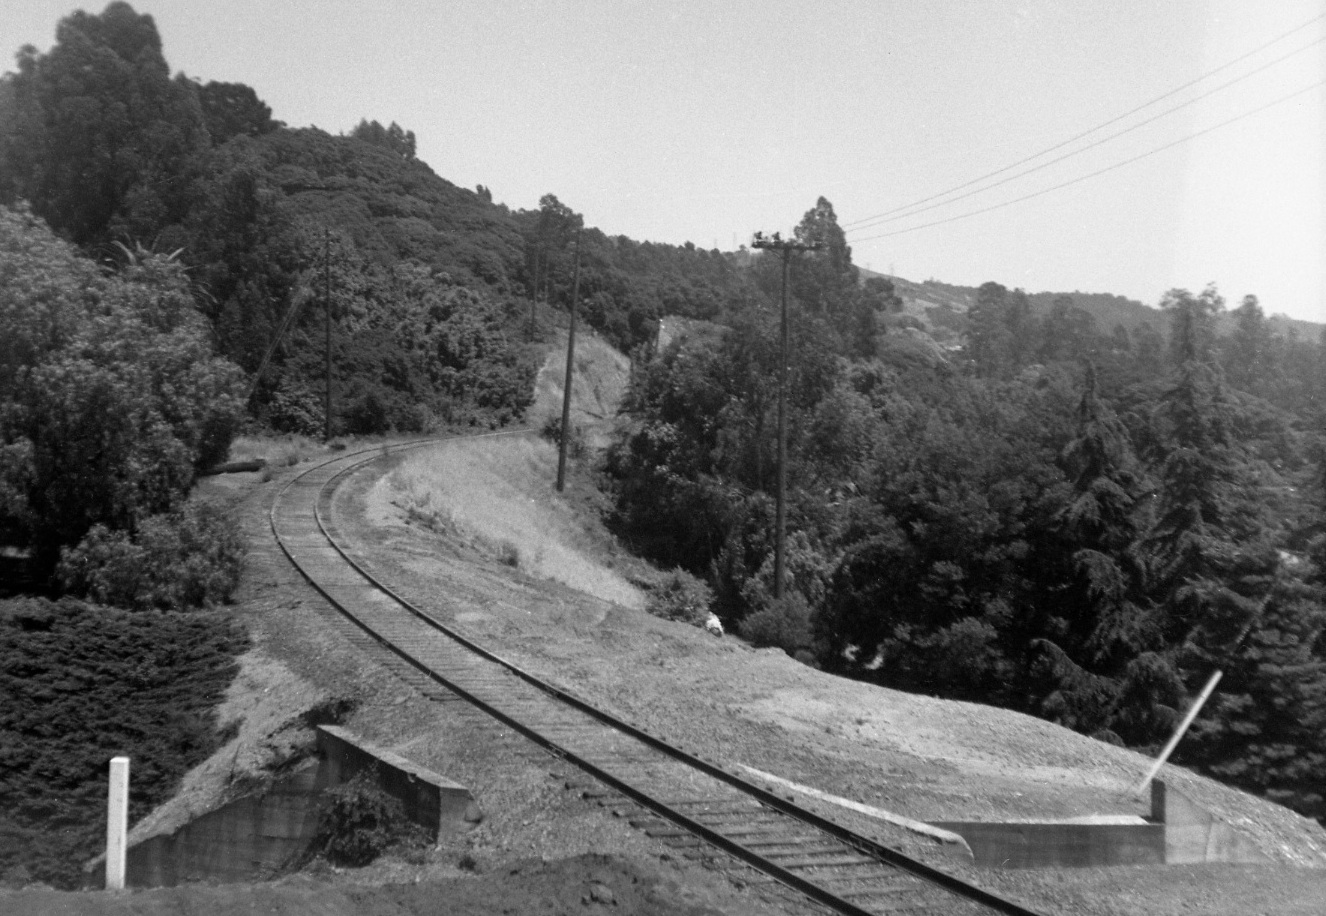
The west view in this image by Wil Whittaker brings the date up to Apr 12, 1952, where a freight has been divided, most likely to navigate the 4.6% grade of the curve and reassemble at Lake Temescal. A small sliver of the big palm can be seen toward the right upper corner.
L56-65-Wilbur C Whittaker Photo, Courtesy Garth Groff, (Image 13 of 25)
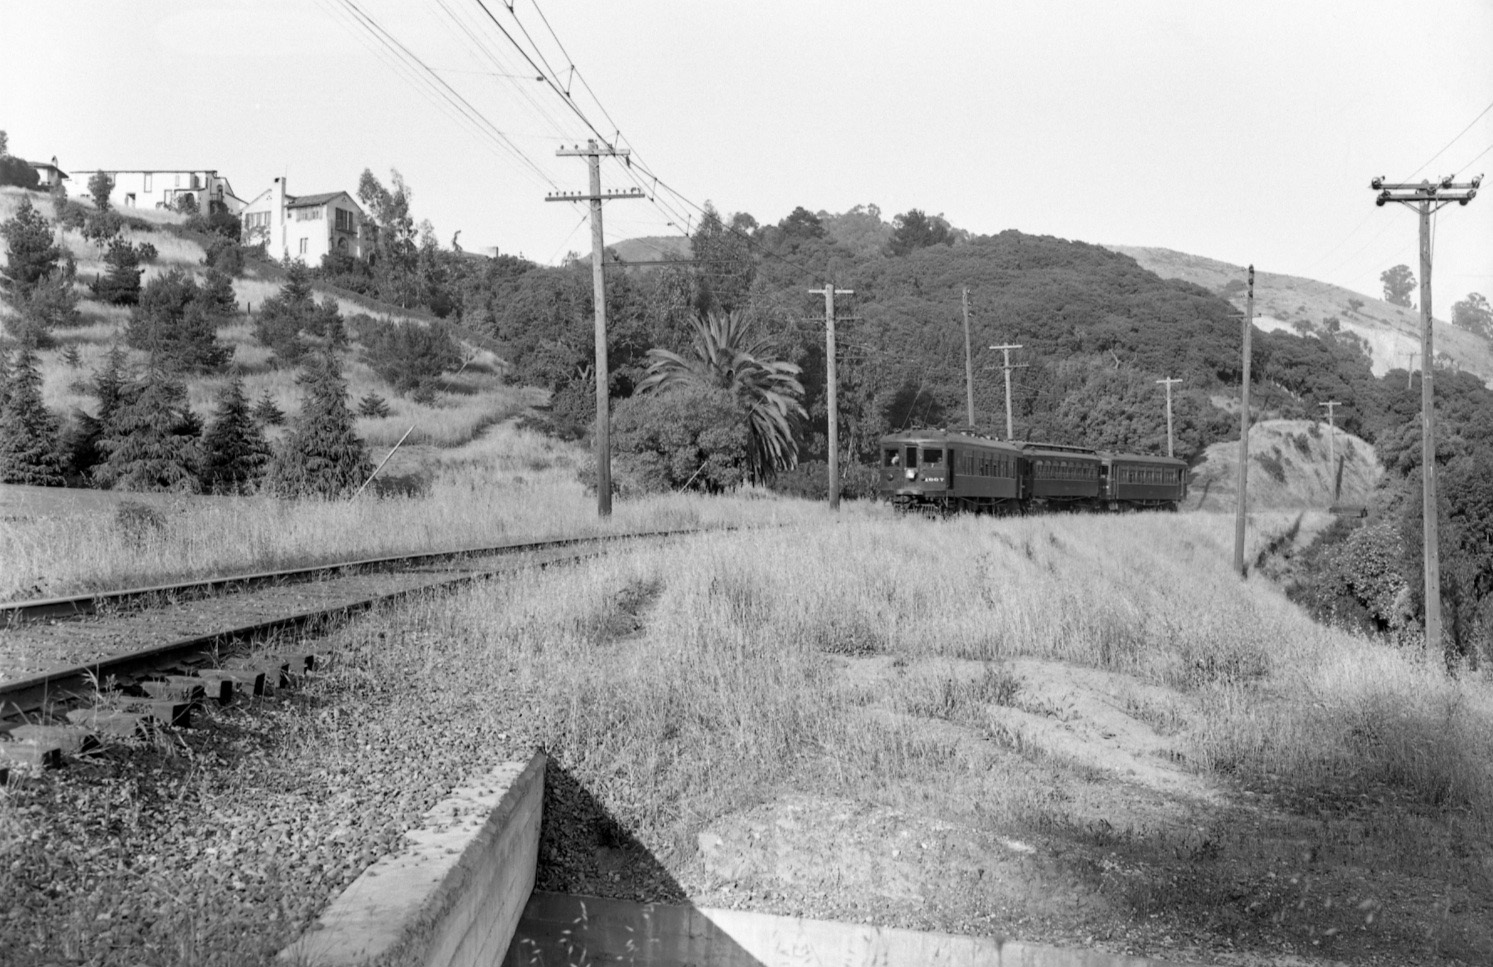
Images to the east of the eastern section of the curve were taken from below to catch the rim contours. SN 1007 leads a three-car train past the big palm tree in 1940 heading west in this east view taken from the concrete bridge by EBMUD.
L56-70-John G. Graham Photo, Courtesy BAERA, WRMA, neg 46802sn , (Image 14 of 25)
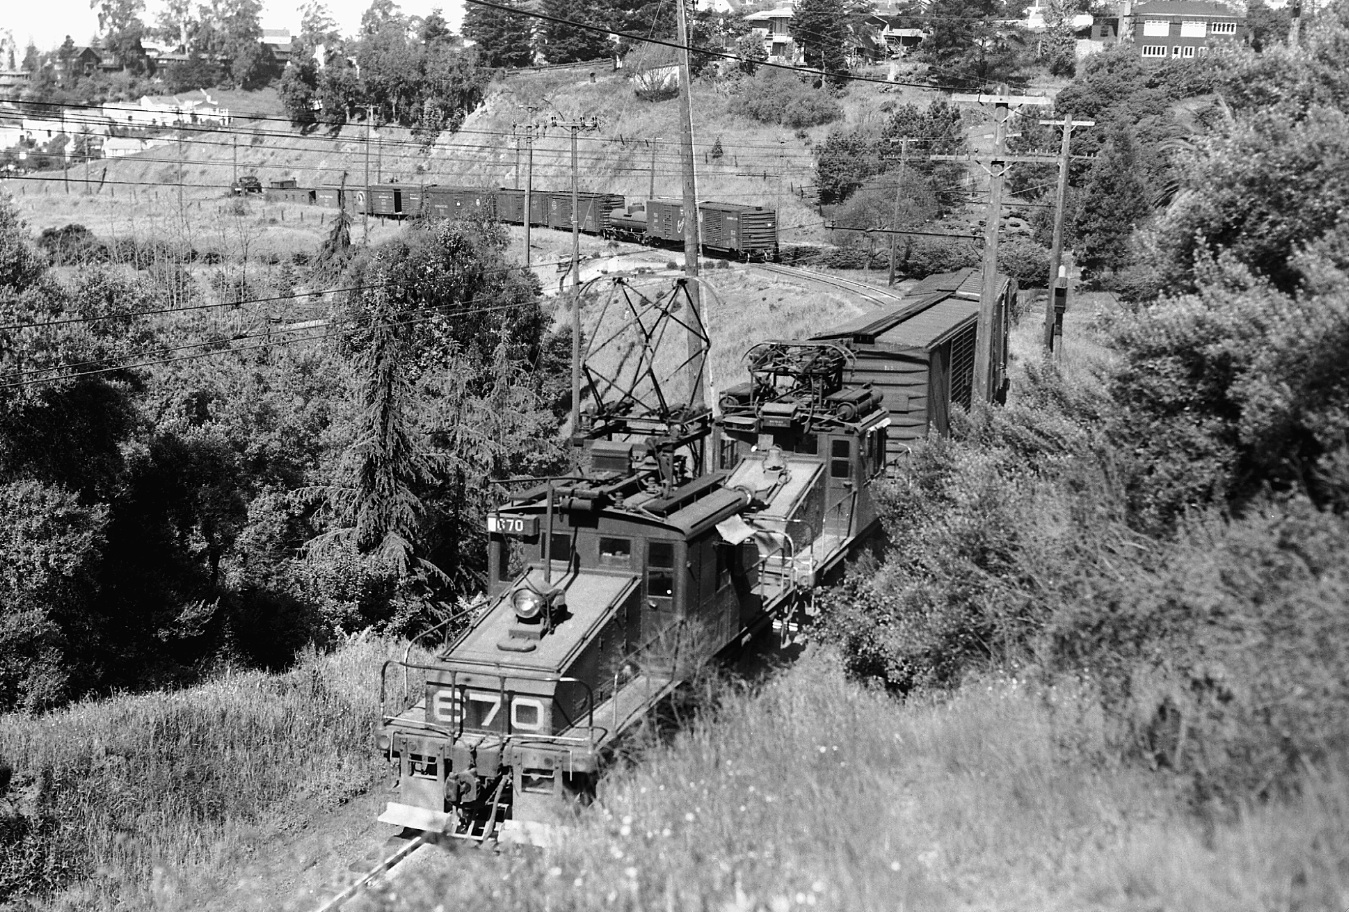
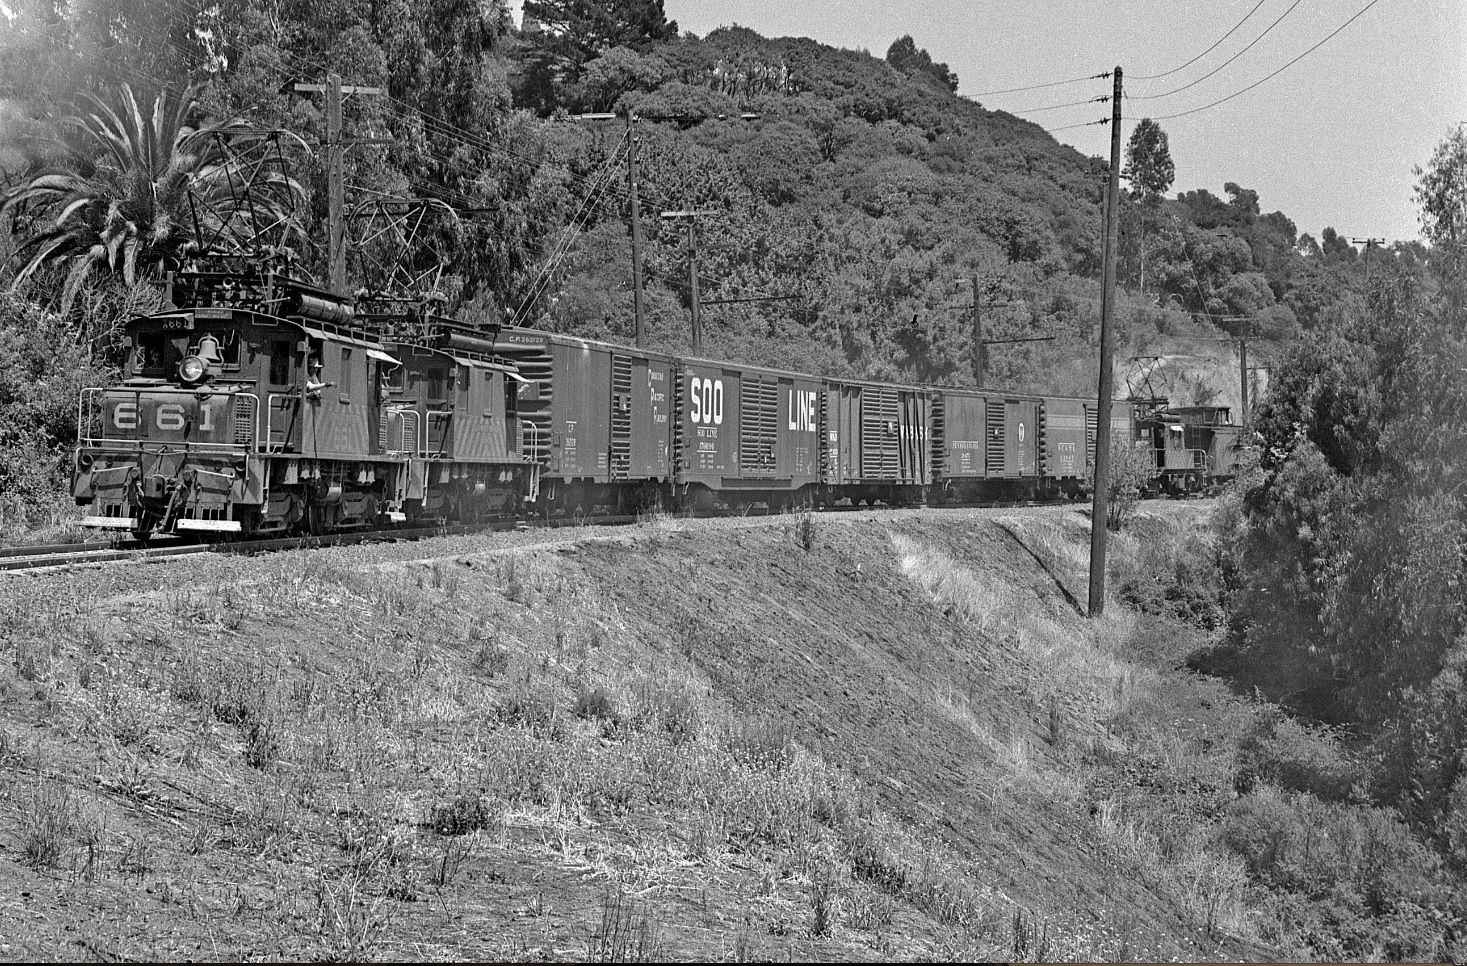
A freight with SN 661 and two helpers take a breather coming through Chabot Canyon and posing by the big palm in 1956, east view.
L56-75-John Harder Photo, Courtesy John Harder, (Image 15 of 25)
Views of the curve sans trains were also popular subjects, here showing a east view from Aug. 25, 1949, left, and a west view from 1954, right. Ref: left, Sappers Collection, BAERA 68145sn; right, John Harder Photo
L56-80-Courtesy BAERA, Western Railway Museum Archives, l, and John Harder, r , (Image 16 of 25)
John Harder came back and walked the line during the final months of the SN, here the same west view from 1956, but this time the palm is bearing fruit.
L56-85-John Harder Photo, Courtesy John Harder, (Image 17 of 25)
Finally, after the catenary and wires were removed, a west view from June 2, 1957 as removal of the rails would be shortly progressing east on Shafter Ave. in about 10 days.
L56-90-Vernon Sappers Collection, Courtesy BAERA, Western Railway Museum Archives, 68825sn, (Image 18 of 25)
Now reversing direction, the complement of L56-50 after the catenary and wires were removed, an east view from June 2, 1957.
L56-95-Vernon Sappers Collection, Courtesy BAERA, Western Railway Museum Archives, 68827sn, (Image 19 of 25)
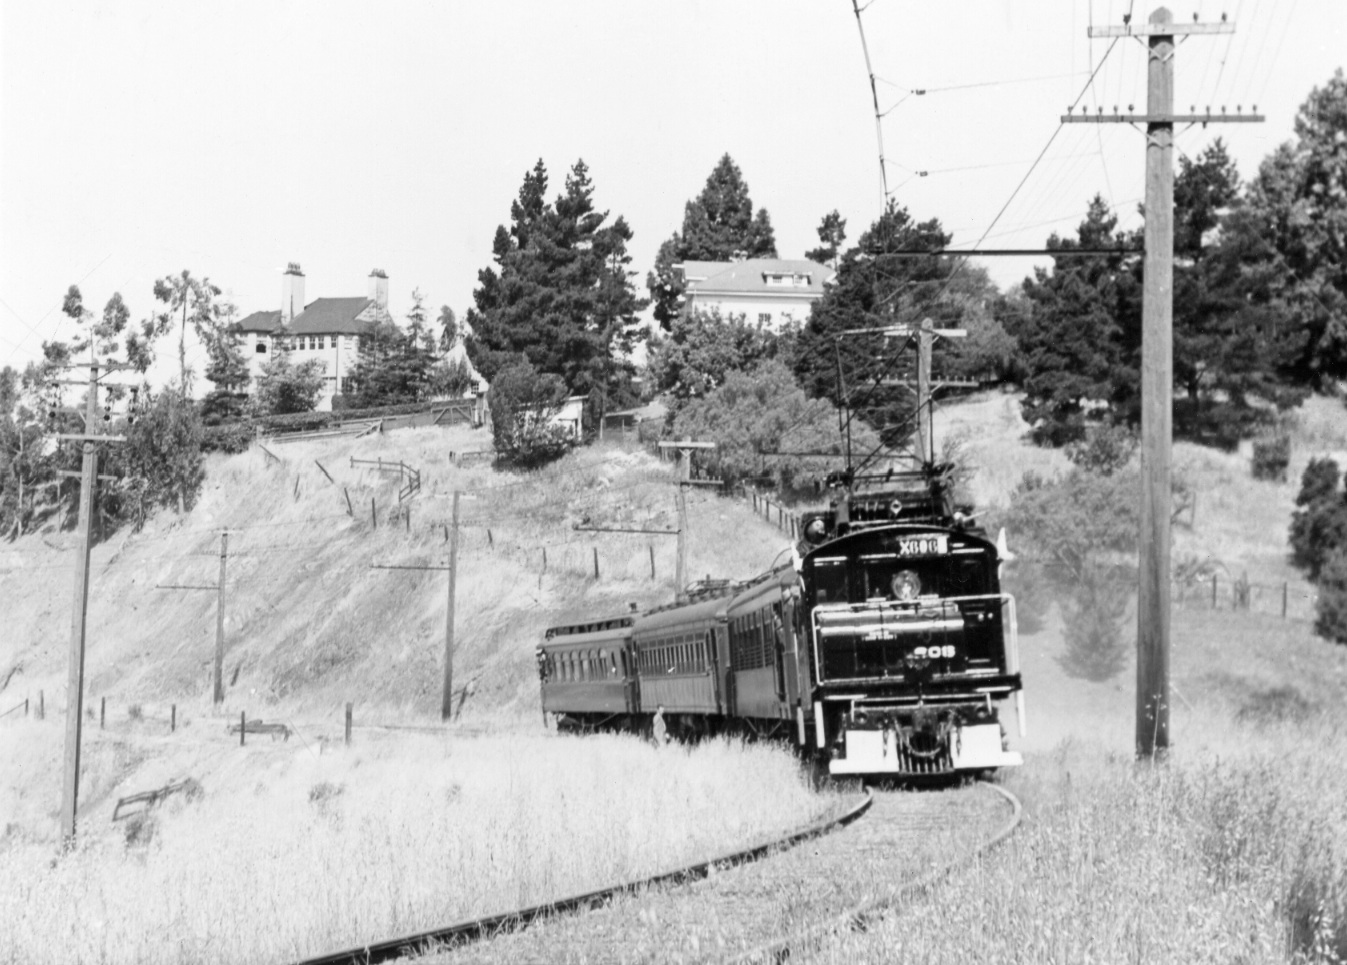
Rockridge Curve was also a popular place to document special train movements. This west view of the curve documents an excursion to Stockton from May 4, 1939 with SN 606 in the lead and the Bidwell at the rear of the train.
L56-100-Harold L Hill Collection, Richard Jenevein Photo, Courtesy BAERA, WRM Archives, 56046sn, (Image 20 of 25)
The Bidwell obscures all but the upper tip of the EBMUD Claremont Laboratory during the June 29, 1941 Cal-Nevada excursion with SN 1014-1005-Bidwell in this northeast view. The 10 mile marker is visible on the pole just to the right of the lead car on the catenary pole just at the position of the concrete overpass.
L56-105-Waldemar Sievers Photo, Courtesy John Harder , (Image 21 of 25)
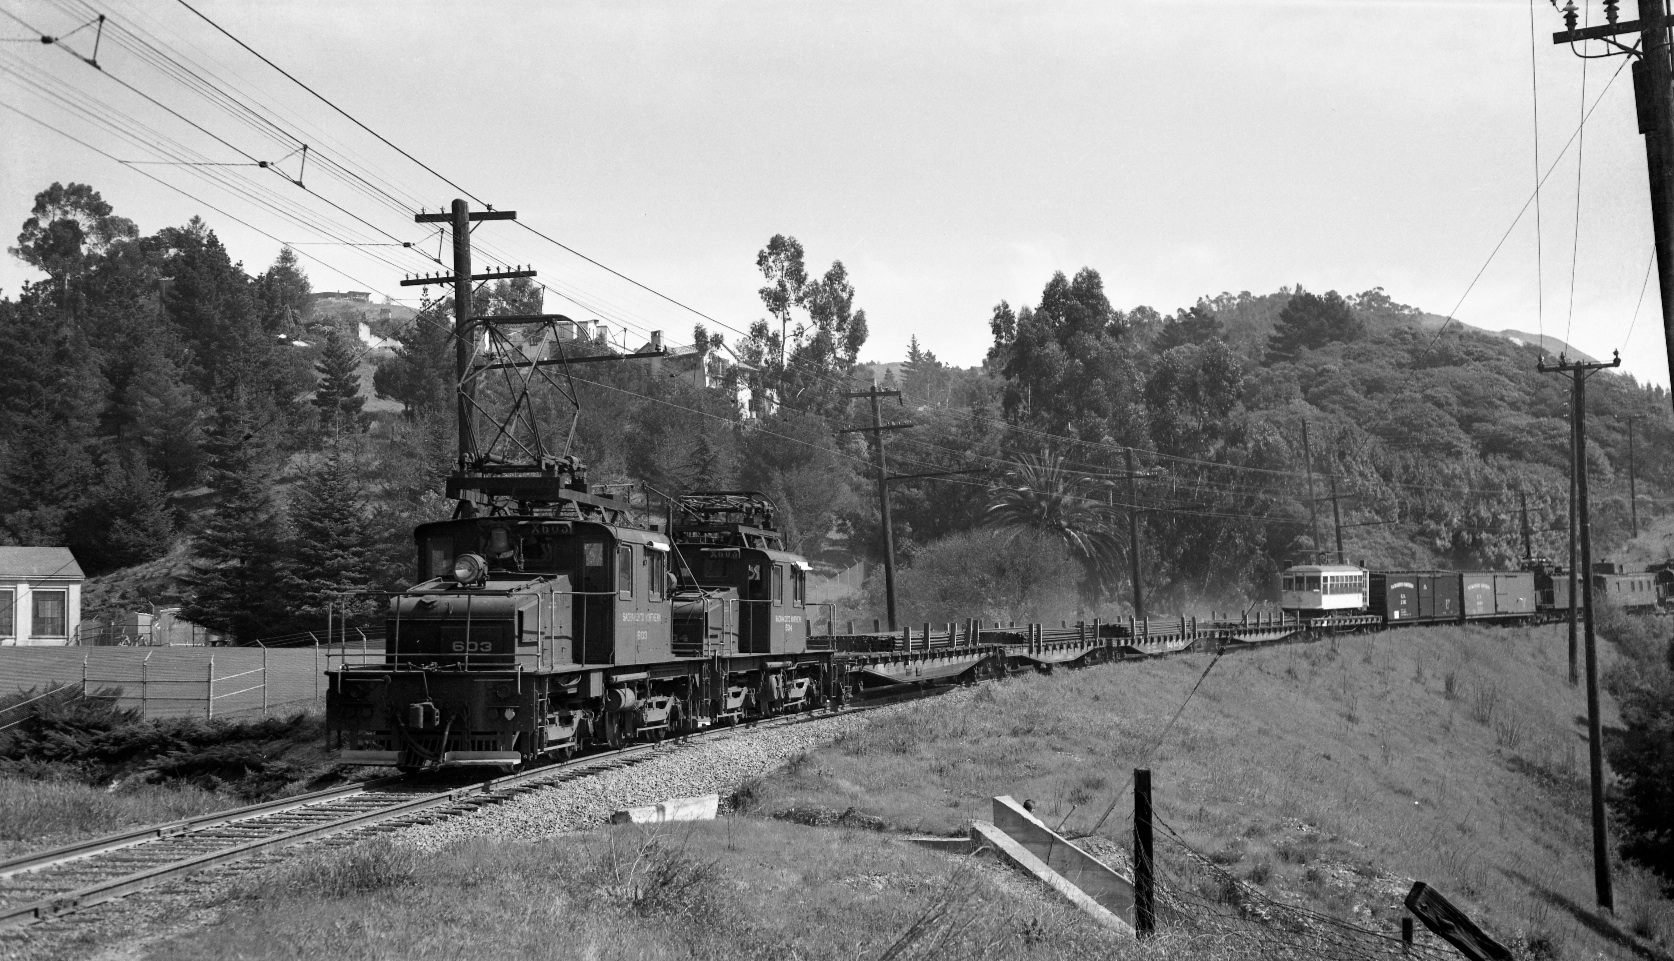
Arthur Lloyd was waiting at the Curve for SN Birney car 62 to come to town on Mar. 5, 1948 accompanied by four motors led by SN 603 and 604 in this east view. The left edge captures a piece of the EBMUD Claremont Laboratory, in the foreground is the concrete overpass over the extension of Golden Gate Ave., and in the background, center, the big palm.
L56-110-Arthur Lloyd Photo, Courtesy Arthur Lloyd, (Image 22 of 25)
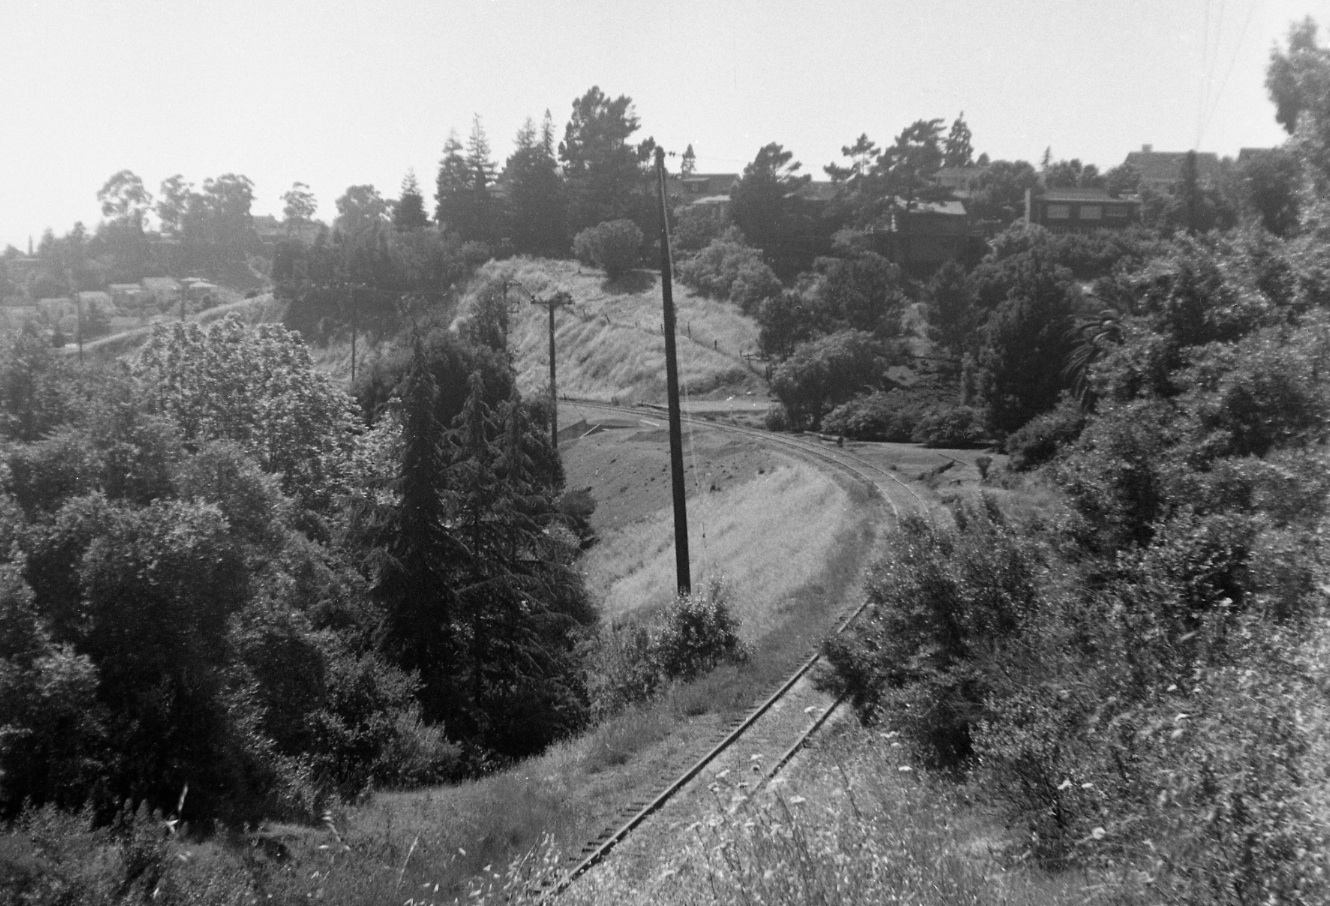
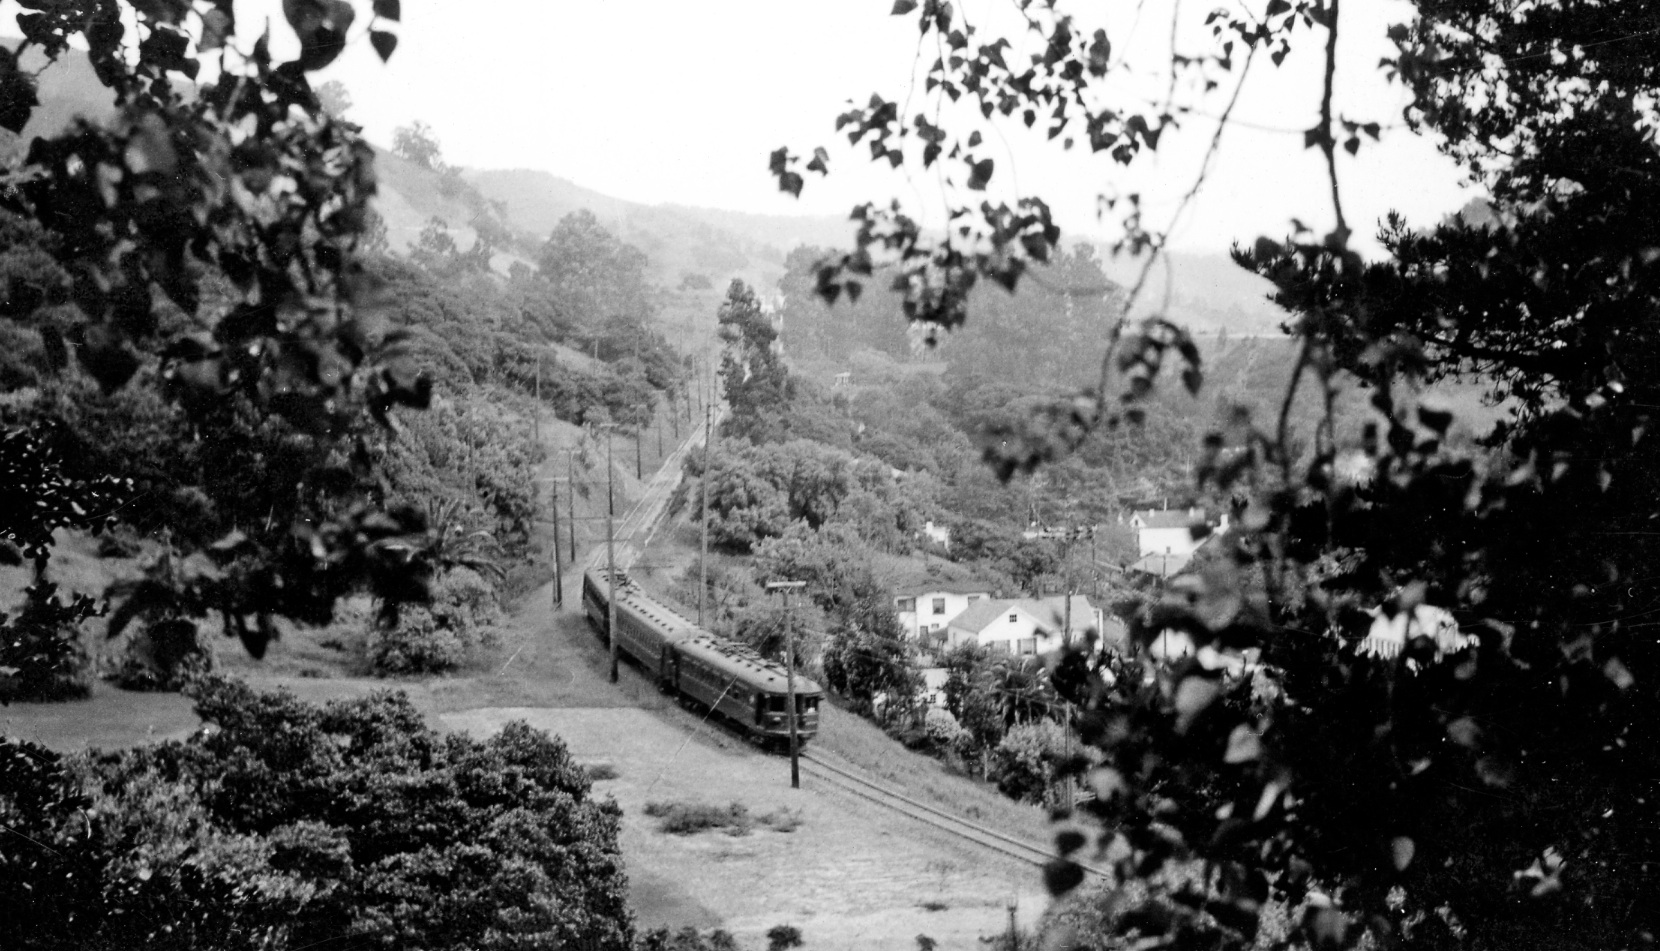
This serene southeast panorama with a three-car train on an unspecified date serves to highlight the straight section east to Heimbold and Roble Rd.
L56-115-Courtesy BAERA, Western Railway Museum Archives, 52059sn, (Image 23 of 25)
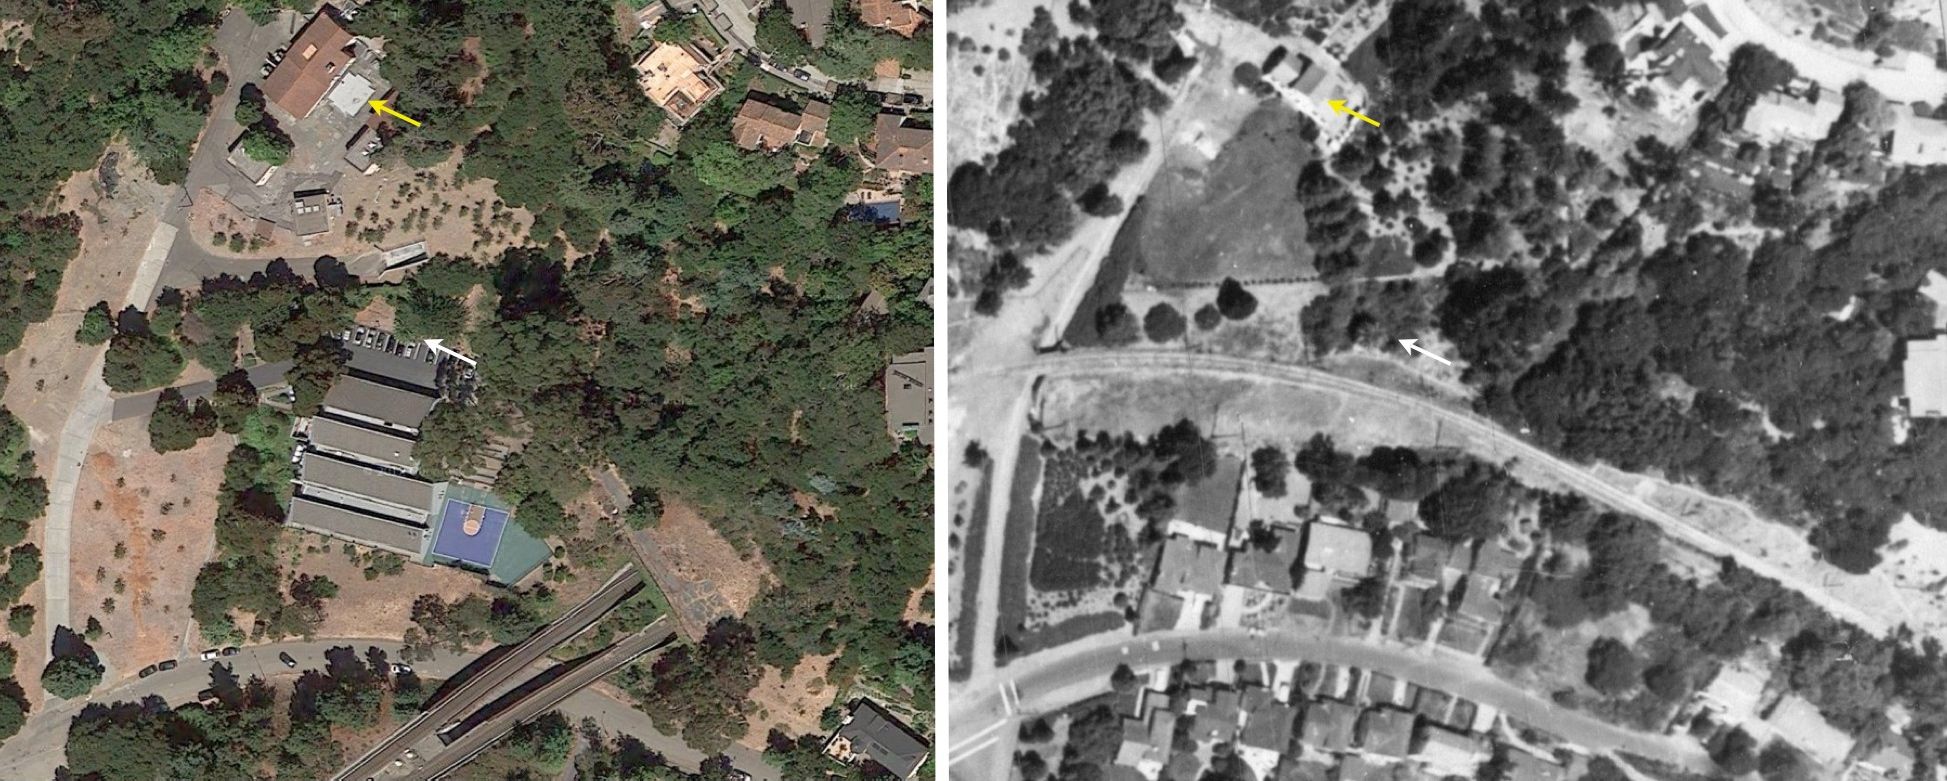
And what of the two palms? Comparison of 2013, left, with 1956, right, shows Rock LaFleche School, now Seneca Center, built over the spot of the palm south of the SN. However, north of the old right-of-way, a palm survives, white arrows. The yellow arrows mark the EBMUD Claremont Laboratory, of which only the foundation and base remain today. Refs: left, ©2013 DigitalGlobe, U.S. Geological Survey, Map data ©2013 Google and, right, RM Towill Photo, G4364_B5_A4_1956_R6_no.116
L56-120-Courtesy Google and Earth Sciences and Map Library, University of California, Berkeley , (Image 24 of 25)
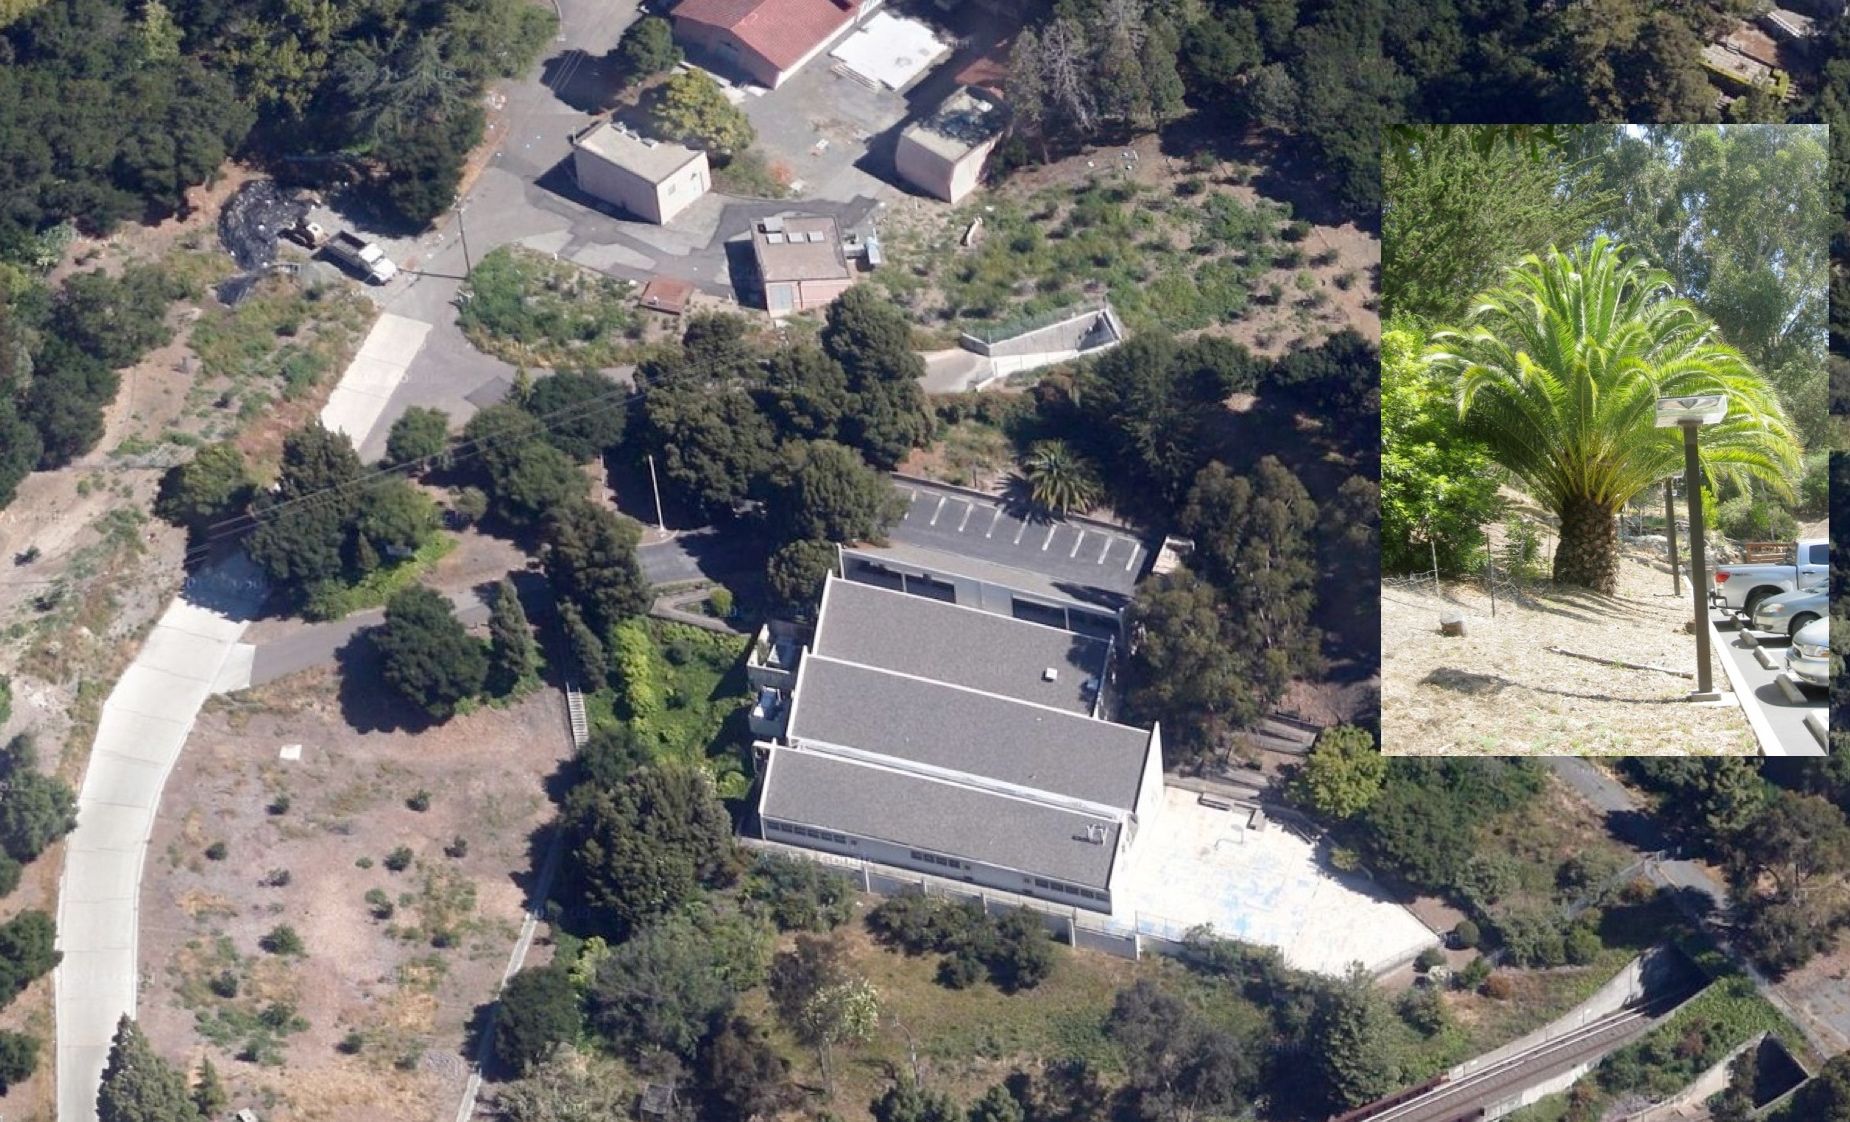
Close-up views of the area of the original big palm reveals a much shorter tree than its predecessor, the latter removed or diminished in size between 1968 and 1980 based on historicaerials.com. Could enough of the tree have been spared to allow regrowth? Unknown for now ...
L56-125-Courtesy Google Maps and Stuart Swiedler, (Image 25 of 25)