Eastport to Moraga
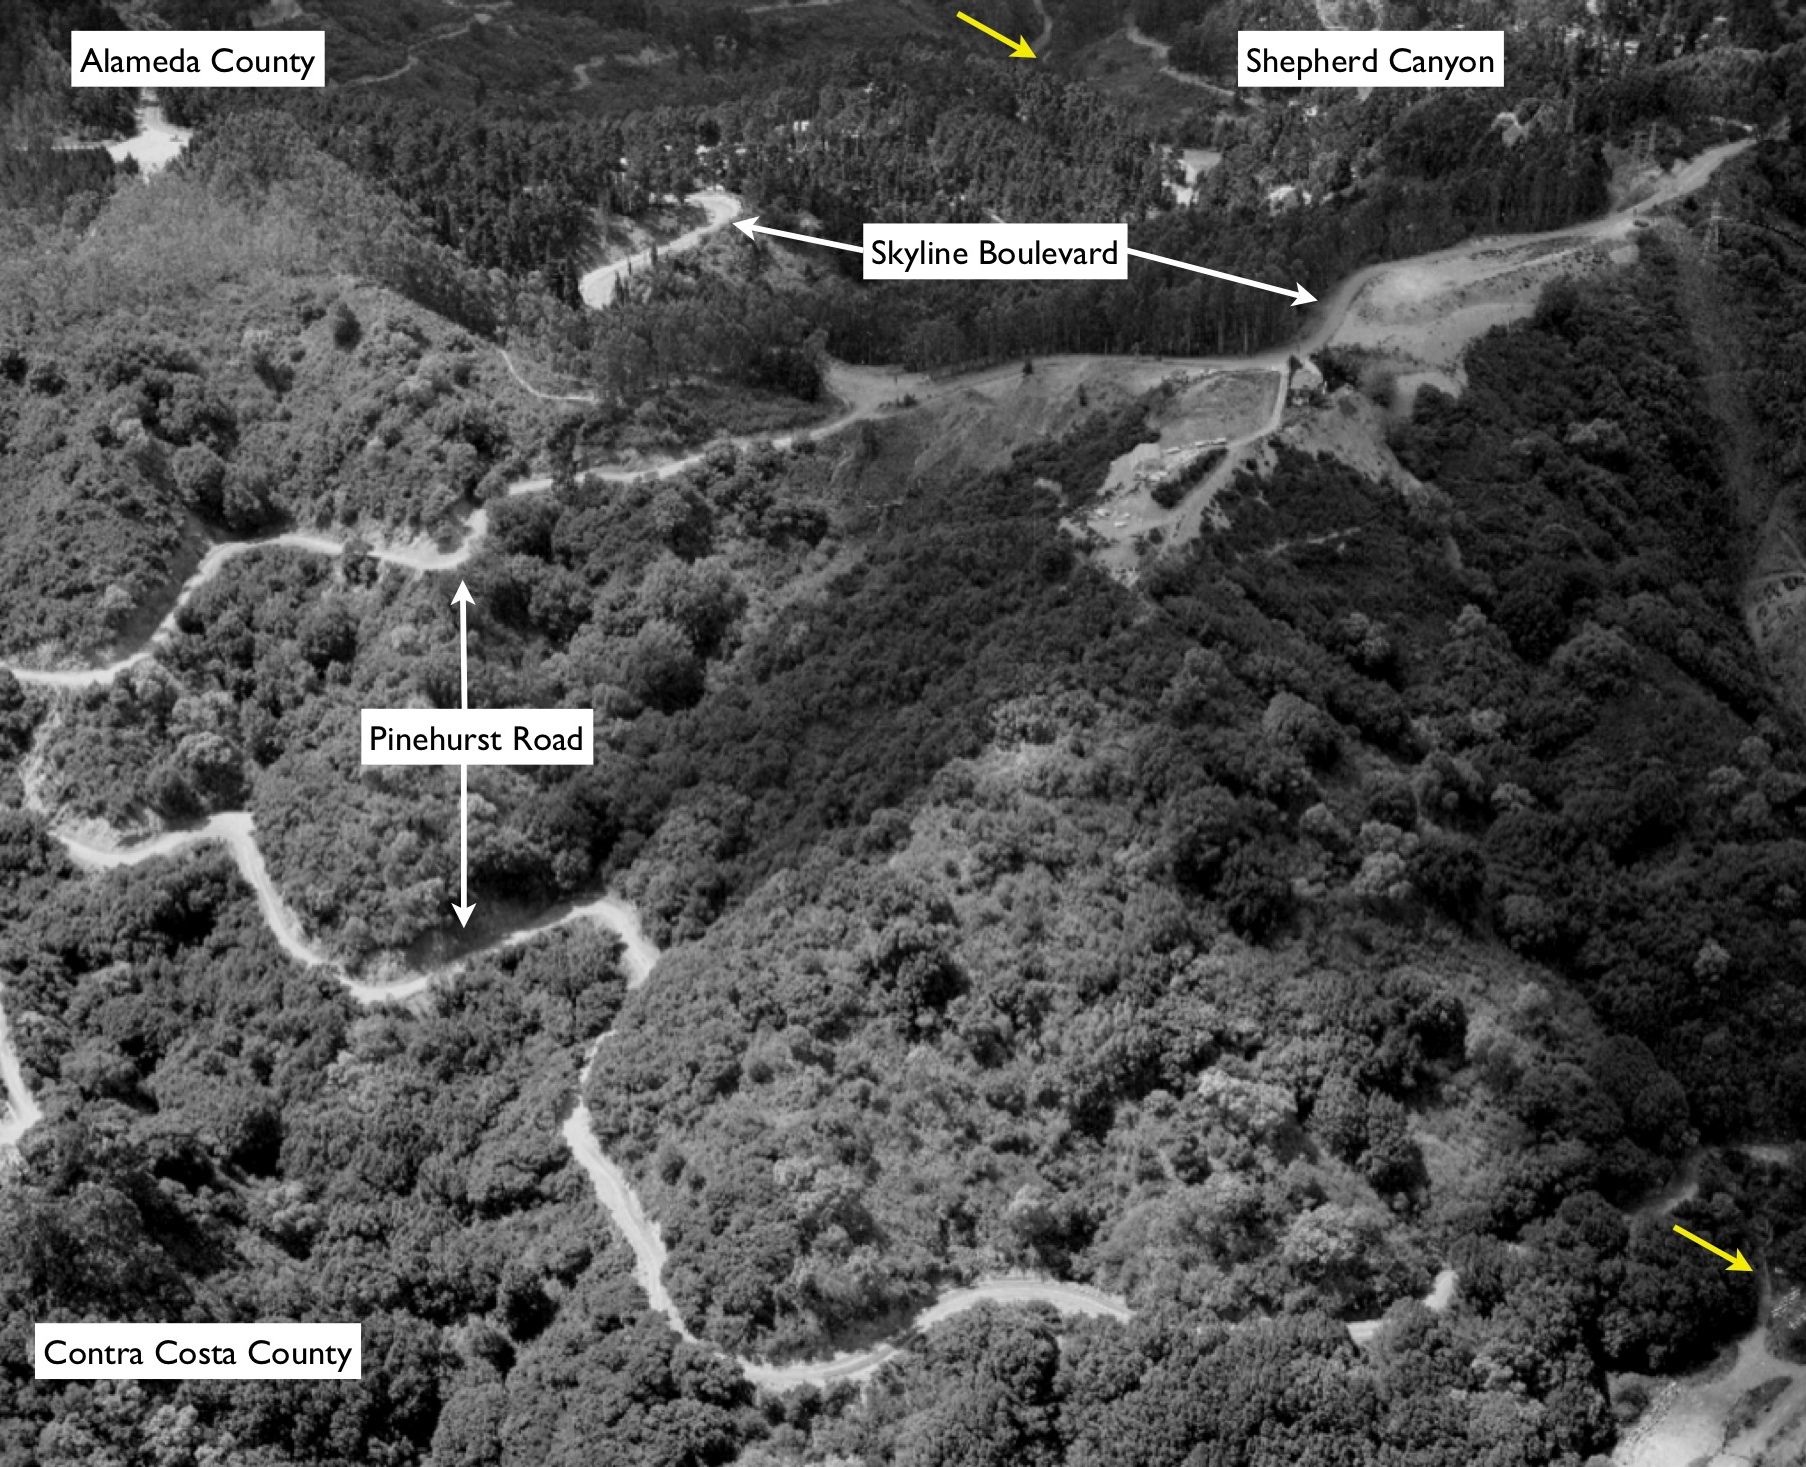
When we last left Charlie Siebenthal, he had located the sealed west tunnel portal in Shepherd Canyon at Saroni Dr. in Alameda County, marked in this west view from Apr. 22, 1960 by the top yellow arrow. His search would continue east of the east portal at Eastport in Contra Costa County, lower yellow arrow.
L181-05-Copyright California Department of Transportation, 7453-8, (Image 1 of 31)

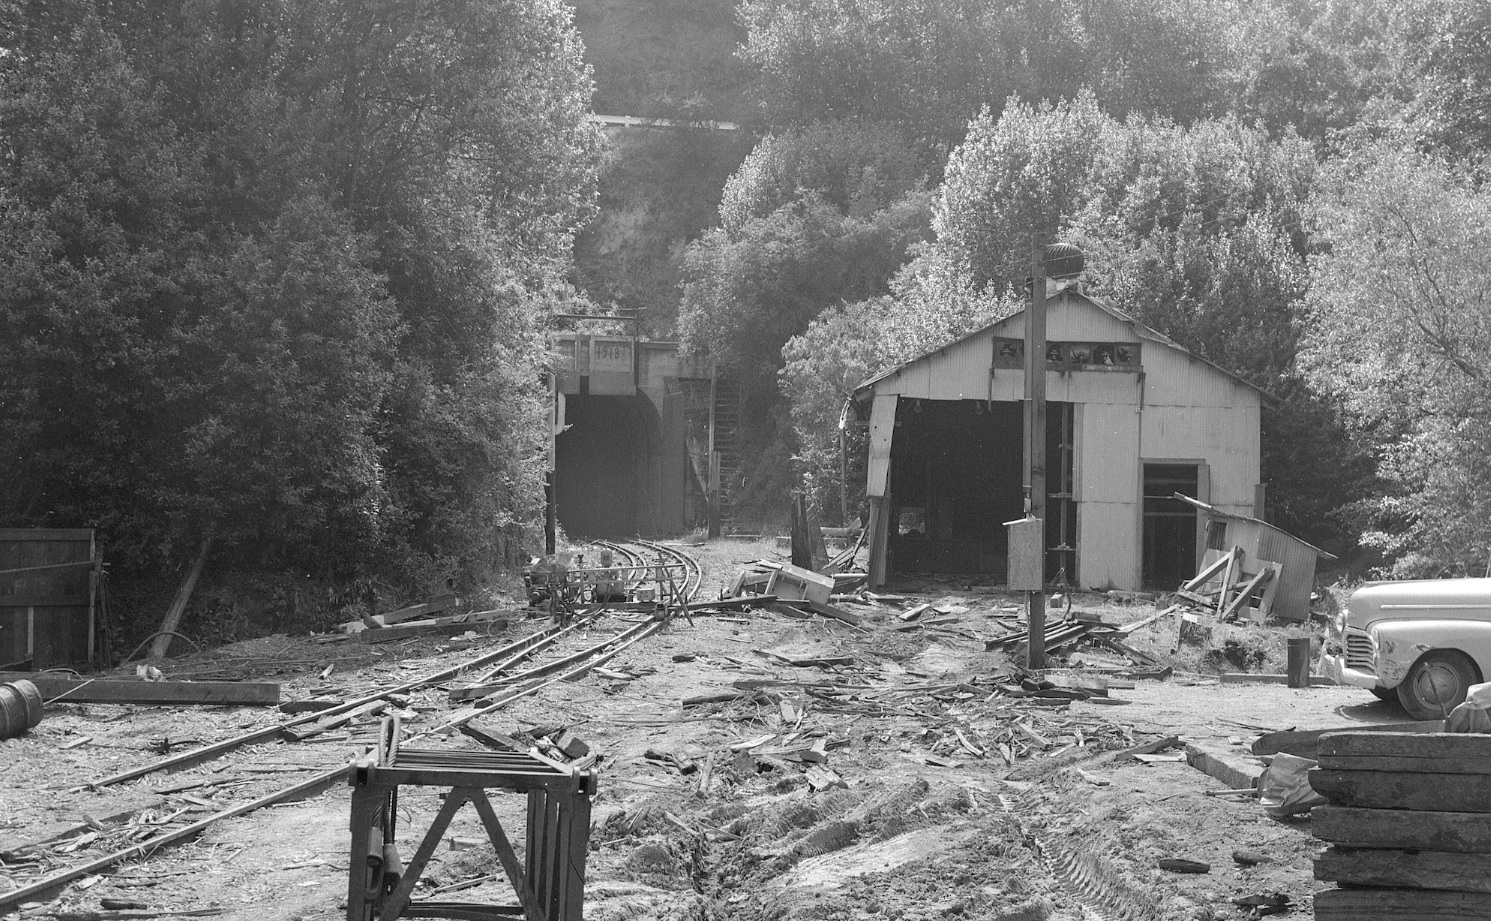
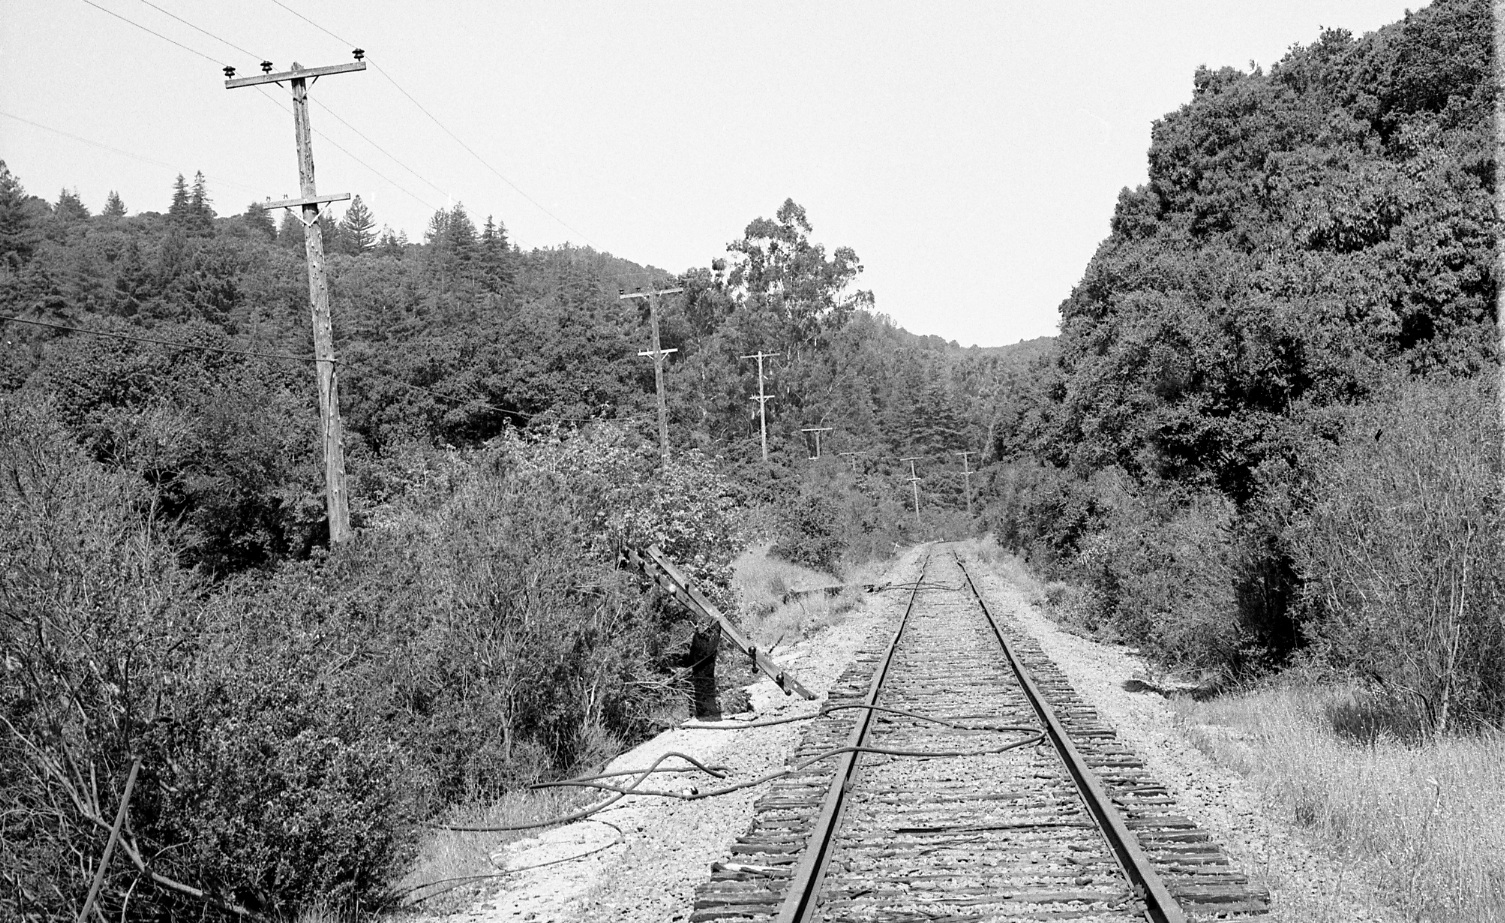
As with the main south-end facilities at 40th and Shafter, the Western Pacific was in a hurry to tear down Eastport as documented in John Harder’s chilling portrait taken in the spring of 1957, west view.
L181-10-John Harder Photo, Courtesy John Harder, (Image 2 of 31)
Fred Matthews also captured the moment in one of his famous perches above the tunnel portal, east view in 1957...
L181-15-Fred Matthews Photo, Moreau Collection, Courtesy BAERA, WRM Archives, 90069sn, (Image 3 of 31)
... and in a west view the same day.
L181-20-Fred Matthews Photo, Moreau Collection, Courtesy BAERA, WRM Archives, 90068sn, (Image 4 of 31)
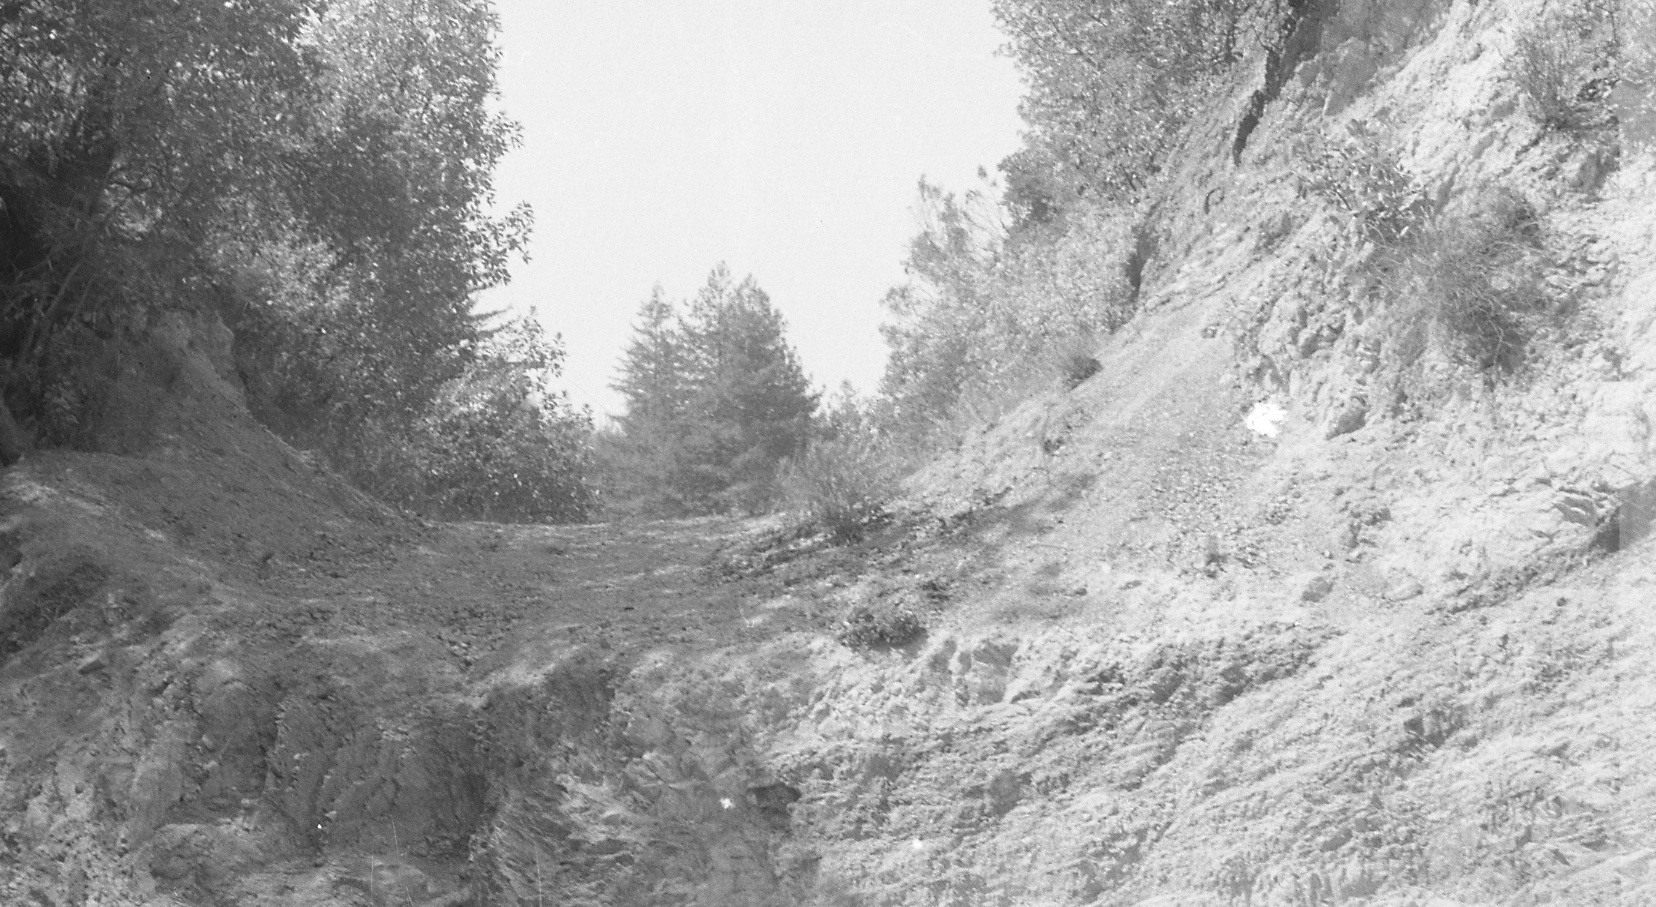
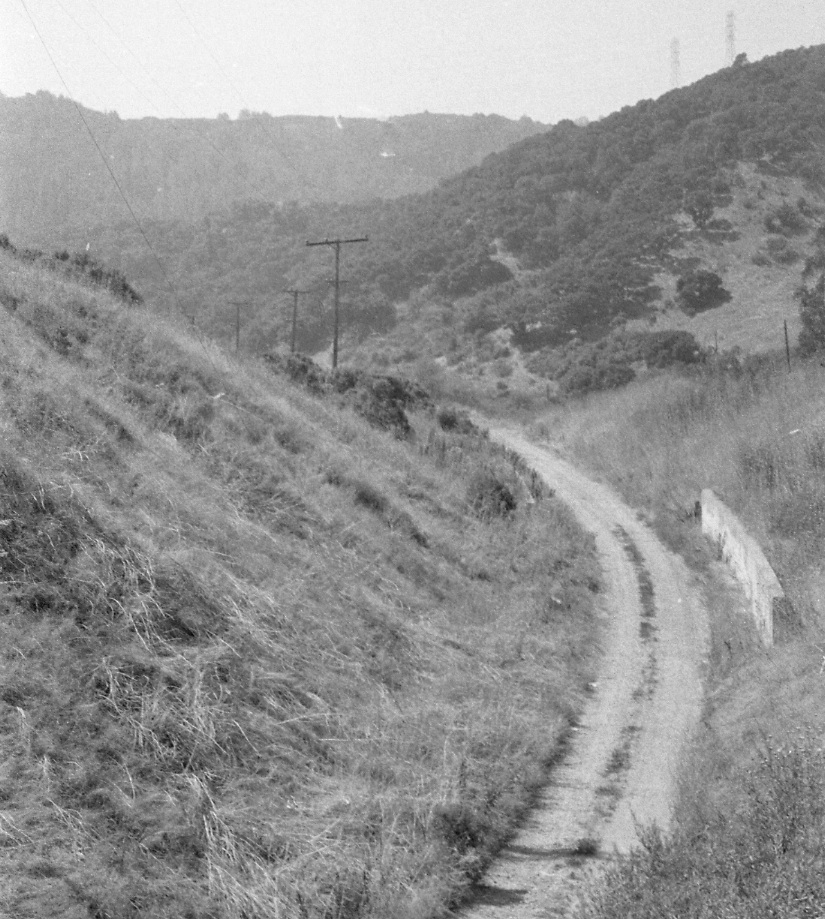
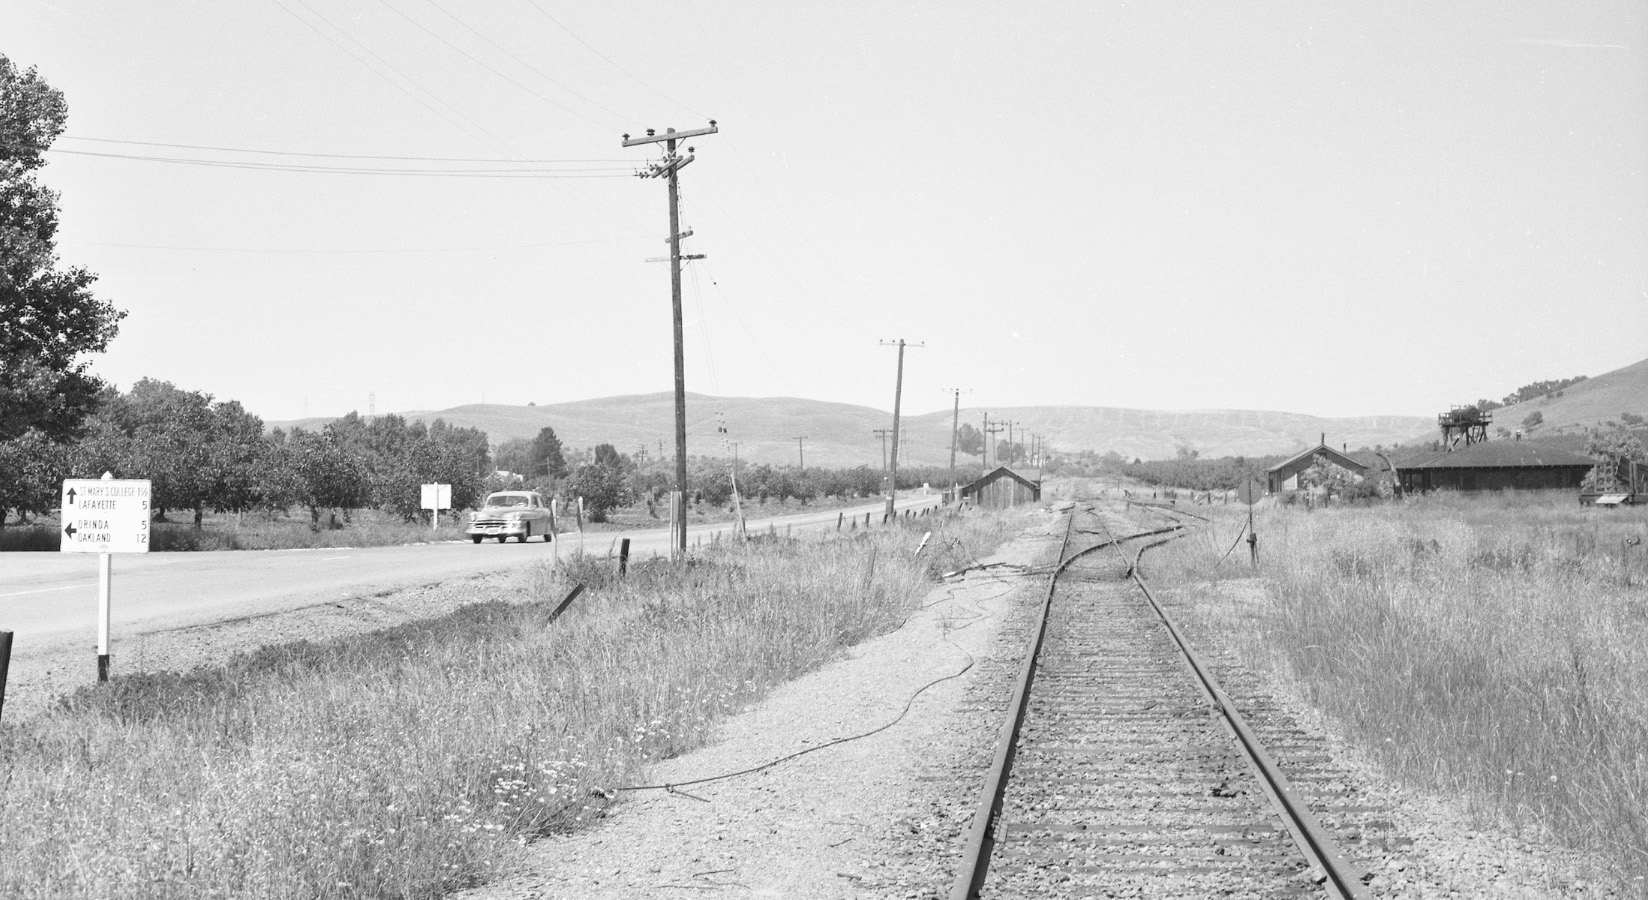
Charlie’s first image at Eastport appears to be a northwest view taken east of Pinehurst Rd., east of the site of the trestle over that road. The east portal should have been visible in 1974 as it was not covered with dirt until 1980, but would be out of range in this image.
L181-25-Charlie Siebenthal Photo, Courtesy Charlie Siebenthal, (Image 5 of 31)
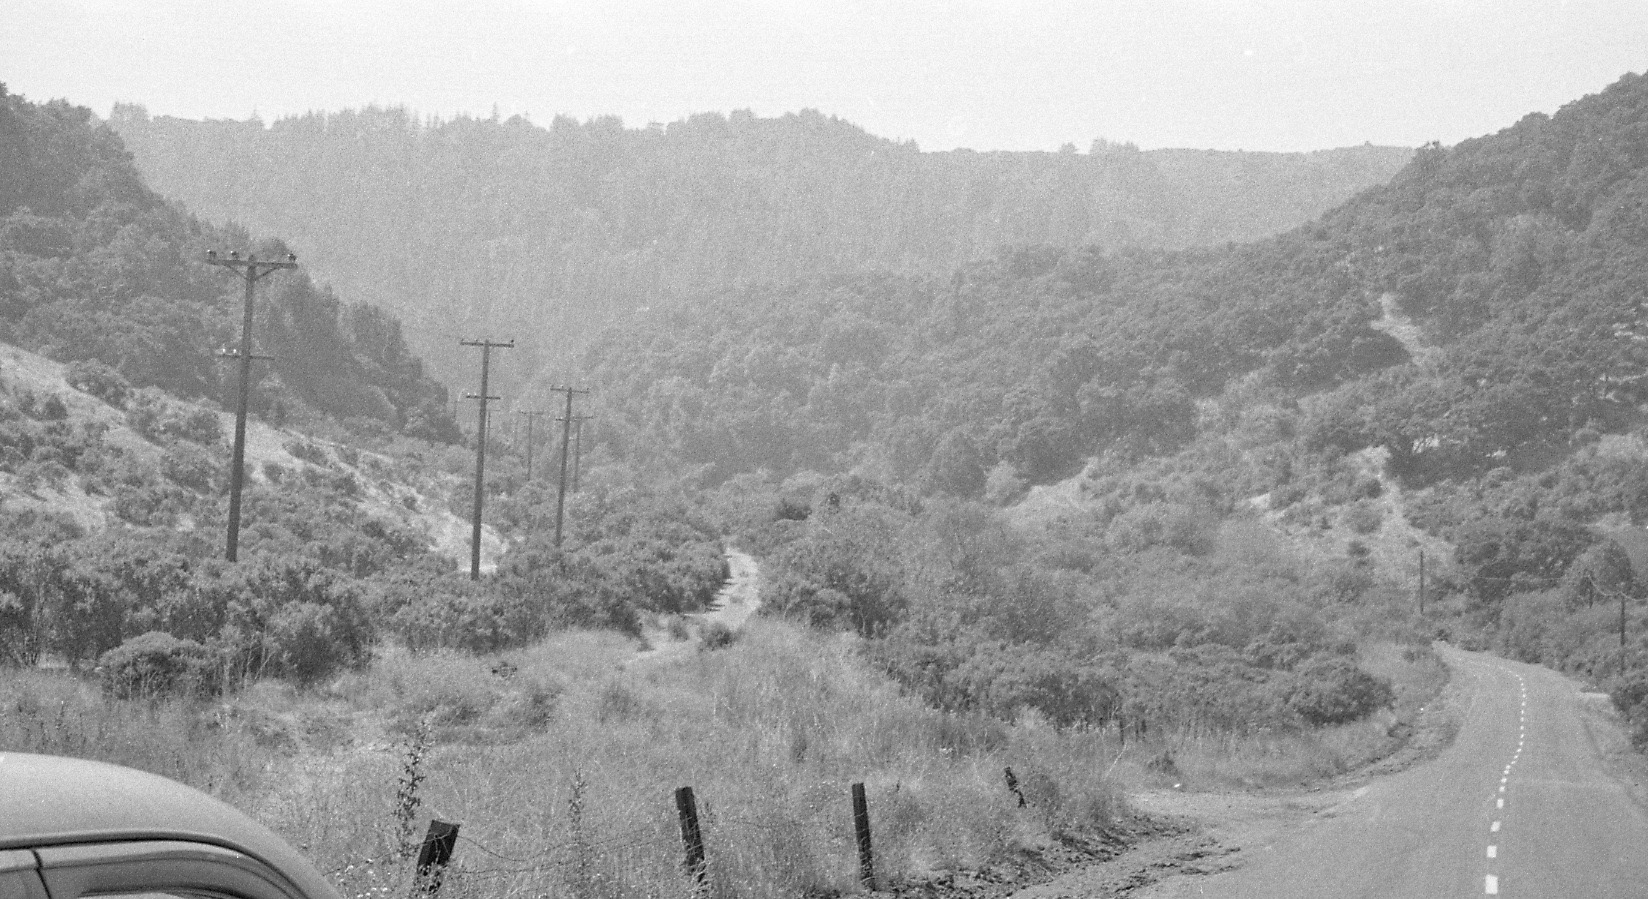
Charlie continued on the right-of-way to the southeast, turned around and took this north view showing two electrical transmission towers that held the wires he had followed since entering Melin Cut in Shepherd Canyon.
L181-30-Charlie Siebenthal Photo, Courtesy Charlie Siebenthal, (Image 6 of 31)
Only one other of his images was found along the section between here and Canyon Rd., this southeast view taken between the shelters used by the SN at Canyon and Pinehurst.
L181-35-Charlie Siebenthal Photo, Courtesy Charlie Siebenthal, (Image 7 of 31)
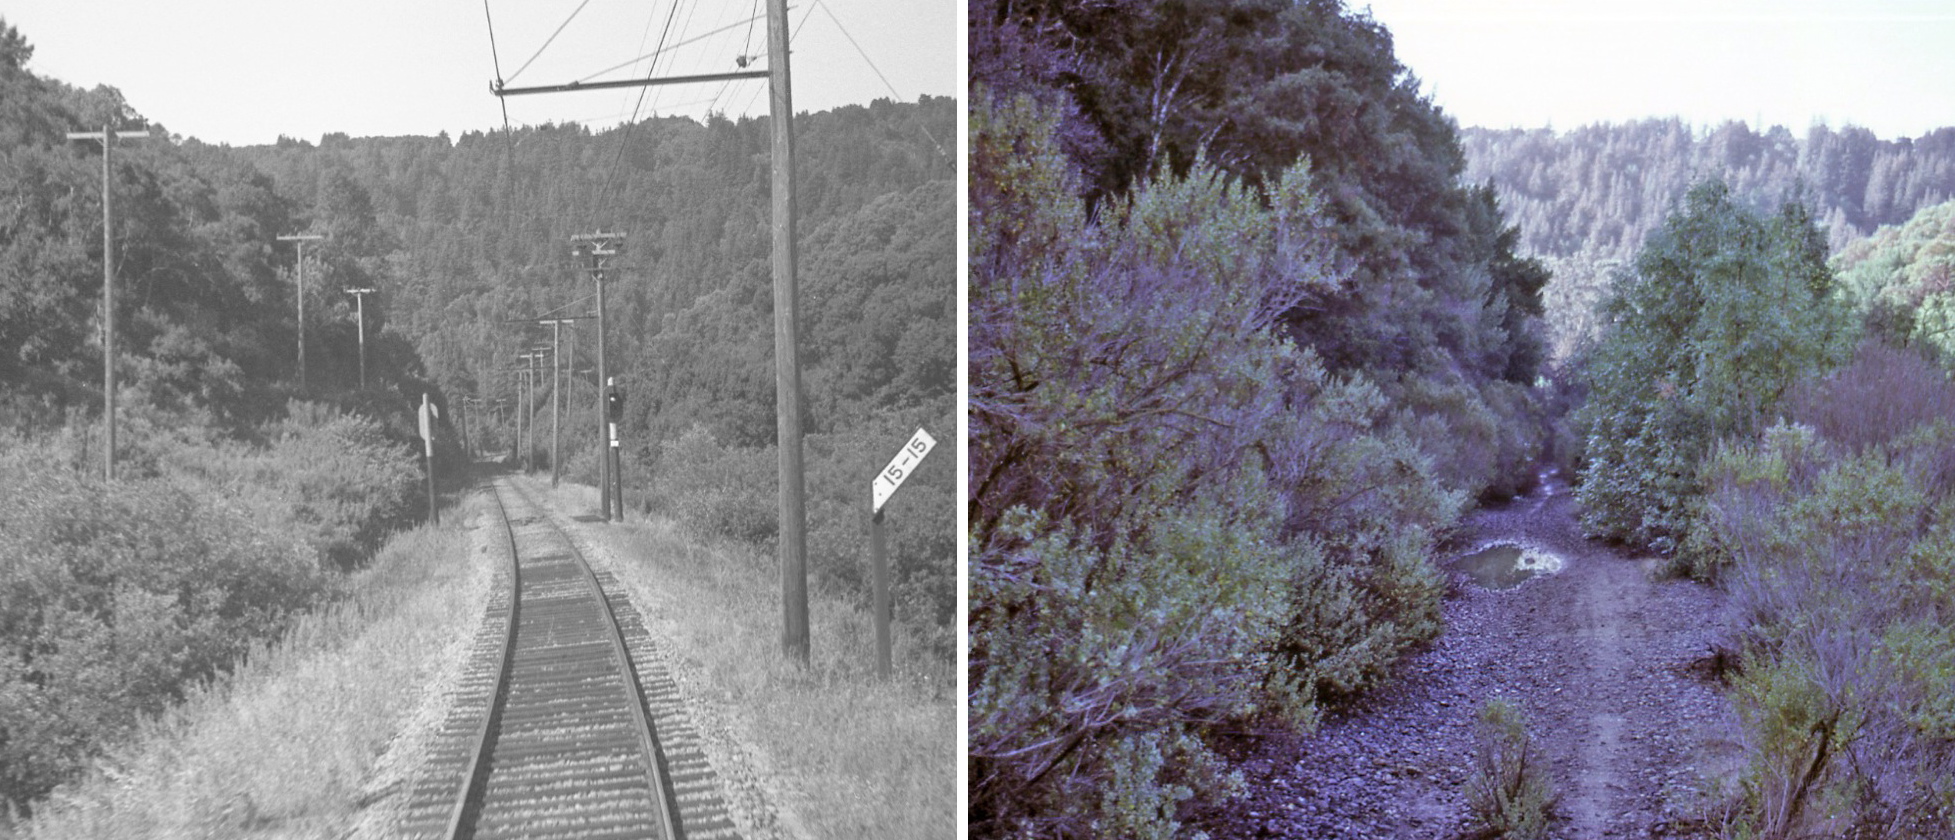
More can be learned about the abandoned SN right-of-way in the Canyon to Moraga segment by viewing these ca. early 1960s images. Shown on the left is a northwest view taken north of Wilcox, the latter site depicted on the right in this mid-1956 fan trip with an SN motor, SN 1005 and Salt Lake and Utah 751.
L181-40-Moreau Collection, Courtesy BAERA, Western Railway Museum Archives, 133065.1, l, 54978, r, (Image 8 of 31)
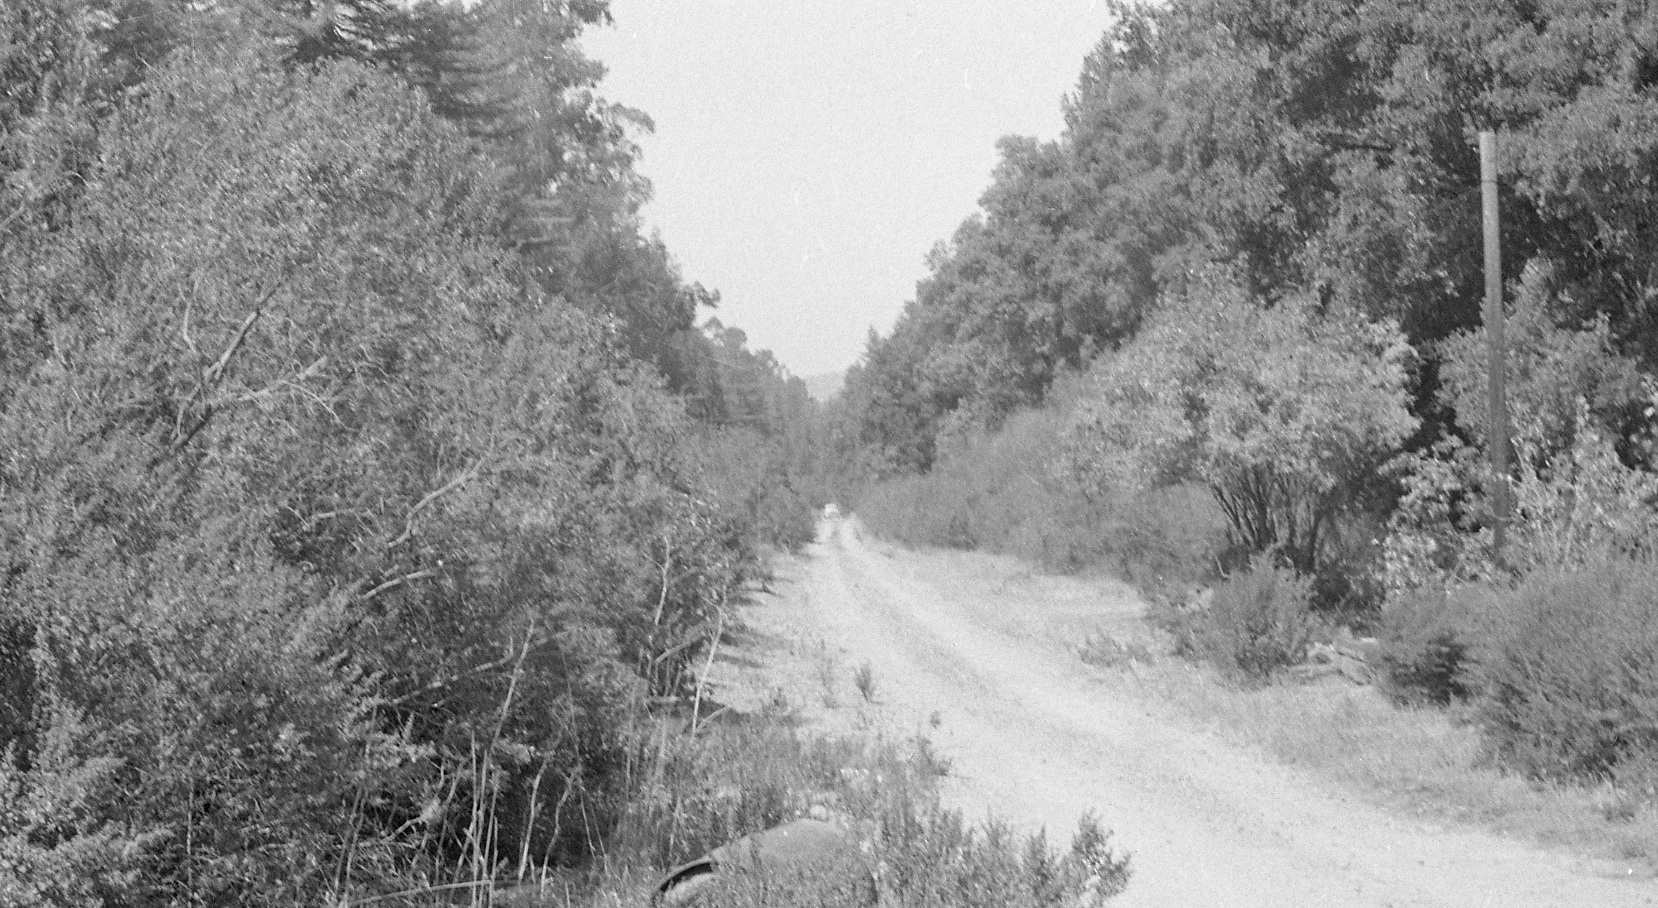
Shown here in a northwest view is the scene observed in the spring of 1957 west of the Pinehurst double-track segment.
L181-45-EK Muller Photo, Courtesy BAERA, Western Railway Museum Archives, 77098sn, (Image 9 of 31)
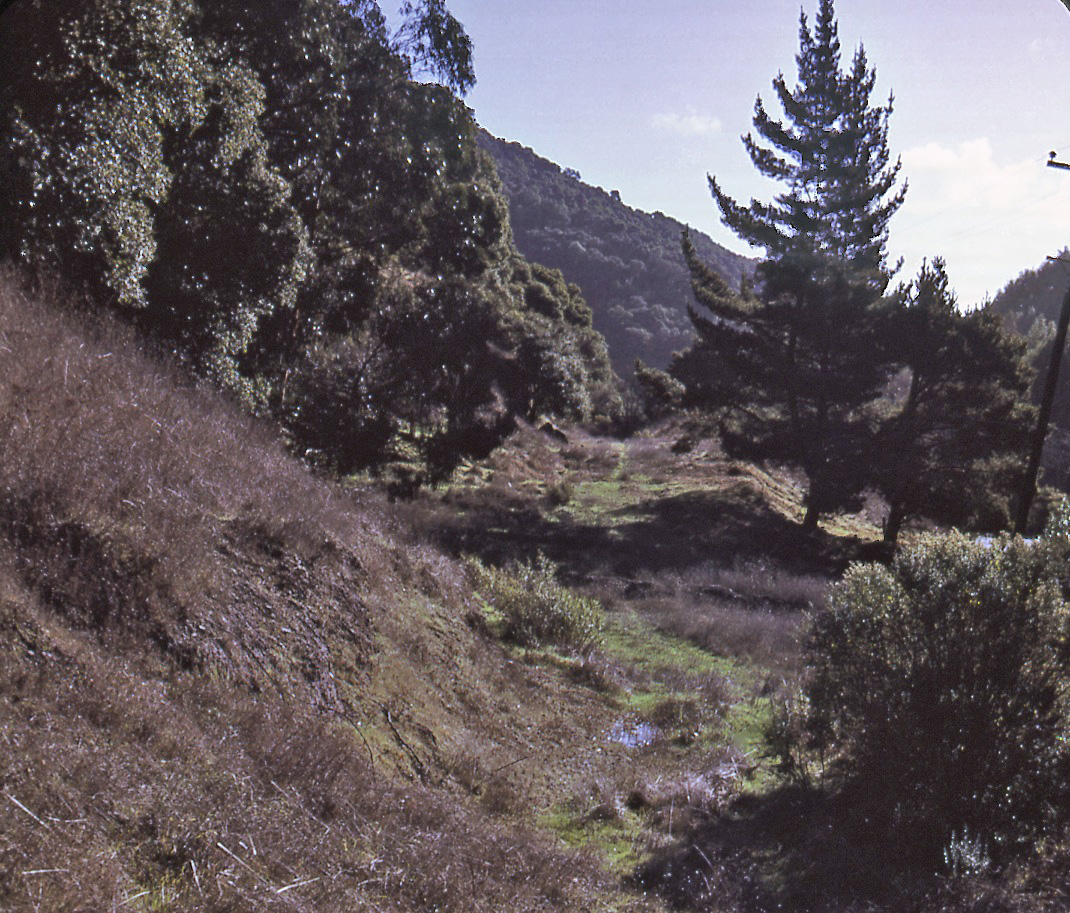
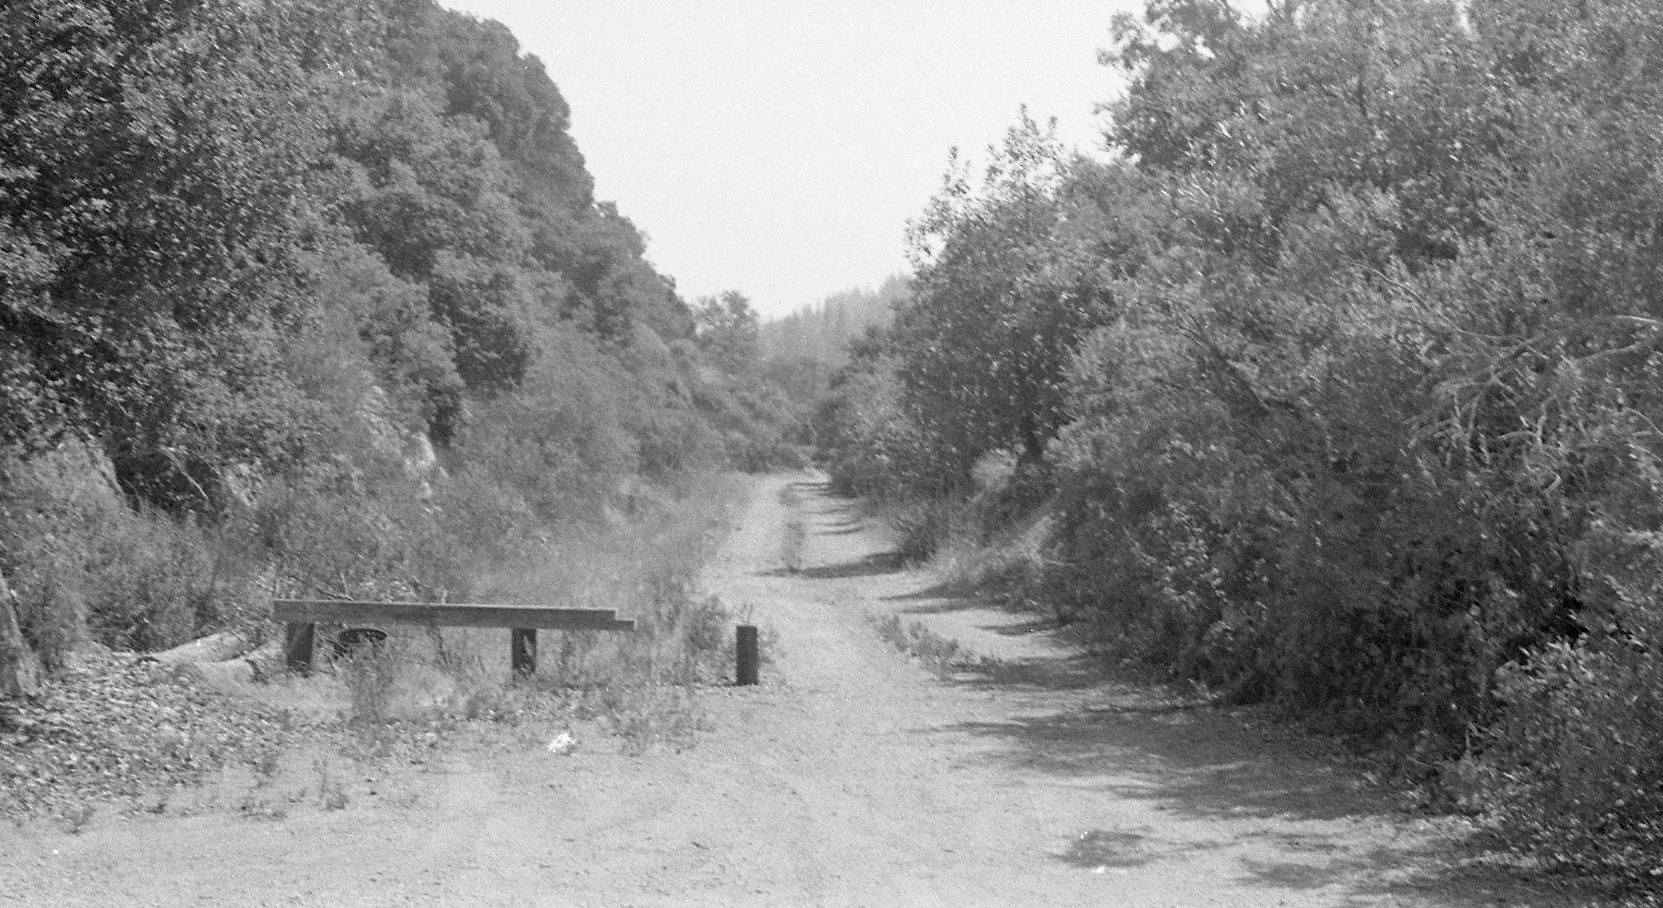
Another northwest image from a similar location from the 1960s showing the proliferation of vegetation post-abandonment.
L181-50-Moreau Collection, Courtesy BAERA, Western Railway Museum Archives, 133065.2sn, (Image 10 of 31)
To complement the previous image, a southeast view from a similar location in the 1960s toward the Pinehurst area.
L181-55-Moreau Collection, Courtesy BAERA, Western Railway Museum Archives, 133065.3sn, (Image 11 of 31)
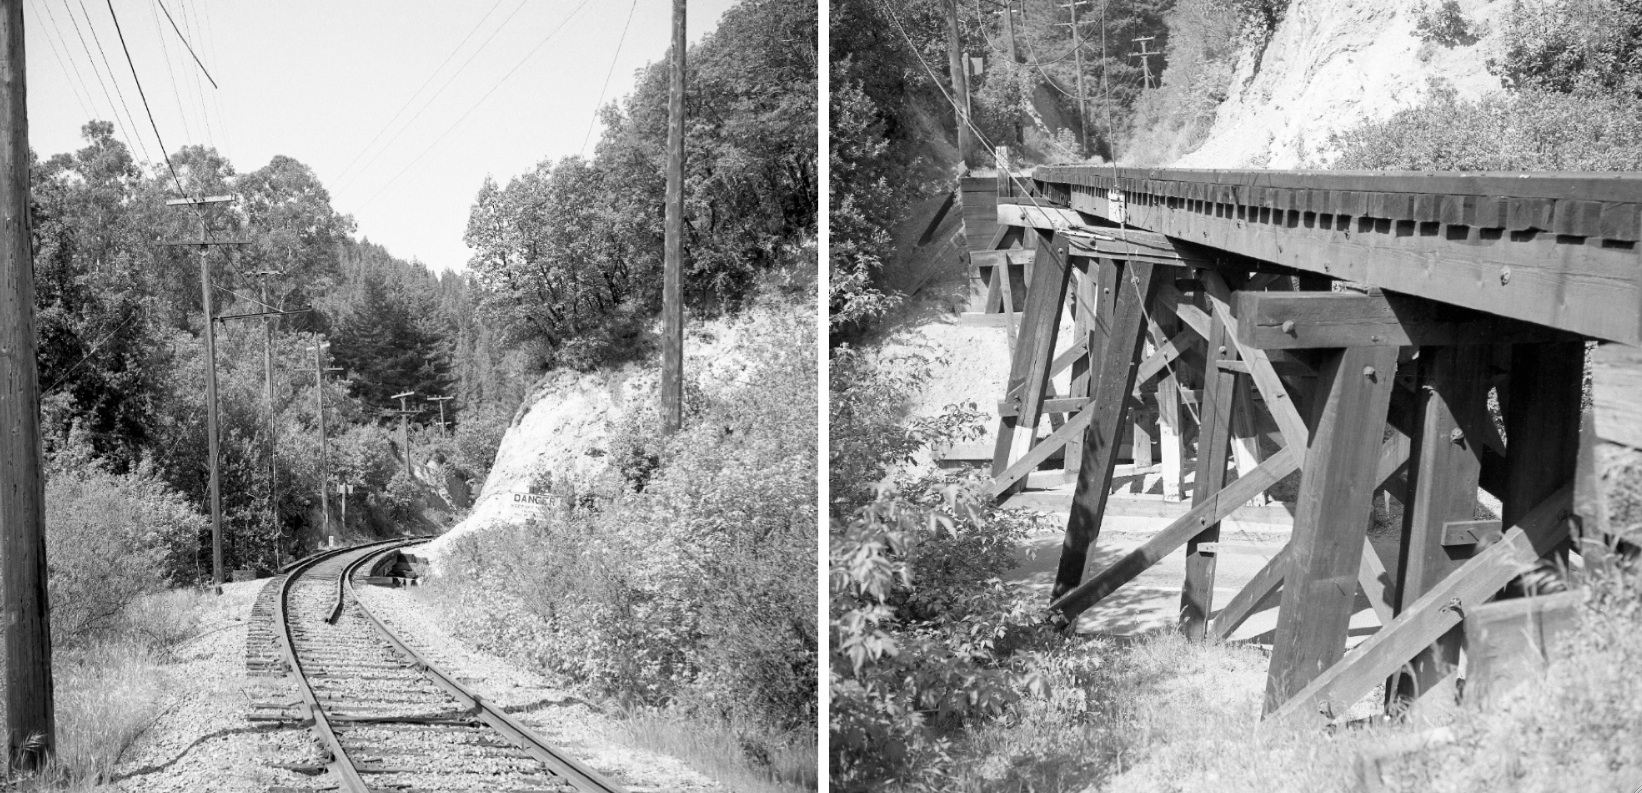
A favorite of SN photographers was the trestle over Canyon Rd., captured in these two west views during EK Muller’s 1957 post-abandonment survey of the Pinehurst area.
L181-60-EK Muller Photo, Courtesy BAERA, Western Railway Museum Archives, 77093, l, 77089sn, r, (Image 12 of 31)
The same west view from the early 1960s ...
L181-65-Moreau Collection, Courtesy BAERA, Western Railway Museum Archives, 133065.4sn, (Image 13 of 31)
... and Charlie’s 1974 version of the abutment notch.
L181-70-Charlie Siebenthal Photo, Courtesy Charlie Siebenthal, (Image 14 of 31)
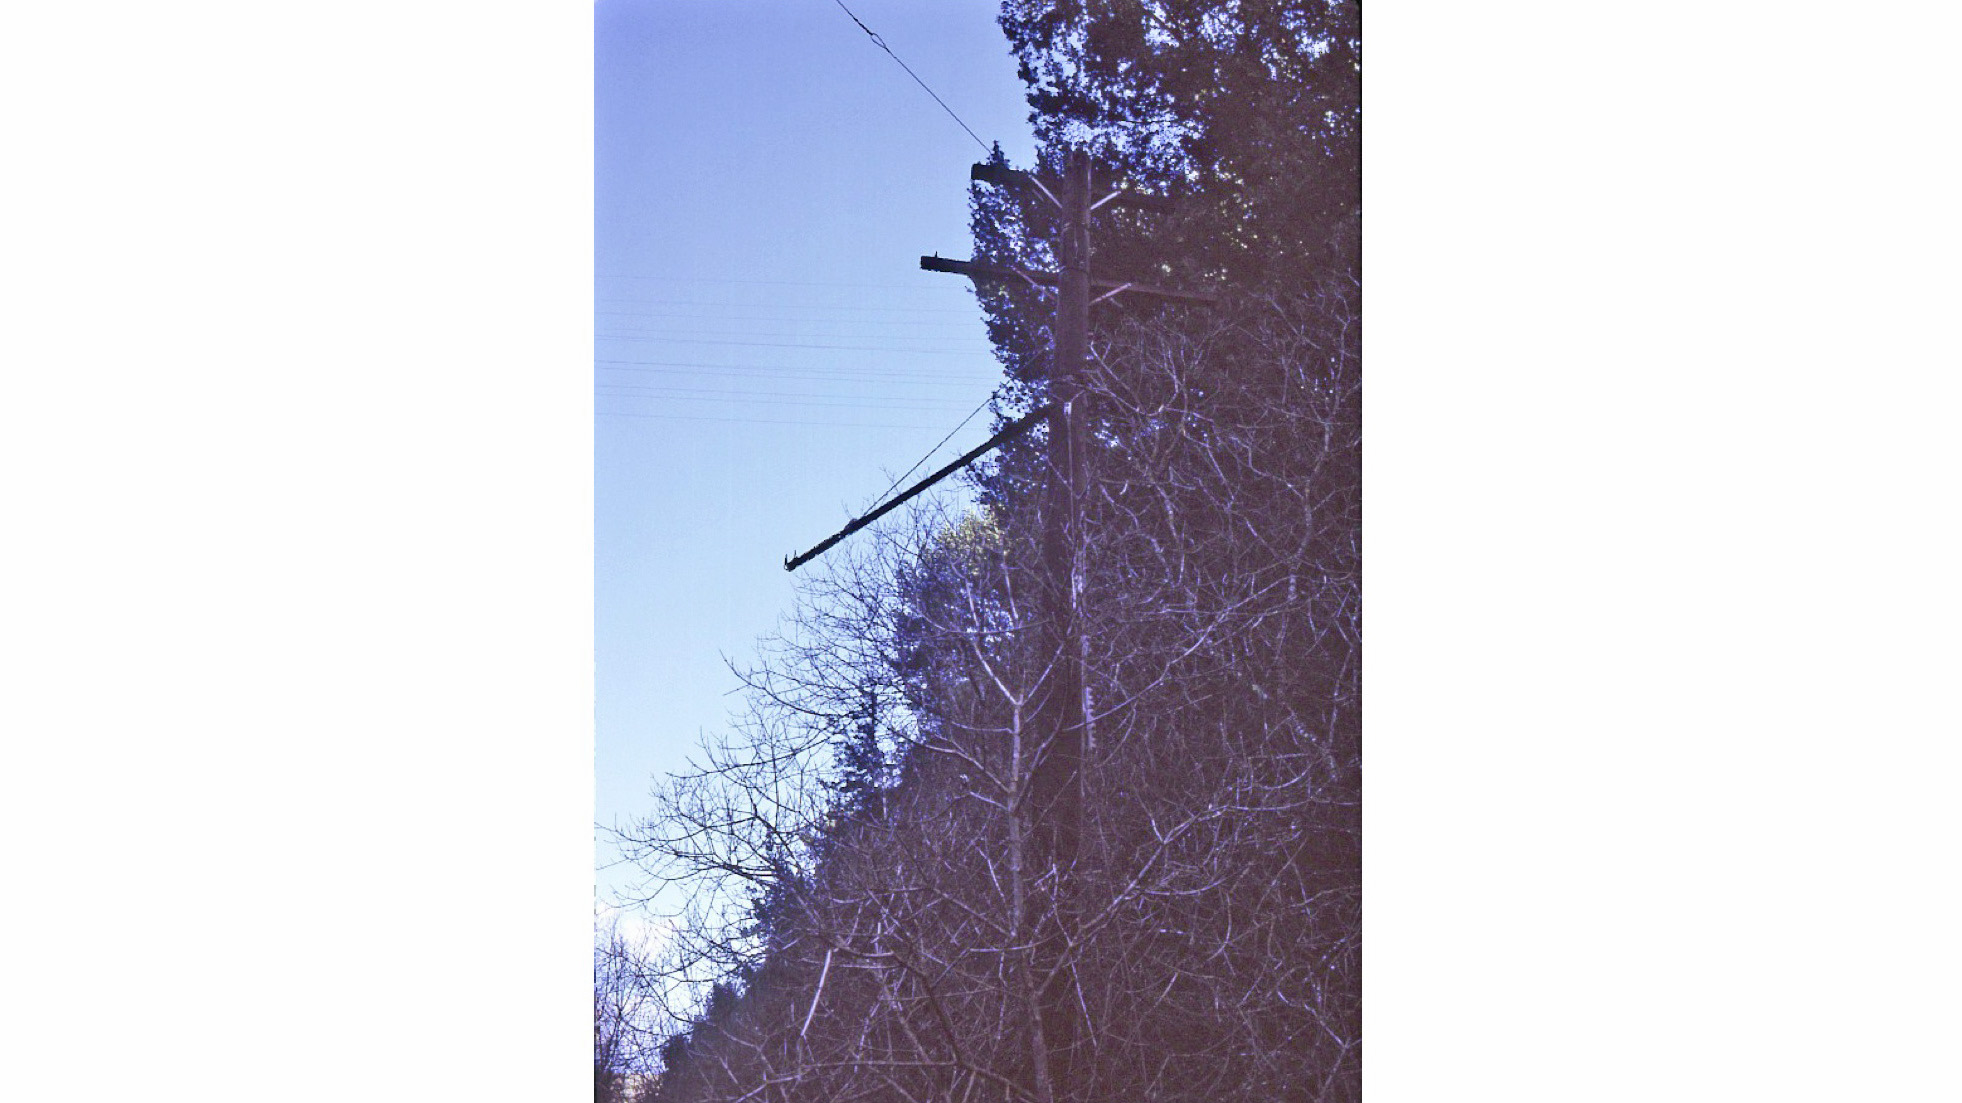
Charlie climbed up the east side of the berm, and as he began his walk toward Moraga, he found a lone catenary holder along the way.
L181-75-Charlie Siebenthal Photo, Courtesy Charlie Siebenthal, (Image 15 of 31)
On his way toward Valle Vista, Charlie turned back and took this south west view back toward Pinehurst, right. The undated image on the left shows a similar matching image from the later 1930s.
L181-80-Courtesy BAERA, WRM Archives, 59246, l, Courtesy Charlie Siebenthal, r, (Image 16 of 31)
Charlie would have eventually reached Canyon Rd., after removal of the road overpass observed in the 1960s from this spot, east view, and the accompanying road re-alignment. To clarify, refer to Landmark update http://www.eastbayhillsproject.org/where-was-canyon-road-sn-overpass.
L181-85-Moreau Collection, Courtesy BAERA, Western Railway Museum Archives, 133066.1sn, (Image 17 of 31)
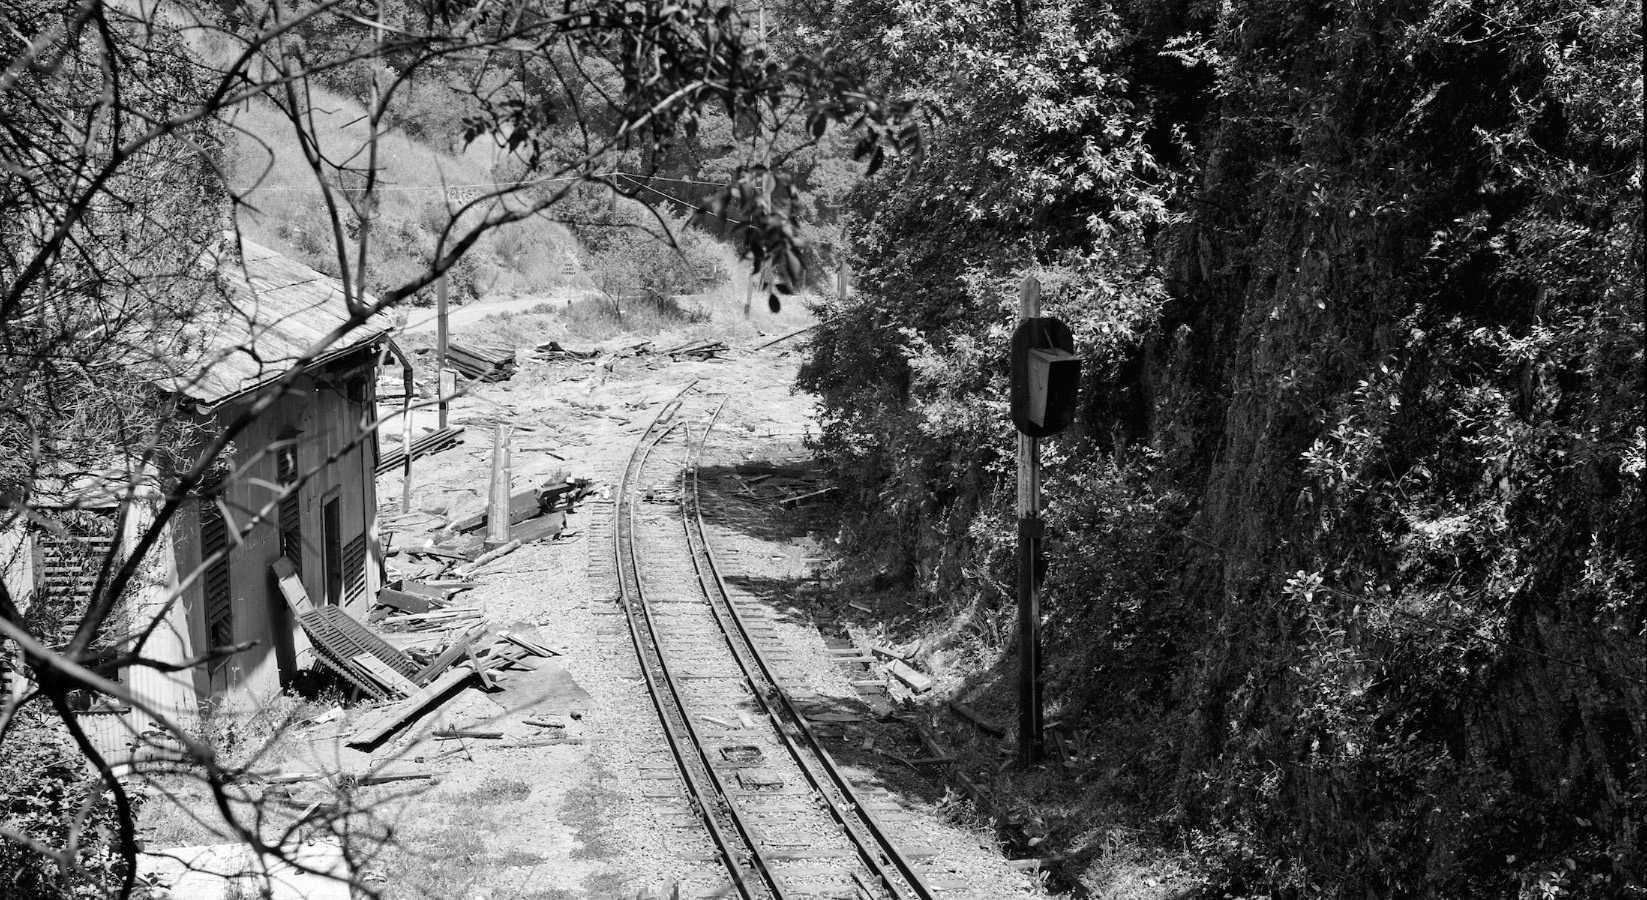
Best then to look back to the early 1960s for a reminder of the state of the right-of-way continuing with this east view from Canyon Rd. toward the approaching right-of-way.
L181-90-Moreau Collection, Courtesy BAERA, Western Railway Museum Archives, 133066.2sn, (Image 18 of 31)
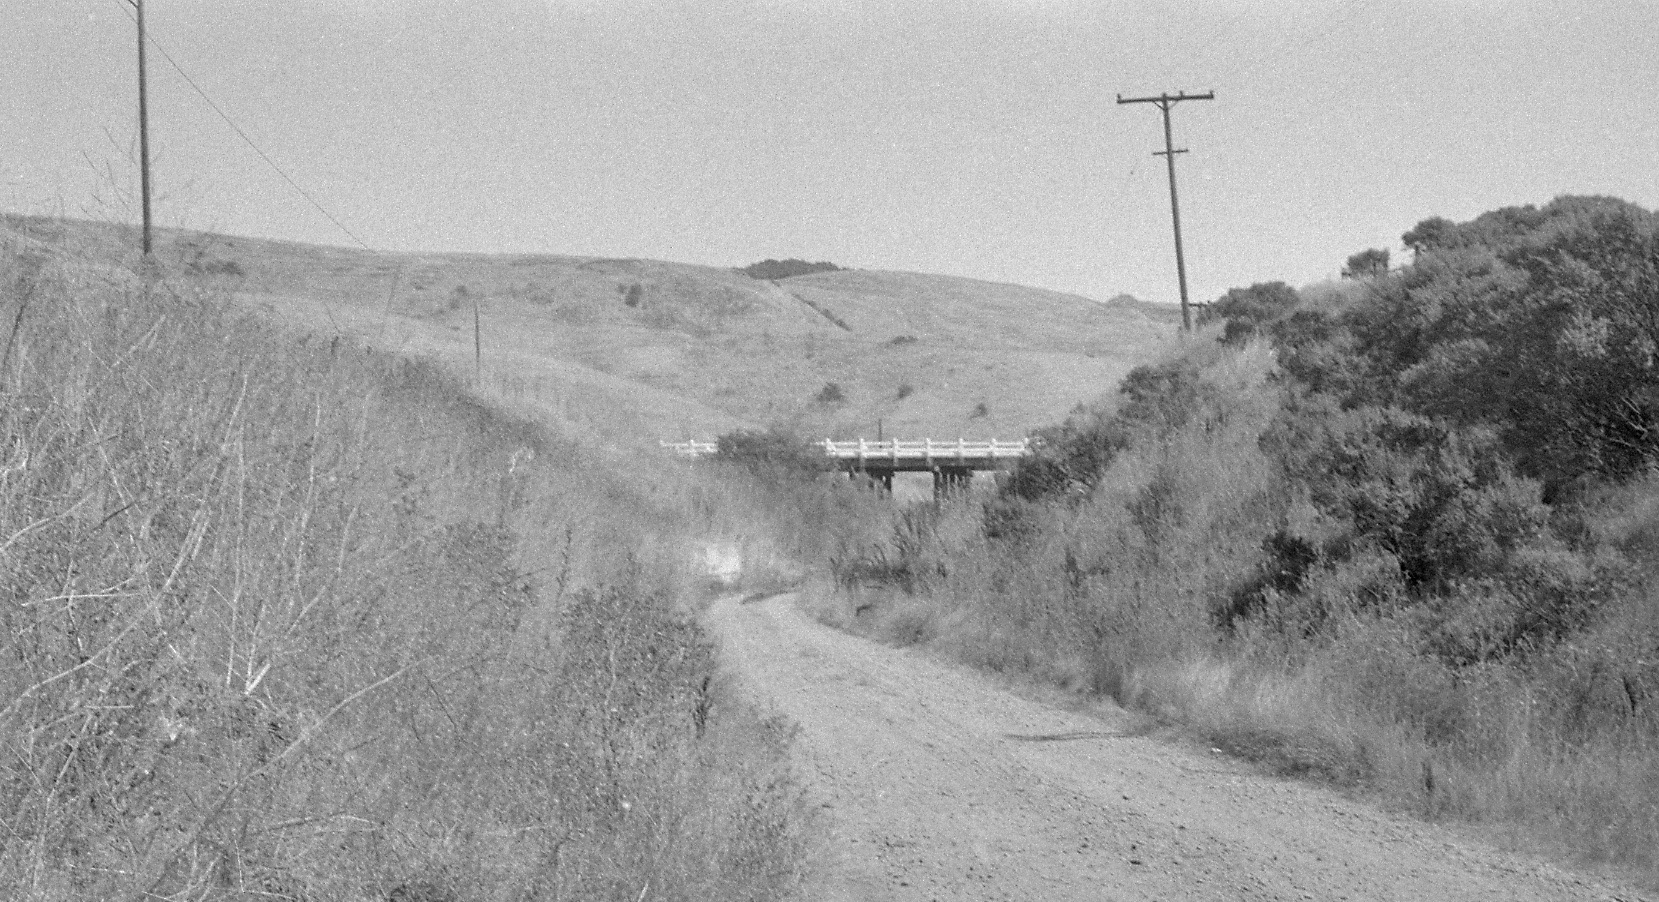
Continuing east on the road brought you to the overpass.
L181-95-Moreau Collection, Courtesy BAERA, Western Railway Museum Archives, 133067.1sn, (Image 19 of 31)
A view to the west of the right-of-way from the overpass in the early 1960s ...
L181-100-Moreau Collection, Courtesy BAERA, Western Railway Museum Archives, 133067.2sn, (Image 20 of 31)
... and to the east of the right-of-way from the overpass in the early 1960s.
L181-105-Moreau Collection, Courtesy BAERA, Western Railway Museum Archives, 133066.4sn, (Image 21 of 31)
Continuing to the east on the right-of-way in the early 1960s, the future start of the Lafayette-Moraga trail is just ahead. The trail post-dated Charlie’s walk as well.
L181-110-Moreau Collection, Courtesy BAERA, Western Railway Museum Archives, 133067.4sn, (Image 22 of 31)
Once around the big curve at Valle Vista, a southeast view from the right-of-way in 1965 shows the growing housing development in Moraga, but Augusta Dr. has not yet buried the right-of-way.
L181-115-Louis L. Stein Photo and Collection, Courtesy BAERA, Western Railway Museum Archives, 75329, (Image 23 of 31)
Ignoring the southeast, Charlie took this northeast image after he had rounded the curve at Valle Vista.
L181-120-Charlie Siebenthal Photo, Courtesy Charlie Siebenthal, (Image 24 of 31)
With the orchard to his right or north, Charlie found more SN artifacts embedded in the gravel. All of this lost when Augusta Dr. was built. This northeast view hints that the trail ahead will soon swing to the southeast and bring him into central Moraga.
L181-125-Charlie Siebenthal Photo, Courtesy Charlie Siebenthal, (Image 25 of 31)
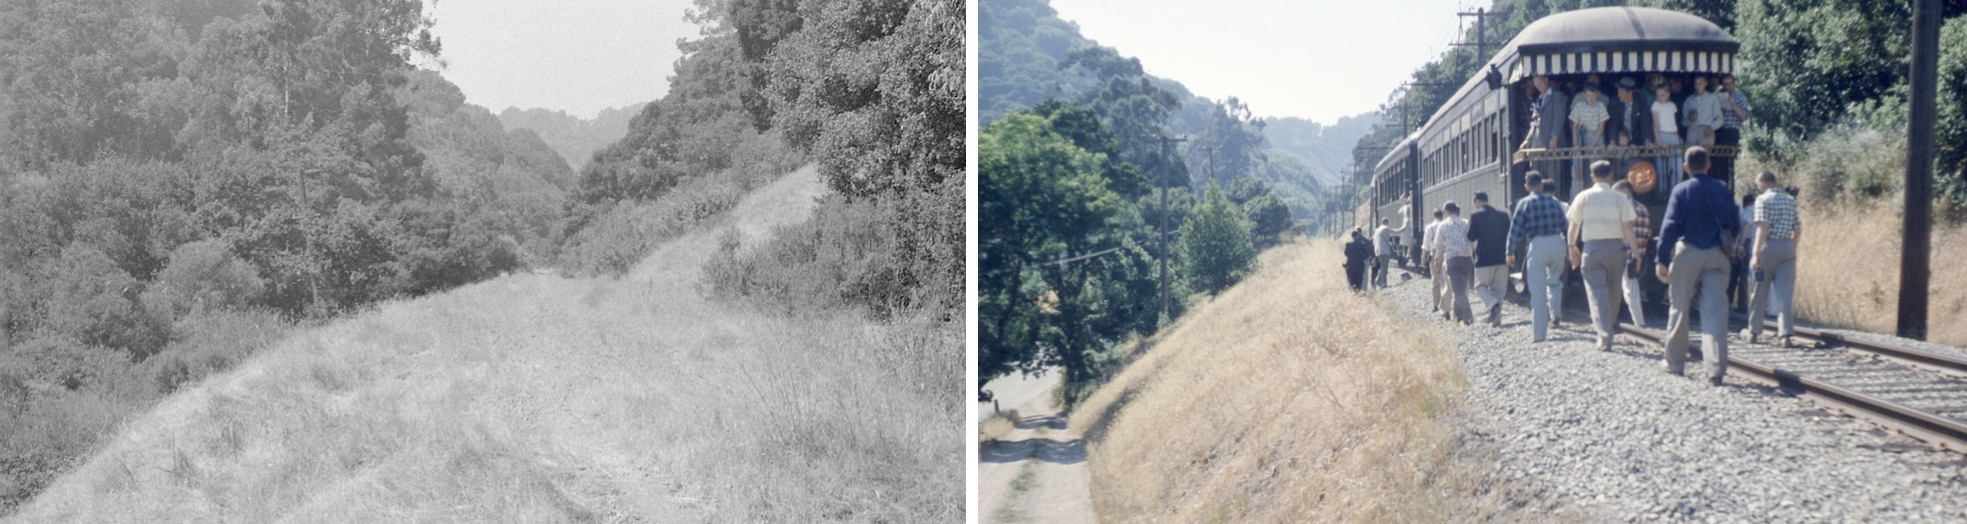
After facing southeast with a clear straight-away to central Moraga, Charlie approached Moraga Creek, that once sported a trestle at mile 18.42. In this southwest view, the trestle supports SN 1005 and MW 302 on a BAERA-excursion in the early 1950s.
L181-130-Courtesy BAERA, Western Railway Museum Archives, 87340sn, (Image 26 of 31)
Charlie’s southeast view of the state of affairs in 1974 speaks for itself.
L181-135-Charlie Siebenthal Photo, Courtesy Charlie Siebenthal, (Image 27 of 31)
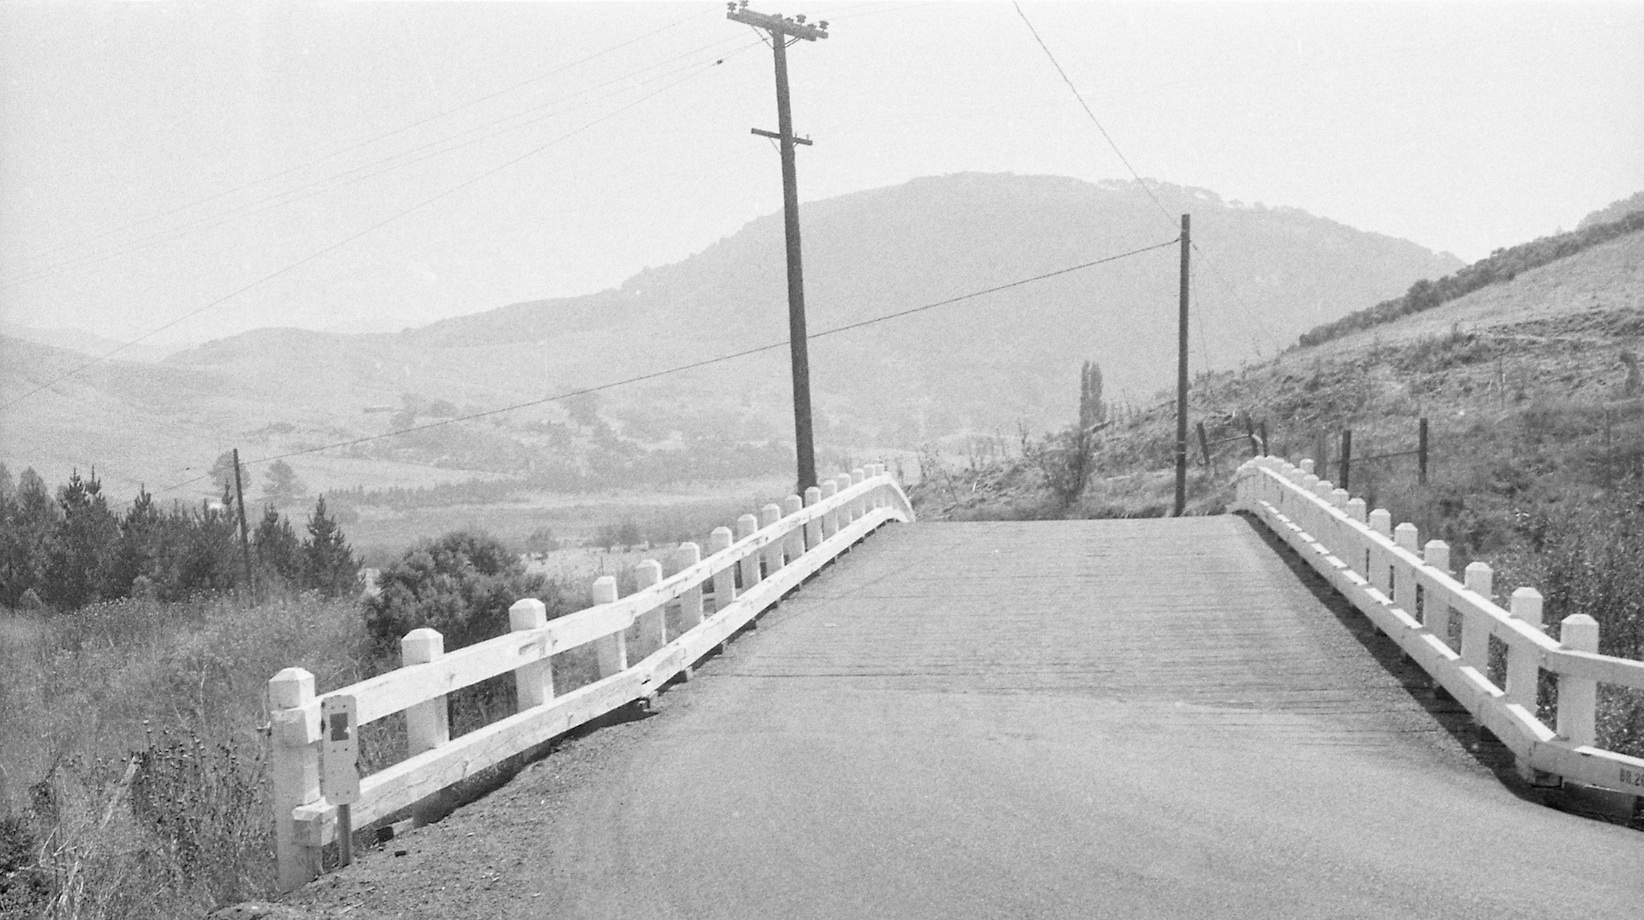
Luckily he had a way to get across the creek on a parallel road, a structure from days gone by. That ends Charlie Siebenthal’s slide set from 1974, but there is a little more worth showing in the context of the SN abandoned right-of-way in Moraga.
L181-140-Charlie Siebenthal Photo, Courtesy Charlie Siebenthal, (Image 28 of 31)
Fred Matthews continued his survey in mid 1957 along the SN track sans overhead wires and turned just before Country Club Dr. to capture this northwest image. Note Willow Springs Church along the right edge of the image.
L181-145-Fred Matthews Photo, Moreau Collection, Courtesy BAERA, WRM Archives, 90066sn, (Image 29 of 31)
In the early 1960s, a similar northwest view showed the overgrown path left after track removal. Today this area remains untouched as a result of EBMUD’s easements across this field.
L181-150-Moreau Collection, Courtesy BAERA, Western Railway Museum Archives, 133067.5sn, (Image 30 of 31)
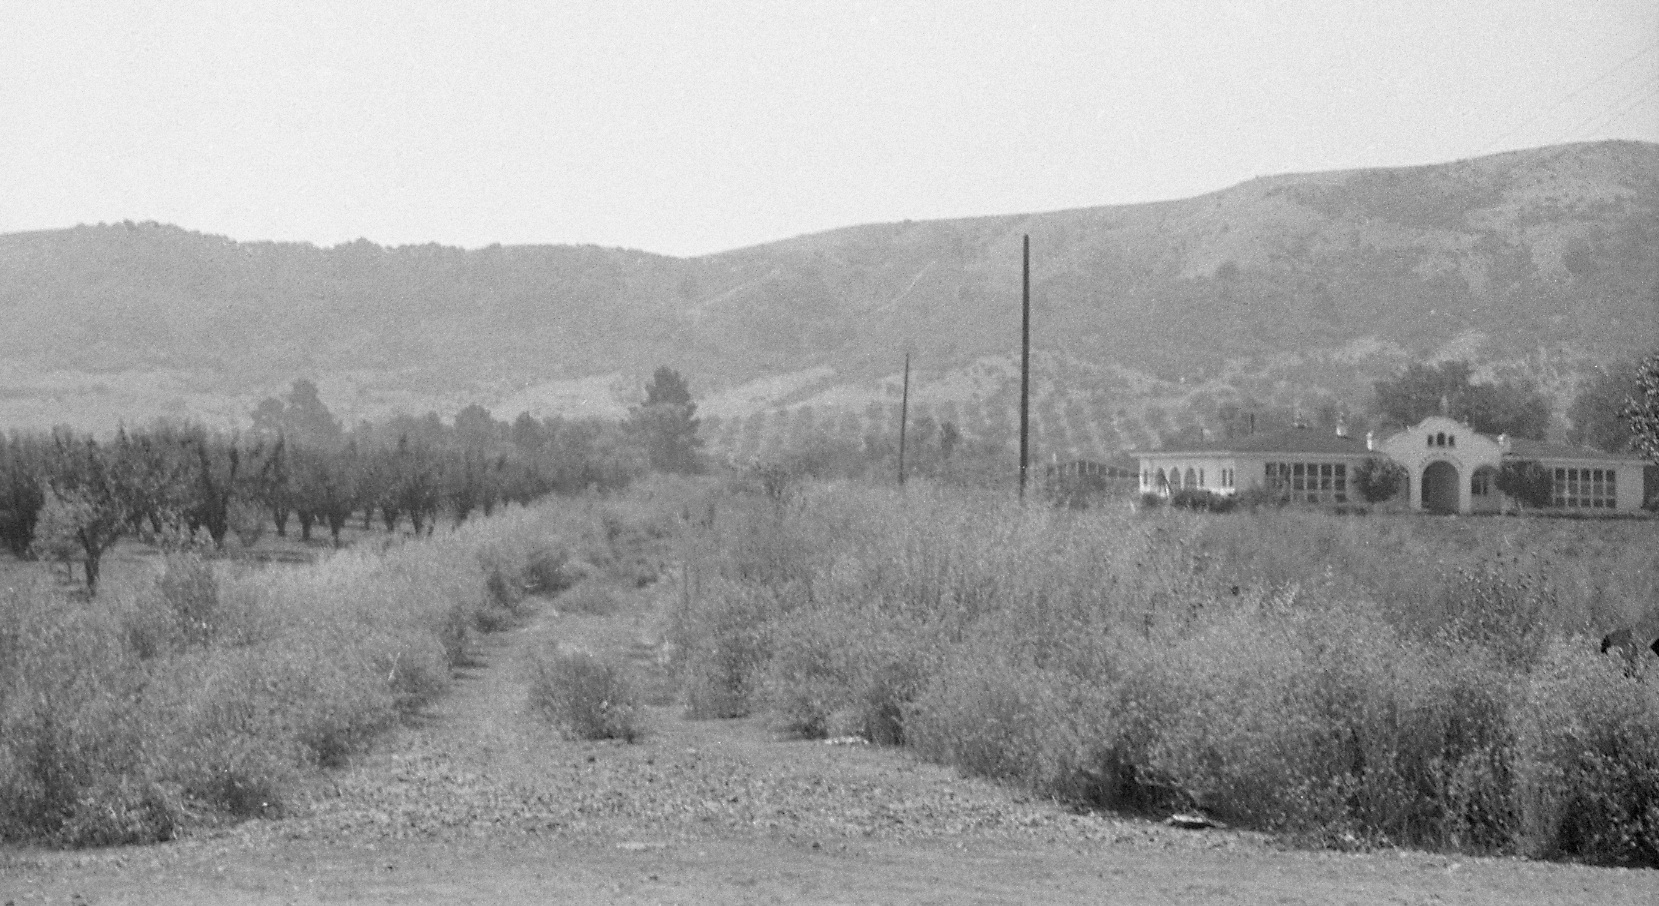
Fred Matthew’s final image from 1957 shows the right-of-way north of Country Club Dr., with St. Mary’s Rd., the south end of the SN yard, and adjacent fruit-packing shed. In 2018, the right-of-way is buried under the west edge of Orchard Supply Hardware, the Moraga Shopping Center and Safeway. Thanks to Charlie Siebenthal and the other pioneers of the abandoned SN right-of-way.
L181-155-Fred Matthews Photo, Moreau Collection, Courtesy BAERA, WRM Archives, 90067sn, (Image 31 of 31)